EScanlon
Free Member
-
Joined
-
Last visited
Everything posted by EScanlon
-
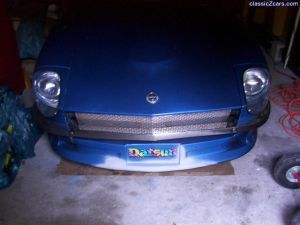 I agree. It looks good, but I had to look at both pictures since the first shot kind of blends the bumper and new grille together. Definitely a Dark Matte Grey or just darker than the bumper to help the eye differentiate between the two. That cheesy "license plate" has got to go though.
 -
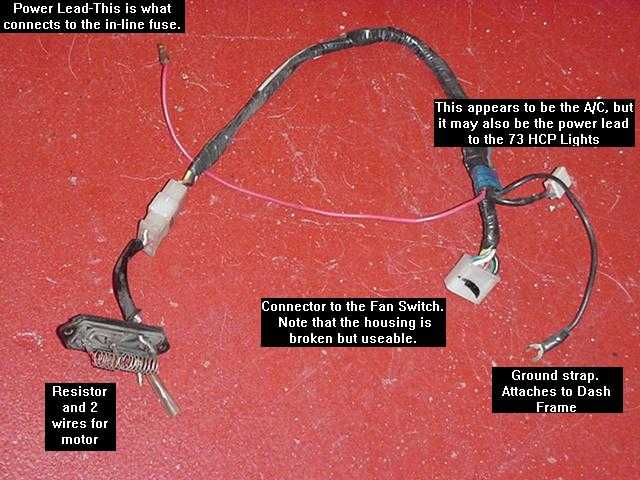
Kats: The hole right by the "Y" in the wiring harness. All of that wiring will be hidden by the rear hatch plastic cover. The plug you have in the hole now will be used to plug the hole you are currently using. Enrique
-
Go to a larger hardware store. I've seen many colors in the high-temp paints. Additionally, don't waste money on the primer as the high temp Rust-o-leum variety (even Stephen's NOW) will adhere well enough for what you are doing. The biggest thing you MUST do, is ensure that the caliper is degreased and free of dust / rust / fingerprints. To degrease, you can use plain old lacquer thinner, or get spendy and go for the true blue Wax and Grease Remover available at a paint shop. You could even use Mineral Spirits as long as you wipe it off completely and allow any possible residue to evaporate. Now you are ready to paint. For most spray can paints you should have a temperature of at LEAST 65° F. Less than that and the paint will not cure properly and take forever to dry, and it won't really be dry. Note that this means the PART should be 65°F or greater, just cause the ambient air temp gets to that stage doesn't mean the part has reached that temperature. You can use a heat gun or hair dryer to raise the parts temperature, but don't overheat it as that causes other problems. Next, apply your first coat of paint LIGHTLY. Allow to dry to "tacky" (i.e. your finger sticks slightly, but does not marr the paint) and then apply a second or additional coats as desired. Now - WAIT! I've seen more spray can jobs ruined by too impatient handling than anything else. If you try to rush the job by using the heat gun or hair dryer be aware that it is very easy to "skin" the paint. That is where you dry the outermost layer of it, but the interior is not, just like a pudding. That's not what you want as that will trap the solvent(s) in the paint and probably mess up the paint job. (By the way, that's one cheap way of making wrinkle paint.) If you wait 24 hours or so, and the temperature of the part has been maintained, then you will have a nice finish that should last quite a while. Mine has lasted close to two years and has even survived a couple of mechanical fixes. Hope this helps. Enrique
-
CHEATER CHEATER!! Ok, Stephen, go put a couple bucks in the Club till for the advertisement. Enrique
-
I painted mine with plain old Rustoleum. Figured: A) It's cheap. If they flaked, or started looking bad, the repaint would only set me back a few bucks. The color selection was more than adequate. C) If I didn't like the way they looked afterward, or later, all it would take is a rag soaked in thinner to rectify. D) It's CHEAP!! E) It didn't matter if they got ugly in a few weeks, a simple wipe of a thinner soaked rag and / or a color change, and VOILA! done again. F) IT'S CHEAP! 2¢ Enrique
-
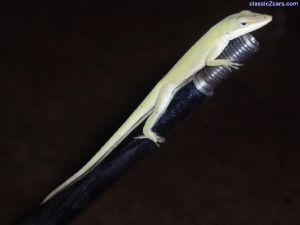 That's the GEICO lizard. He was probably checking out your car!
 -
Don't know if you can get it in Australia, but JB Weld is a type of epoxy that is harder than your usual resin style epoxy. You could even make a mold off the good one and then make the new one. 2¢ Enrique
-
Ok, with that picture I hope you can address whether you need that wiring harness or not. Now, as far as wiring schematics are concerned. They are fine if you know where to find the individual wires that are represented by the wiring schematic. Unfortunately, the majority of schematics do NOT identify which wires are together. An exception to this is the later schematics for the 260 and 280. However, those have their own level of incredible complexity tossed in as to make them totally unuseable. The FSM does have a Multiple Connector Diagram as well as a Single Wire connector diagram. Those in hand with the wiring schematic are a good set to decyphering out the wiring. So, hope all this helps. Enrique
-
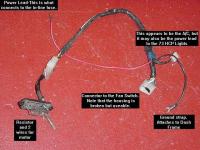
First, take a look at the picture I'm attaching. I "borrowed" it from the e-Bay auction. Enrique
-
The inline fuse should be behind the radio / HCP not too far from the wiring connections to the heater. If you look back there there should be 2 inline fuse holders. One is for the radio the other for the heater blower and resistance. Now, as far as the wiring to the blower motor. Yes both wires APPEAR to go to the resistor, but in fact only the BLACK actually connects directly to the resistor. The RED wire connects to the wiring harness and then feeds up to the Heater Control Knob. If you'll note the 4 wires coming out of the Resistor, the black goes to the motor, and the other three go up into the wiring and then to the control knob. The fourth wire is a red and it connects to the red wire from the motor. Now, on the short wiring harness between the heater control knob and the motor / resistor, you'll note that there are six wires feeding to the knob. The additional two wires are a red and if I recall a blue or black. The red would go to the one you found that looks like it was blue changed to red. The other should connect to another connector or directly to ground. (Sorry, I couldn't find that short harness in my spares box.) Hope this helps. Enrique Scanlon
-
Find a good mechanic and have him do a good tune-up. You'd be surprised how spunky the Z can be without all those performance mods. By this I mean get your valves adjusted, have the brakes checked / repaired, get a set of tires that will make the ride better, check / replace shocks, lube the car. You get my drift. I would recommend you do this BEFORE you start modifying. I'm not opposed to mods, but let's face it, you rarely get the opportunity to go 100+ mph and worst of all it's dangerous and illegal. If that's your bag of tricks ... go for it. However, be advised that the majority of "help!" calls people post are of the "I added a thing-a-ma-jig and now I'm having serious problems." type. So, if your car is absolutely perfect mechanically, and you still hanker for that extra oomph, then go for it. However, have you considered that MOST of the time that you will be showing off your car, it will be ....STOPPED? With that in mind, I would recommend making sure that the car LOOKS cherry. Get the seats recovered, if they're like the majority of 30+ year old seats, all torn and delapidated. Get the paint polished. Again, if the mods are required for your enjoyment, then 2mZ has good input. Personally, I've seen too many souped up cars in the .... junkyard or wrapped around a tree. 2¢ Enrique
-
1. The two connectors are correct. The 6 wire side goes to the switch and the 4 goes to the wiring harness if I recall properly. (I may have it backwards, but I also thought it was odd.) 2. Yes. The motor has part of it's wiring directly connected to that resistor, the other wire goes to the wiring harness. 3. Hard to tell from your picture, but they may be the courtesy light wires. All of the wiring to the blower motor goes through the heater blower switch, and not from the right hand side kick panel. Have you checked the inline fuse on the wiring to the blower motor? That one looks like a radio fuse, but it is a second fuse put in line for the motor / resistance. Hope this helps Enrique
-
Felida, just North and West of Hazel Dell. Enrique
-
And if you're not a big stickler for OEM or exact replacements you CAN find the same style rivet at Lowe's. Go to their specialty fastener section and you'll find them in various lengths and diameters. Right off the top of my head I believe they are the 3/16" - 1/4" diameter and about 1/2" to 3/4" length range. You should be able to find a good close replacement. Hope this helps Enrique Scanlon
-
Actually the rarest one is the one that has 710 on it. 2¢ Enrique
-
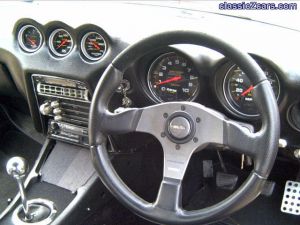 Those replacement gauges go well with the car! The silver trim is decidedly sharp!
 -
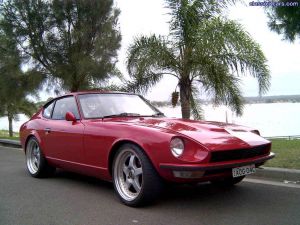 Gotta admit that painted bumper does blend in well and looks sharp!
 -
 Excellent! I see a very strong contender for the Monthly Featured Car and also Car of the Year! Nice Job! The paint and the methodology behind it is very commendable. Enrique
 -
As far as my connection, (dial up) I do find that those animated avatars do cause the mouse to jump and react differently as well. Being selfish, I would ask for the non-animated avatar, but since I don't have broadband and I know the majority of folks out there do, I've just learned to muddle along. 2¢ Enrique P.S.: Although my avatar is "animated" also, I've only noticed the slow down on the movie style ones.
-
My headlights have a "Halo" around the light. The City Light I presume is similar. Unfortunately no pictures were shown as to how they look. Maybe someone has pics. Enrique
-
I found these on e-Bay and although not billed as the same thing as what I have, they appear very similar to mine. The biggest diference is that mine have 2 bulbs for the extra light and not just the one. http://cgi.ebay.com/ebaymotors/ws/eBayISAPI.dll?ViewItem&item=2463105556&category=33710 Hope this helps someone. Enrique
-
Mark: The rust in the gas door opening is from moisture creeping in between the gas door "cup" and the fender skin. That may be possible to fix with only a small amount of fabrication. The hole under the body trim however, looks like it may be from moisture that crept in through the rivet holes used to mount the vinyl strip. You won't know until you open the back side up (inside the car) to determine how far and how bad the rust is. The rust at the bottom of the fender is the worst in my opinion. That is because it appears to be a prior repair with a patch already seamed in. The seam can be seen in a straight line back from the bumper. I don't recall the fender having a seam in this area. If in fact it is a prior repair that has gone bad, it may be cheaper to buy a replacement fender and take care of all the rust all at once. 2¢ Enrique
-
Should be an INLINE fuse if I recall, but not a fusible link. Have you gotten the Wiring Schematic for your year of car? That will go a long way in helping troubleshoot. Enrique
-
Ask 2ManyZ's about the transmission. That one is out of my field of expertise. Enrique
-
Sounds like you bought a 73 HCP. The differences between the wording is essentially Null. Cold vs Off is due to the Water Valve being completely turned off and hence it will not warm the air rushing through it. Room / Floor was probably because the inside of the Z is not a "room" and the heat would be blowing down towards the floor. To determine if in fact you have a 73 vs a 70/71/72 look at the back. If you have three light bulb holders behind the lever control area, and the face of the HCP is smooth, it's a 73. If on the other hand, there are no lights and the labels for the levers are above the lever on "tape", then it's an earlier model. You can pretty much use them interchangeably. To use the 73 on an earlier car, you'll have to splice in the light wiring hanress into the light circuit (BLUE / RED STRIPE wire) and make sure that you can slip it into the dash without problems. When I put a 73 HCP on my car (a 71) I found that I had to mount the HCP first and then the center console. The FSM and most other books will tell you to do the center console first and finally the HCP. Hope this helps. Enrique