Site will be going down for maintenance today

inline6
 Subscriber
-
Joined
-
Last visited
Everything posted by inline6
-
 Deep! That said, I think the worst option is spray coatings into this deep crevasse and hope for the best. My fabricated parts will direct water away from this area and therefore, keep them dryer than they would be otherwise. Additionally, I have coated these areas on more than one occasion with epoxy primer. Feeling good about it. 😎
 -
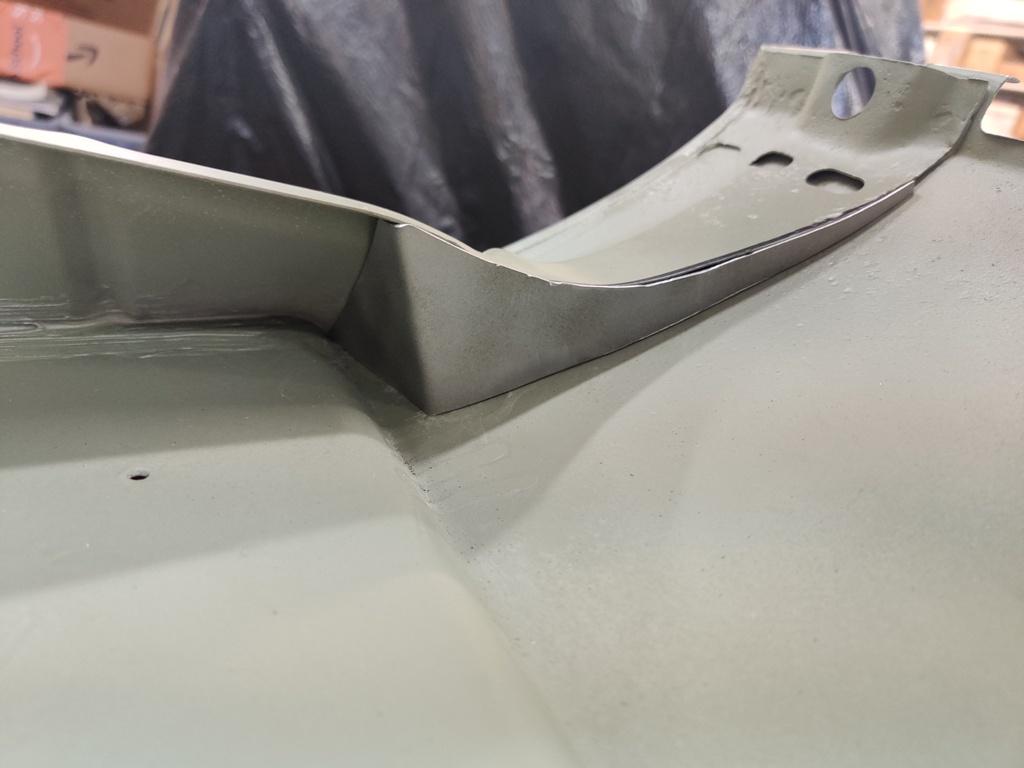
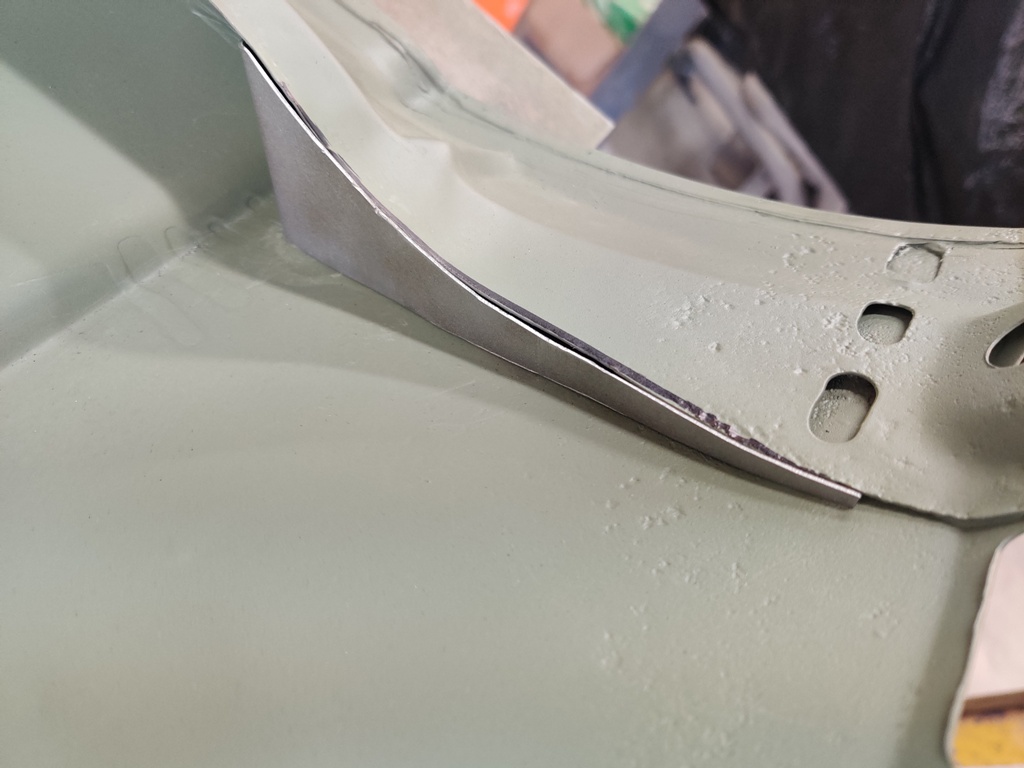
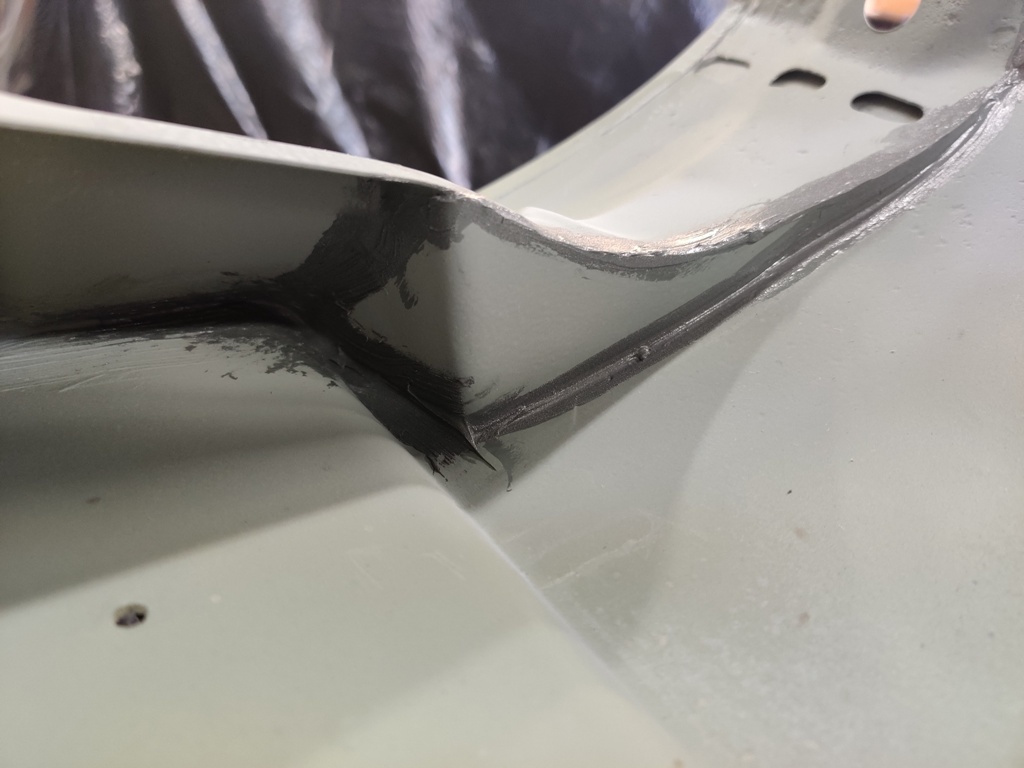
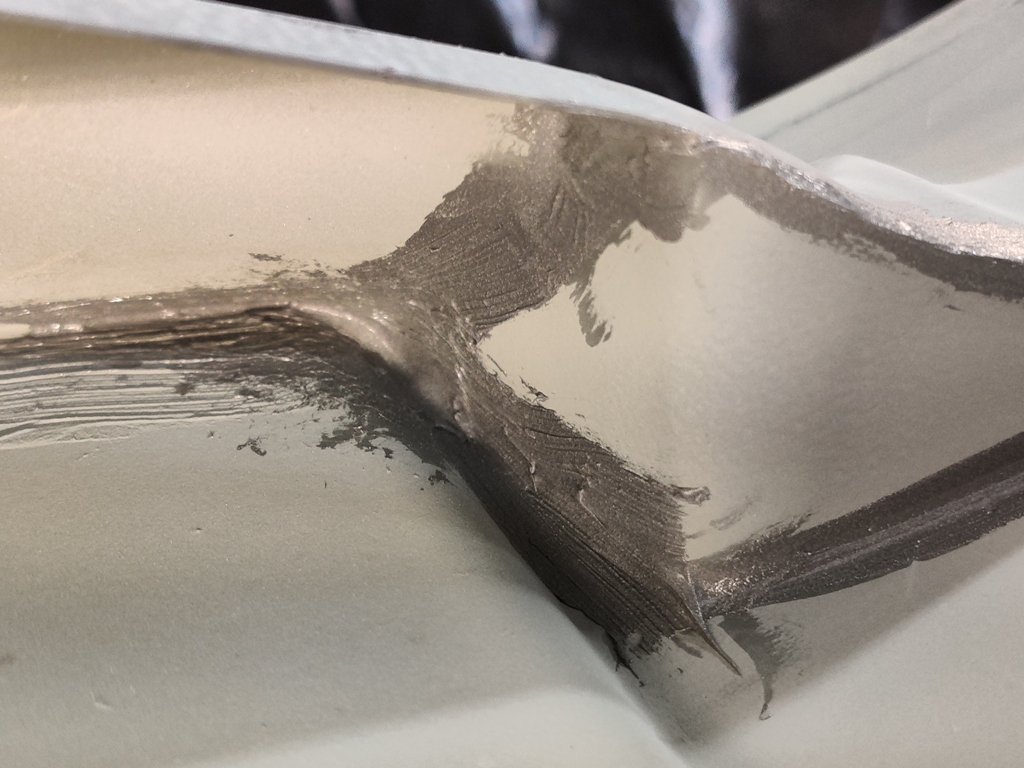
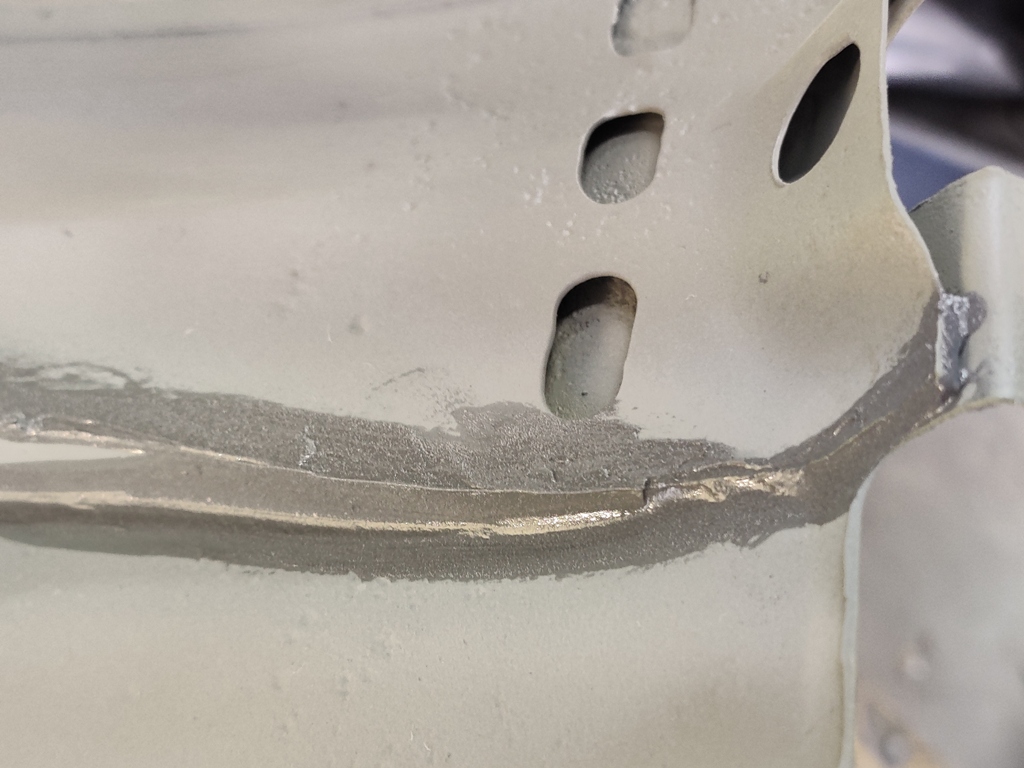
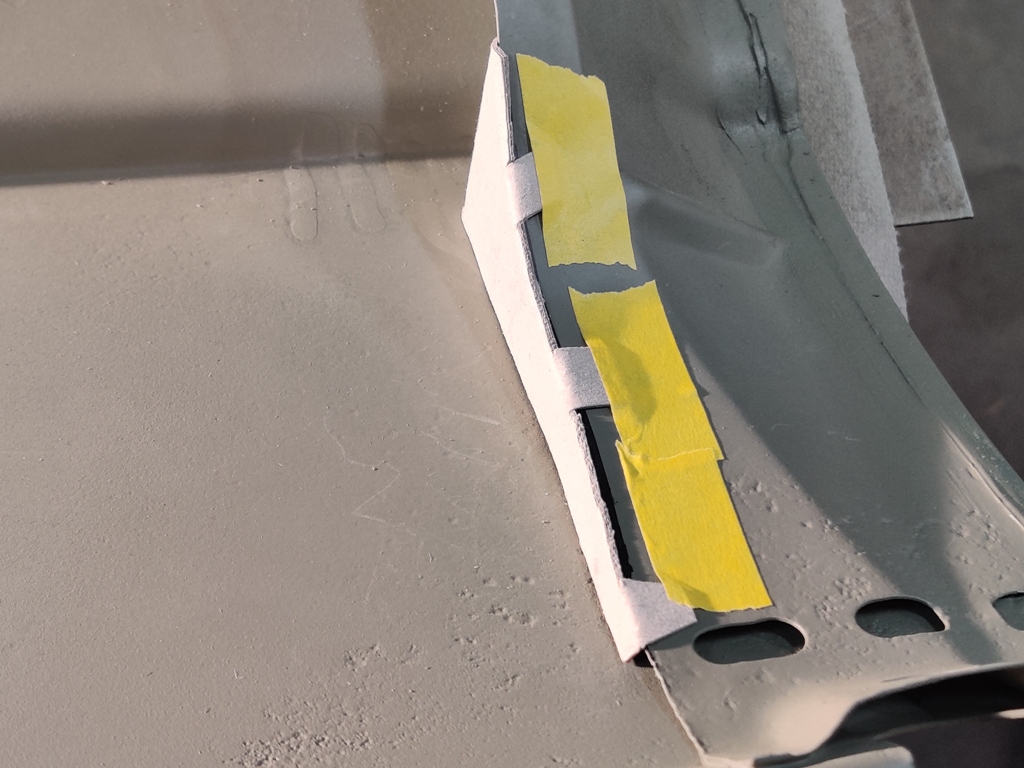
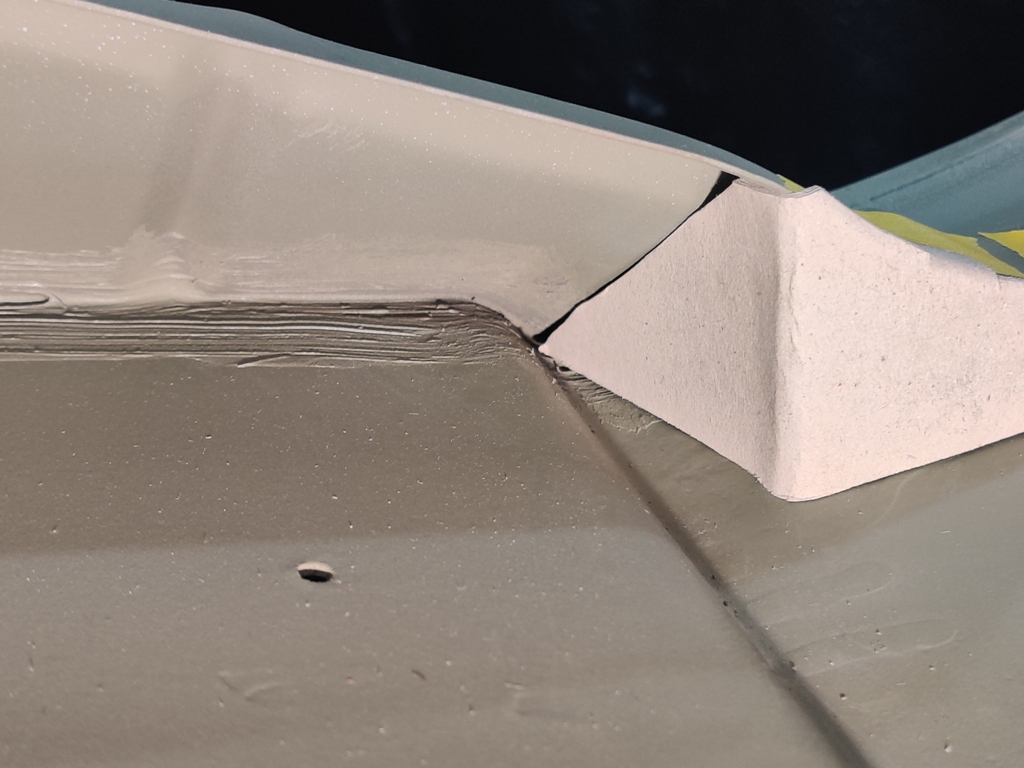
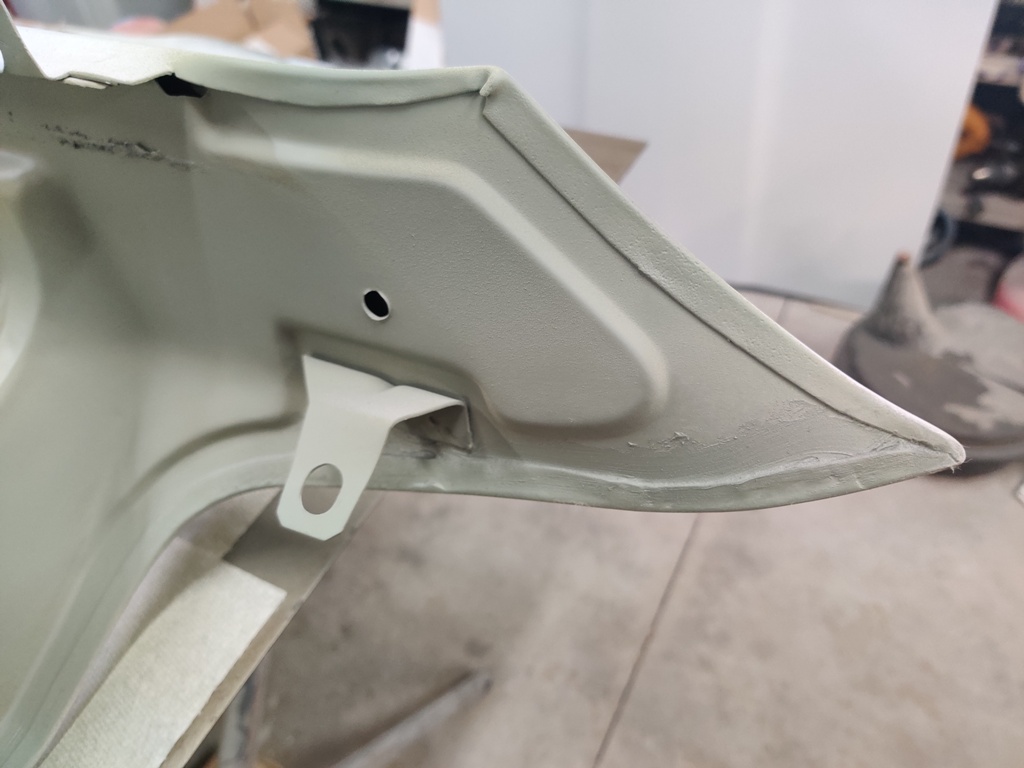
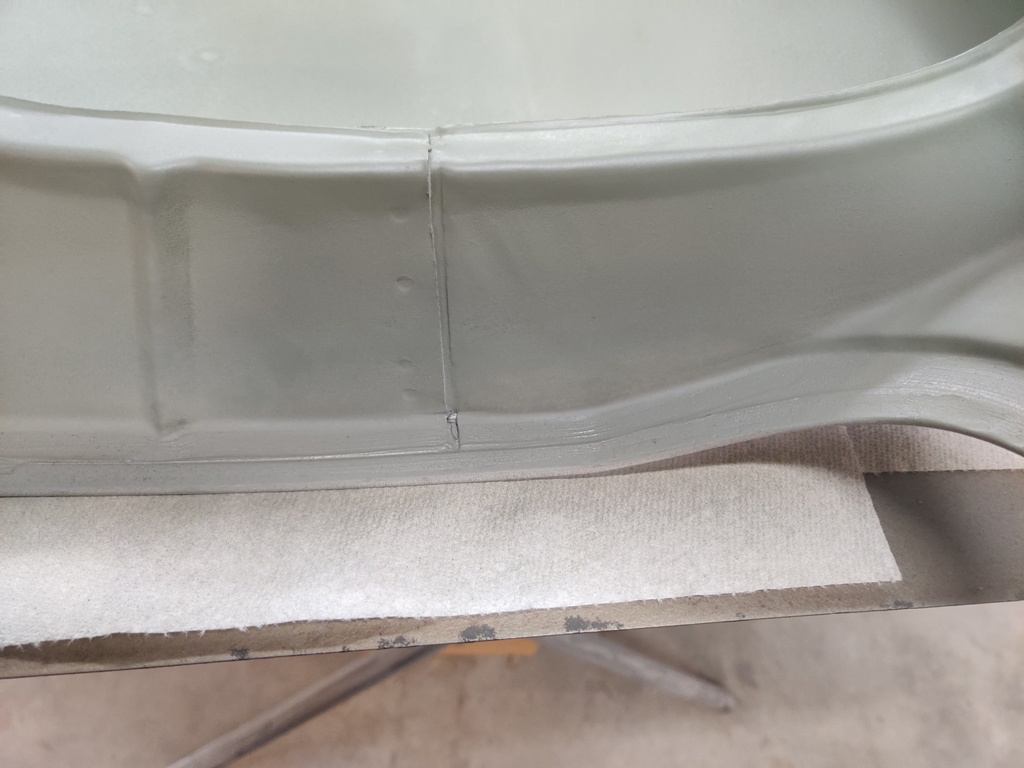
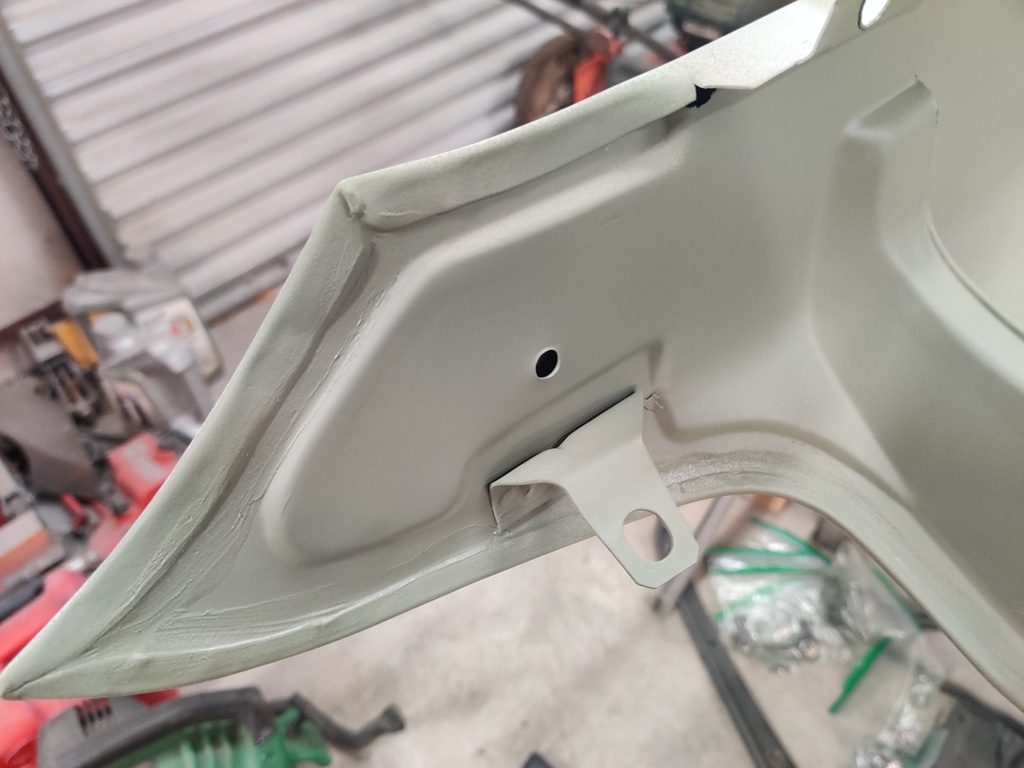
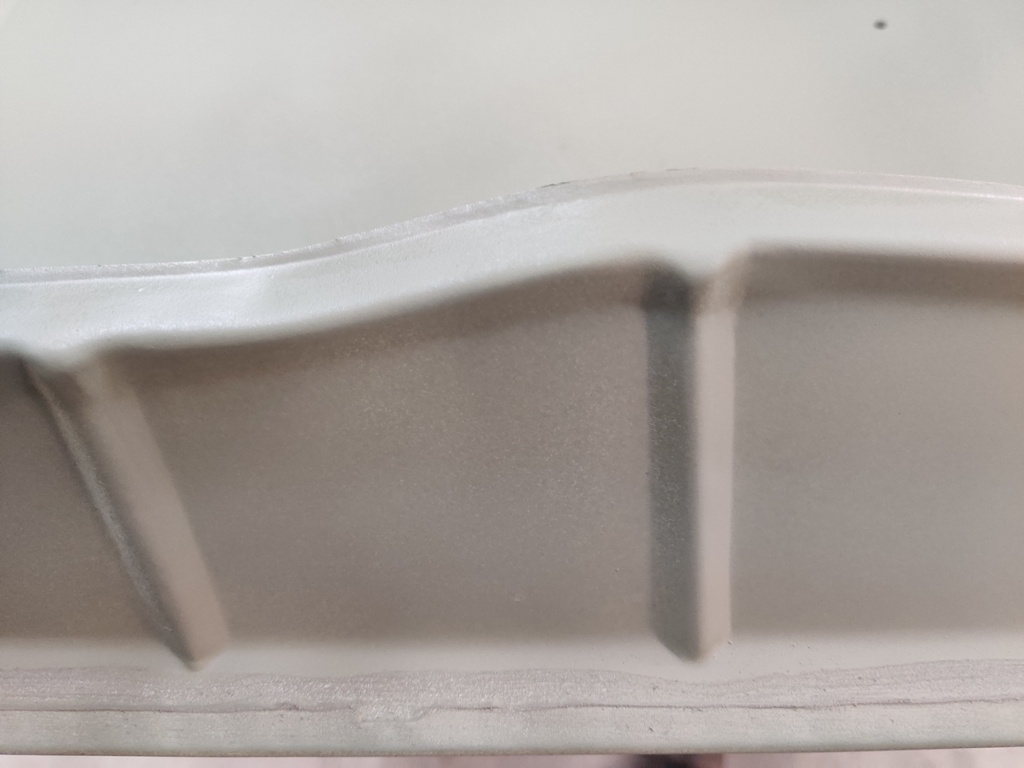
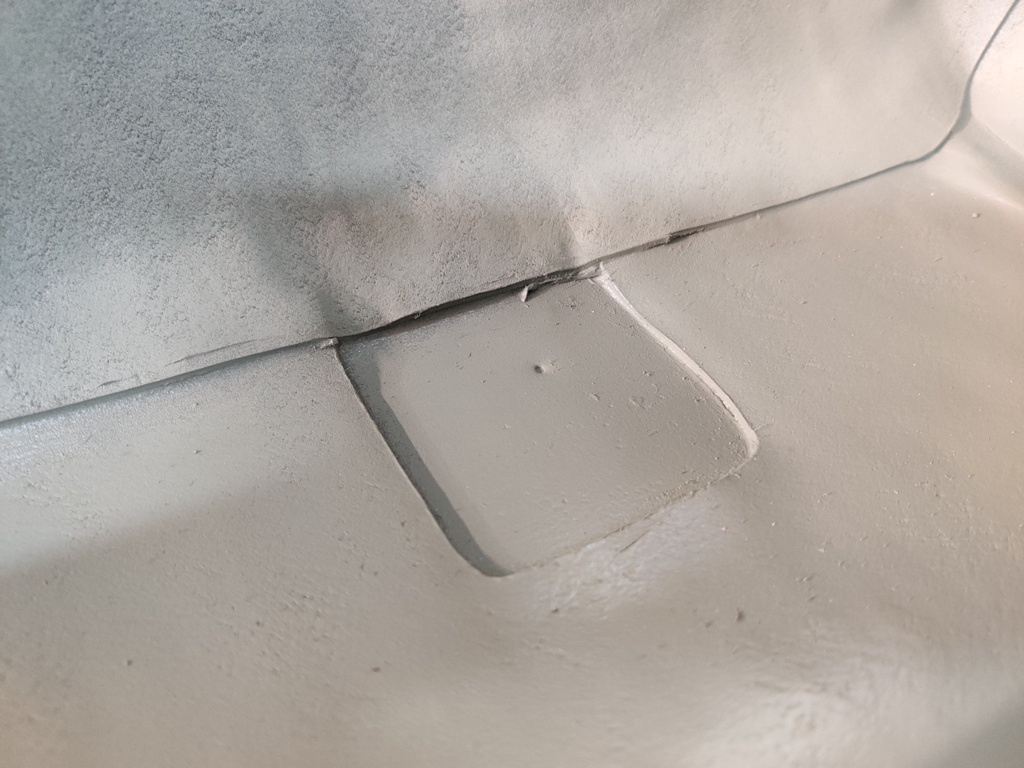
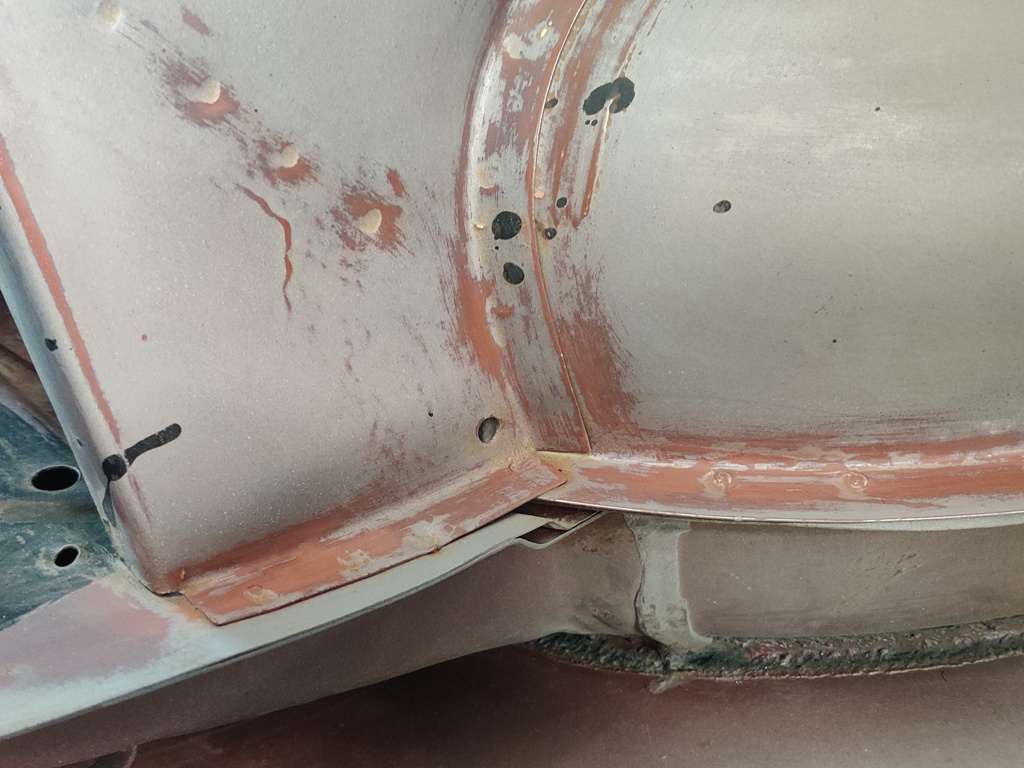
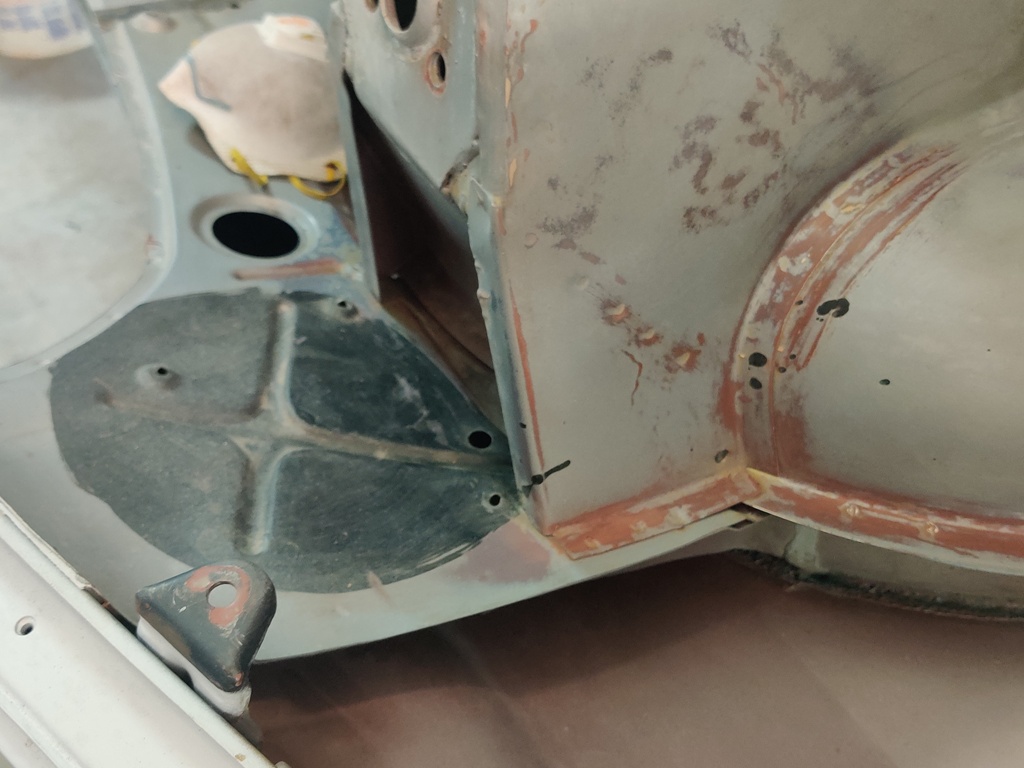
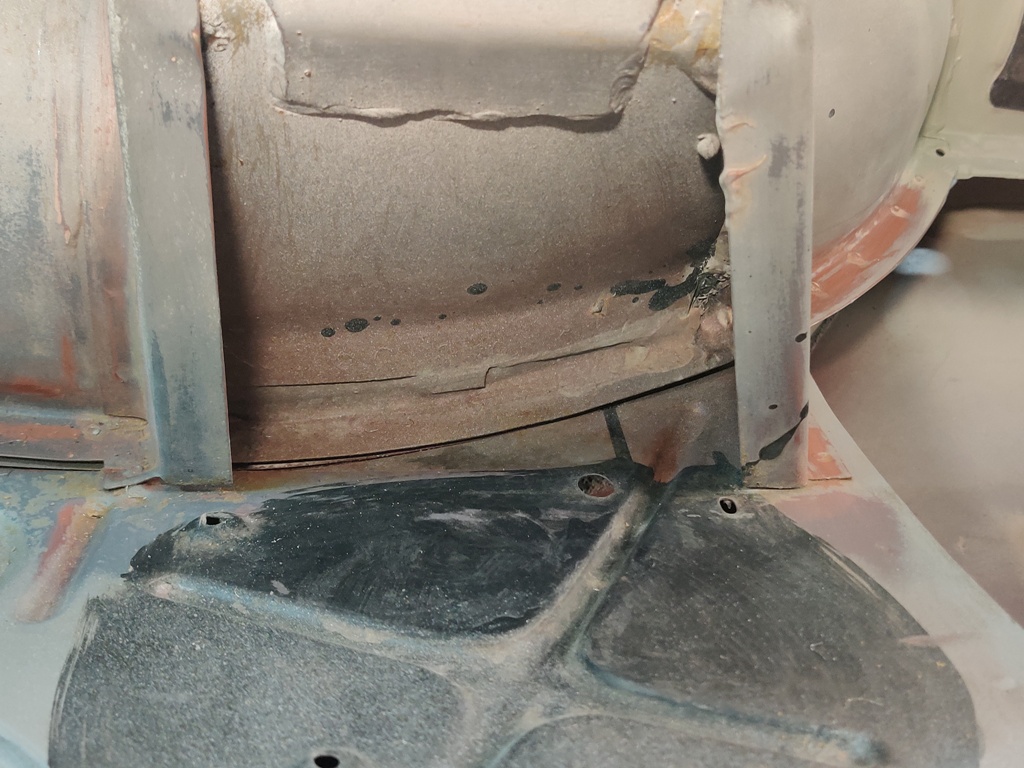
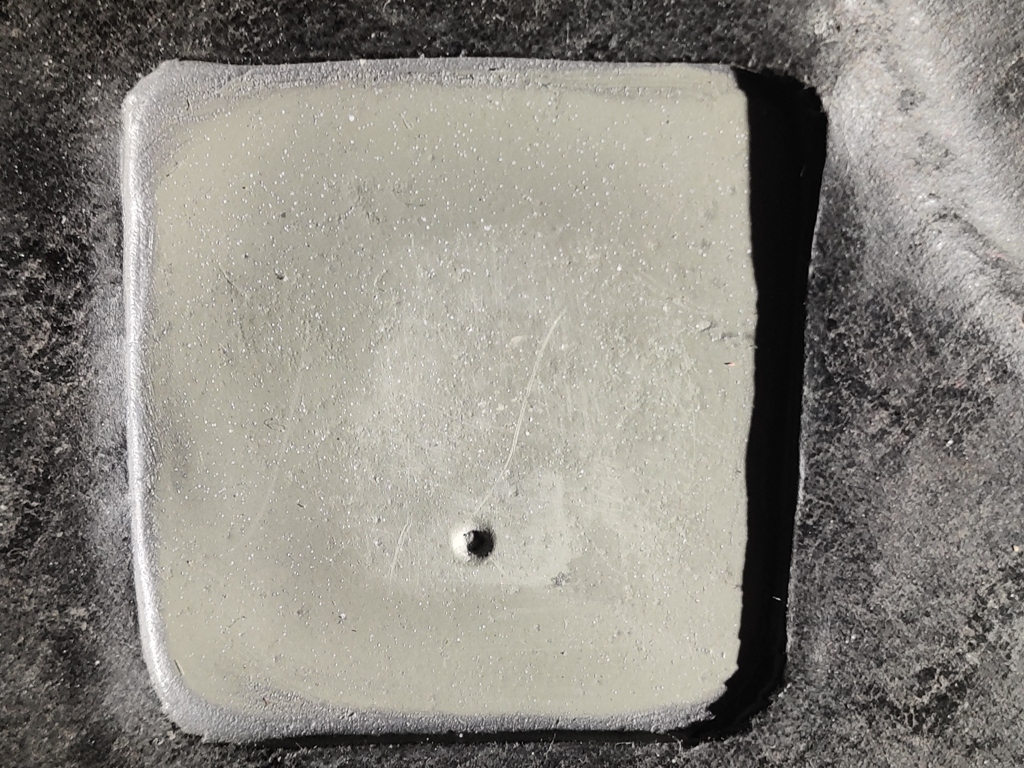
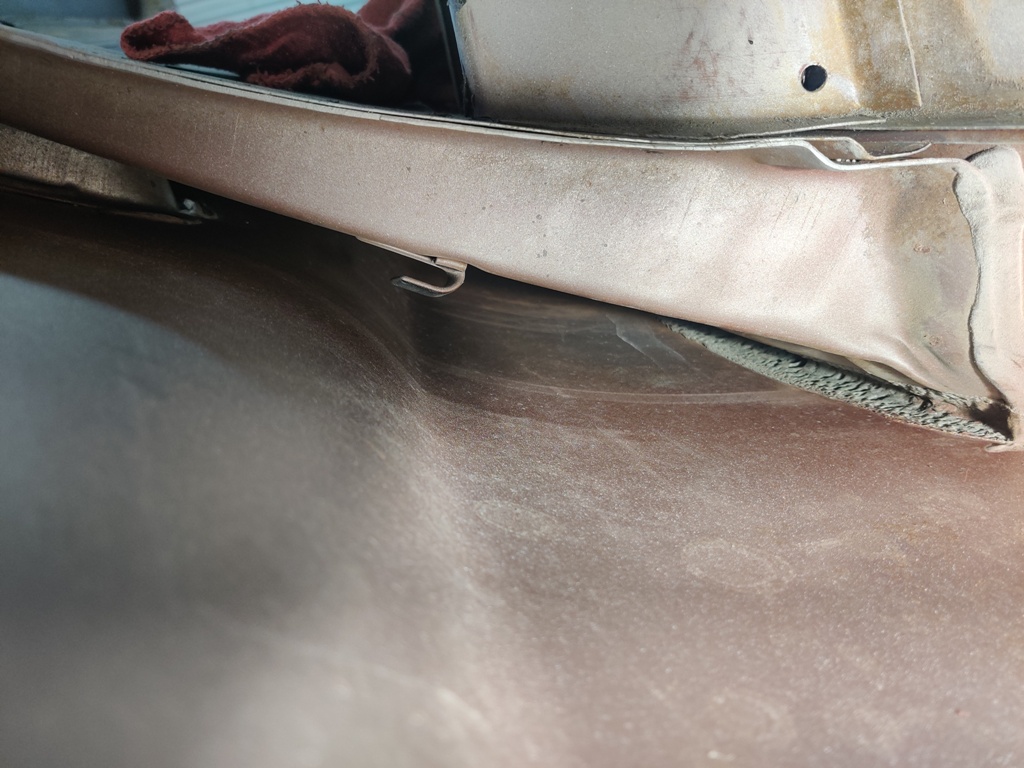
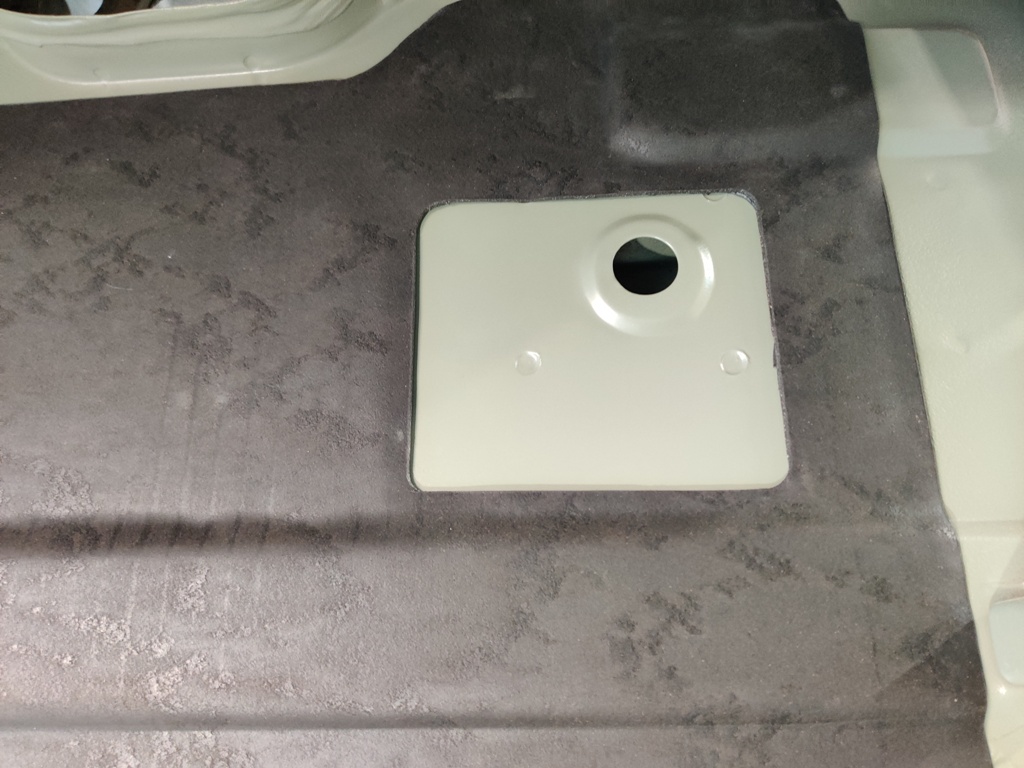
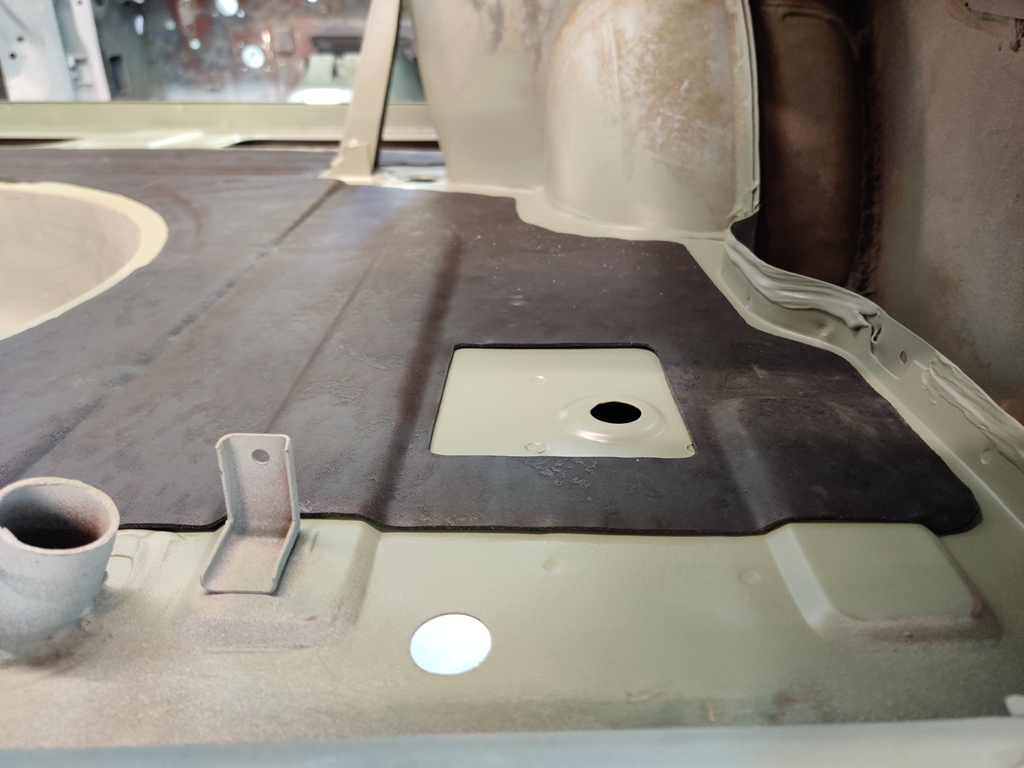
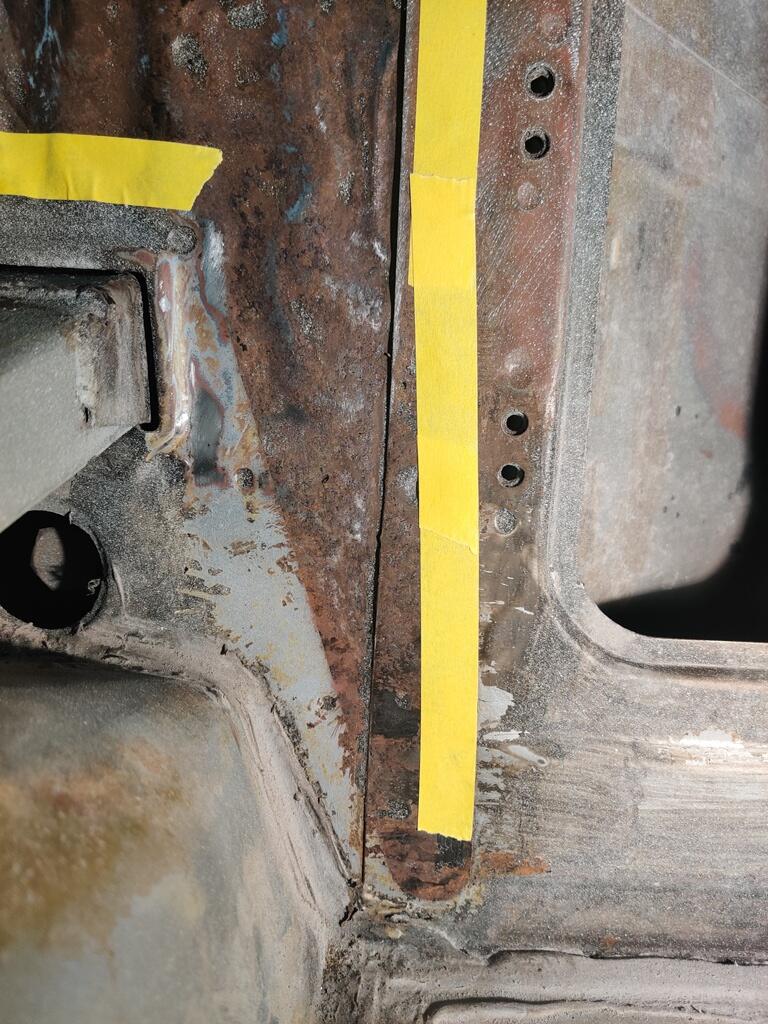
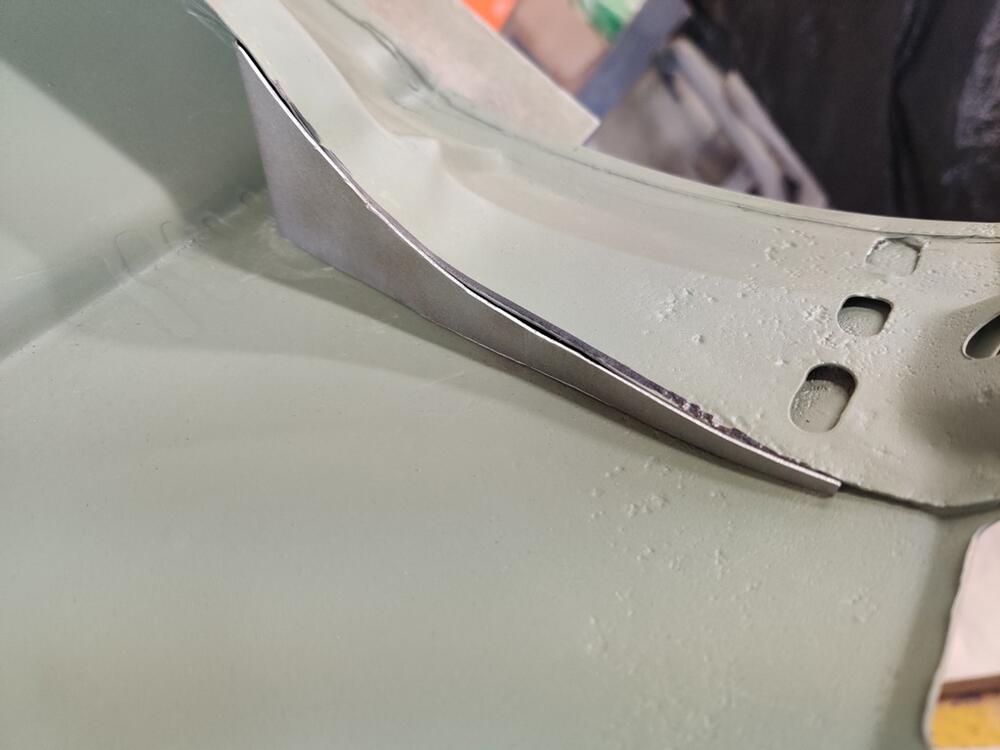
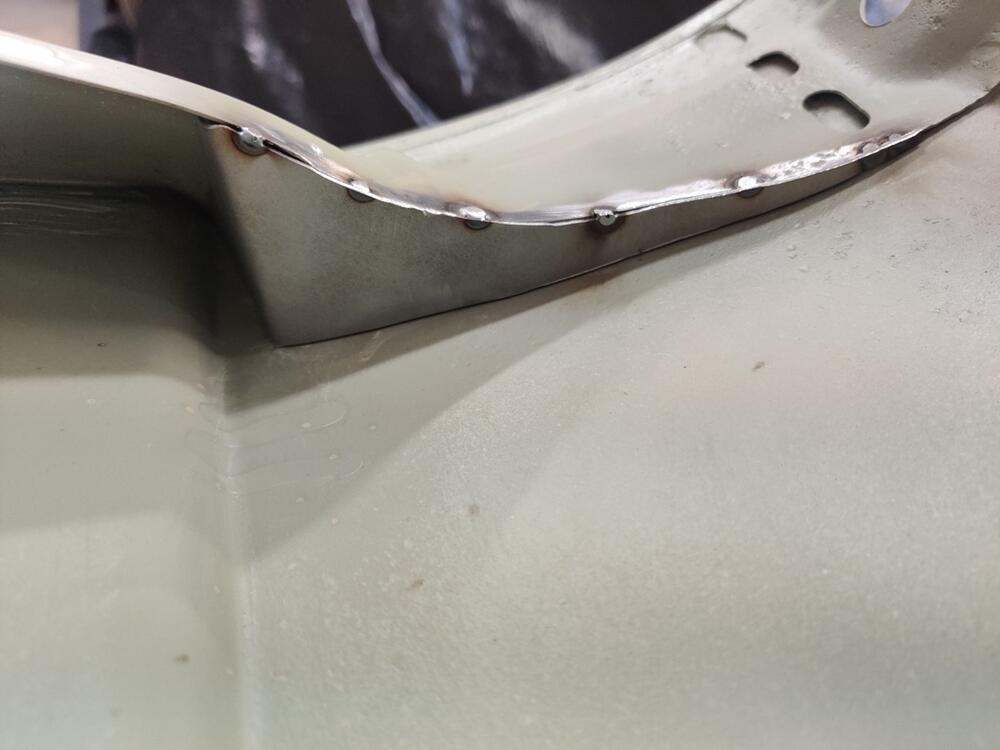
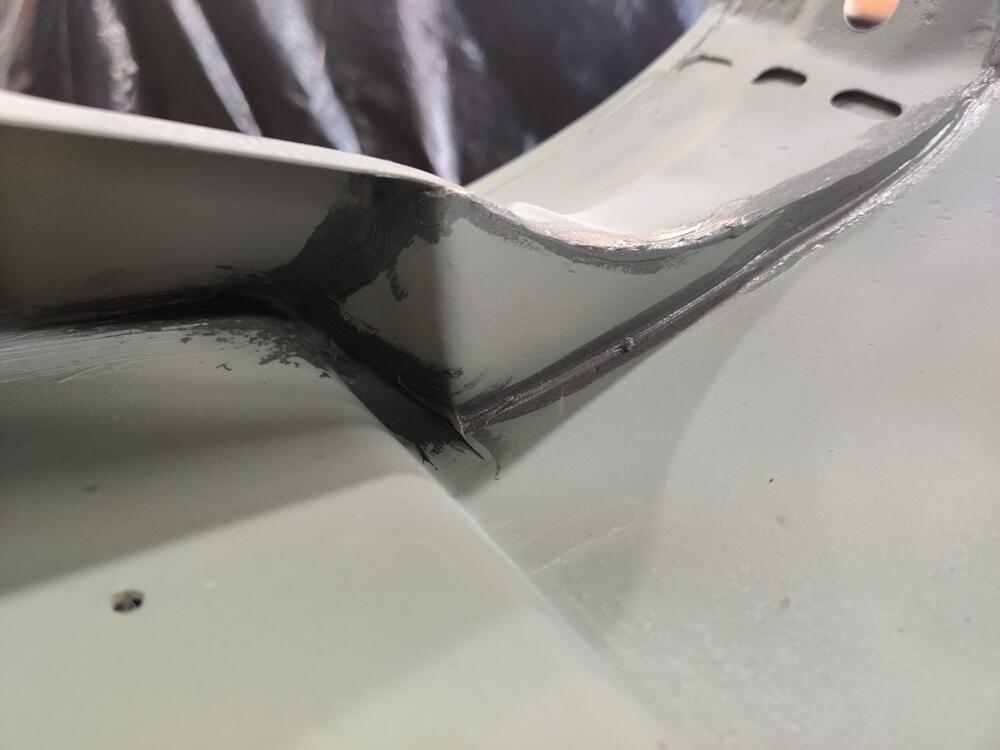
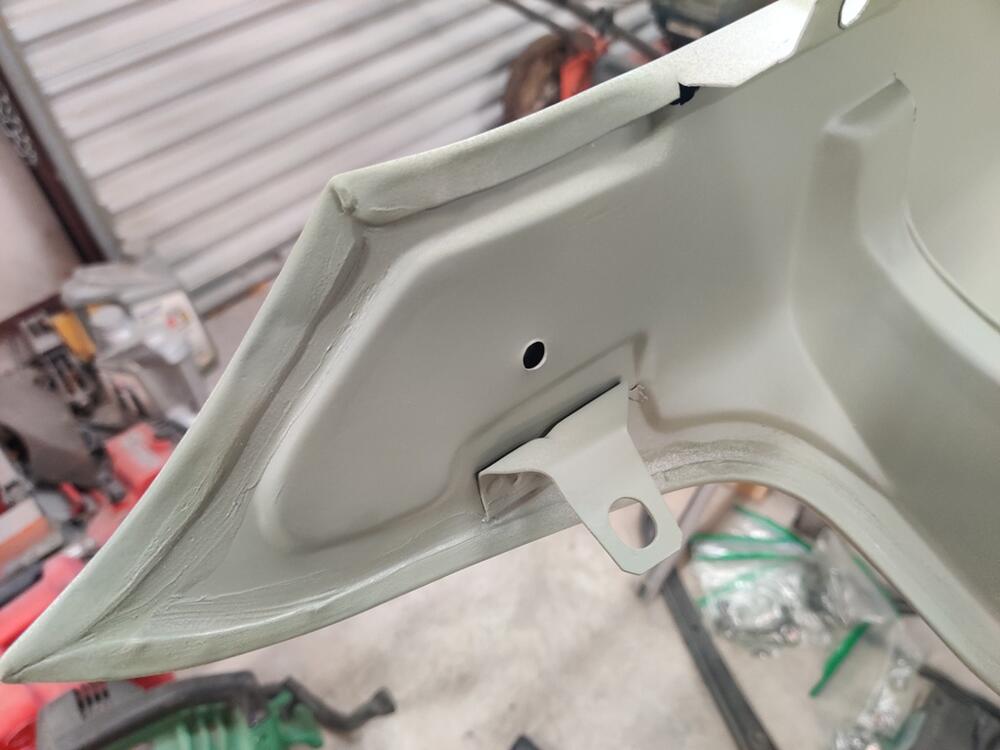
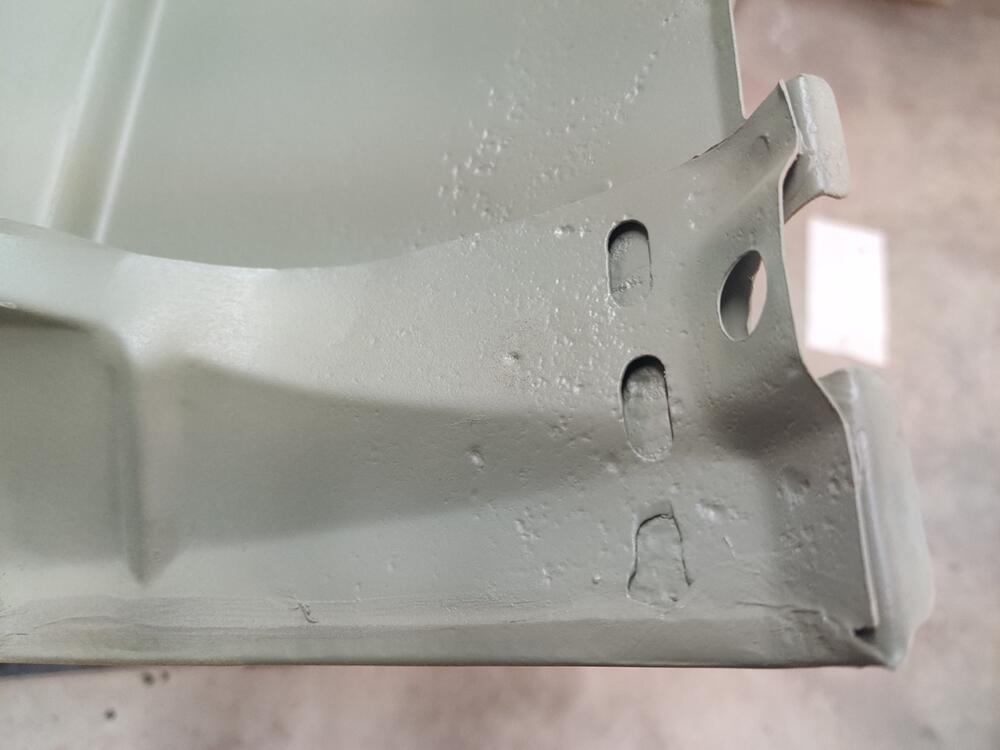
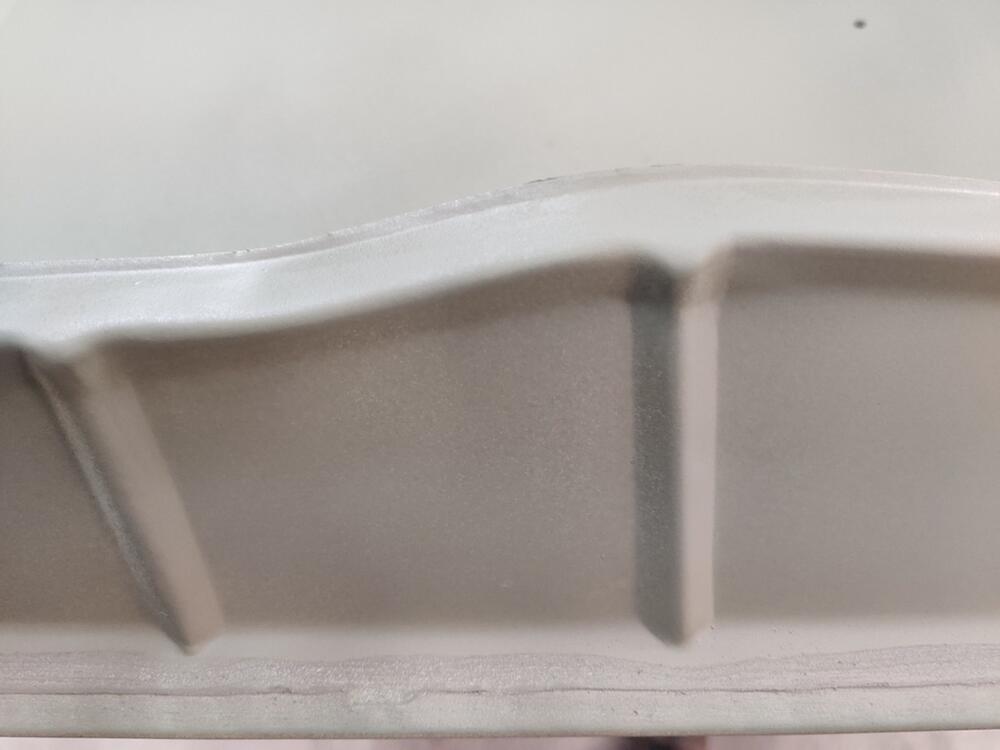
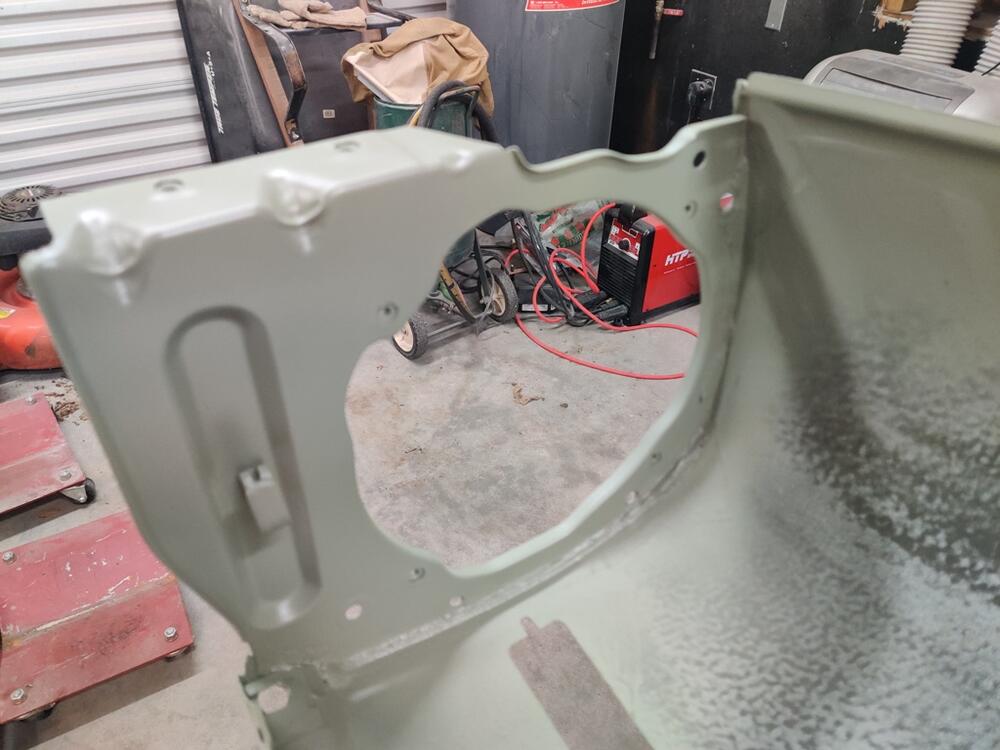
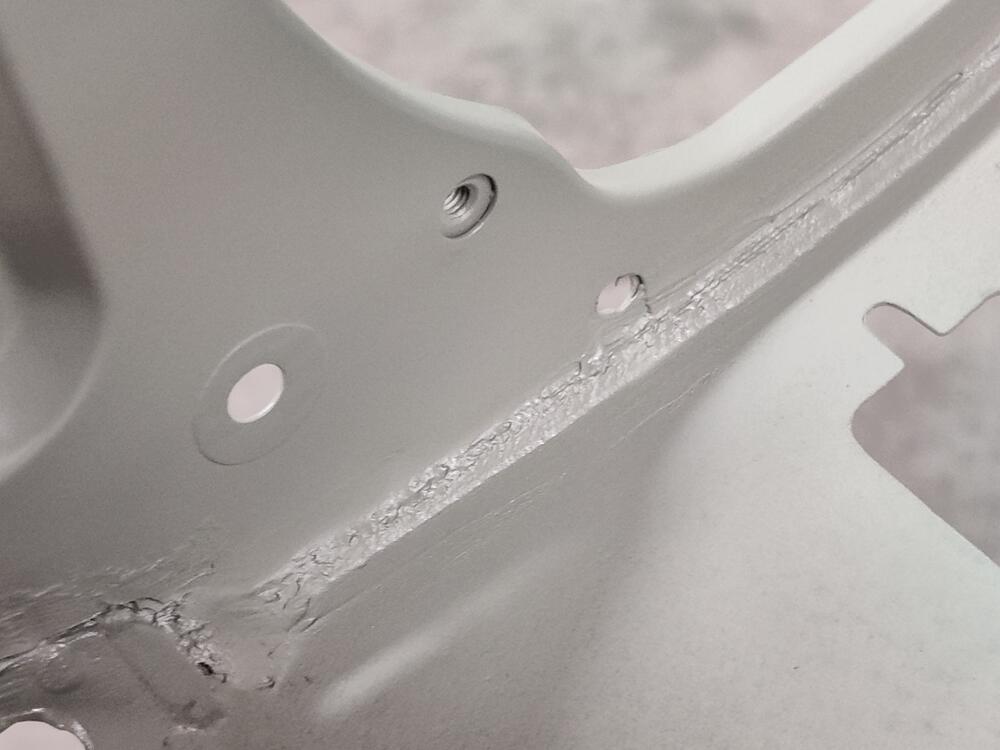
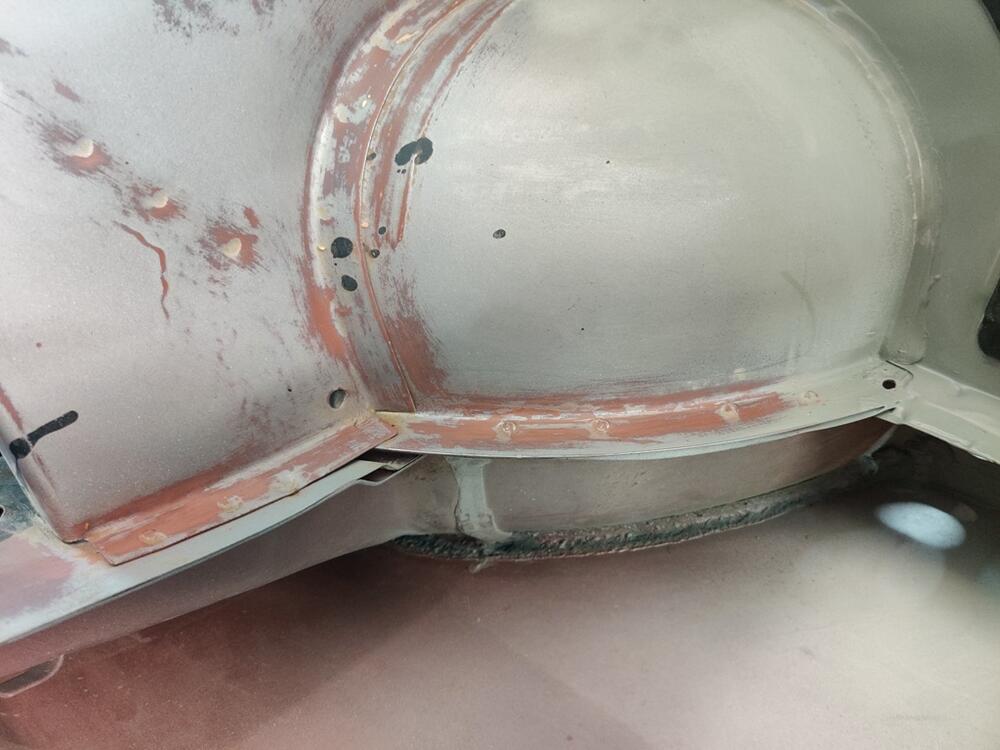
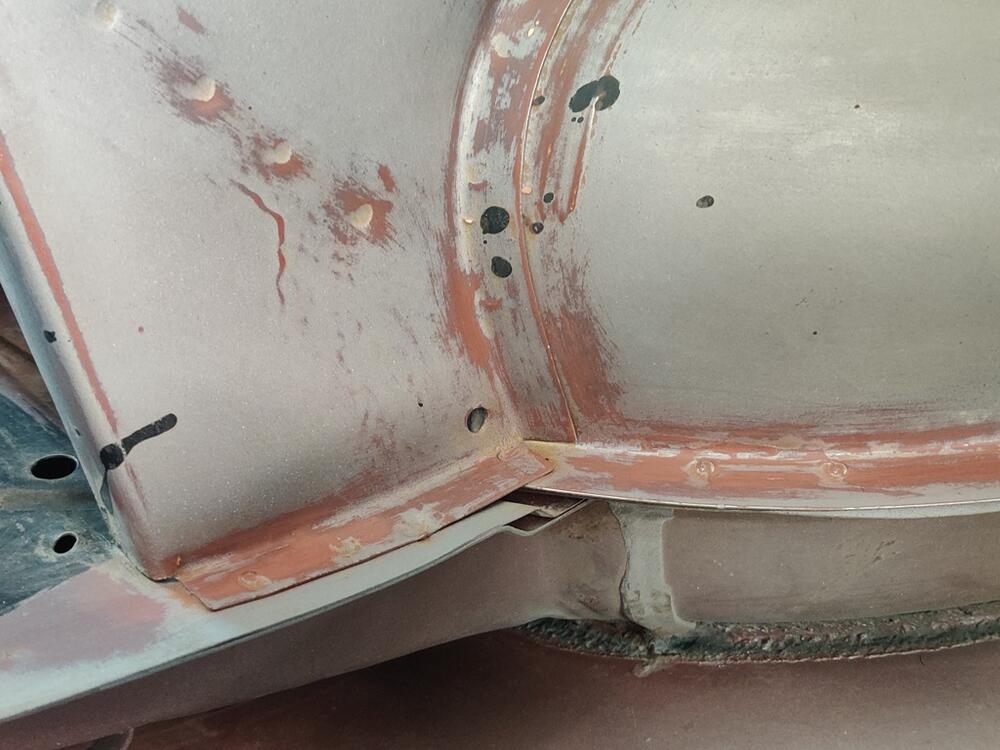
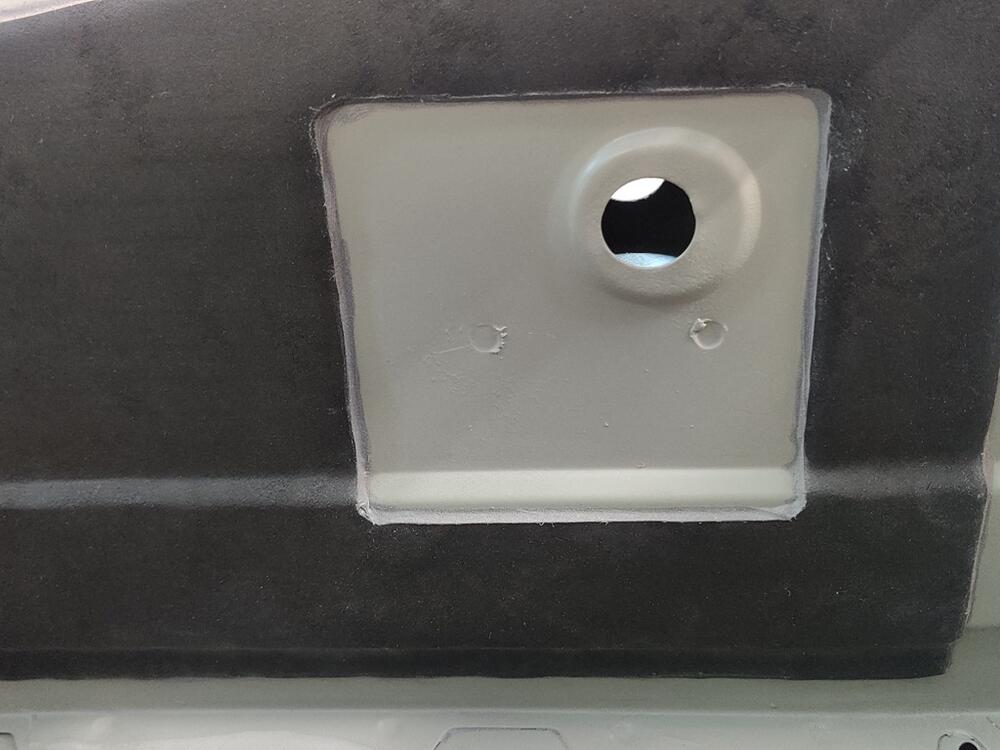
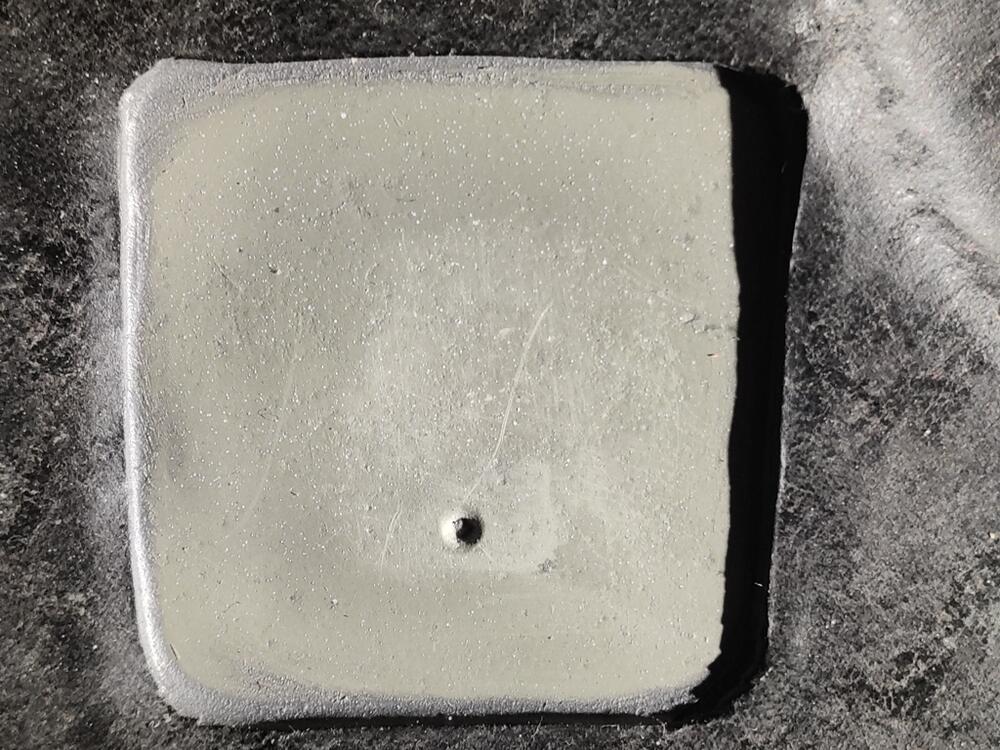
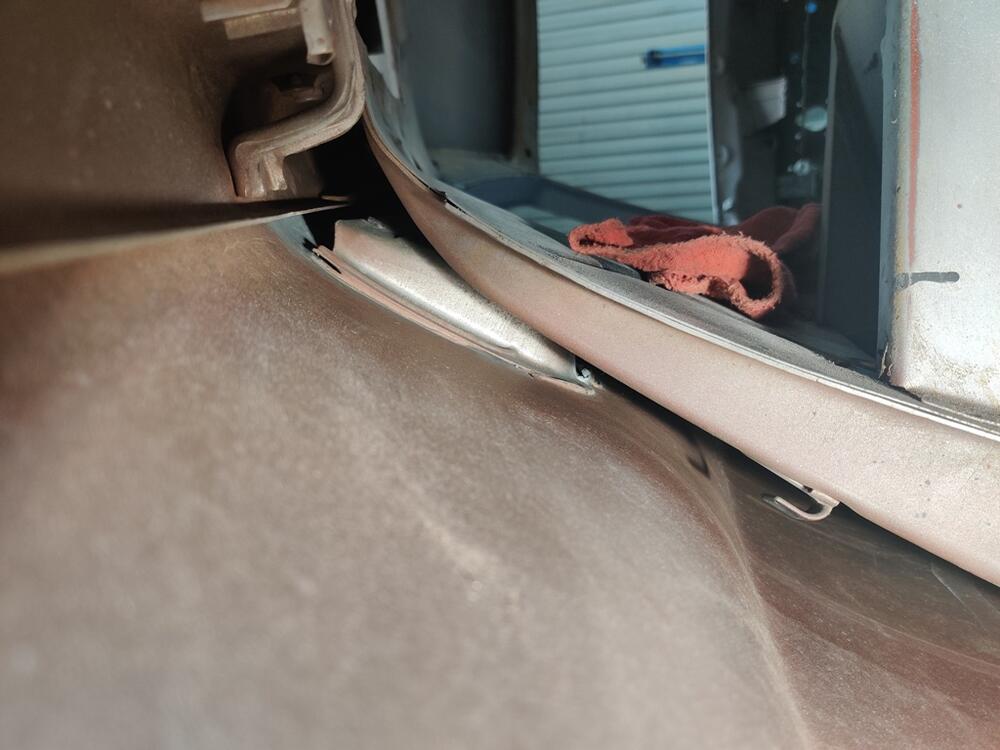
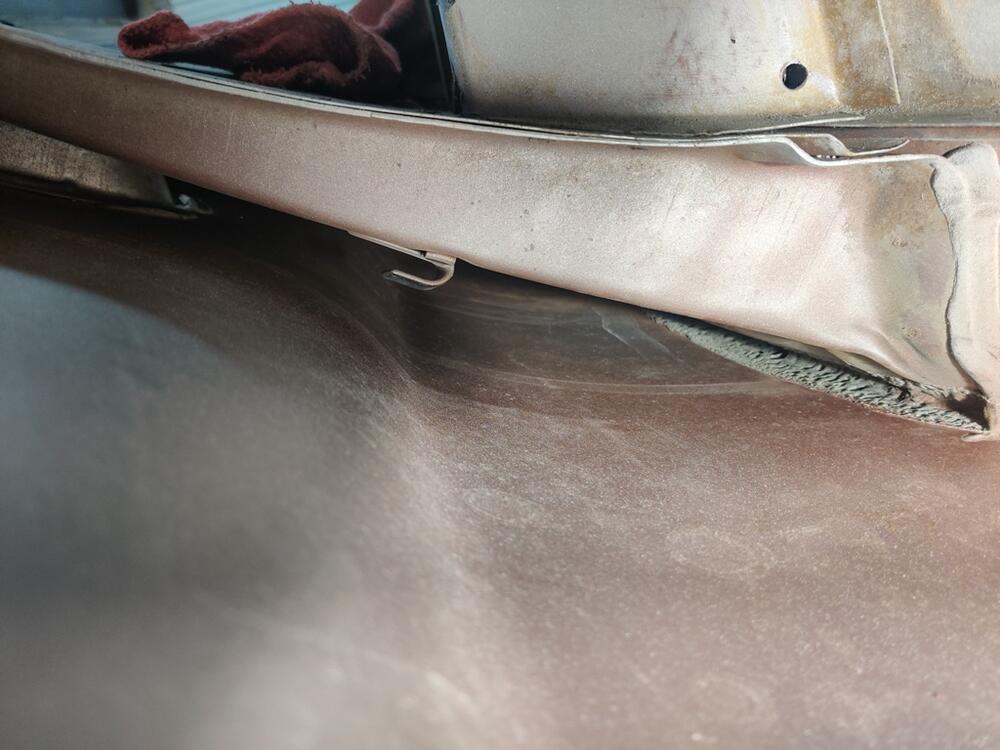
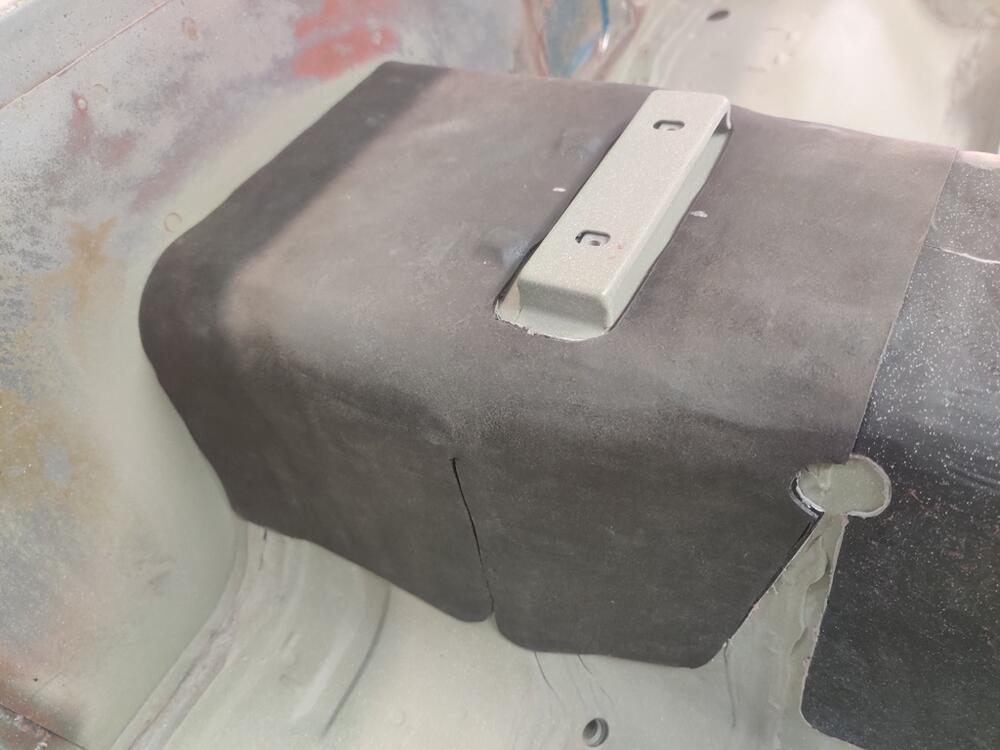
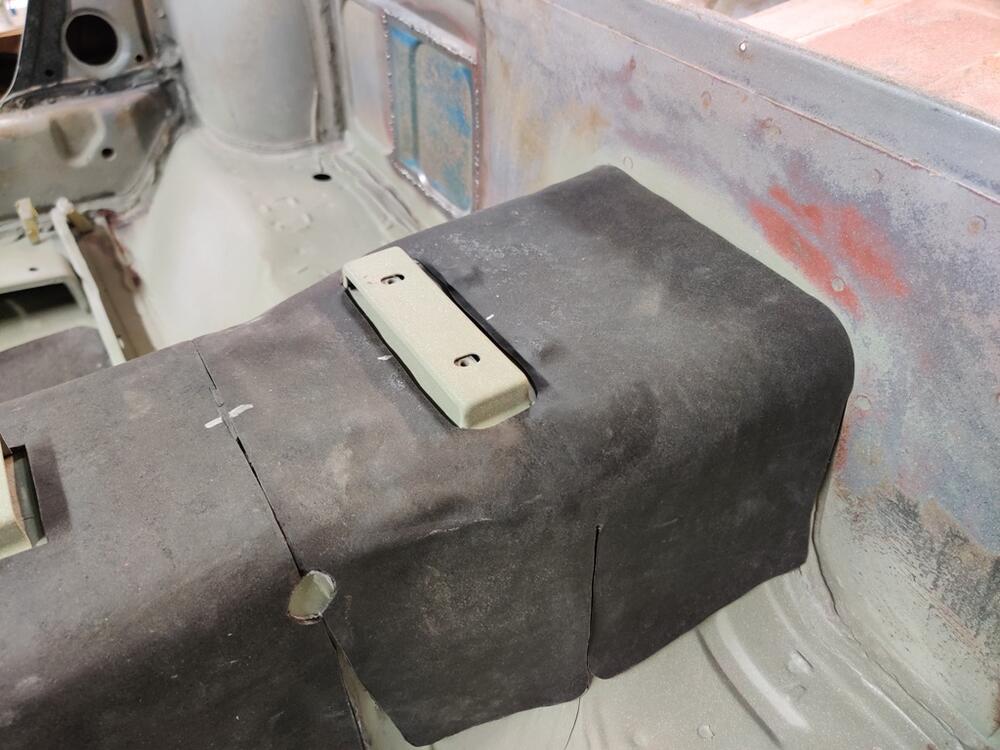
I was able to fabricate these for both fenders today. This metal piece is easy to fabricate as it only has one bend. I decided to tack weld it to the support instead of using pop rivets - thanks grannyknot for the suggestion. I did not tack it anywhere else though, as the body work is nearly finalized and I am not interested in deforming the outside surface of the fender. Hopefully, the addition of this piece does not cause a change in the shape of the panel when it is bolted in place. It might. And more time on bodywork will be the result if it did. After tacking, I used a hand-held belt sander to clean up the edge and then applied seam sealer. Now, any water coming inside the fender will run down the inside and be directed away from this corner by the shelf of this panel.


-
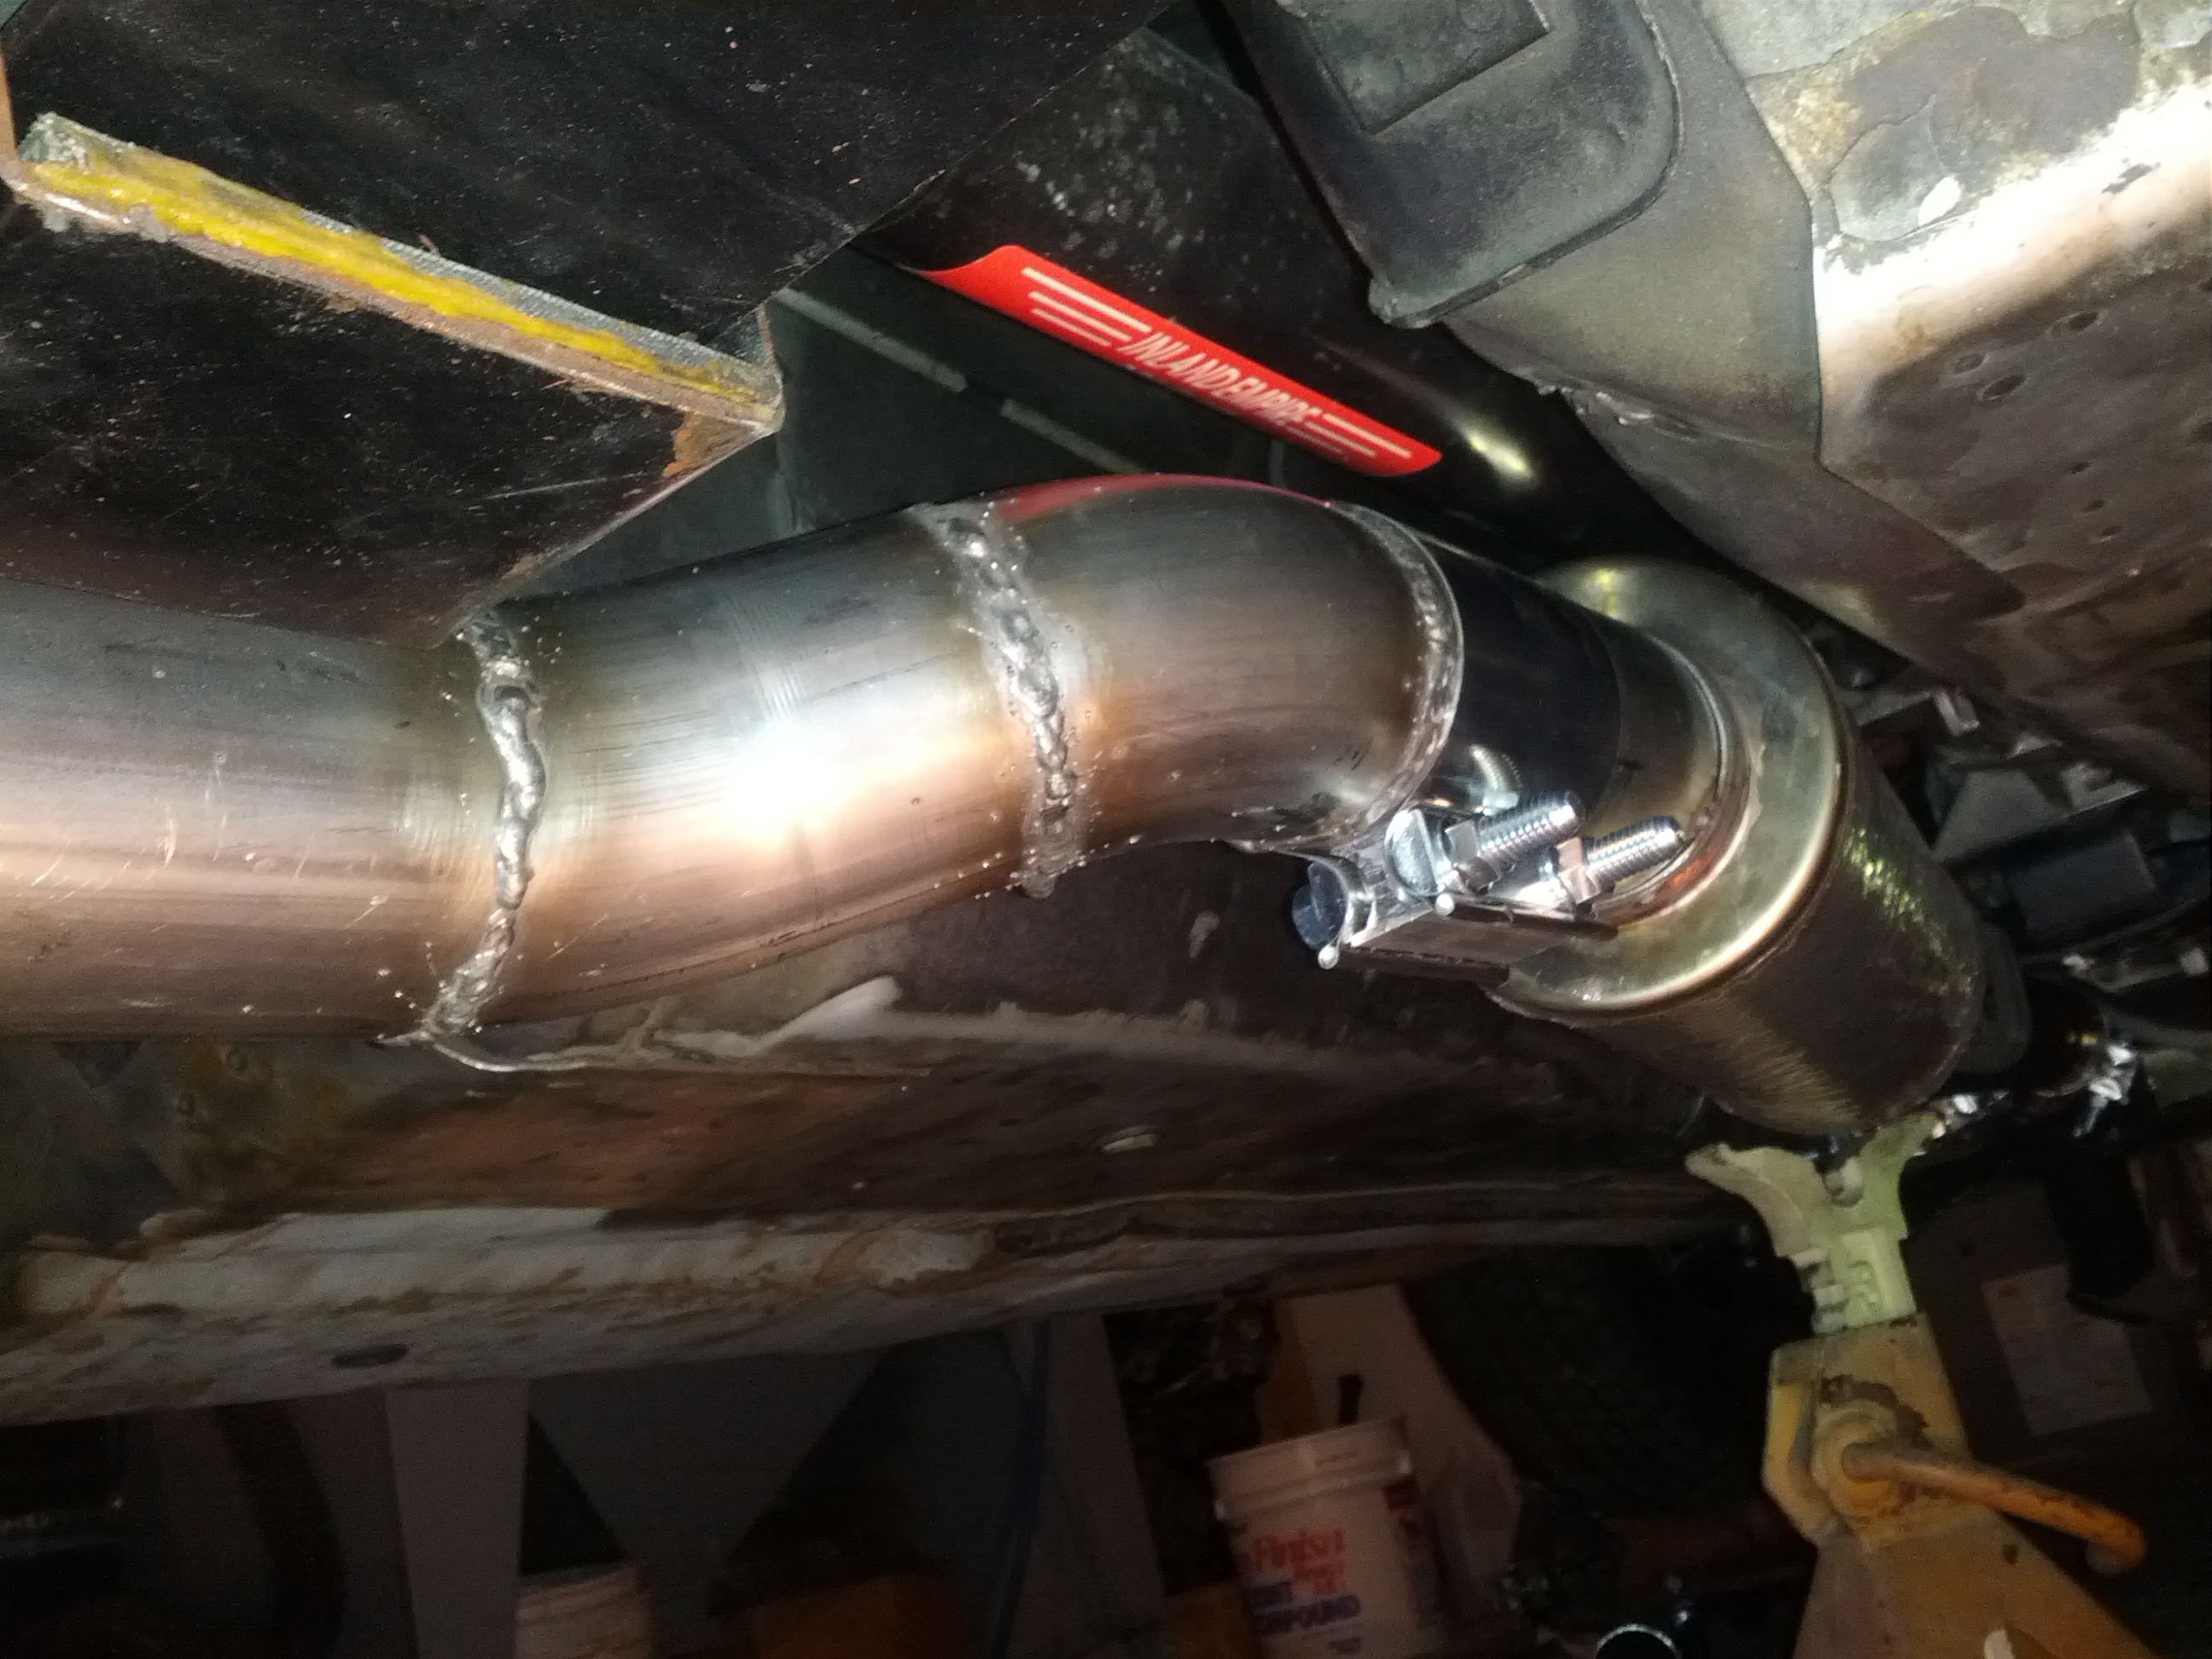
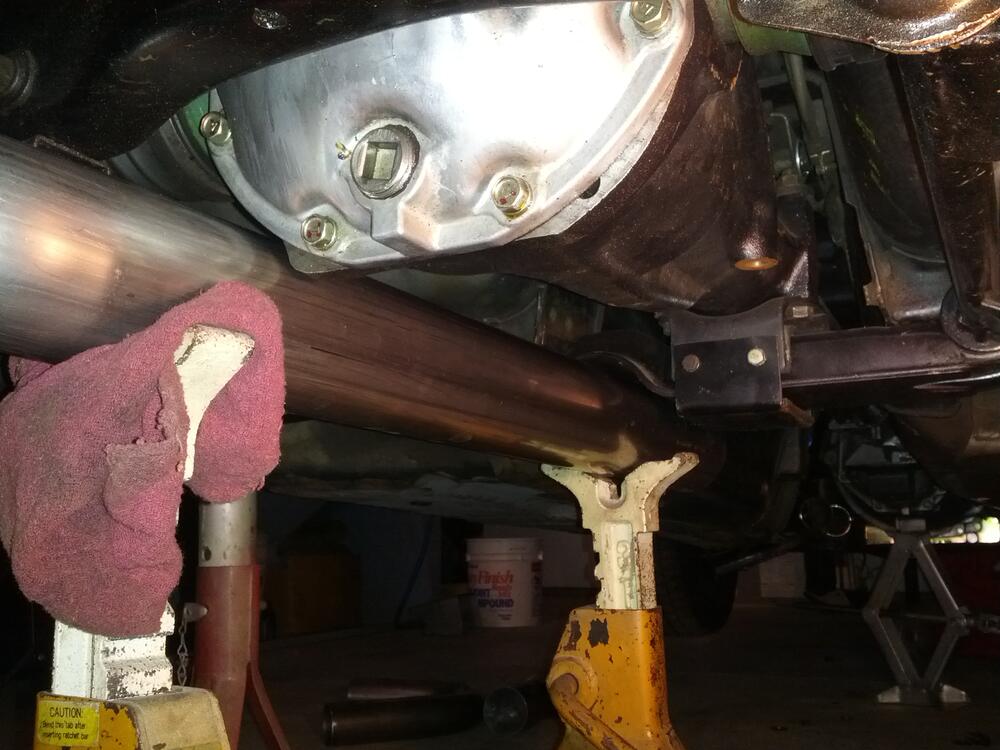
I found a few relevant pics of the bracket from when I was fabricating a 3" exhaust. Here they are: Looks like my air gap is more like 1/4". In the first pic, you can see the rubber padding glued to the floor of the U bracket: Here is a close up of the bracket going under the crossmember. I used yellow contact cement to glue the reinforced rubber belt material to the floor of the "U". You can see the air gap nicely here (top left of the photo):


-
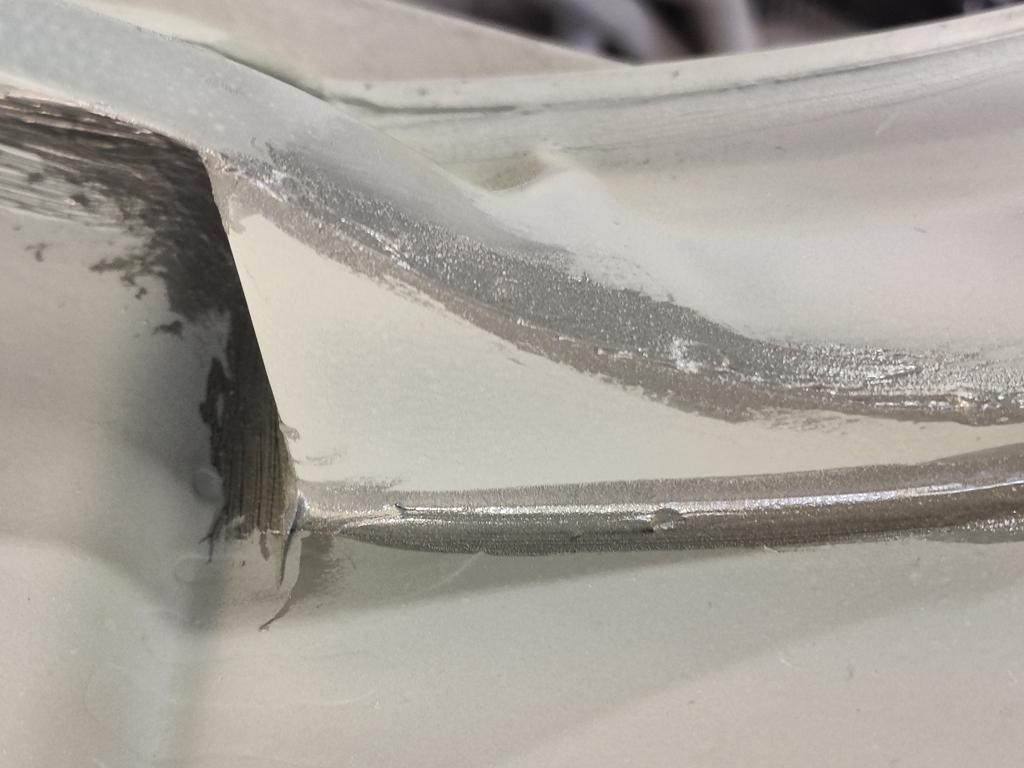
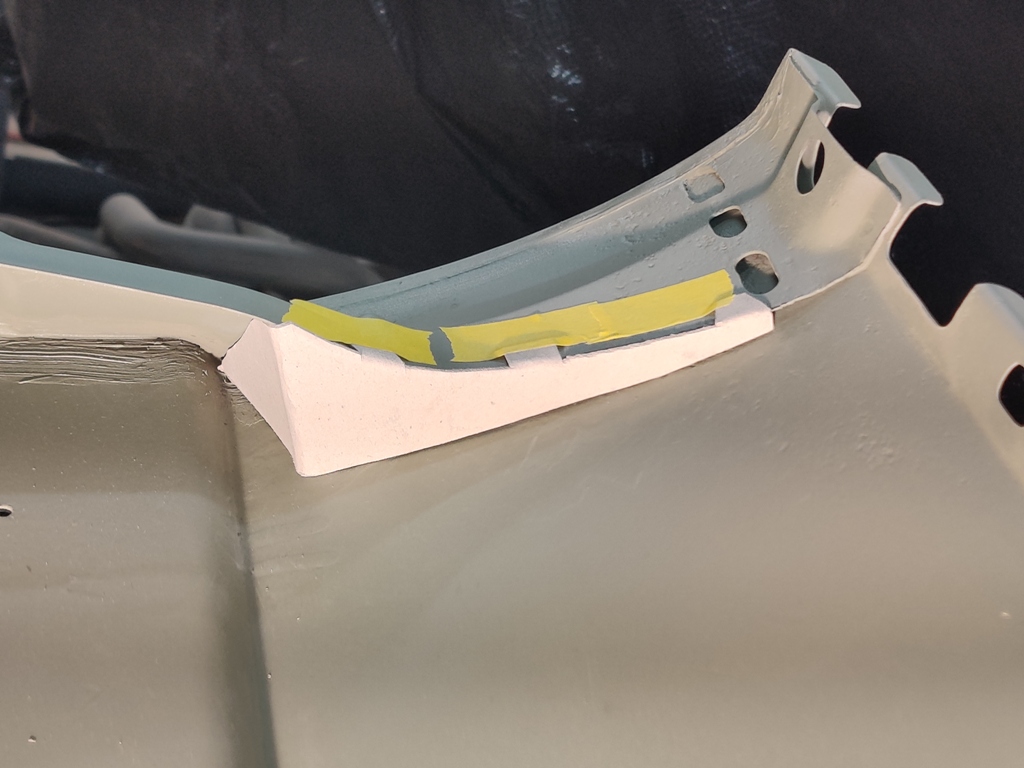
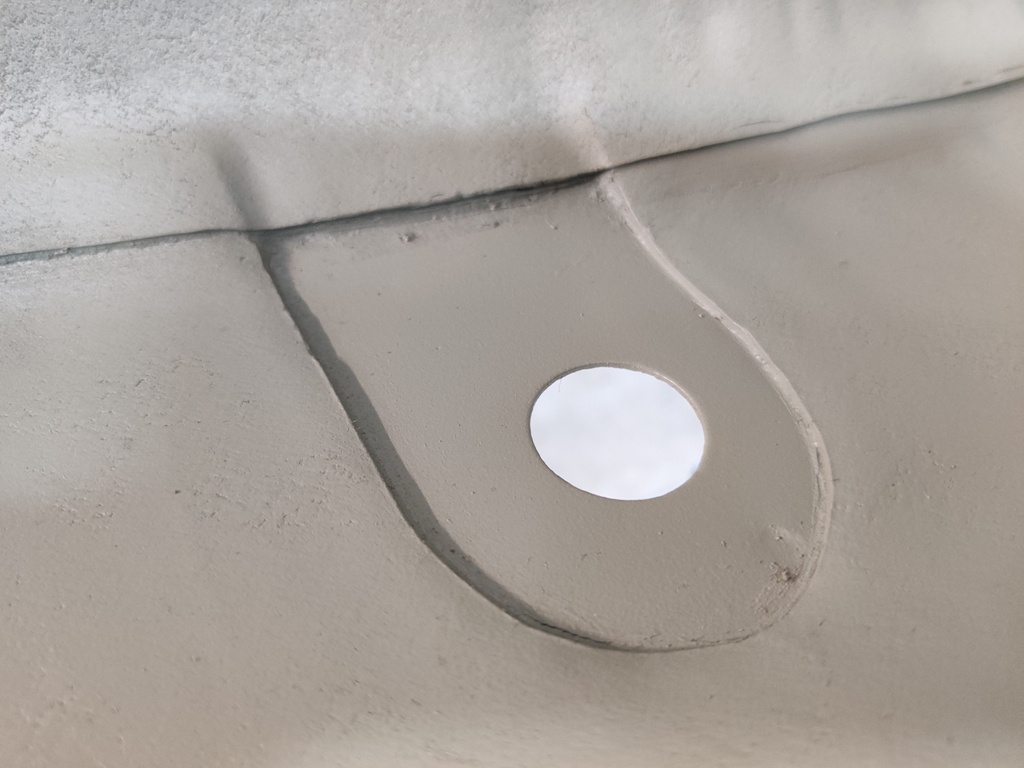
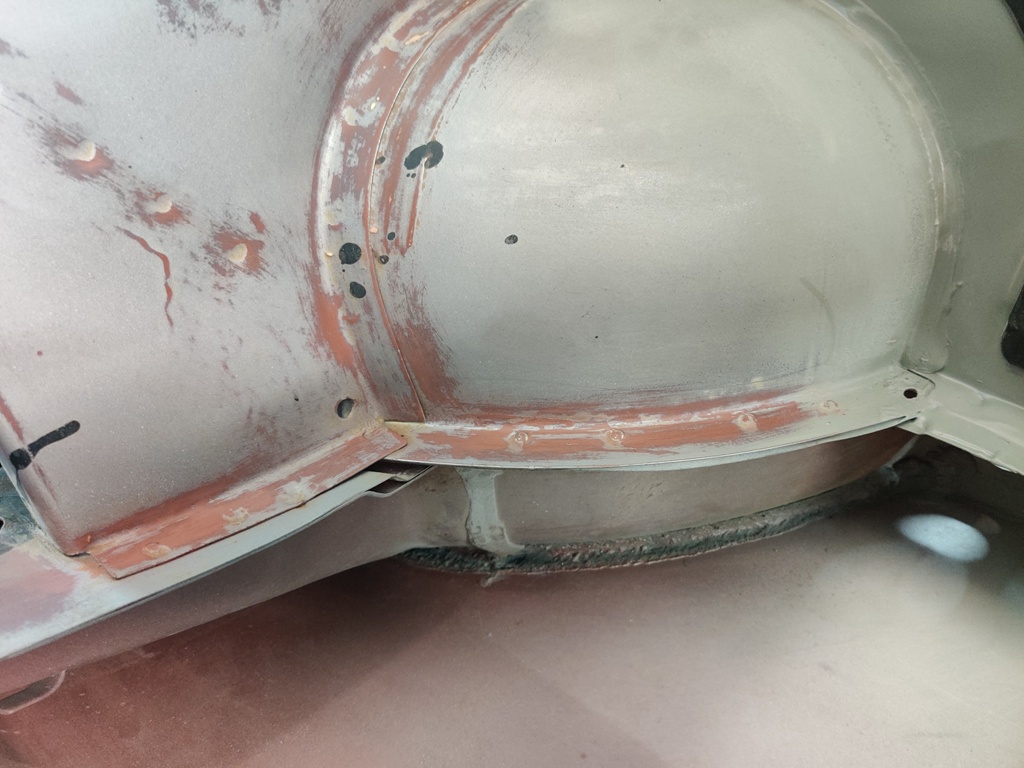
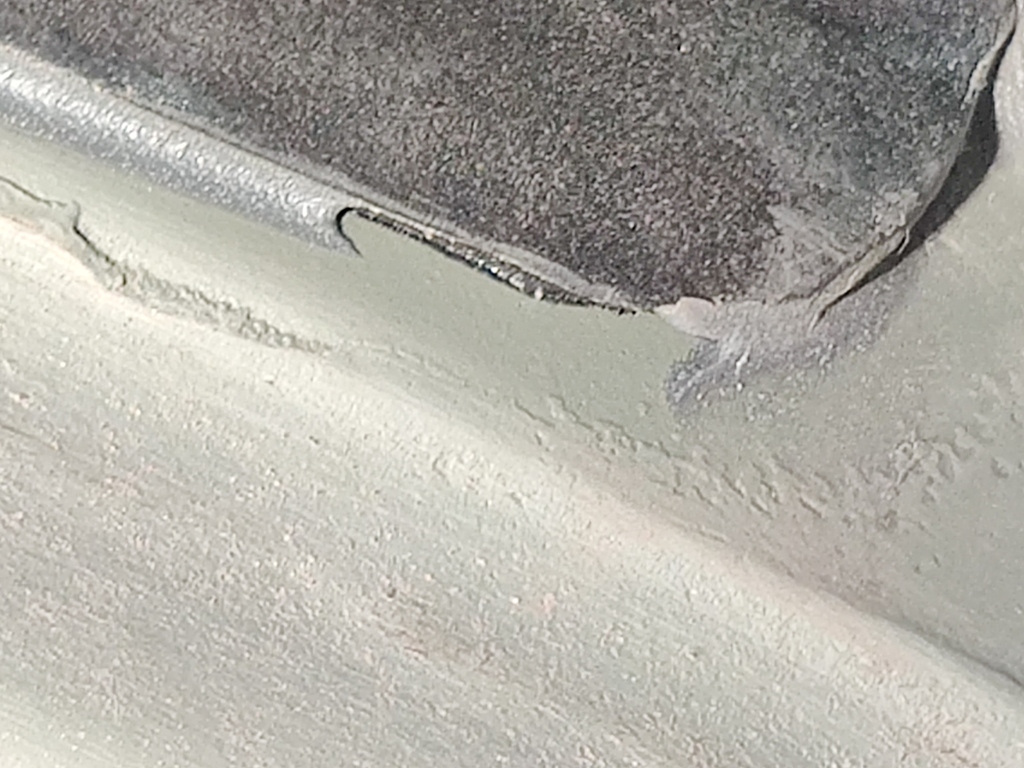
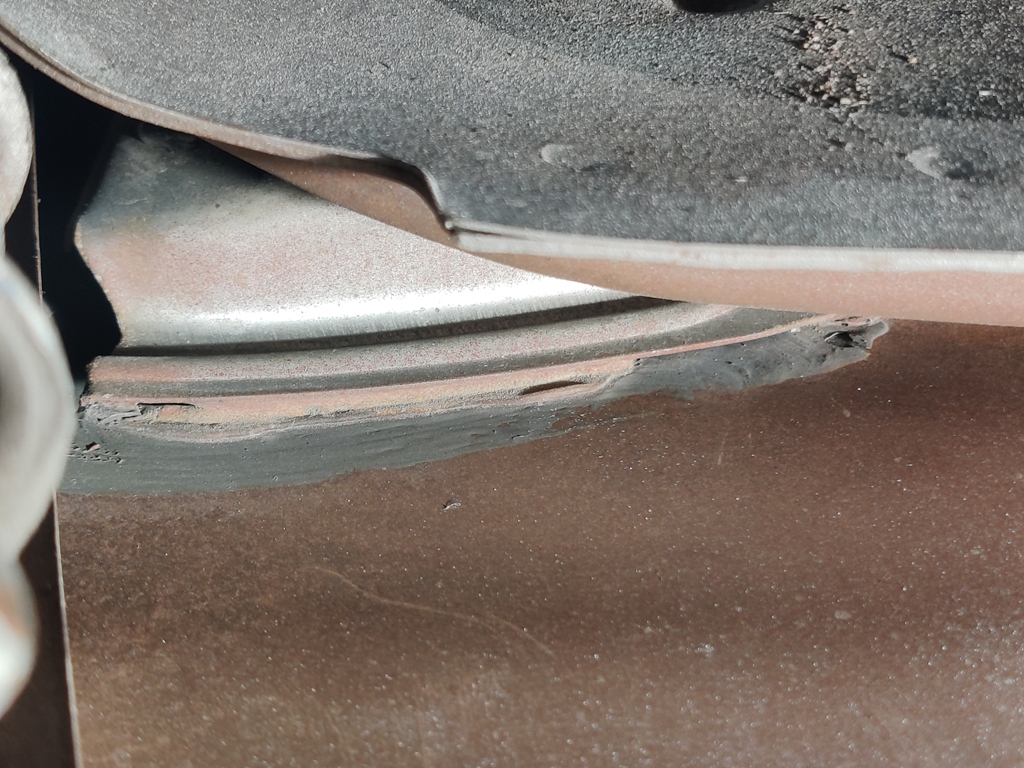
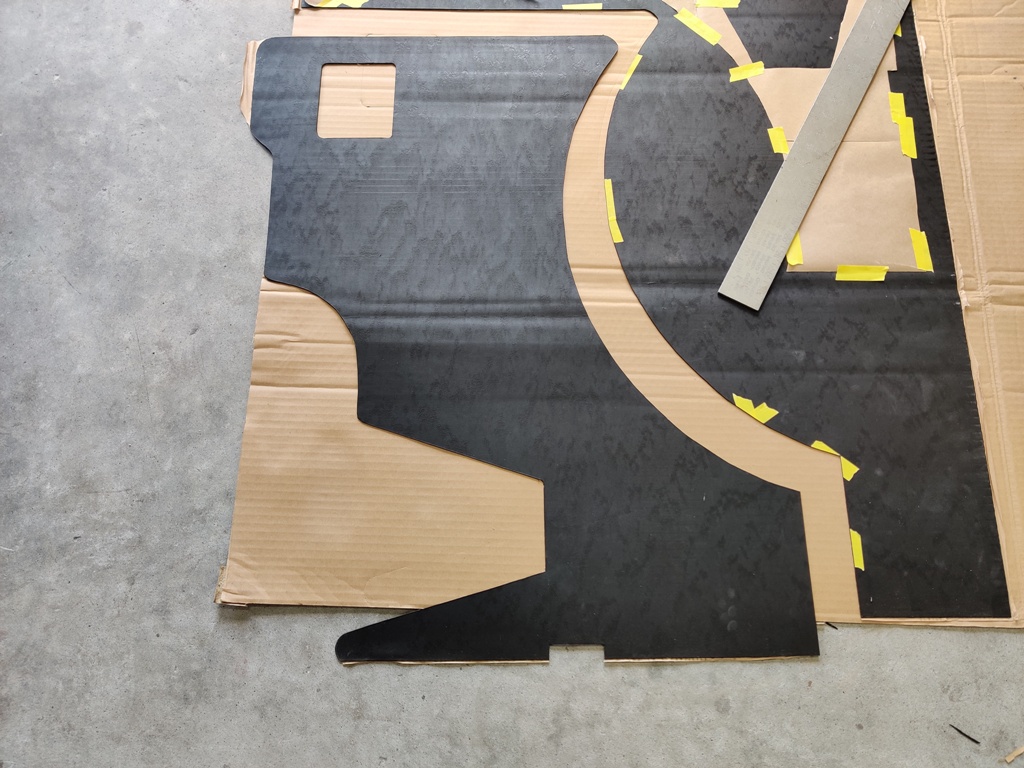
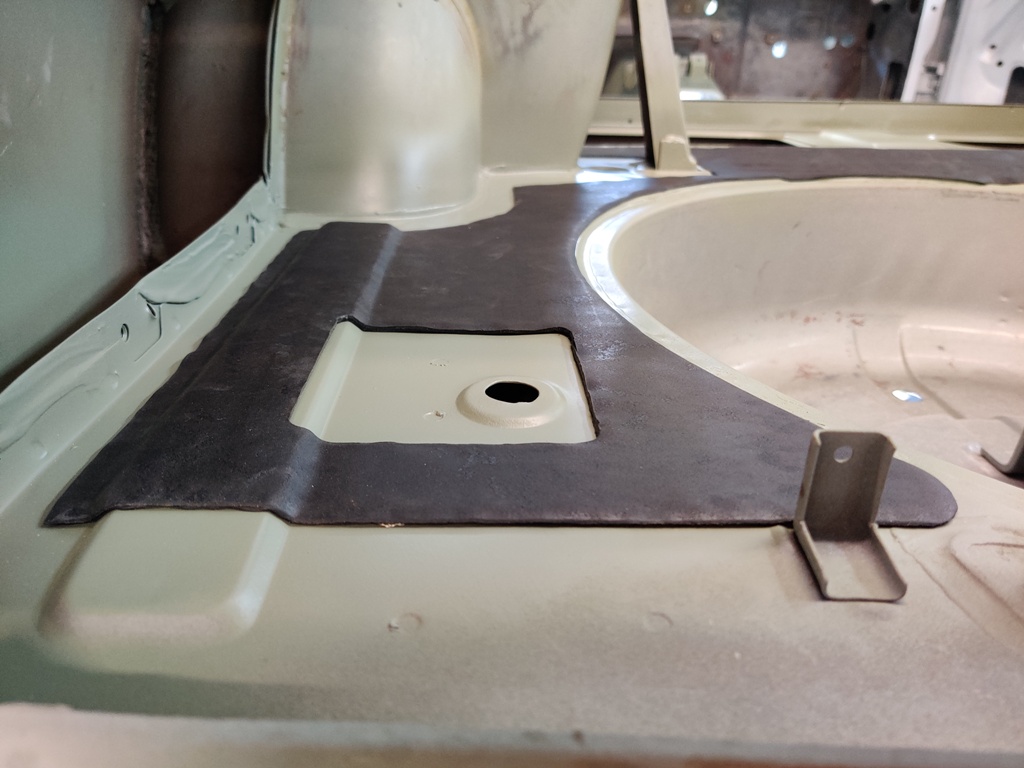
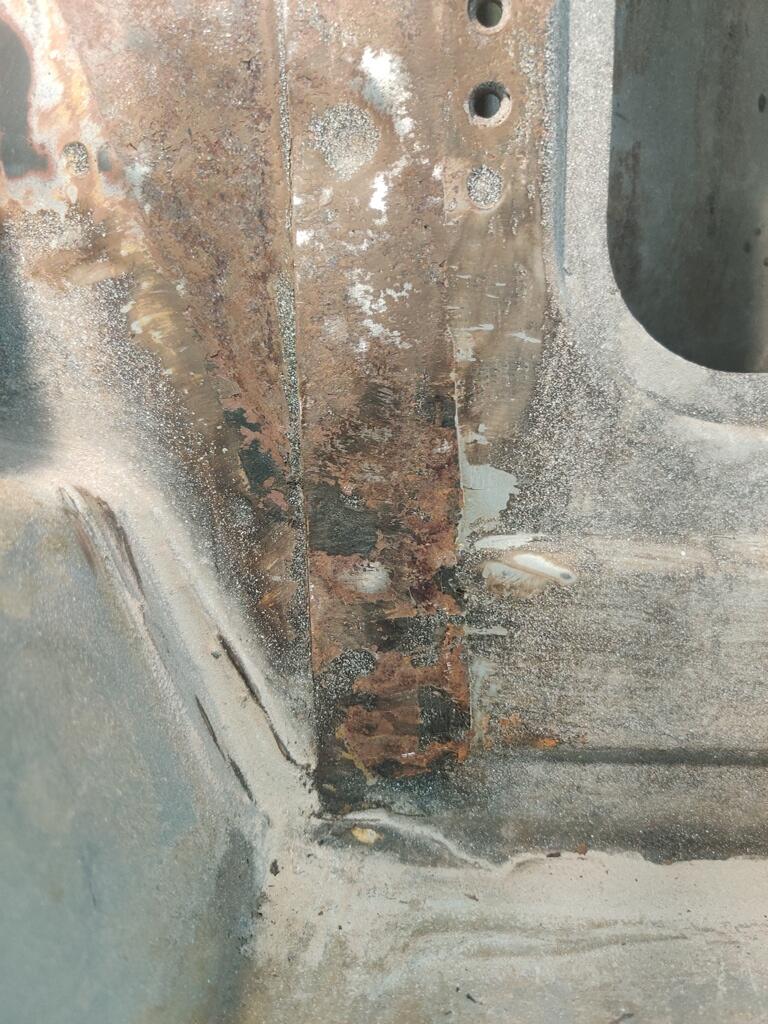
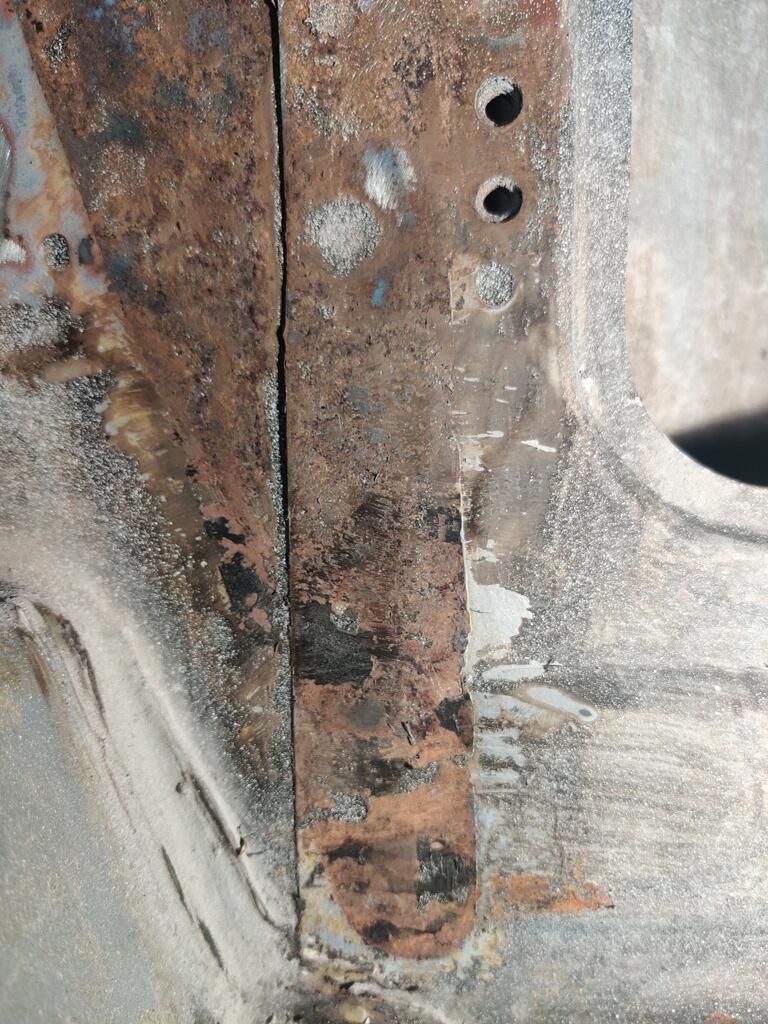
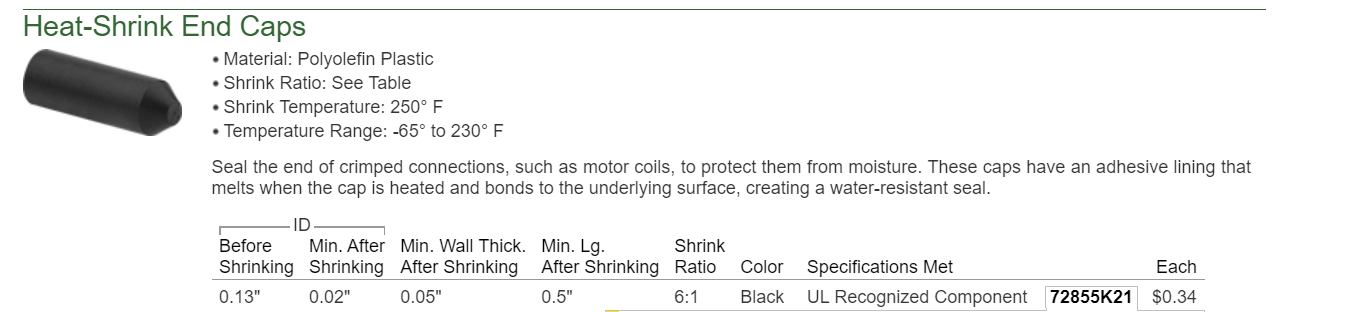
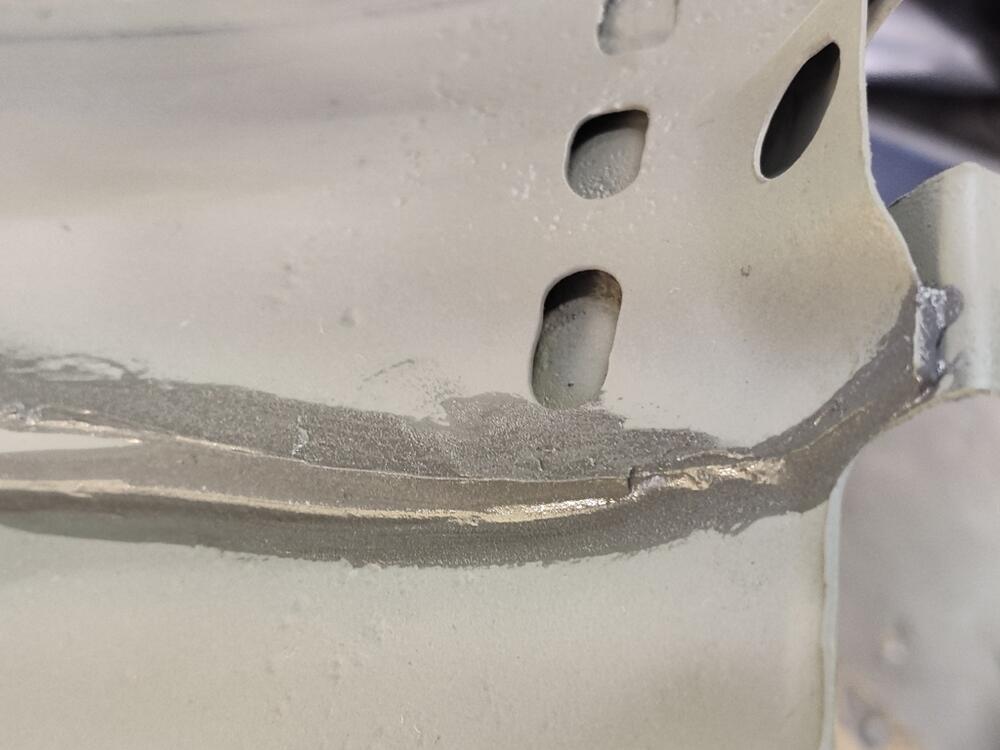
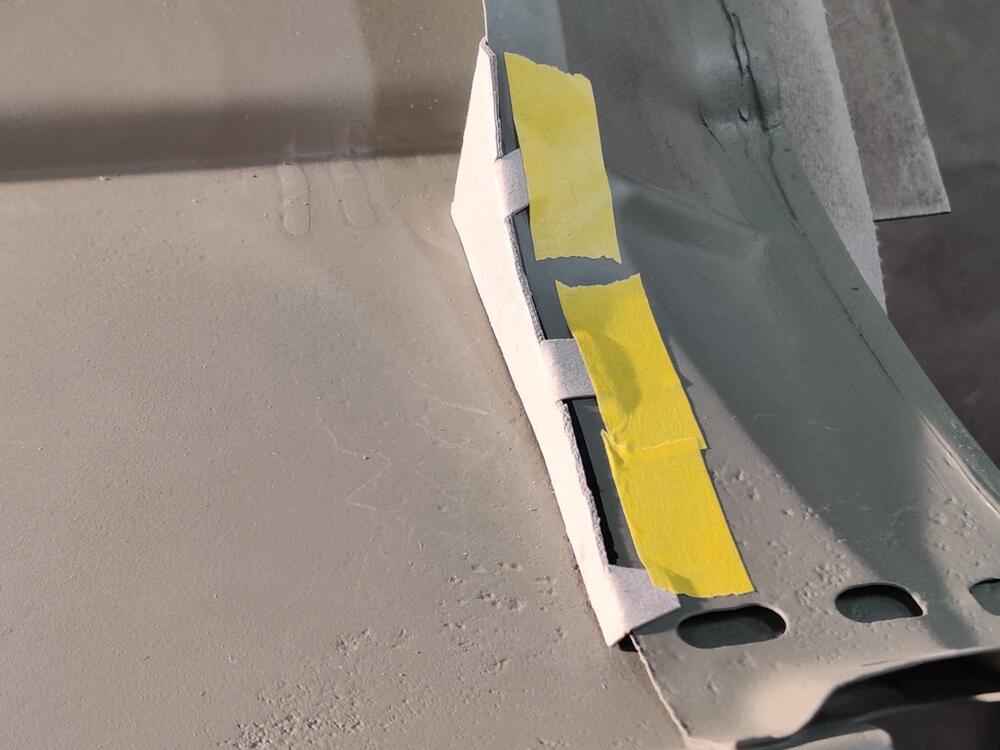
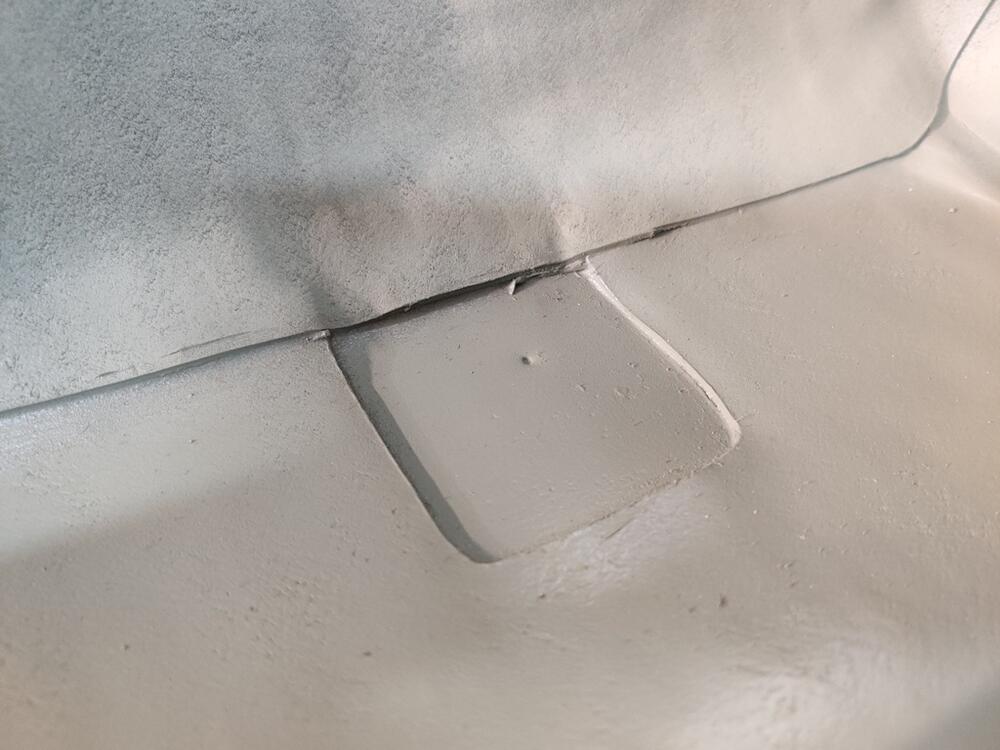
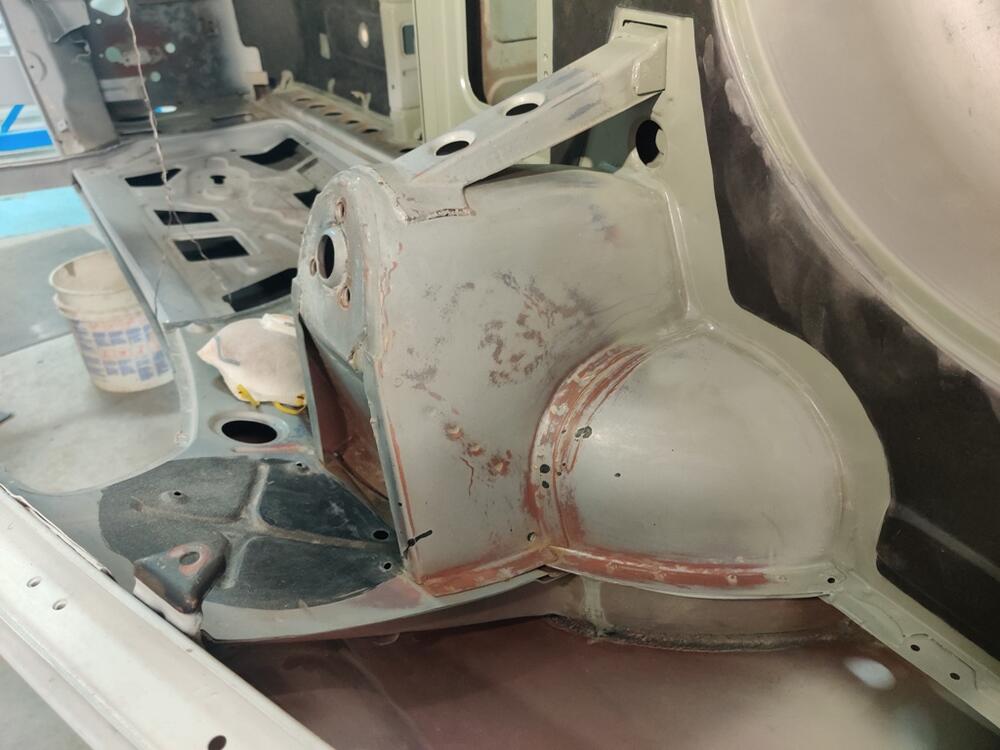
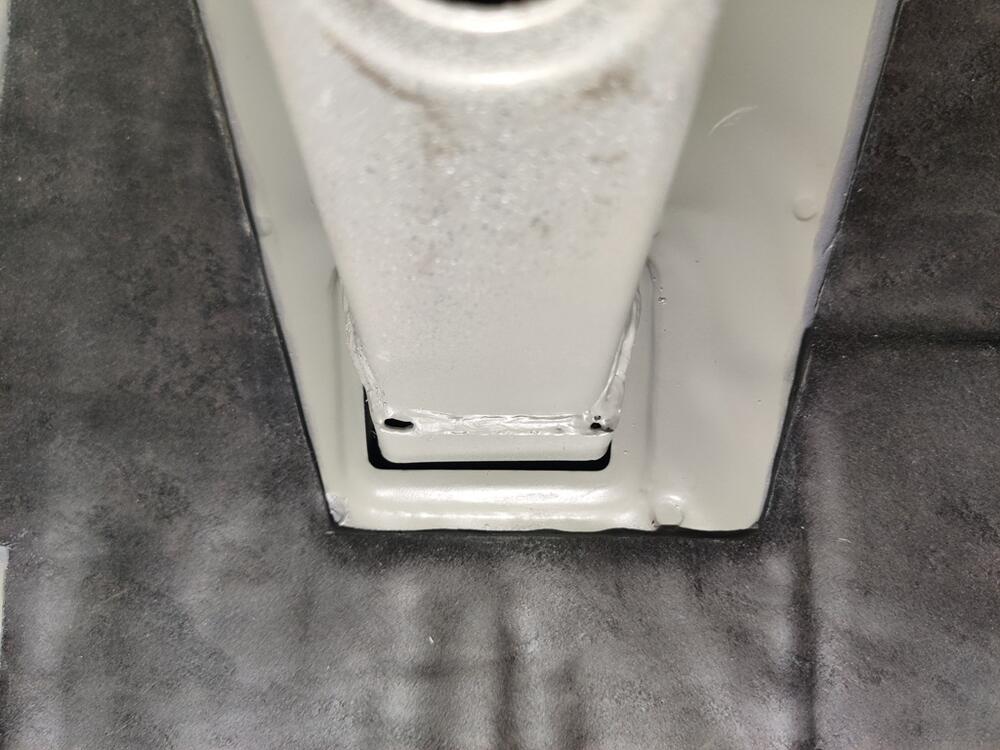
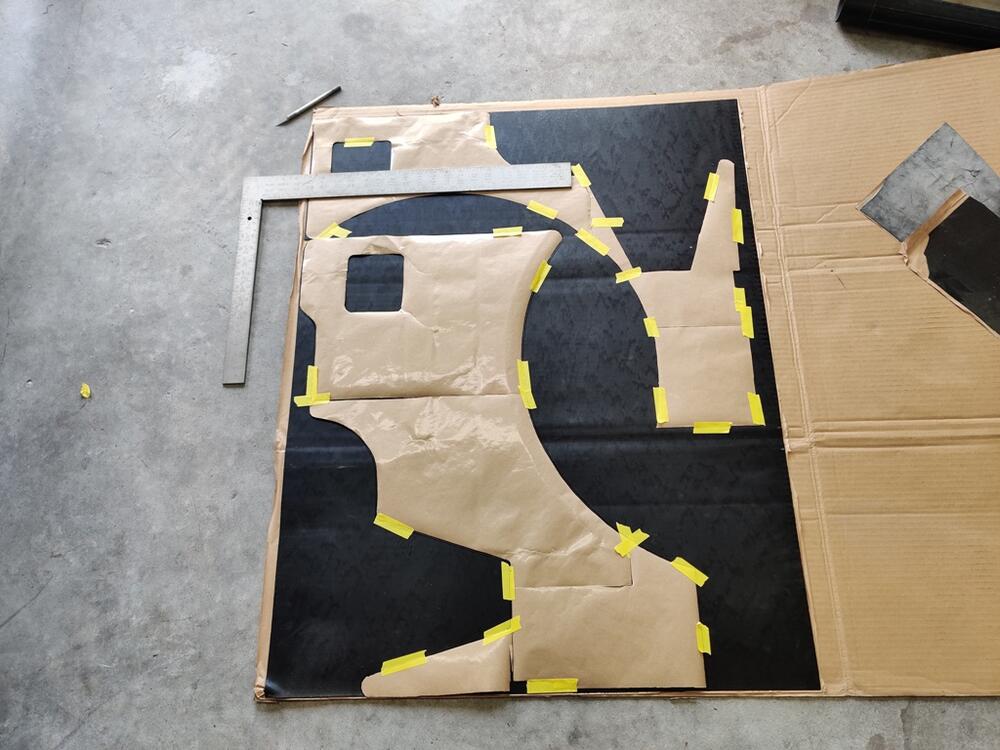
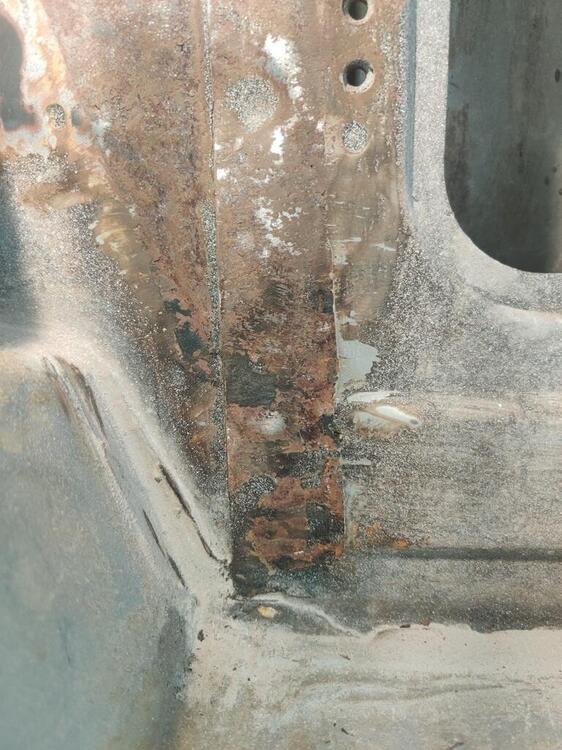
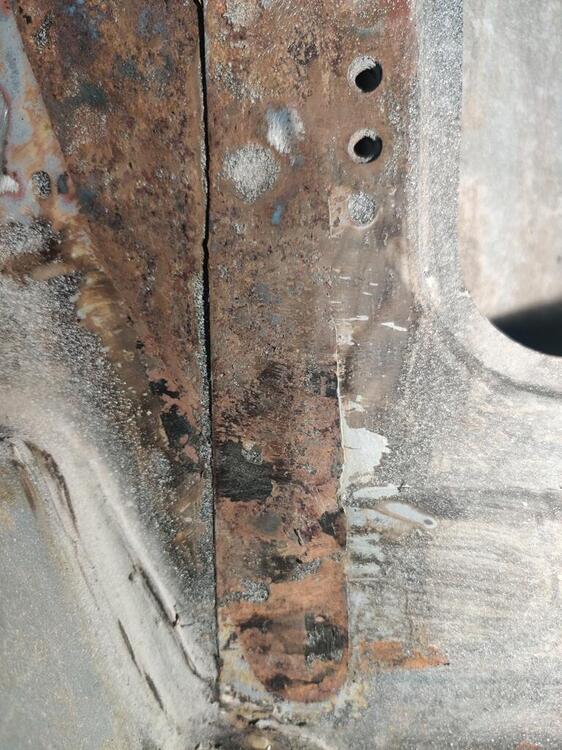
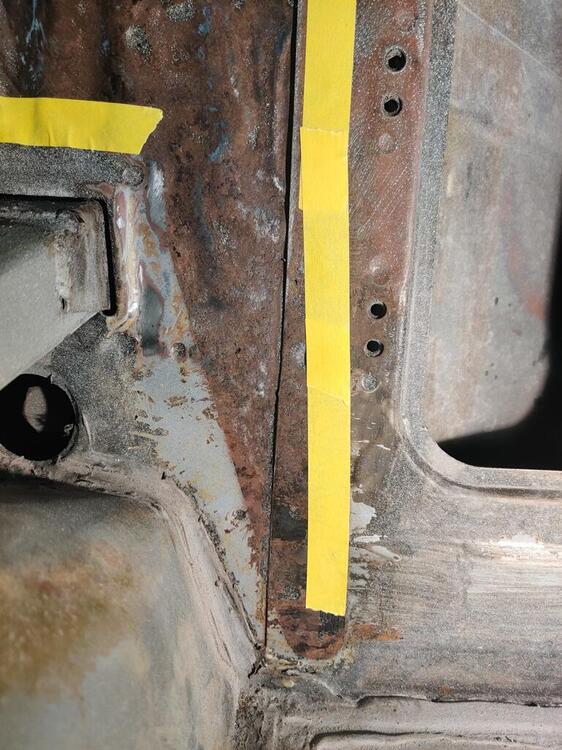
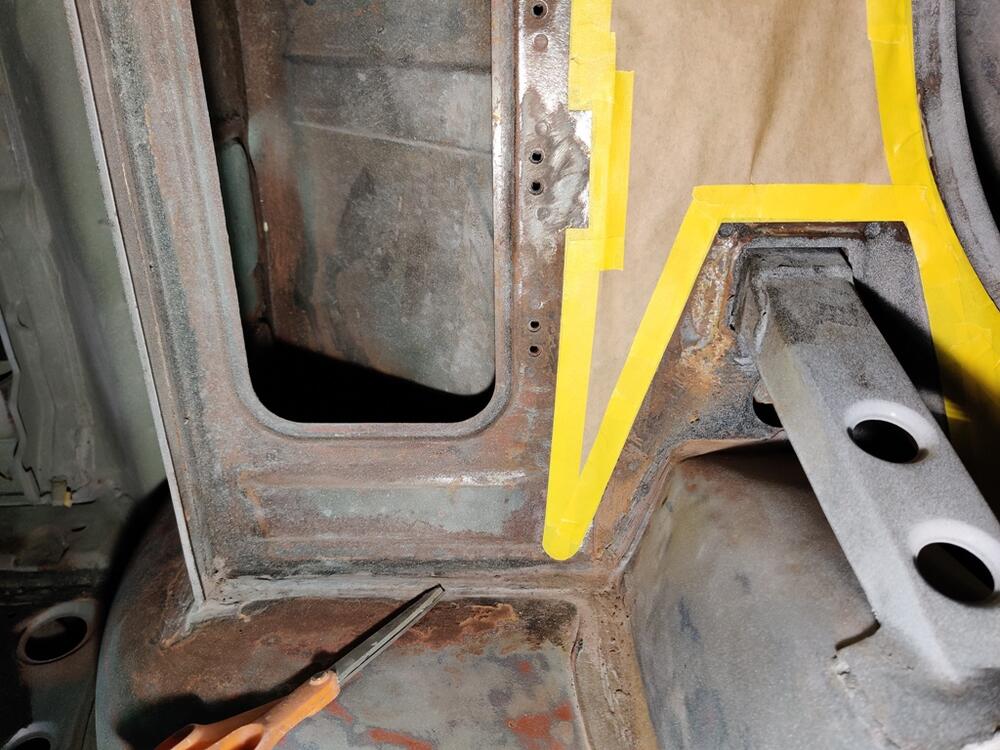
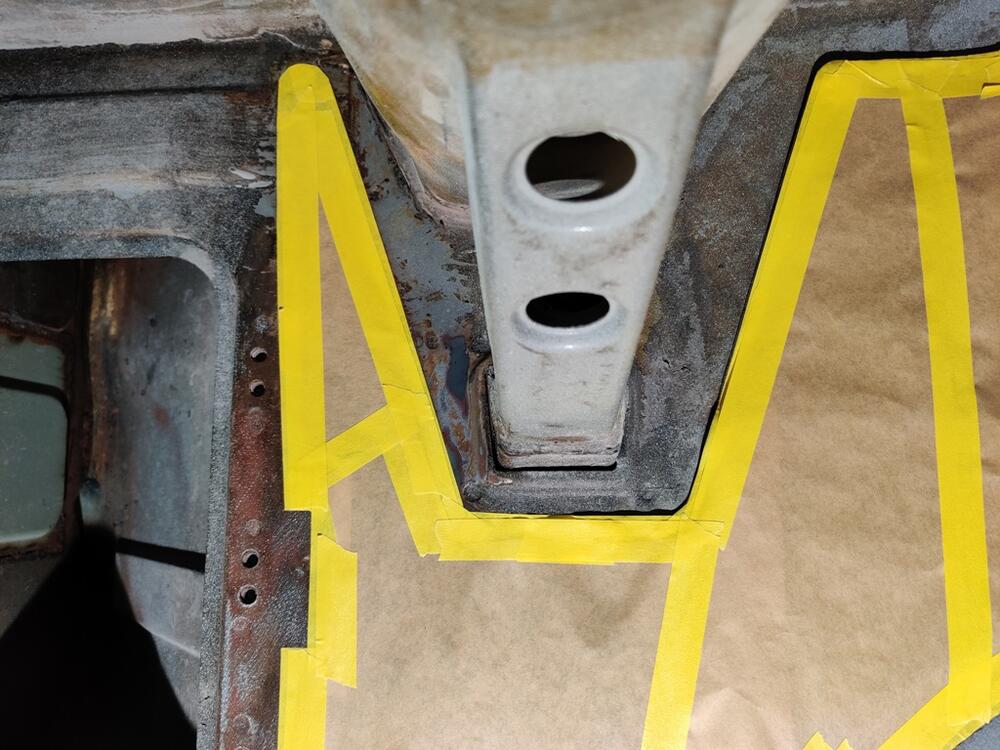
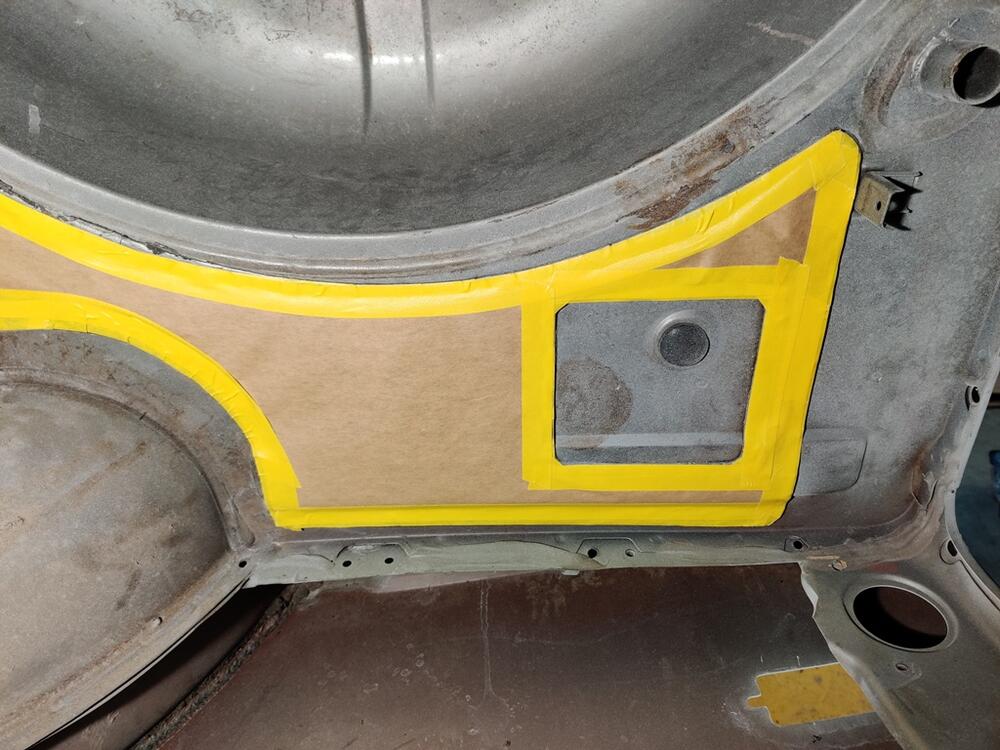
I've been thinking about how best to address one of the most common rust out areas on our cars, the bottom corner of the front fender. There is a reinforcement panel which is crimped into the back edge of the fender, and where it twists at the bottom of the fender, it creates a trap for dirt and debris, which over time, collects in the bottom rear corner. The debris which gets trapped here allows no air circulation so it holds moisture for extended periods of time, over and over again. Eventually, bare metal gets exposed and rust starts. On my first 240Z, I bought brand new OEM fenders, and I sprayed epoxy primer inside this area along with paint. That was in 1993. Even though that car has seen relatively little weather (it has been stored in a garage for most of the years since), the lower corner of the passenger side fender started showing some raised bumps (indicating rust through from behind around 2011. I also, unbolted the bottom of that cars fenders and blew out the debris and dirt a few times over the years with compressed air. Still, these preventative efforts did not work. With the 240Z I am restoring now, I want a better solution. Initially, I thought I would address this problem area by cutting some oval vents to allow additional drainage from this corner, and additional air circulation for drying. However, I think that would only be a slight improvement. Instead, I now have in mind fabricating a small metal panel which will seal off this area completely, and therefore, not allowing any dirt or debris or moisture to collect in the corner at all. Here is a cardboard mock up: I will extend the actual metal piece I fabricate a little further down than this cardboard template, so that the gap is closed. I may pop rivet this piece on using the little tabs. Once secured, I will use seam sealer to seal all the gaps. Of course, I now need to do something to seal up the oval holes that I cut into the reinforcement panel, or water and debris will enter there and I will still have the same problem for the bottom inch or so of the fender corner.


-
I've been thinking about how best to address one of the most common rust out areas on our cars, the bottom corner of the front fender. There is a reinforcement panel which is crimped into the back edge of the fender, and where it twists at the bottom of the fender, it creates a trap for dirt and debris which over time, collects in the bottom rear corner. The debris which gets trapped here allows no air circulation so it holds moisture for extended periods of time, over and over again. Eventually, bare metal gets exposed and rust starts. Initially, I thought I would address this problem area by cutting some oval vents to allow additional drainage from this corner, and additional air circulation for drying. However, I think that would only be a slight improvement. Instead, I now have in mind fabricating a small metal panel which will seal off this area completely, and therefore, not allowing any dirt or debris or moisture to collect in the corner at all. Here is a cardboard mock up: I will extend the actual metal piece I fabricate a little further down than this cardboard template, so that the gap is closed. I may pop rivet this piece on using the little tabs. Once secured, I will use seam sealer to seal all the gaps. Of course, I now need to do something to seal up the oval holes that I cut into the reinforcement panel, or water and debris will enter there and I will still have the same problem for the bottom inch or so of the fender corner.
-
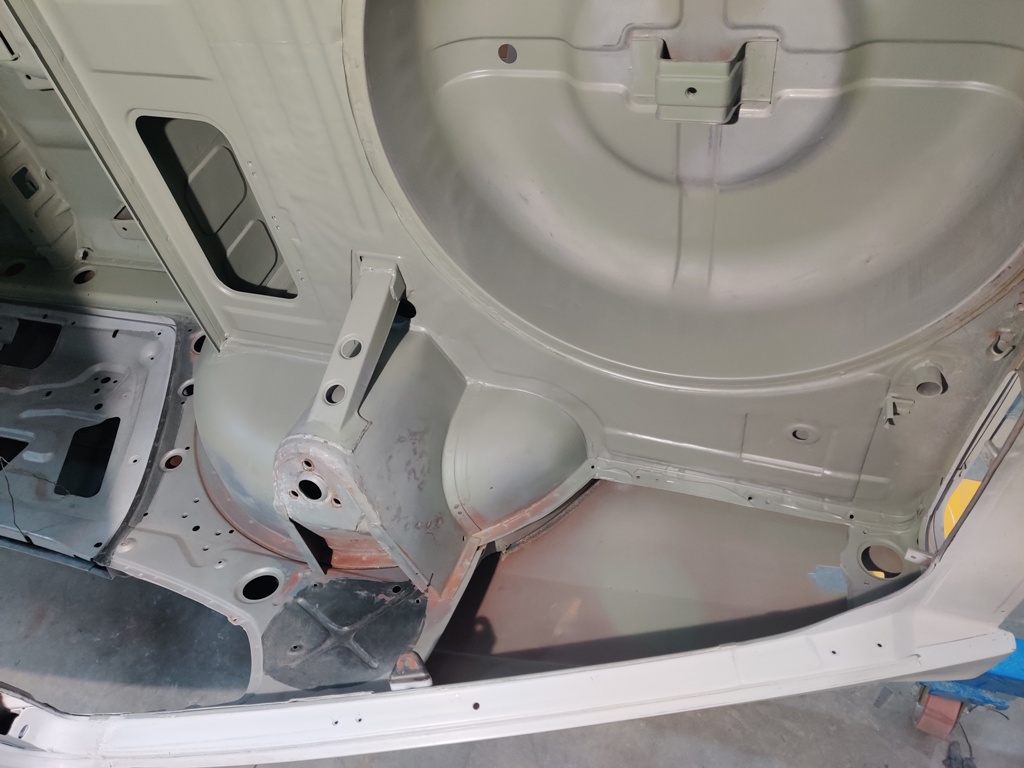
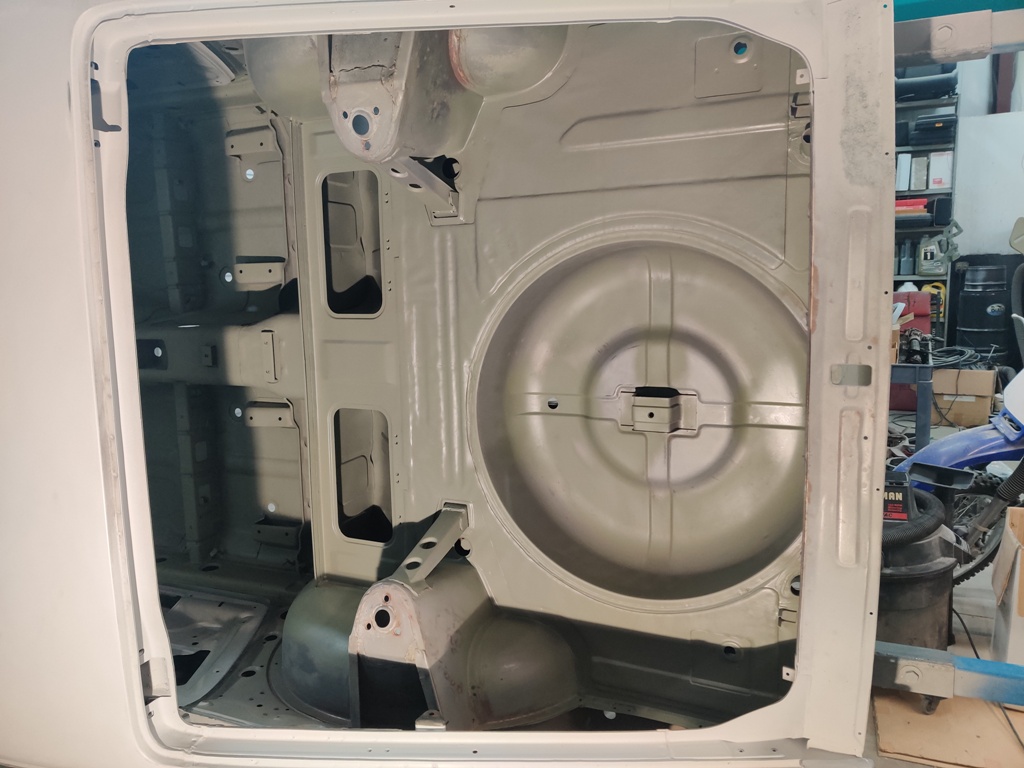
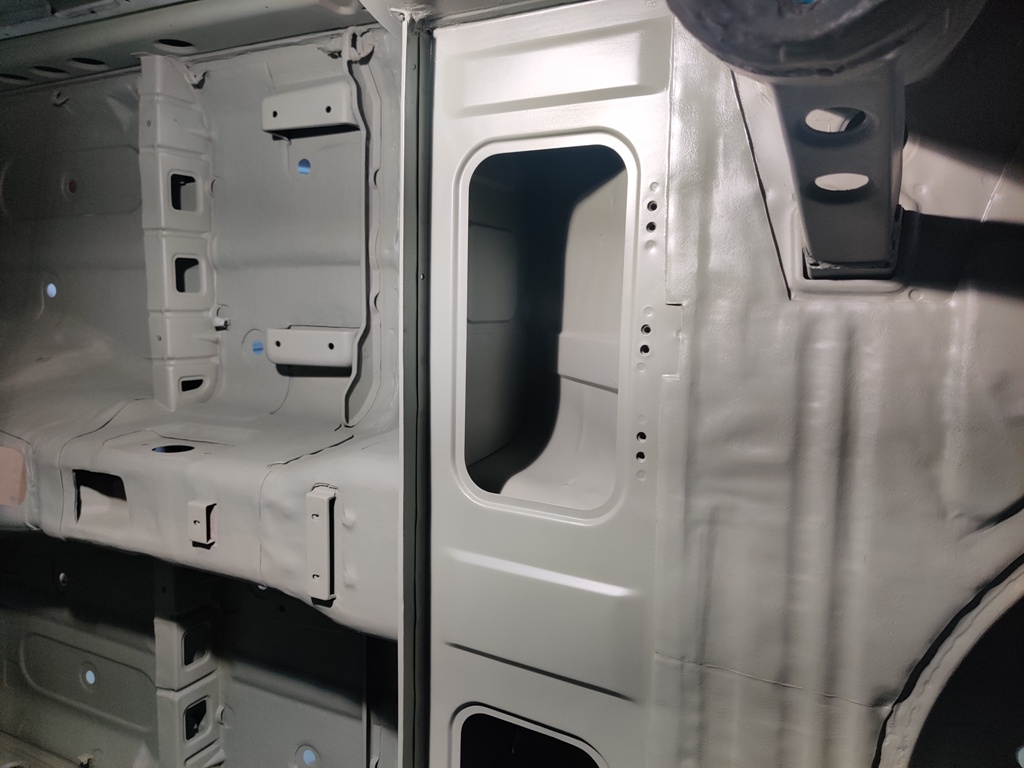
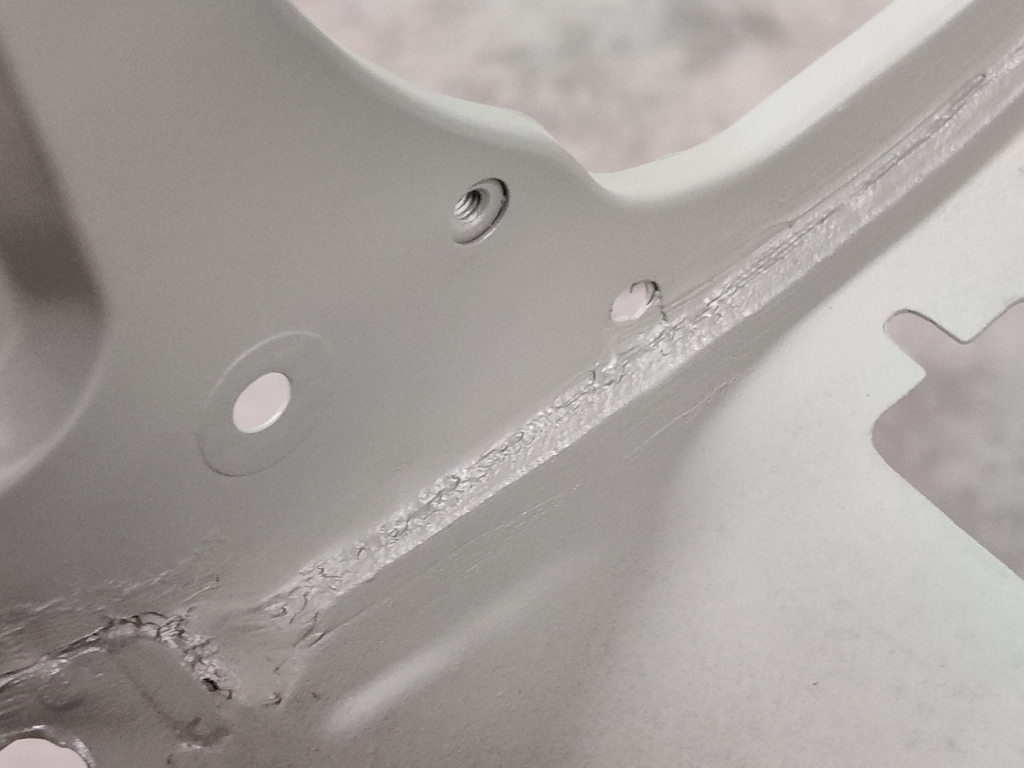
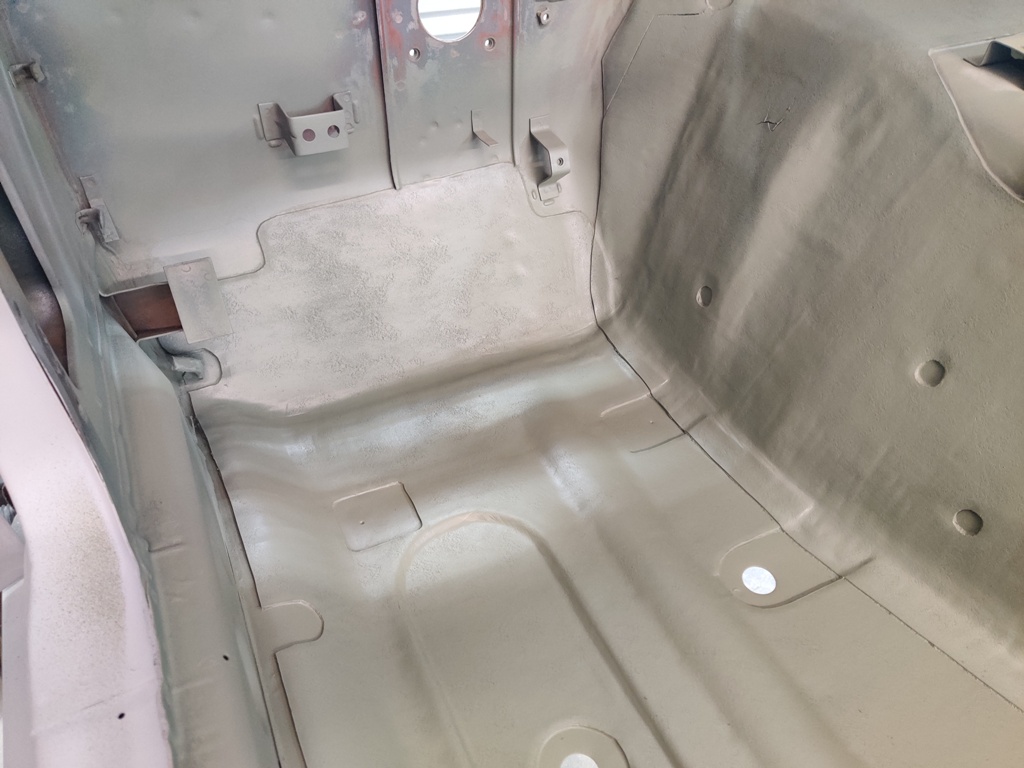
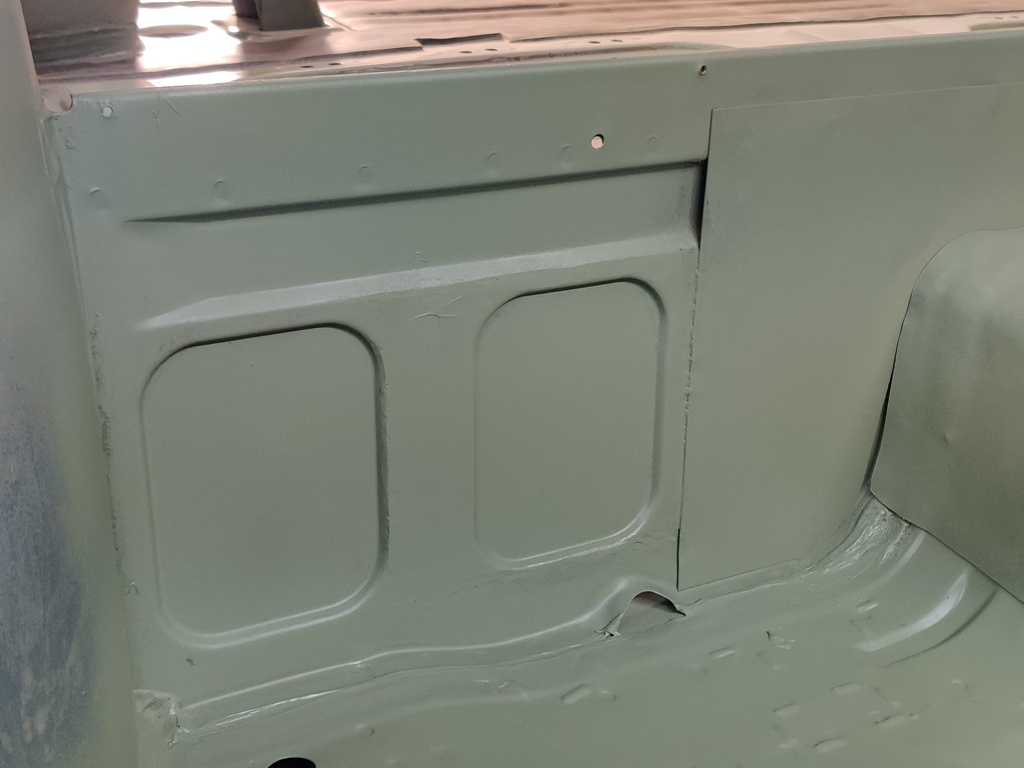
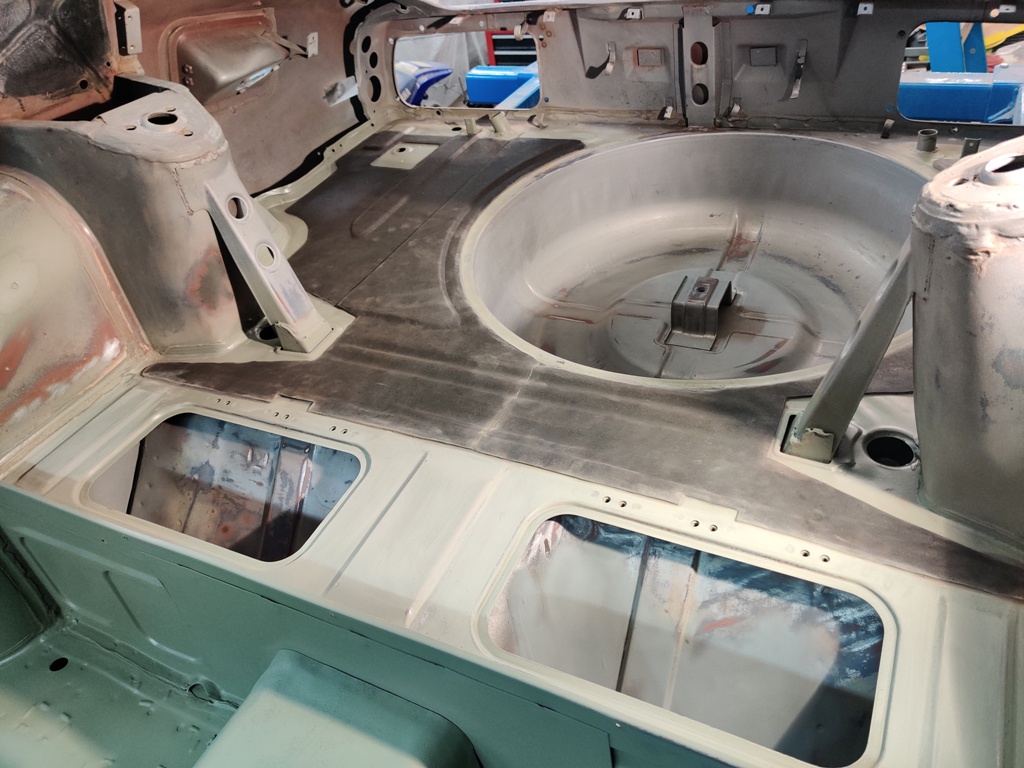
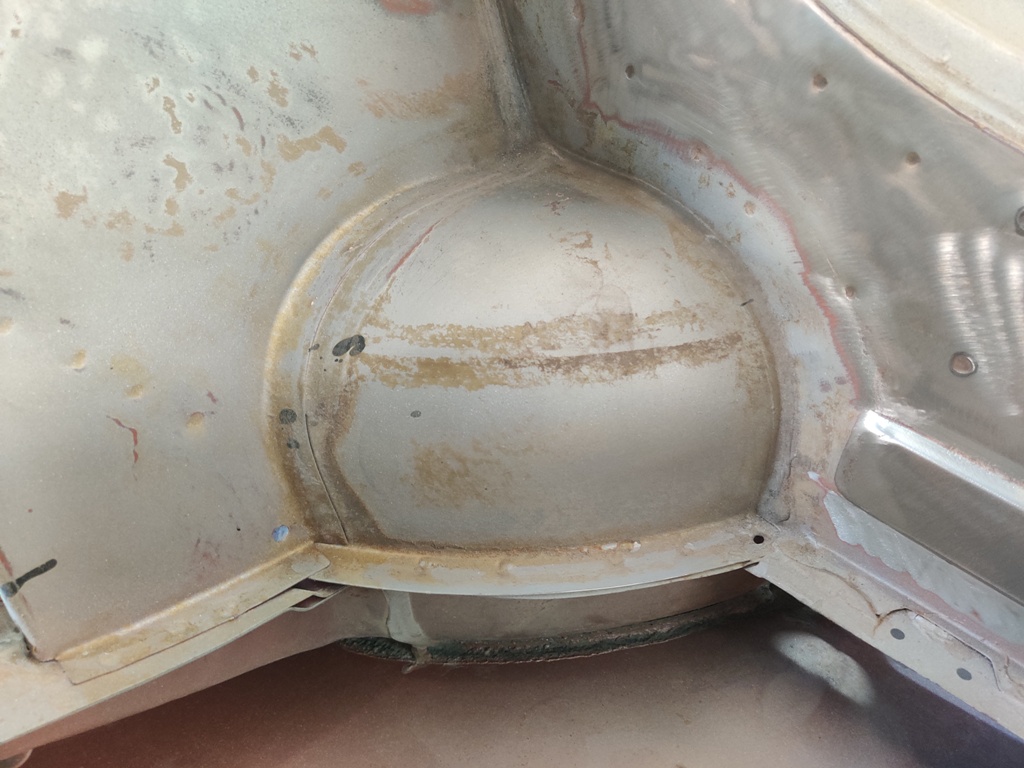
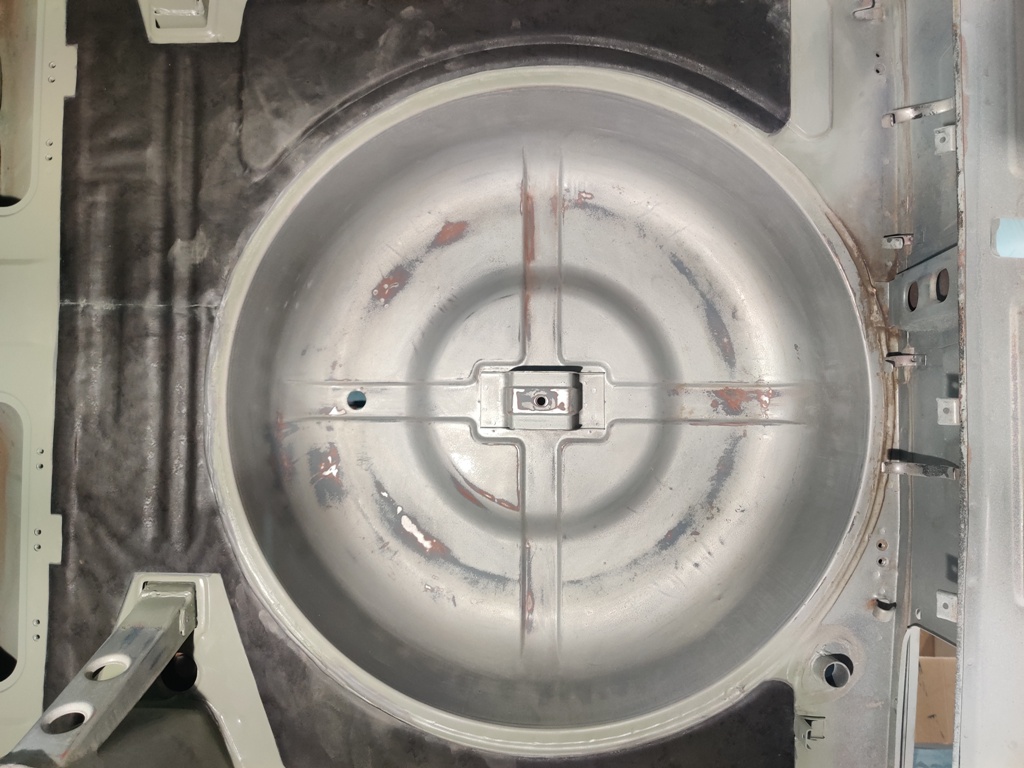
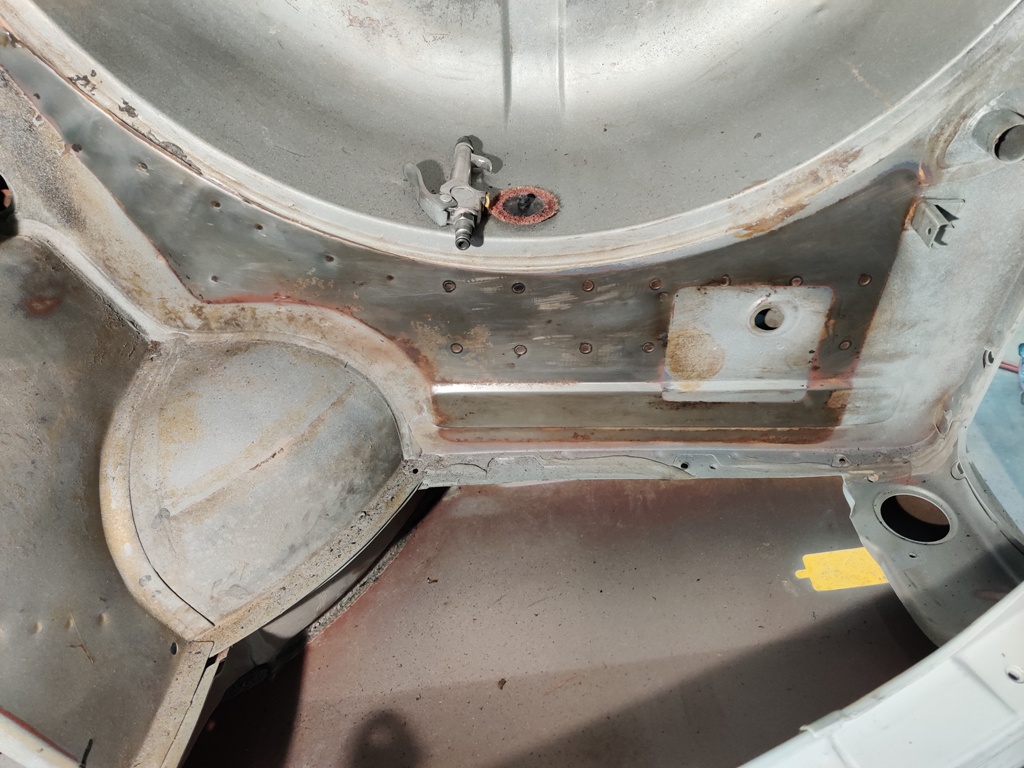
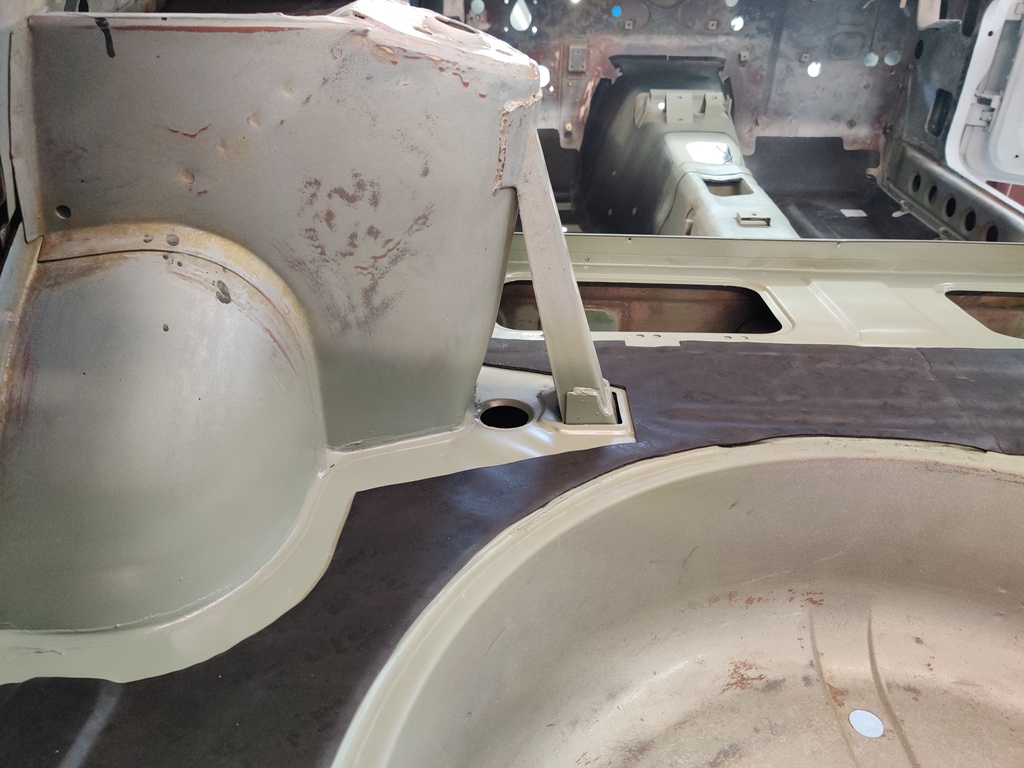
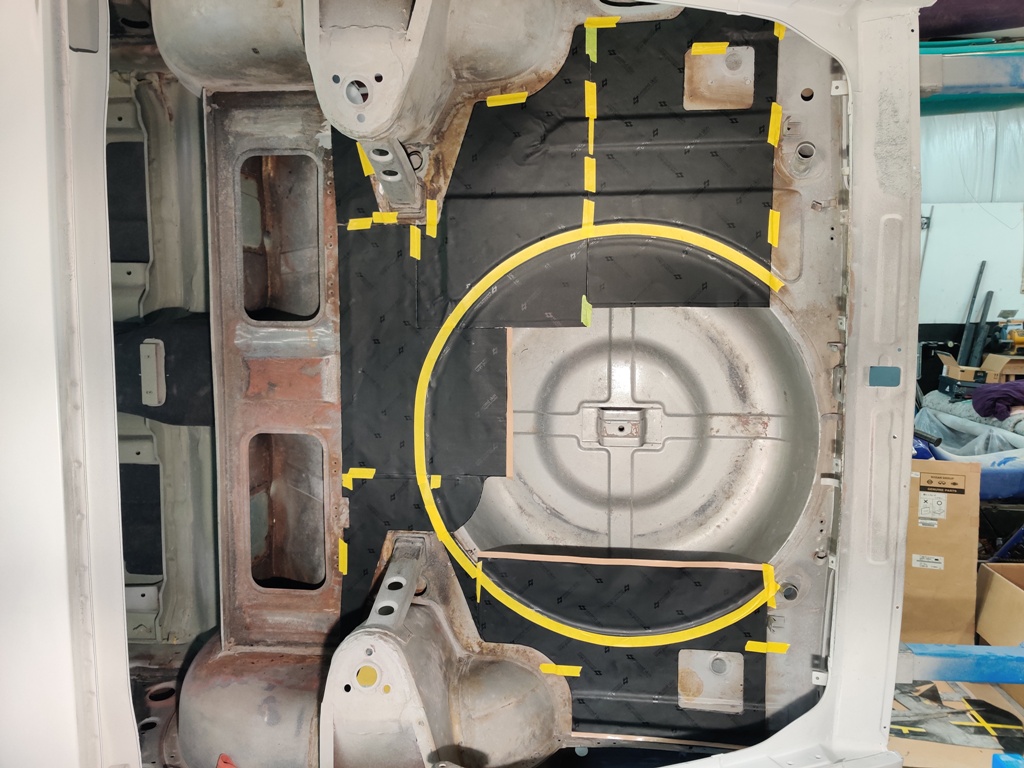
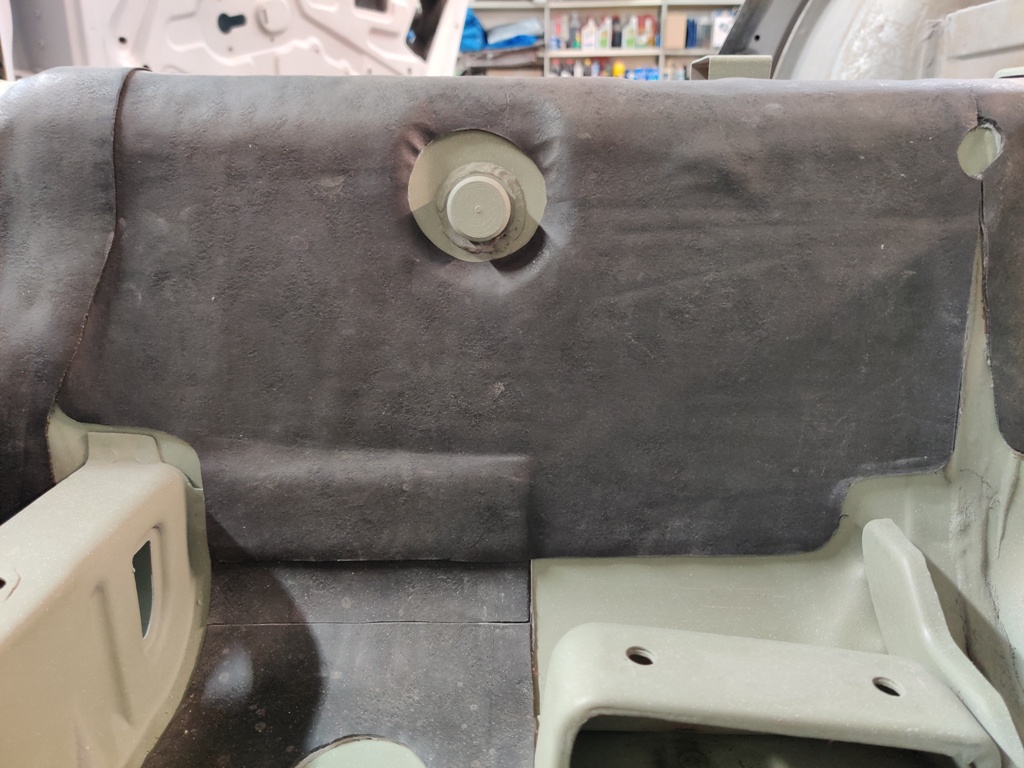
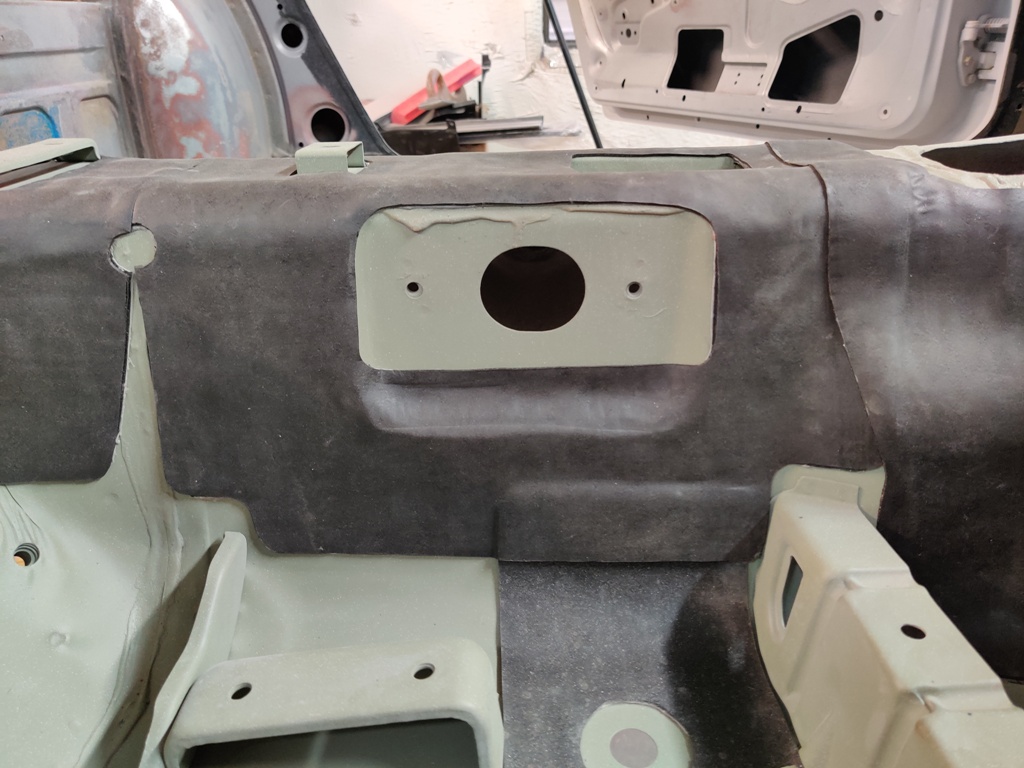
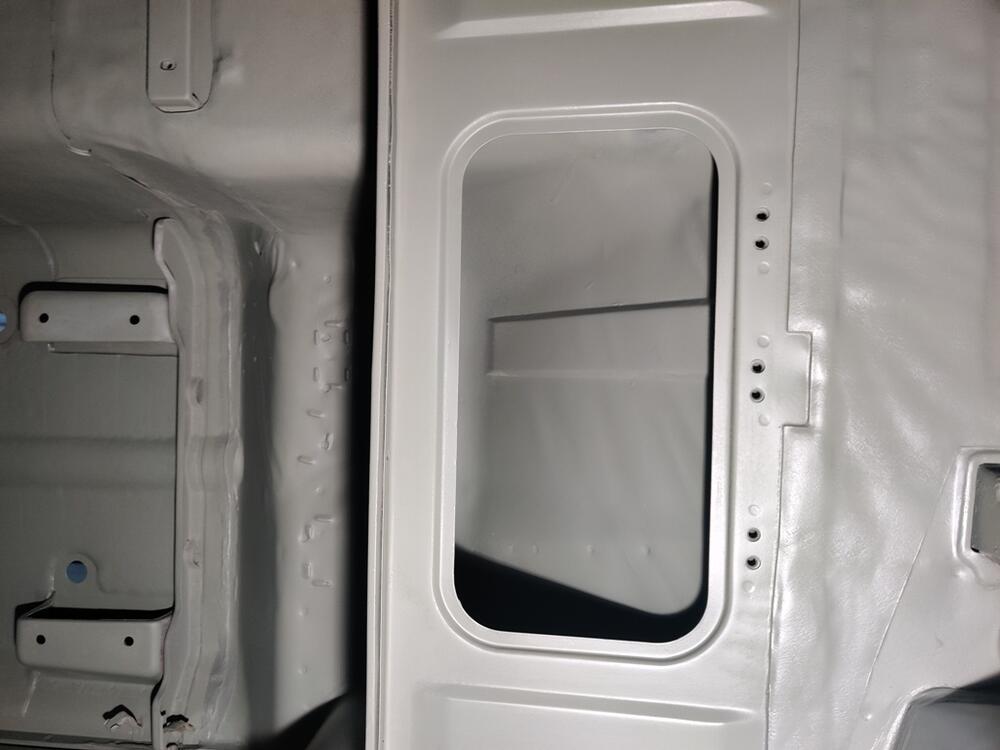
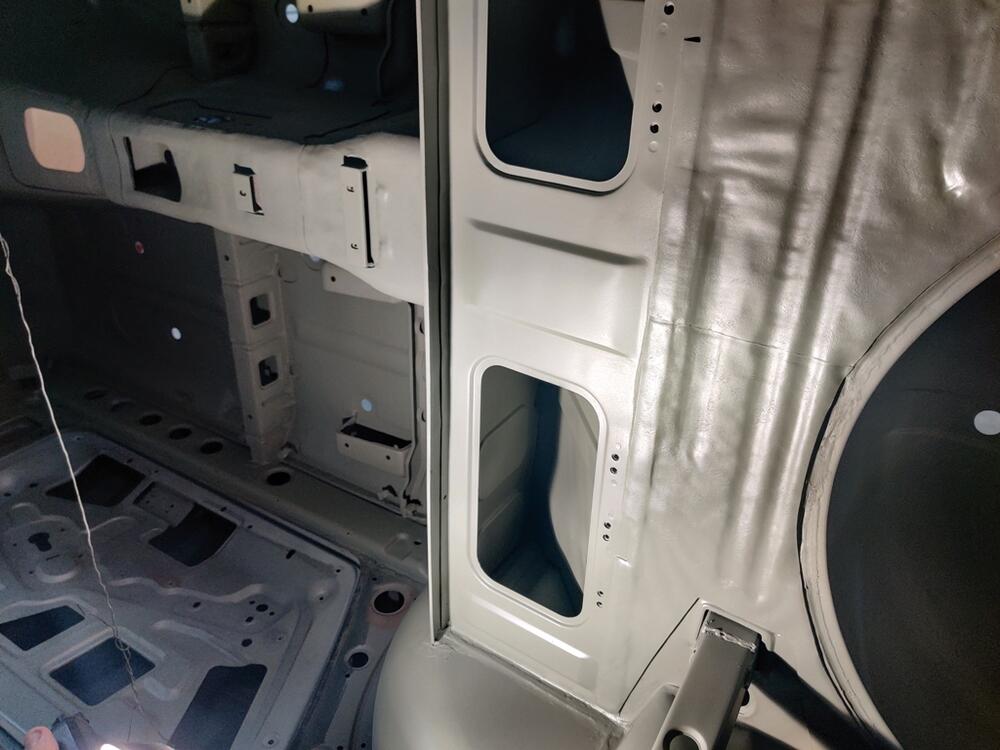
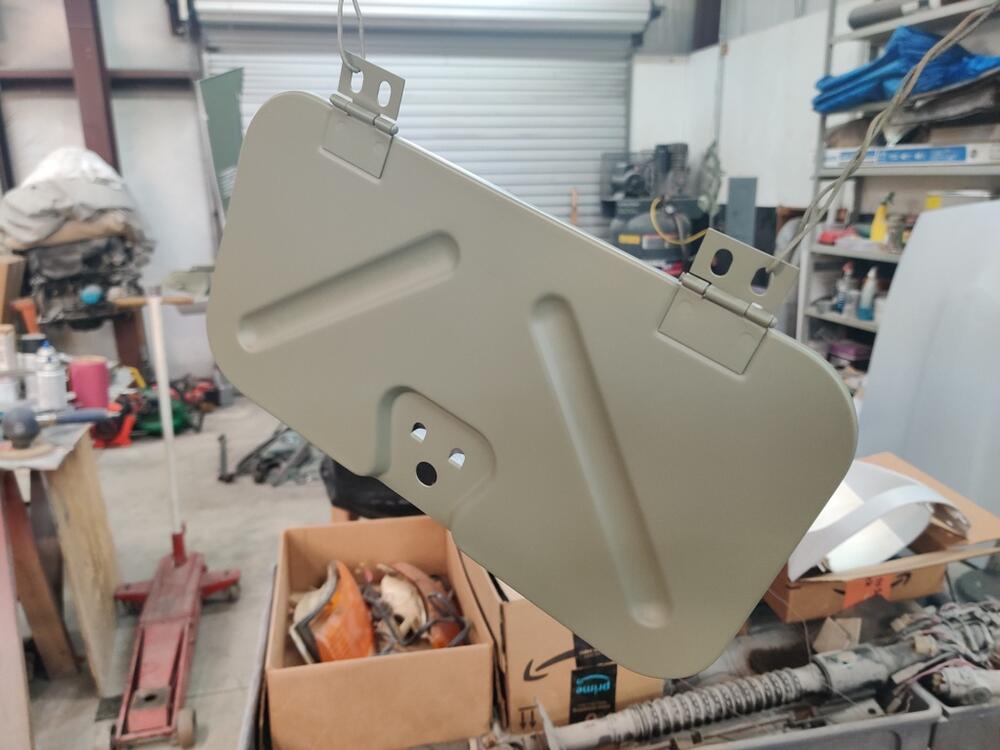
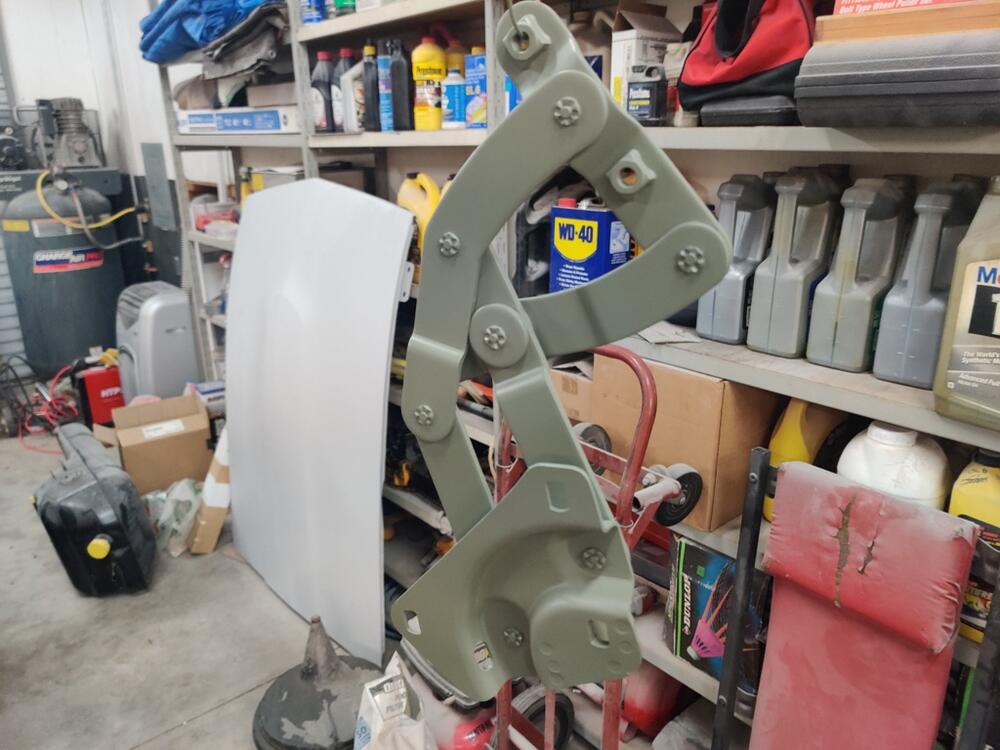
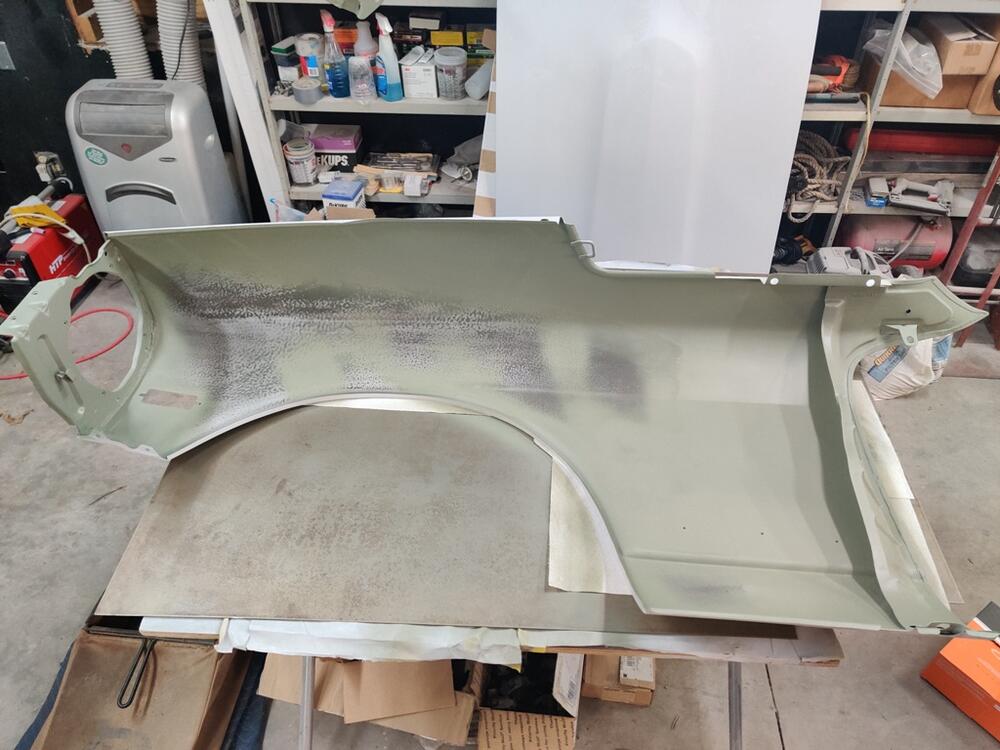
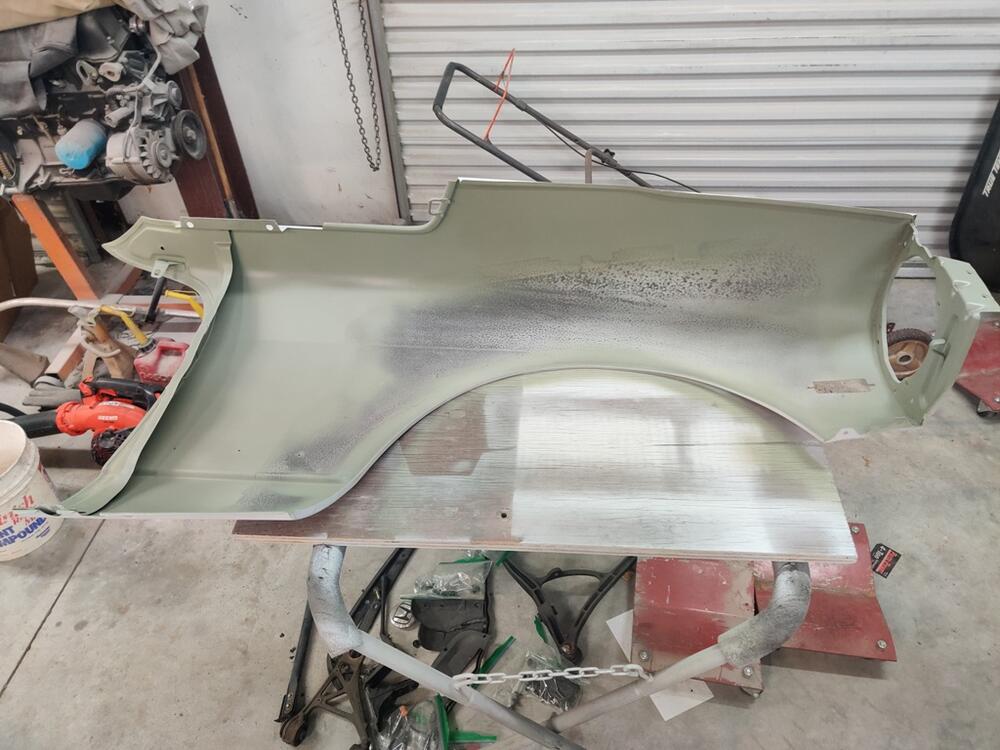
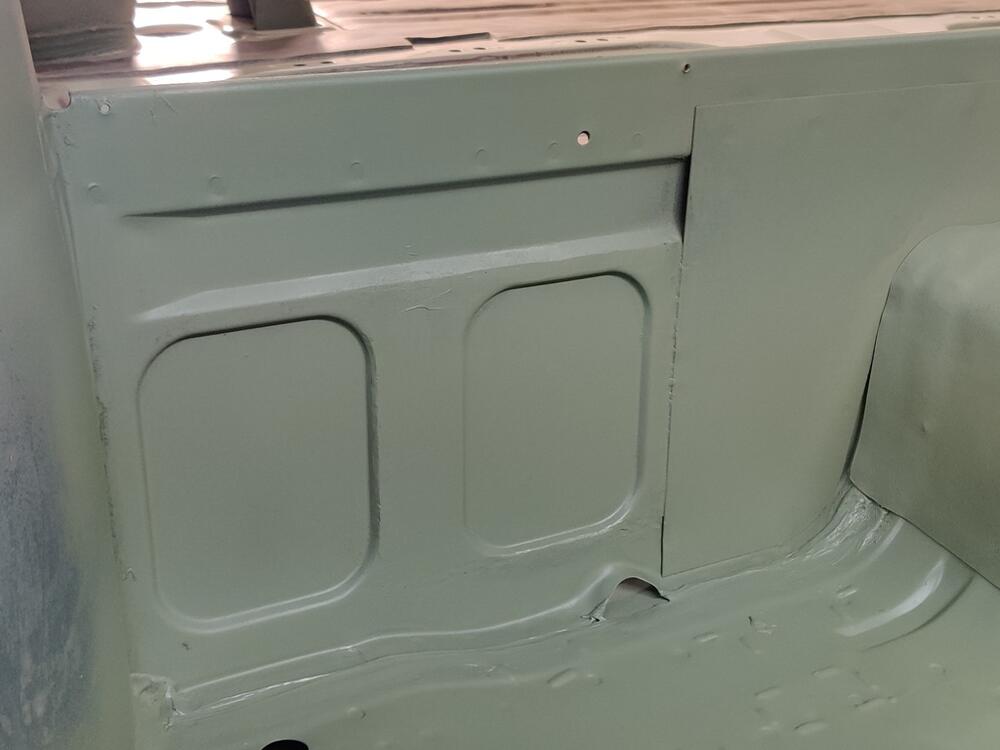
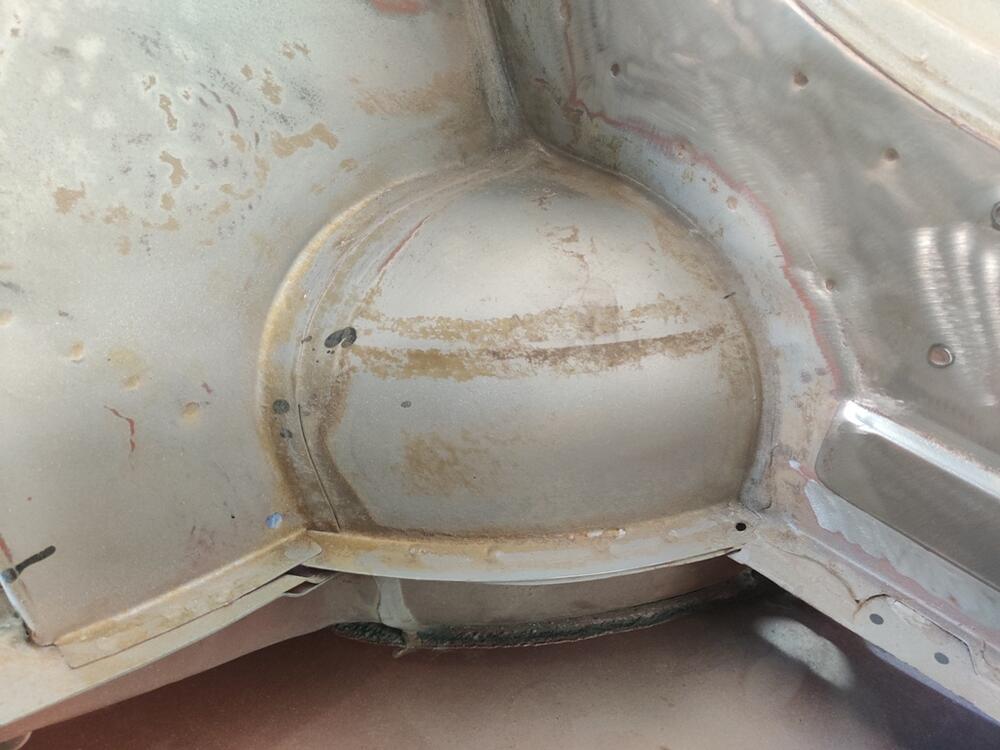
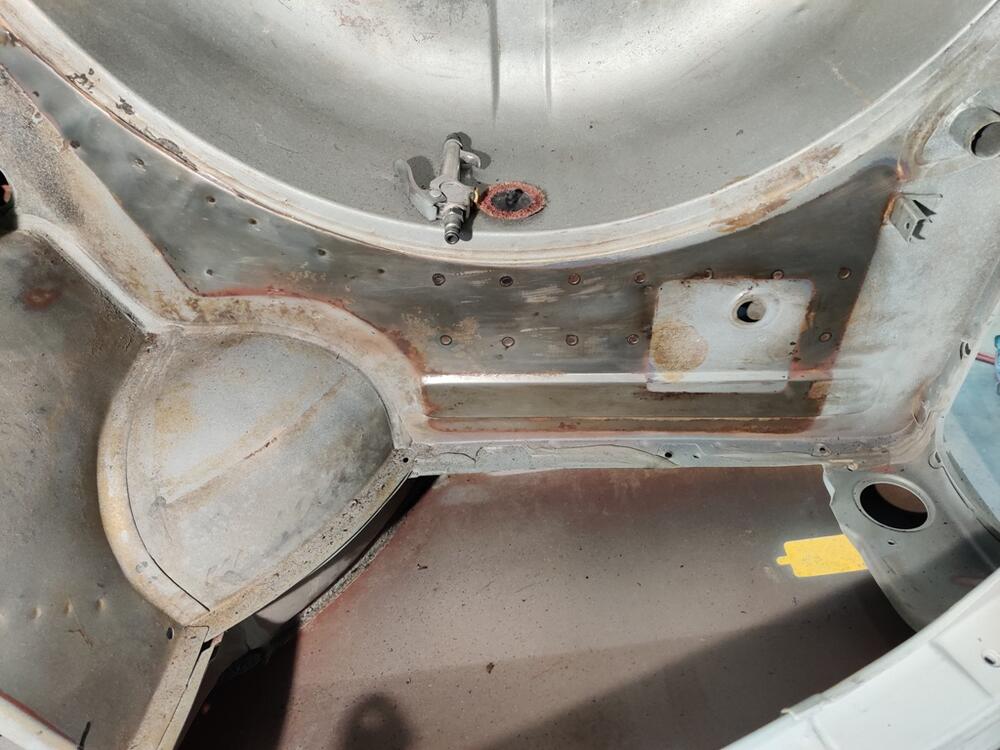
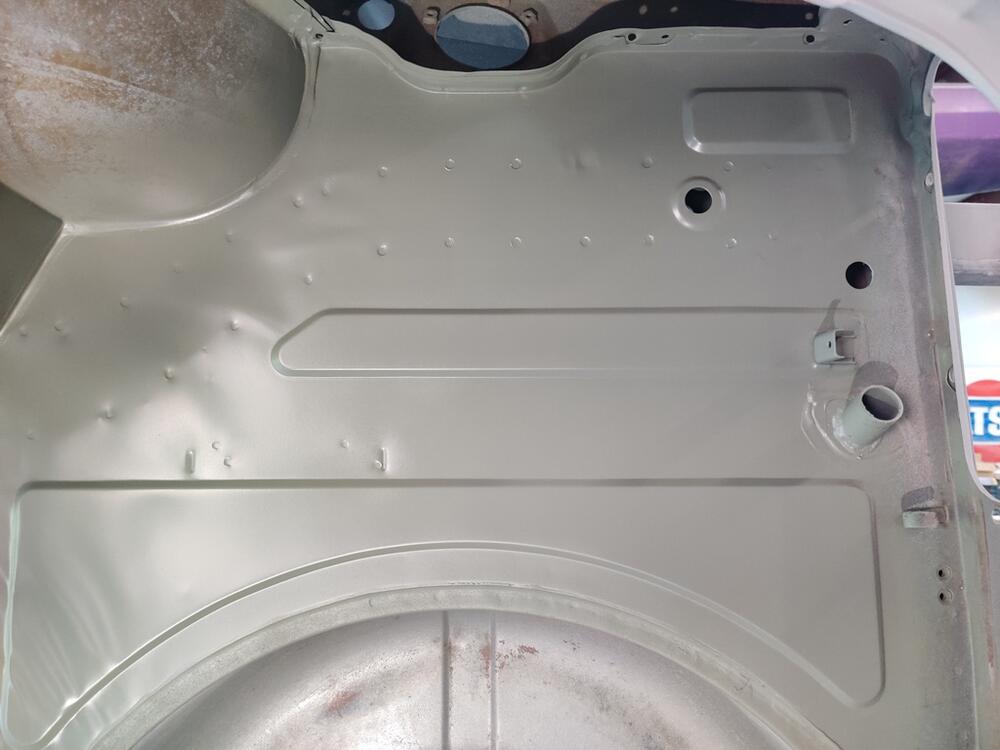
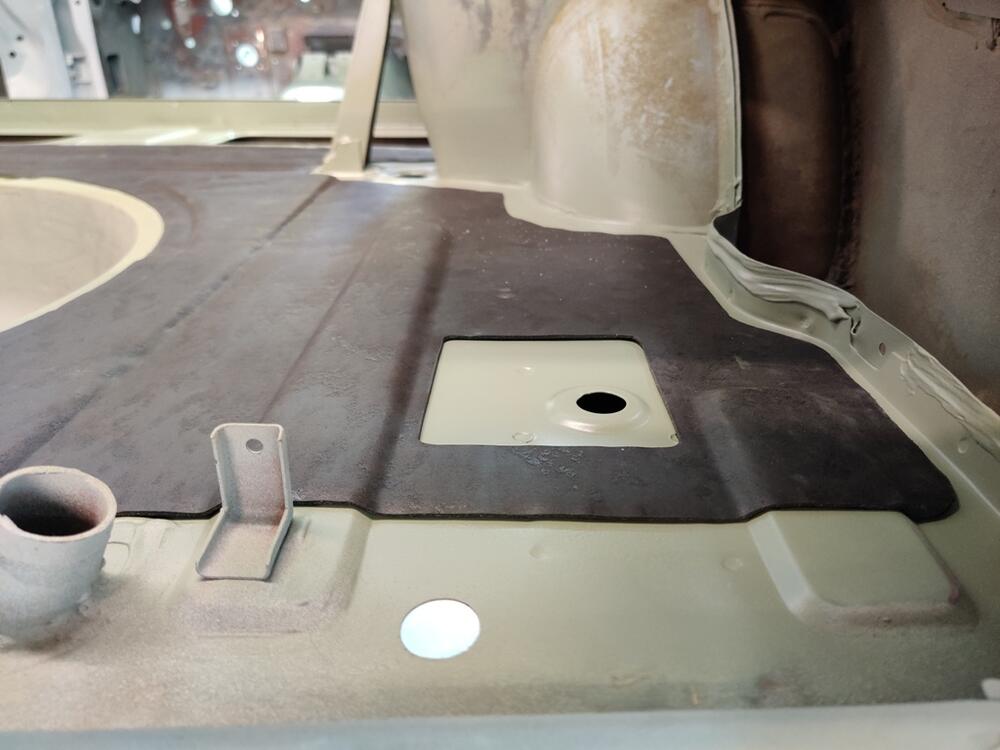
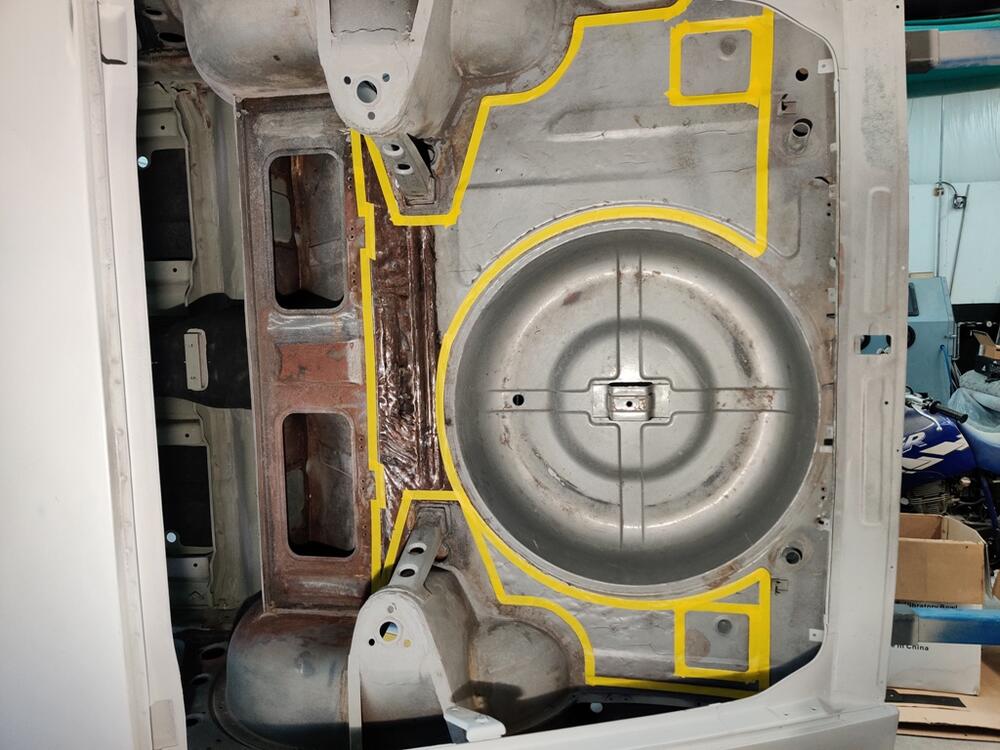
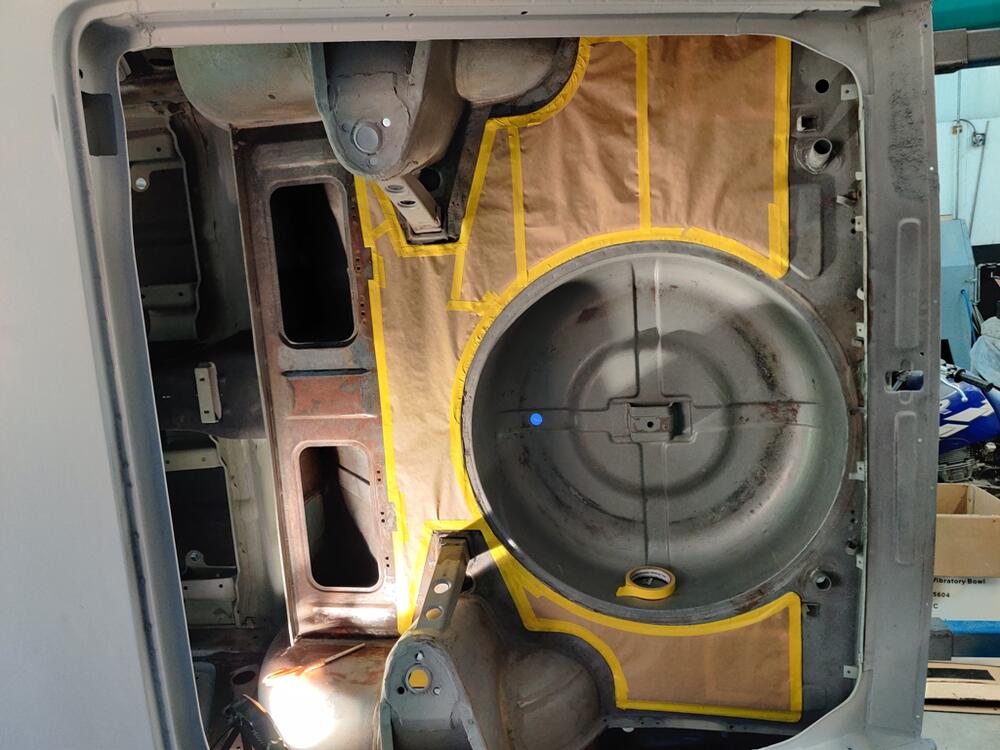
Picking up where I left off, I primed inside the rear hatch area. In the spare tire well, I only sprayed to cover spots where bare metal was exposed during sanding. Since the spare tire well and tool door areas will be more visible when all is said and done, I have spent and will spend more time in these areas to make them look factory fresh looking when the car emerges from the paint booth. While spraying epoxy primer, I sprayed a few other items including a glass bead blasted tool compartment door (I got the car with one blue and one silver one), the two sand blasted hood hinges, and the insides of the front fenders. For the fenders, I put seam sealer in some important areas before priming.


-
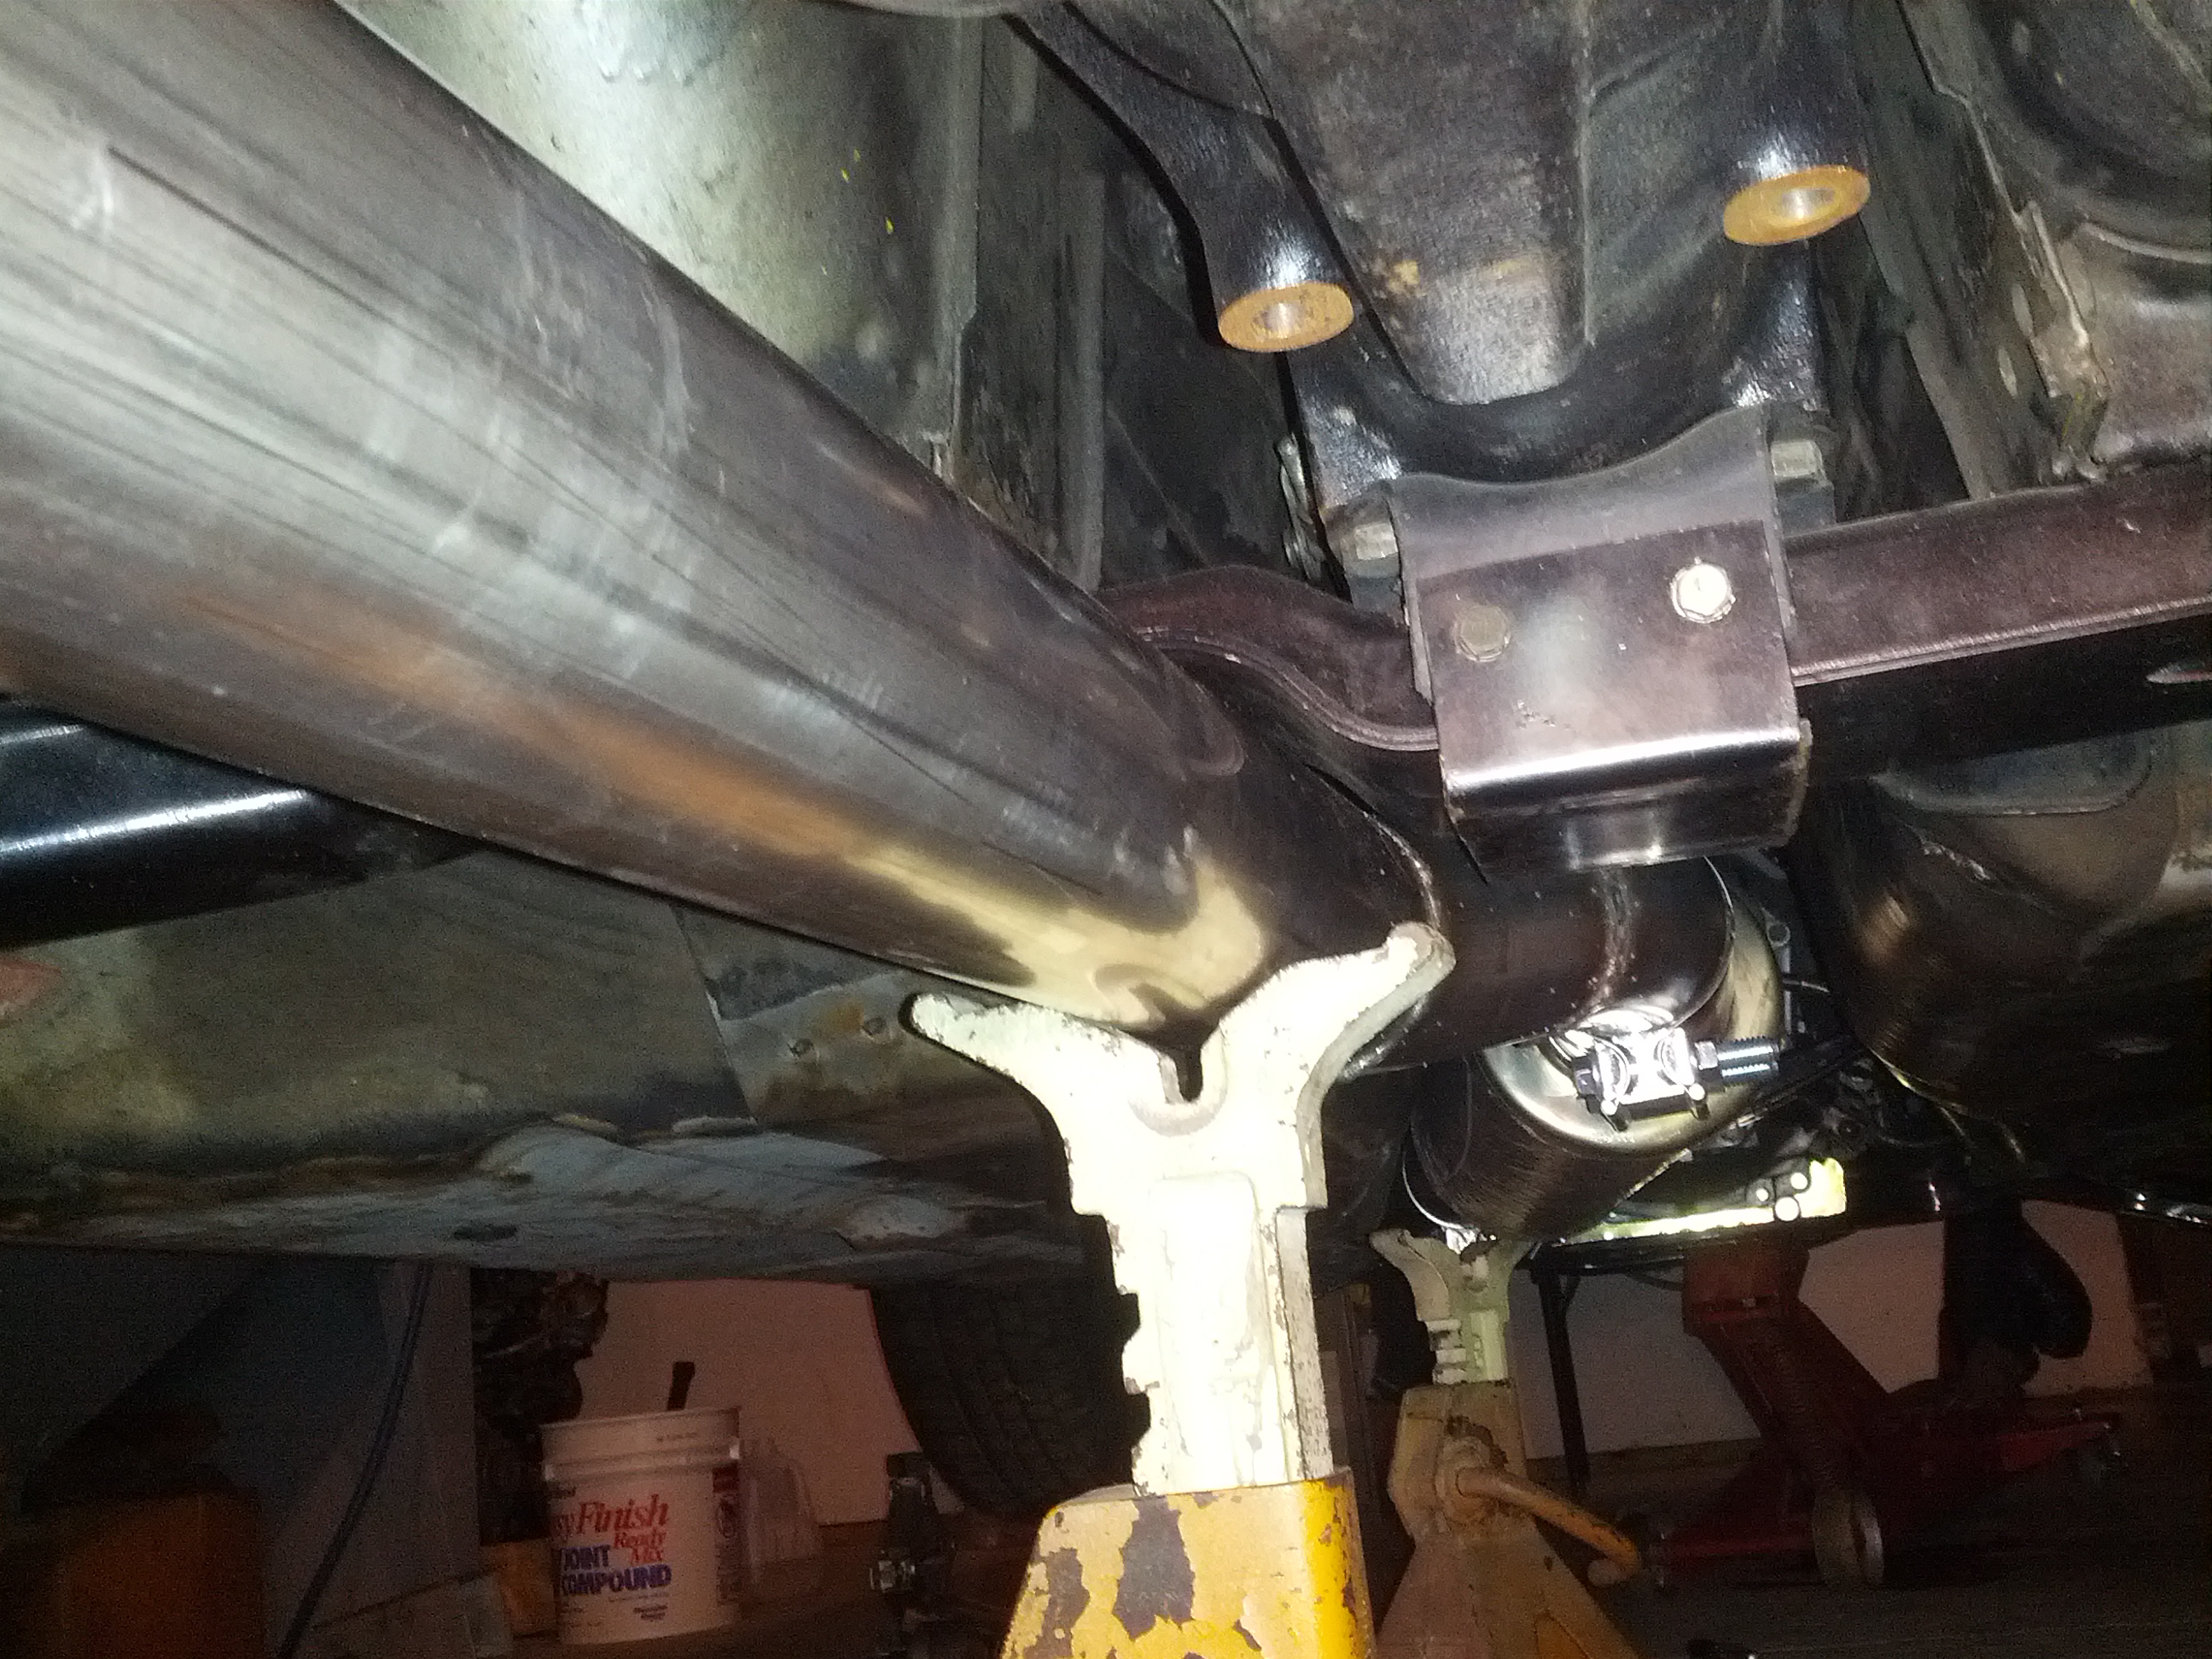
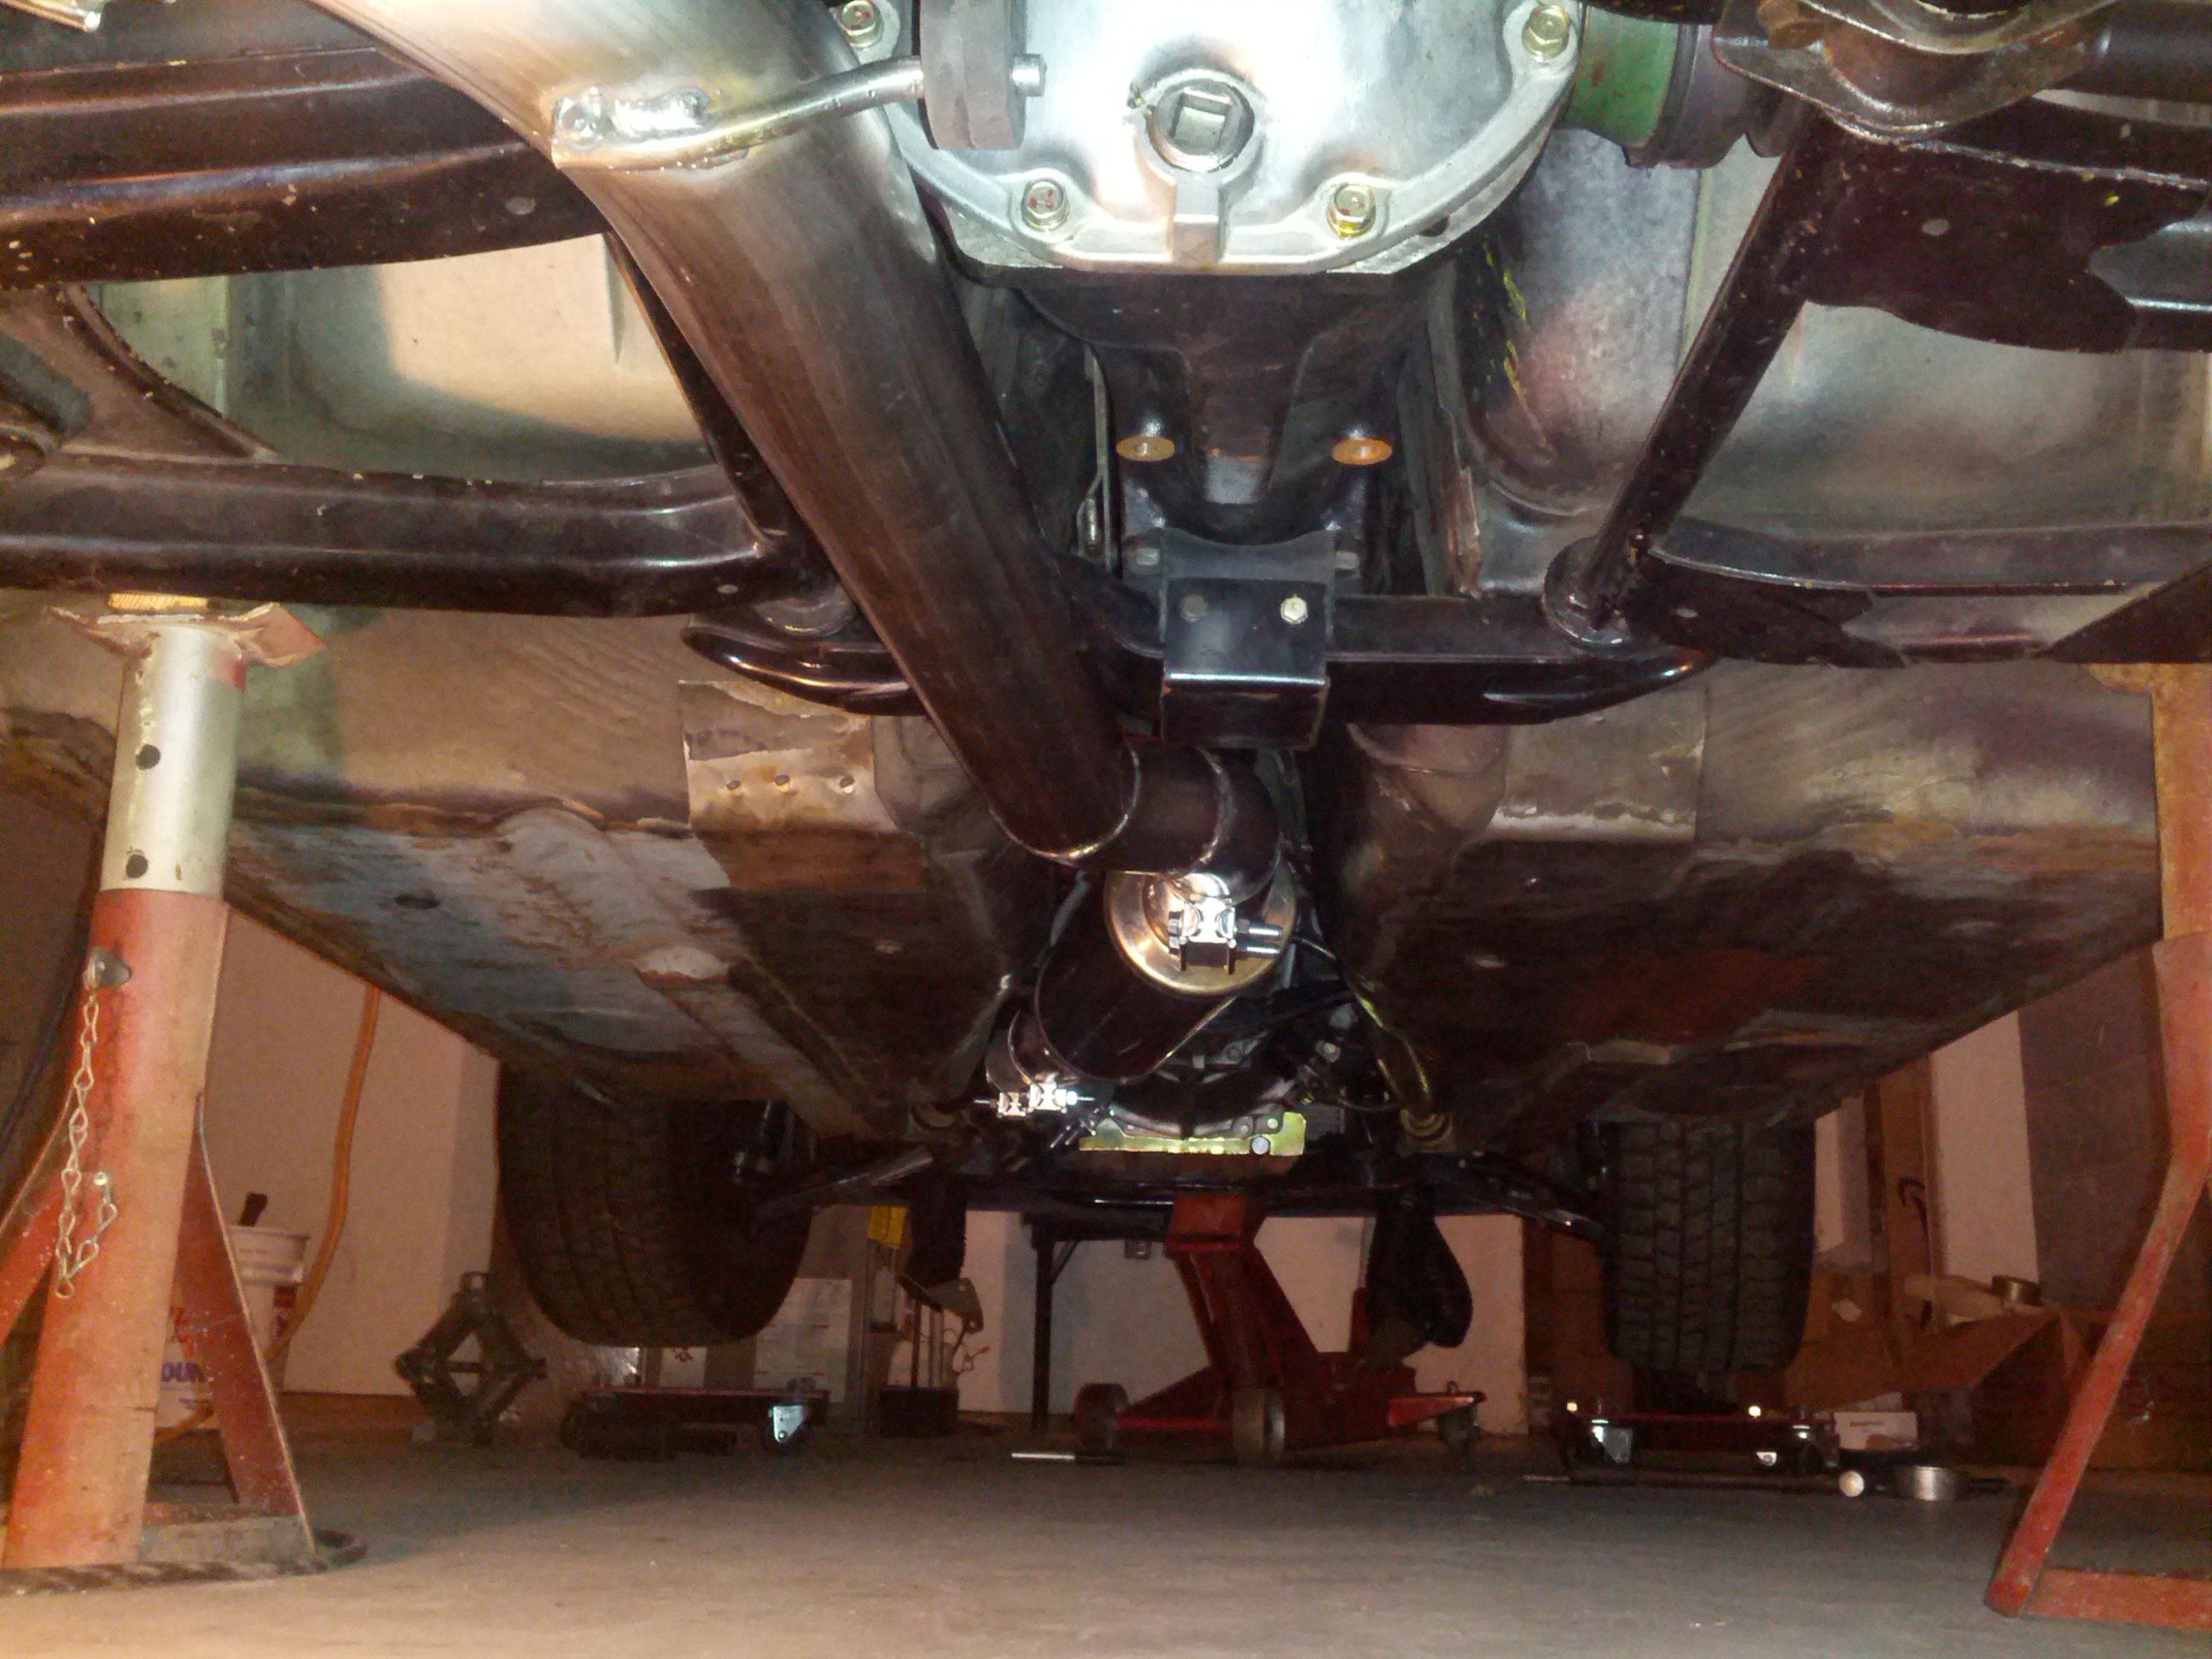
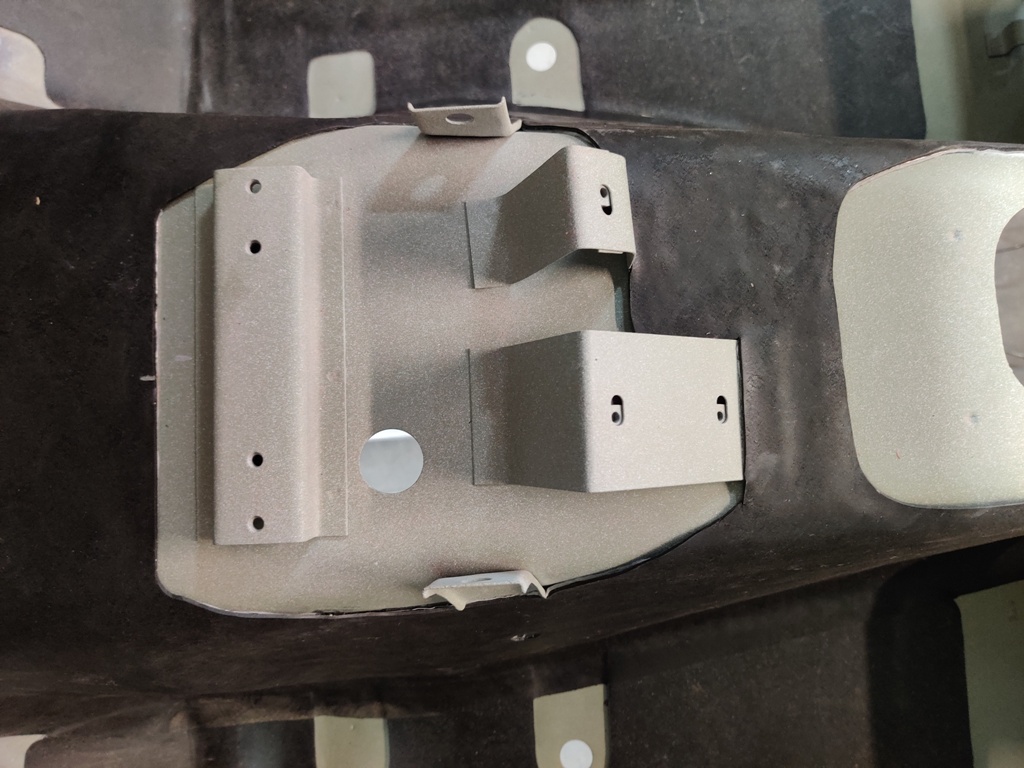
I happened to see this thread and thought I would mention an alternative solution I used. I don't recall if I saw someone else do this, or I came up with the idea, but it consists of using a simple bracket in the shape of a U like this: |______| I bent a piece of 1/8" (.125) or similar thickness plate which I installed underneath the front diff mount/crossmember, so that the motion is stopped by the bracket coming in contact with the bottom of the front diff mount/crossmember instead of the stock design or the RT design that stops movement up above the diff. With this solution, the front diff insulator fits in between the walls of the U and the floor of the U passes under the front diff mount/crossmember. A tight fit to the stock insulator is not needed, but just close fitment. I removed the front diff mount/crossmember and front diff insulator from the car. I bolted the insulator to the crossmember. Then I placed spacers between the floor of the bracket and the bottom of the crossmember so there was a 1/4" between the two parts. I clamped it into place, so that I could drill two holes through the front and rear walls of the plate and into the metal of the front and rear of the diff mount. I then removed the clamps, set the U bracket aside, and tapped the newly made holes in the front and back of the diff mount for metric bolts (6M X 1.0 pitch). Final touches were to glue 1/8" thick rubber mat material (I used a reinforced rubber from Tractor Supply) to the inside floor of the U bracket, and paint it black. At that point, simply re-install the diff mount and insulator as stock, and slide the U bracket in place from the bottom of the car. Two bolts with lock washers on the front, and two on the back, and the bracket is installed. There should be a 1/8" air gap between the rubber glued to the floor of the U of the bracket and the bottom of the front diff mount/crossmember after installation. Cheap - light - easy to remove and install. I don't happen to have pictures because I did this a long time ago, but can add some if needed by anyone who is intrigued by this solution and wants more info.
-
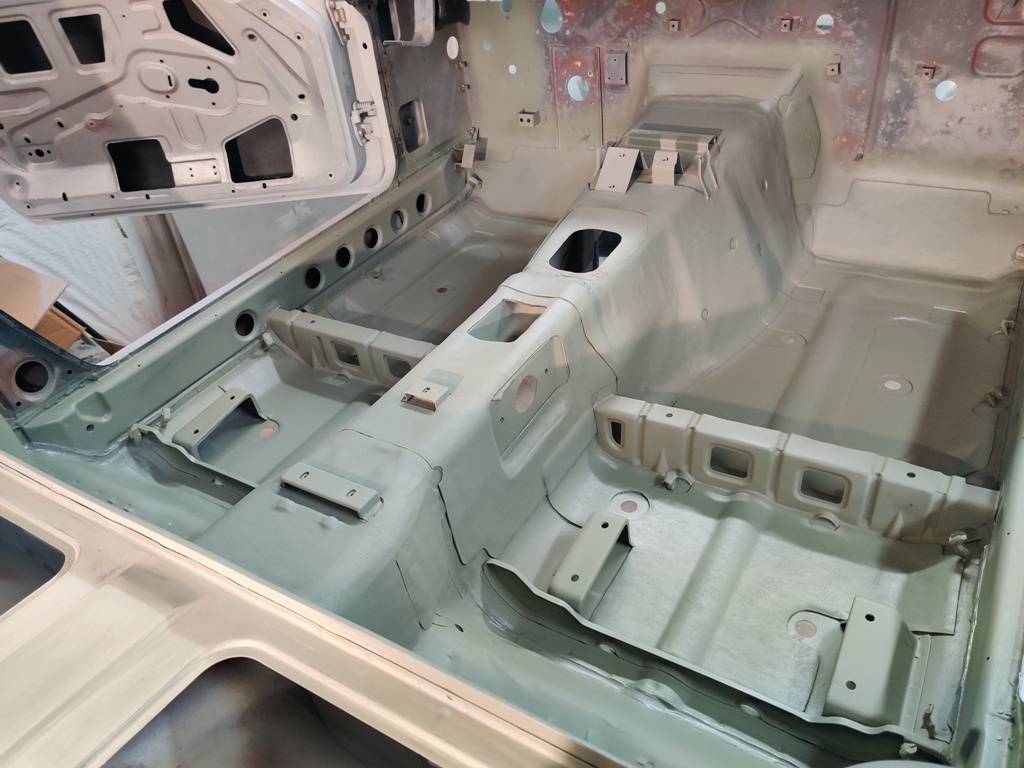
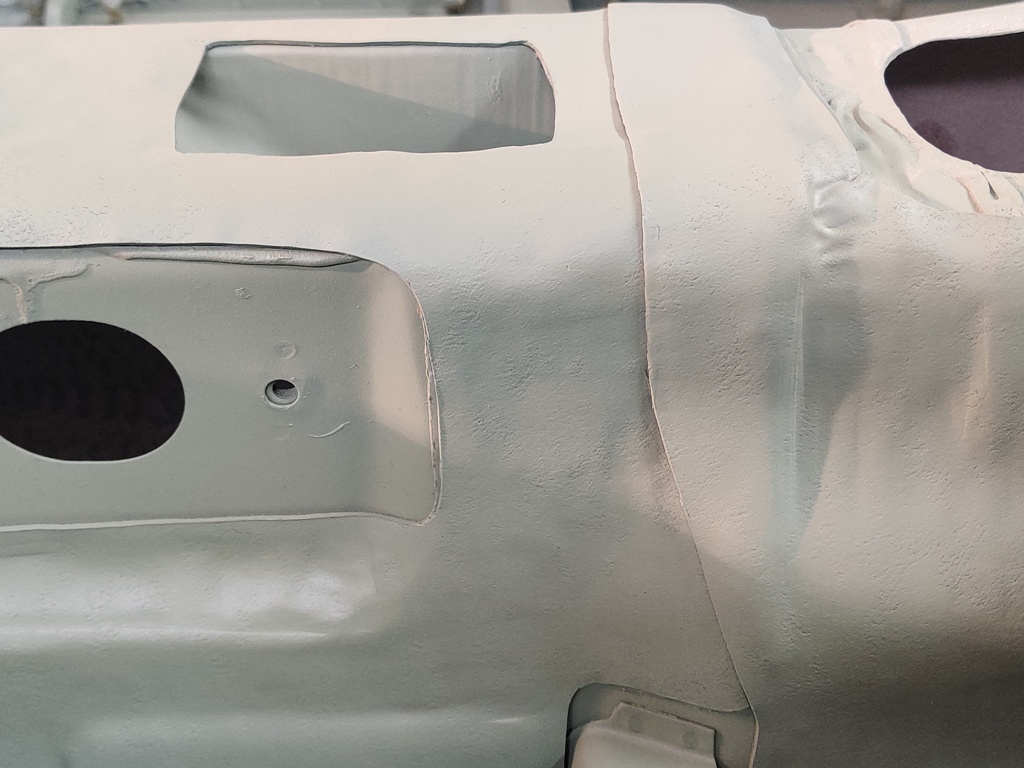
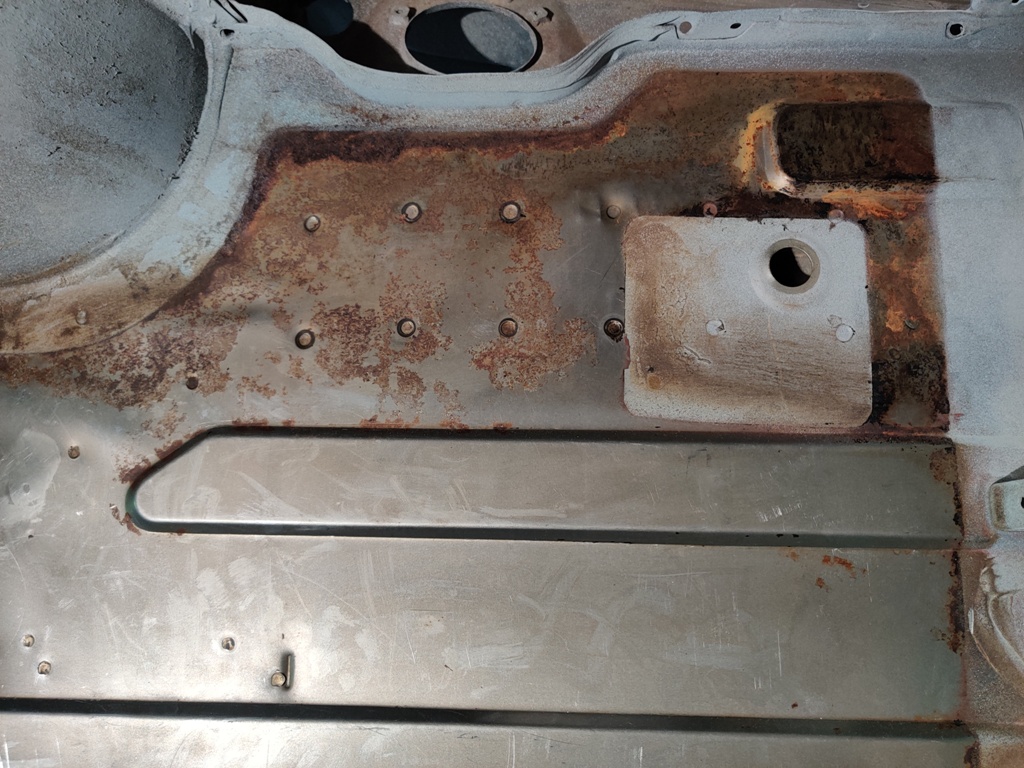
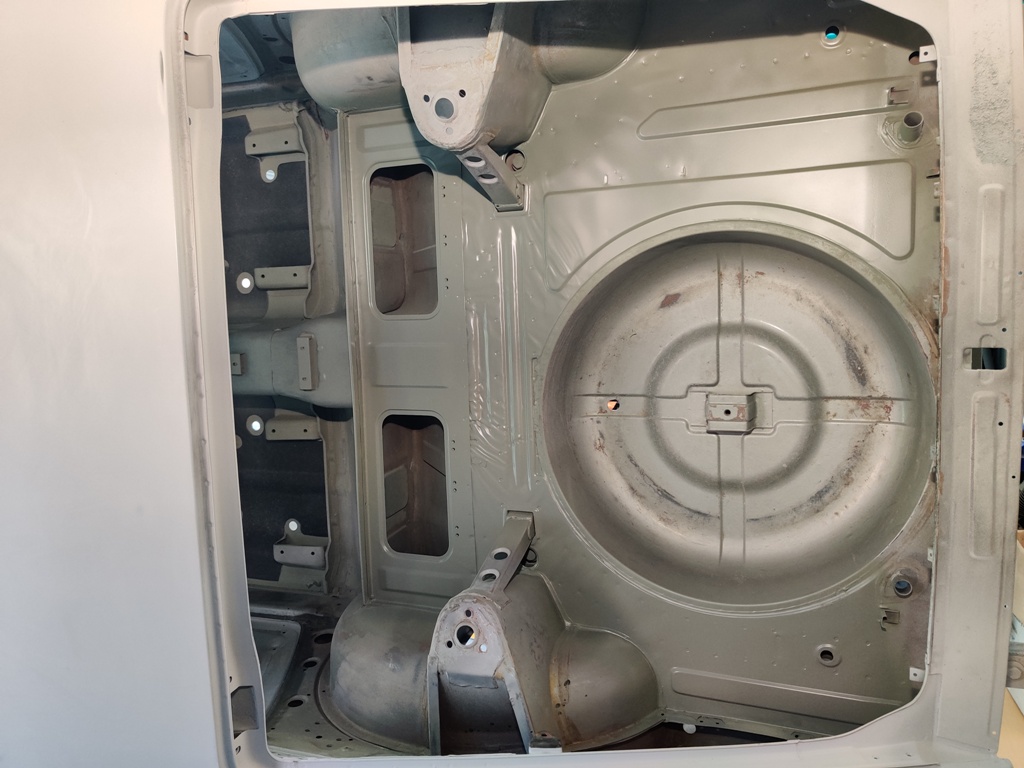
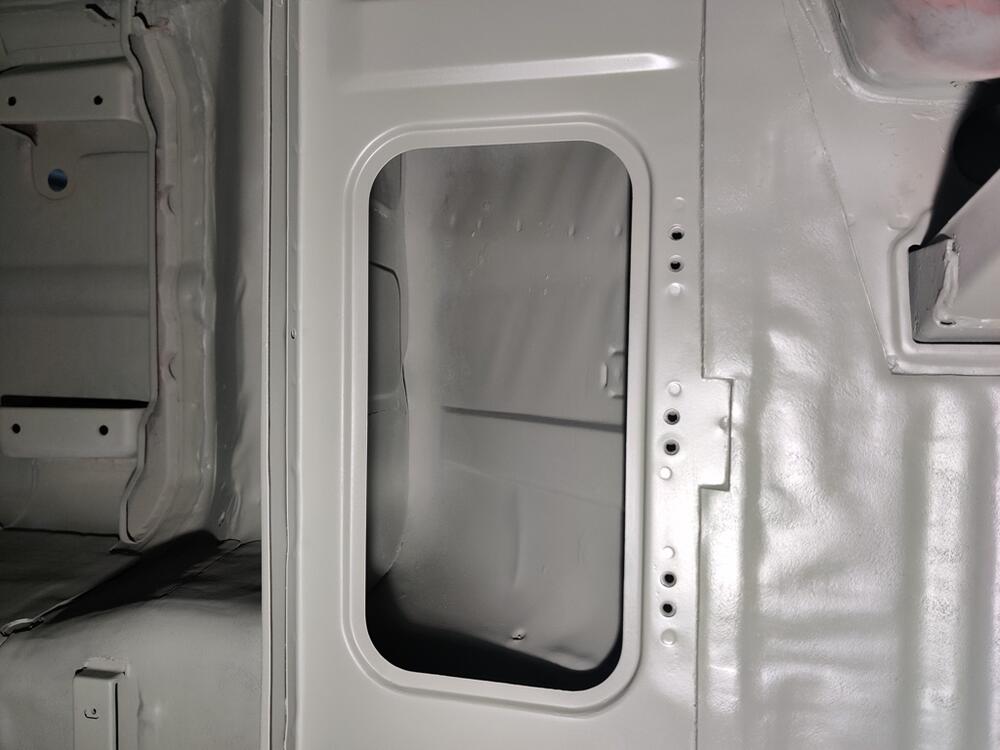
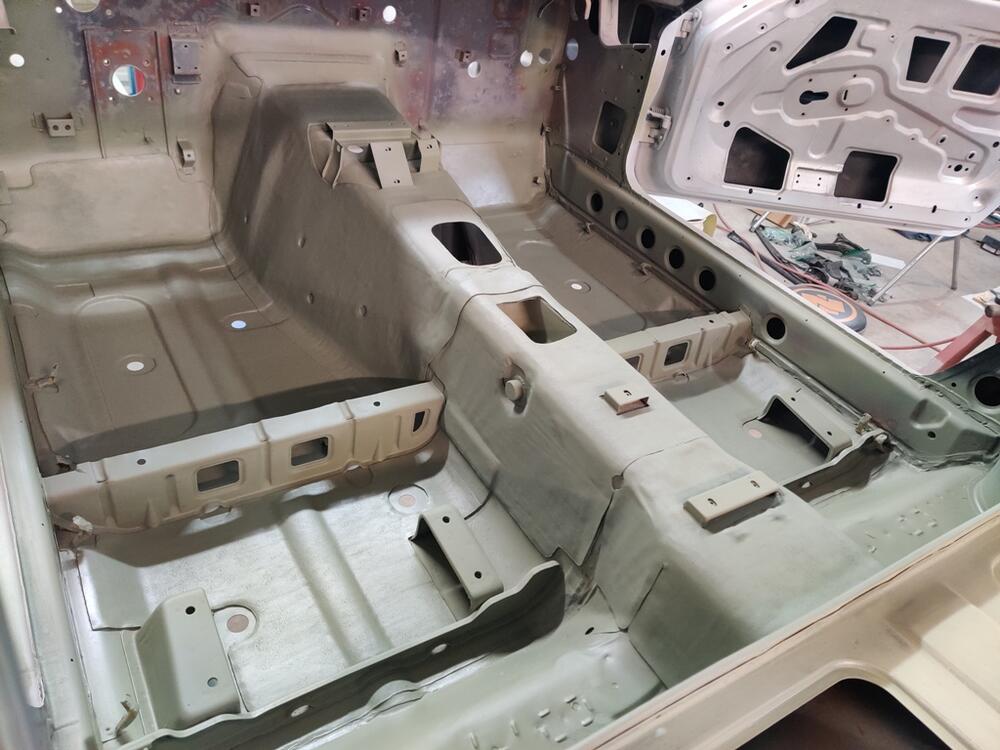
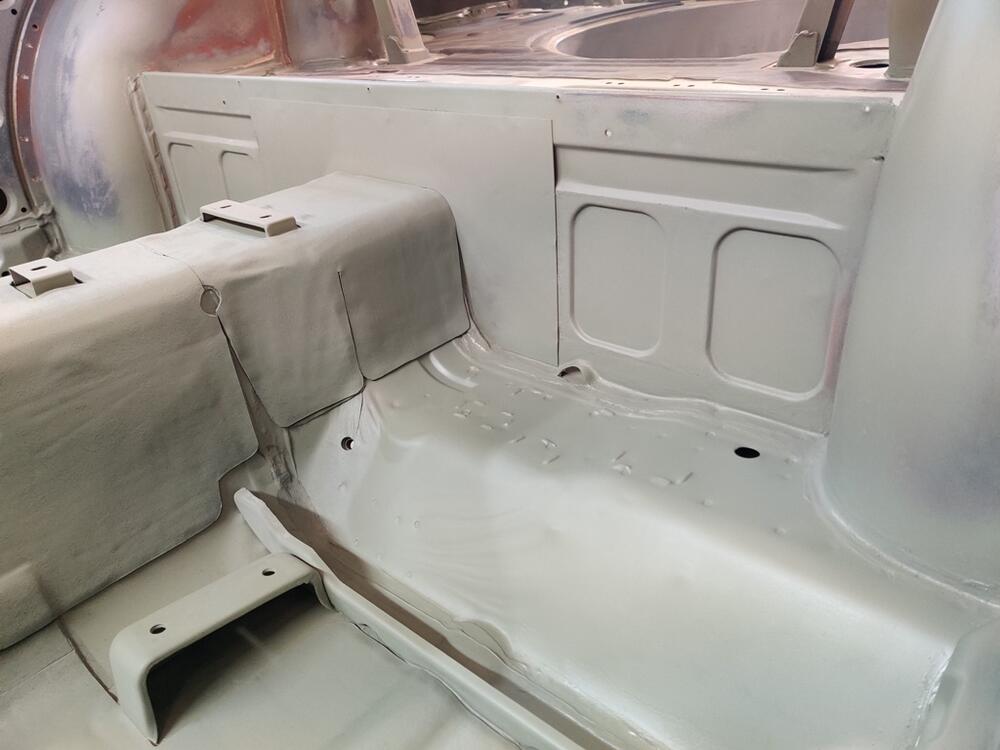
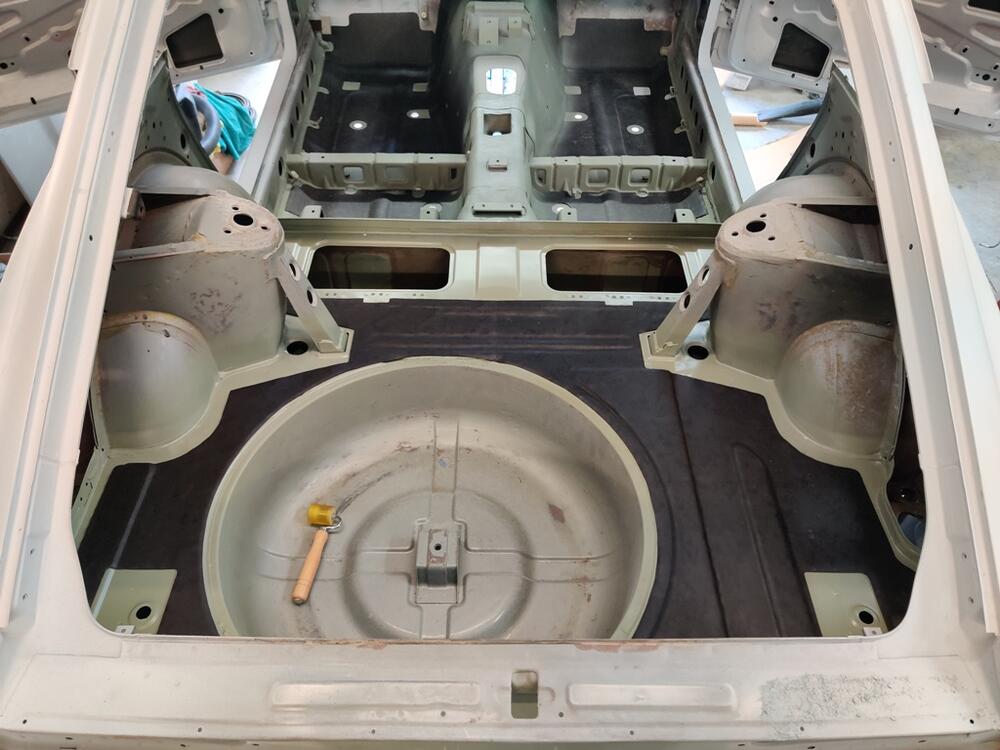
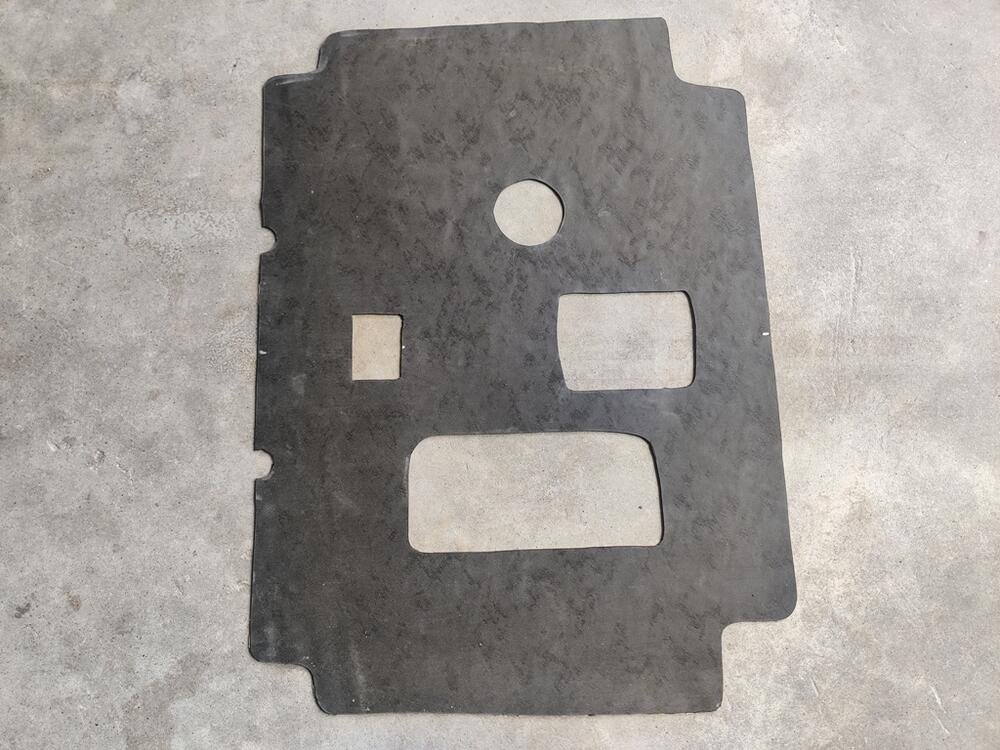
I've spent a lot of hours scrubbing, scraping, sanding, etc. to remove all of the glue from the inside panels of the car. Getting it off shock towers, inner rocker panels, roof, hatch openings, luggage riser, firewall, and inside the tool compartments was a job. I've still got more prep to do before the inside of the car will be ready for paint, but after about 4 Saturdays, I called it 'good enough' to get a layer of epoxy on top of the newly installed sound deadening mats in the passenger compartment. The hatch area will get the same treatment with epoxy soon. A video follows, but here are some still shots as well:


-
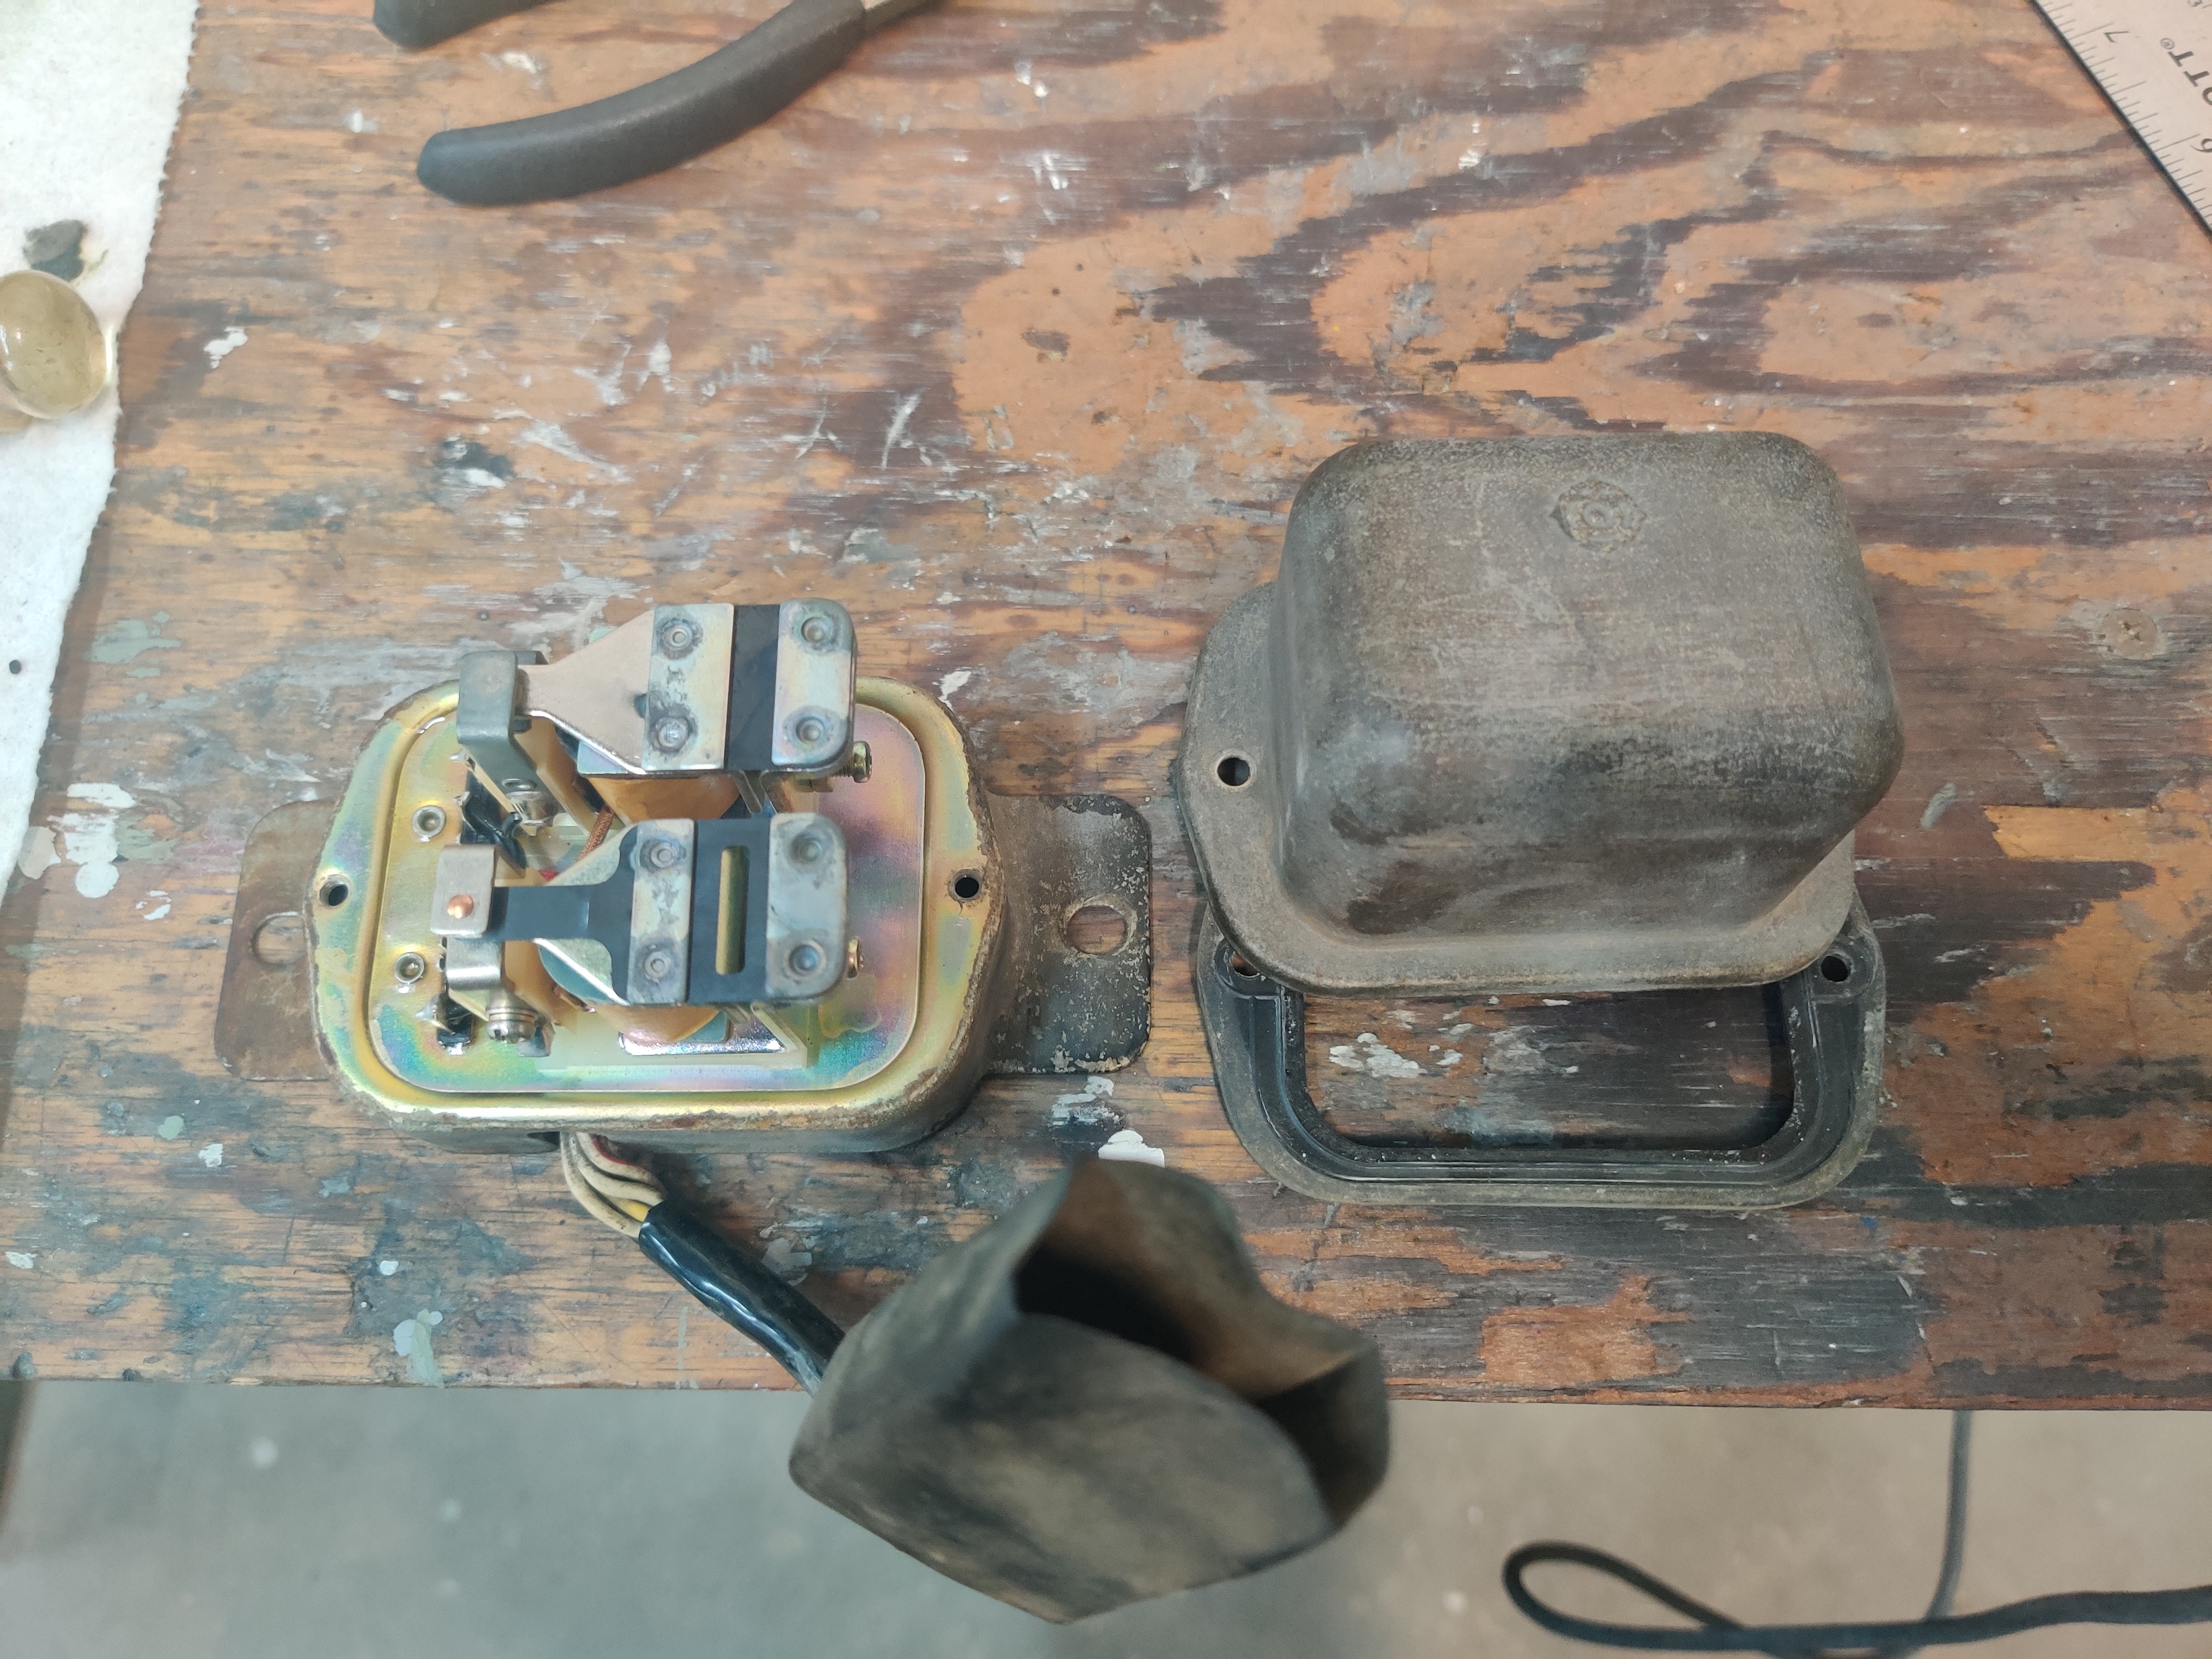
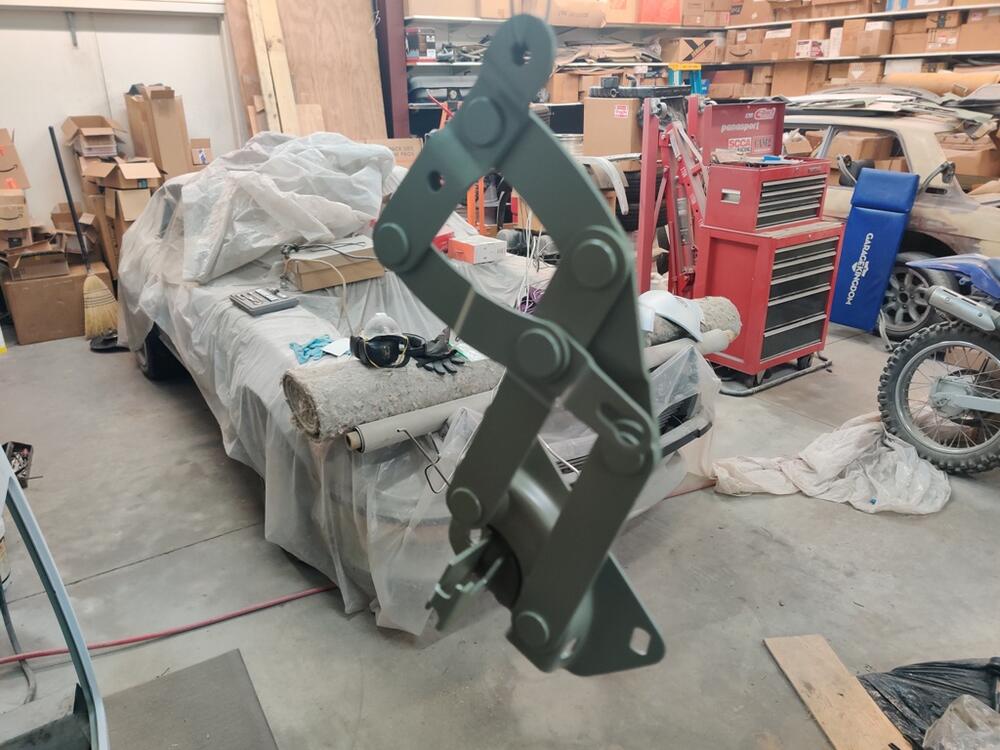
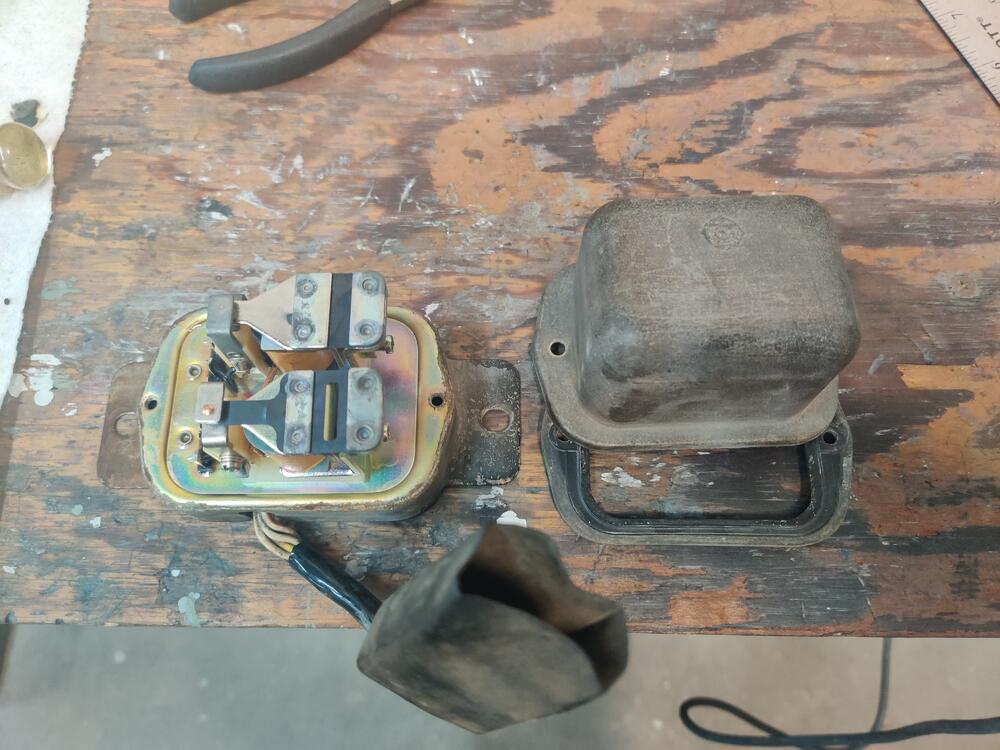
I thought about drilling out the rivets, but they are directly in center line with the two cylinders (in the guts) of the mechanism. I think there are posts running though the center of those and through the mounting plate and the shaft ends are folded down - as the "rivets". So, if I drill them out, I won't be able to just replace them with rivets because the cylinders will not be re-attached to the mounting plate. Replacing the guts seems like a better option, but I will say I am not knowledgeable about automotive wiring/circuits. 6 wires on the original and 3 on the Ford... now what?
-
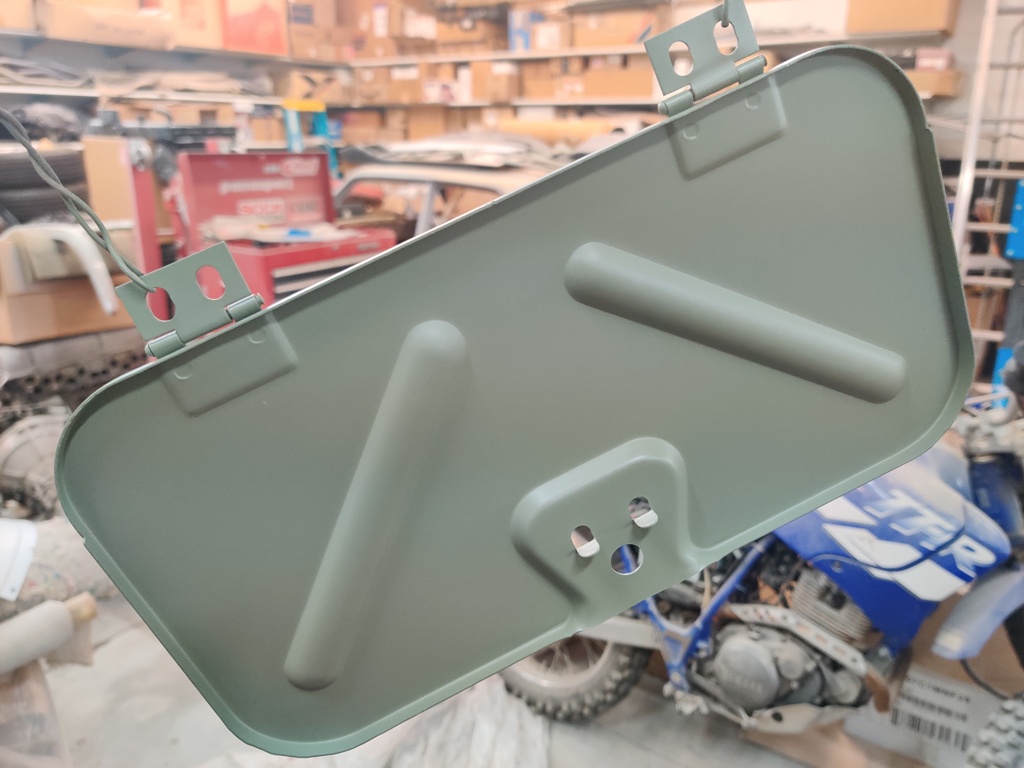
I'm doing a rotisserie restoration and would prefer to get this regulator restored. I can get the cover and screws re-plated, but does anyone know a place that can restore the rest (re-plate the base while not hurting the electrical parts)?

-
Can I buy your old jute? 🙂
-
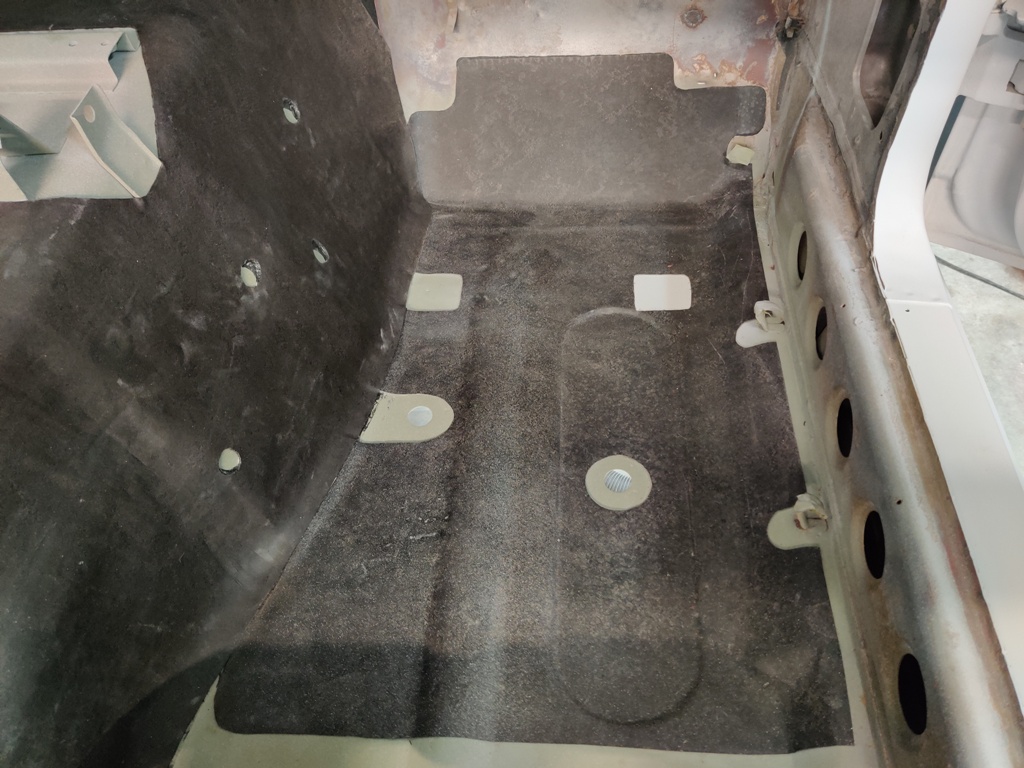
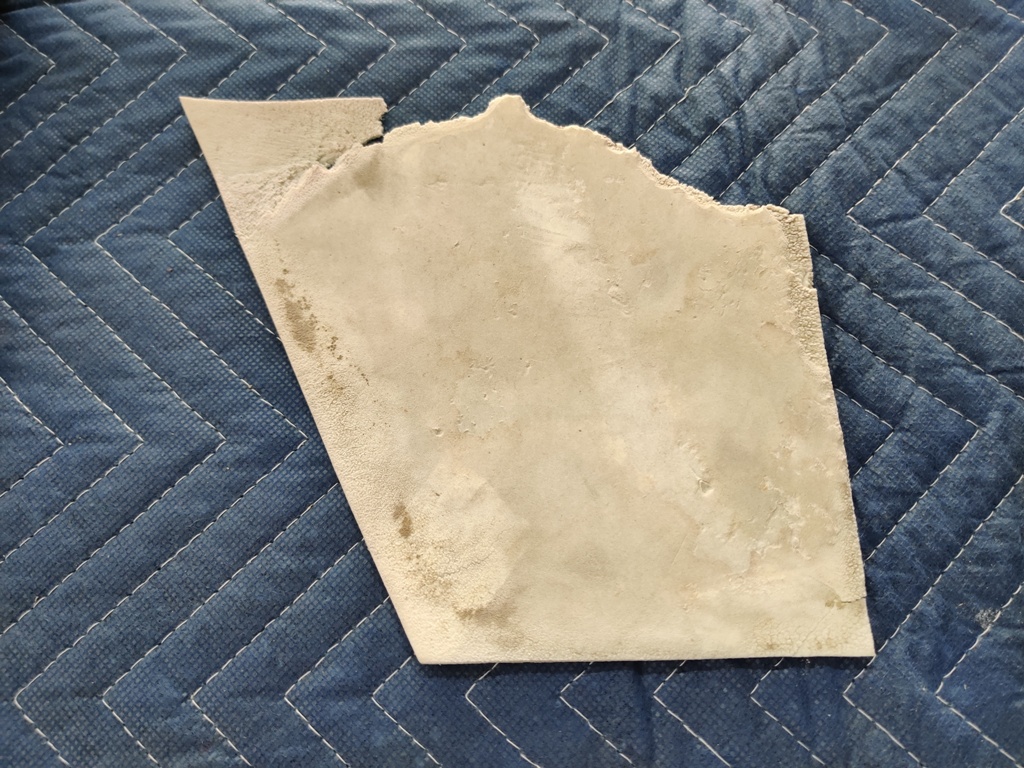
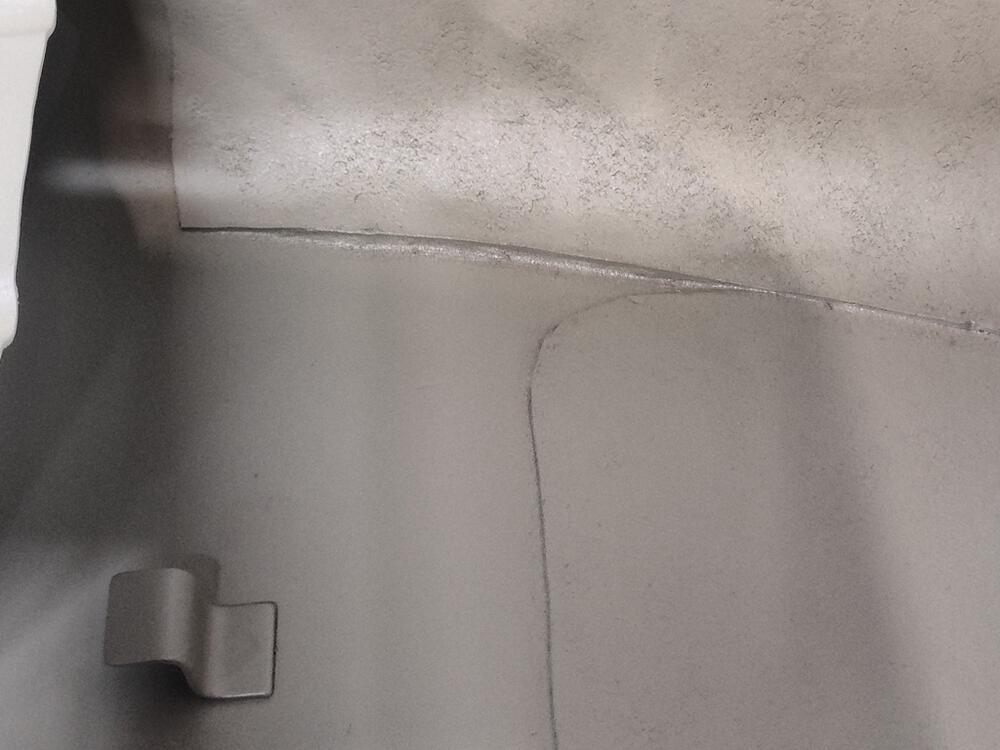
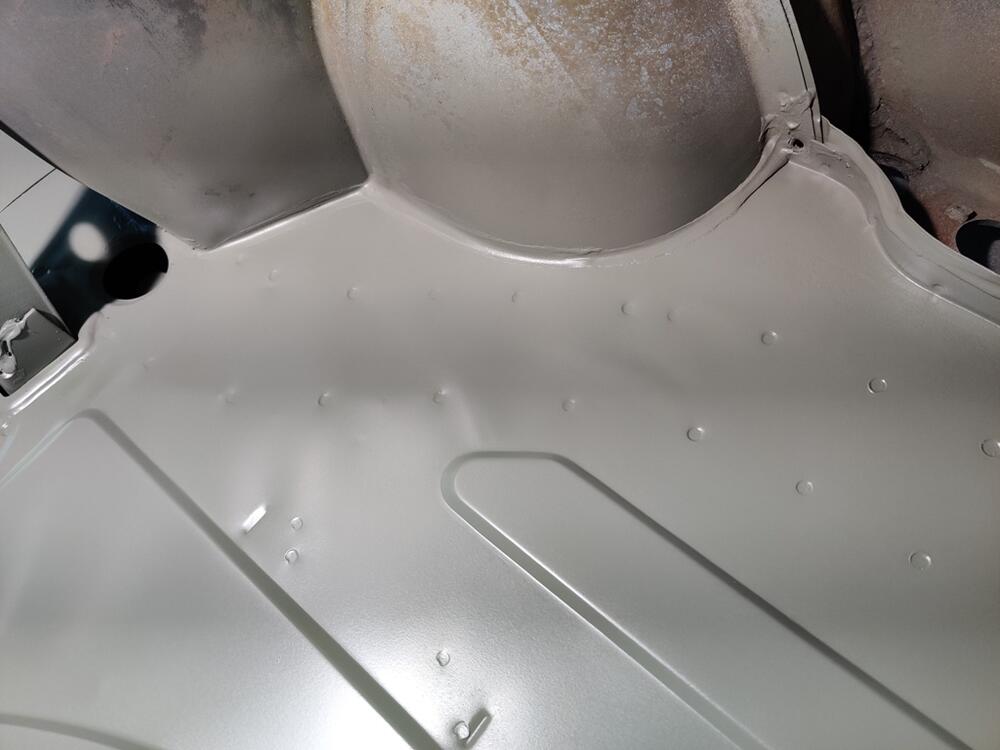
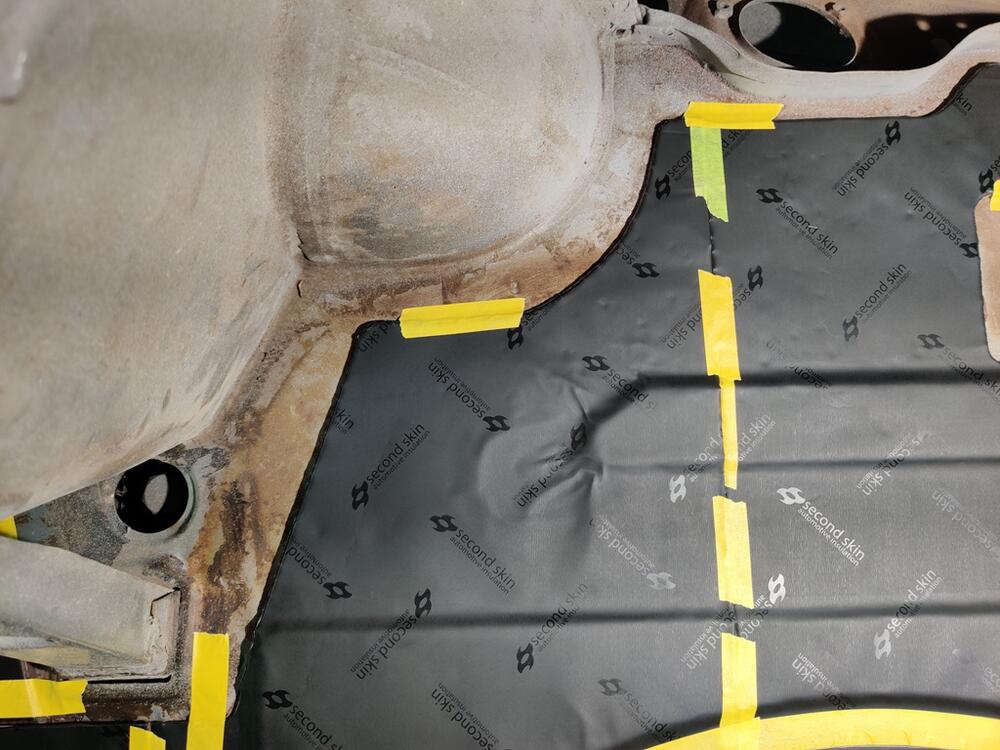
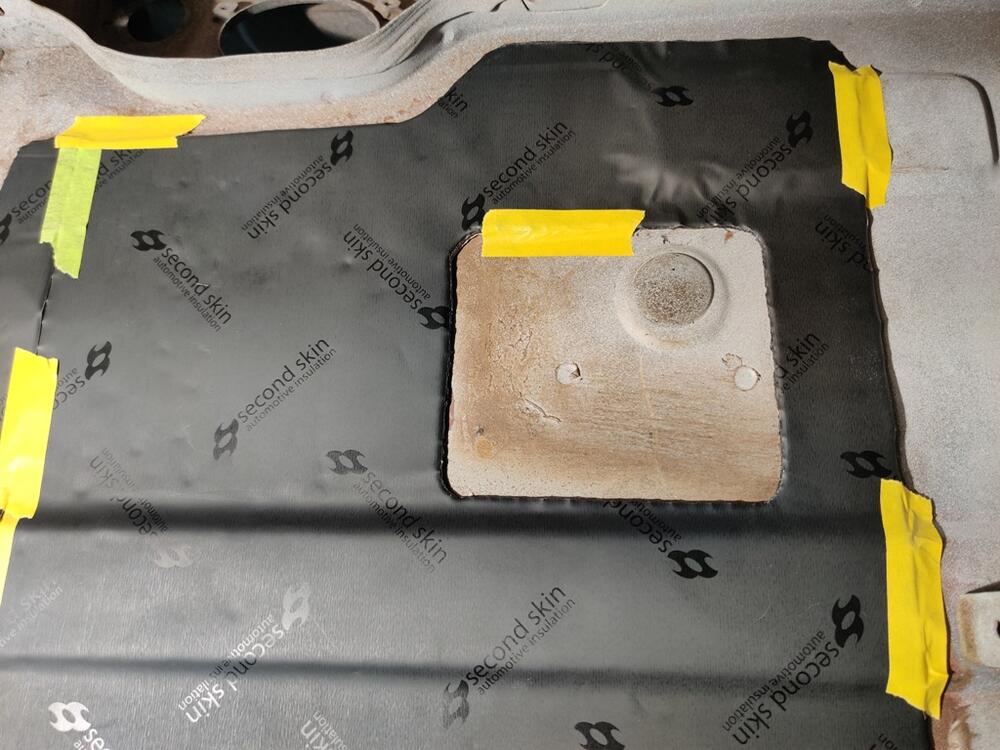
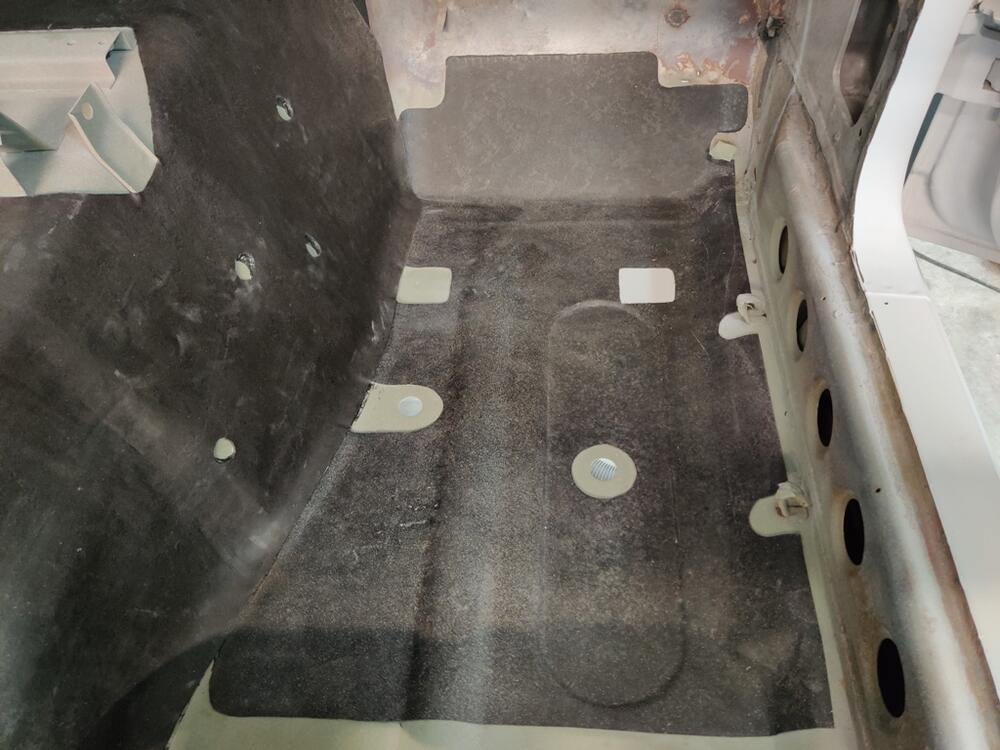
Last weekend, I directed my efforts finishing up the sound deadening mats and at the car interior surfaces. The glue sprayed onto various areas to secure the vinyl trim is quite difficult to remove. After trial and error of various methods, I settled in mostly on using a very stiff metal brush. It seamed to pull the adhesive off the best while least effecting the existing painted finish. Adhesive remover is ok, but more messy and it can prolong the process because the adhesive gets sticky again and smears to a degree. Wiping a cloth with adhesive remover just back and forth briefly on the adhesive and then letting it evaporate for a bit seamed to soften up the adhesive a proper amount to aid with quicker removal with the stiff wire brush. Soaking the adhesive doesn't help as it turns gooey and wants to keep sticking as you are brushing it. And it can get clogged in the brush and smear to other locations. Examples of old adhesive: My goal for the interior prior to getting the car painted is to prep the surfaces by removing all of the adhesive and putting some tooth on the old paint so primer and paint can be applied achieving a clean, "factory applied" paint finish. The original paint is thin inside the passenger compartment and it is easily broken through to the oxide type primer which was applied at the factory. I find the black paint applied by hand with a brush in this circle interesting. The purpose on my car is so the silver does not show through the pattern of vent holes in the trim finisher that goes inside along the rear quarter panel. The presence of runs and drips is interesting to me. I also applied seam sealer to all the edges of the sound dampening mats. This way, water will not be able to get under them in the future. One thing to note is that impacts to the floor can cause the original material to pull loose from the floor as well was crack. This creates an opening for water. If your floors and sound deadening are still not rusted out, you should have a look and address issues via sealant to attempt to keep them that way. I see have some spots where I missed application of the sealer, so I will need to touch those up: Hand sanding the tire well is a time consuming exercise. Power tools don't fit in here well and I didn't sandblast it. So, hand prep it is.


-
I didn't have any issues when I replaced mine on my track Z several years ago.
-
Updated.
-
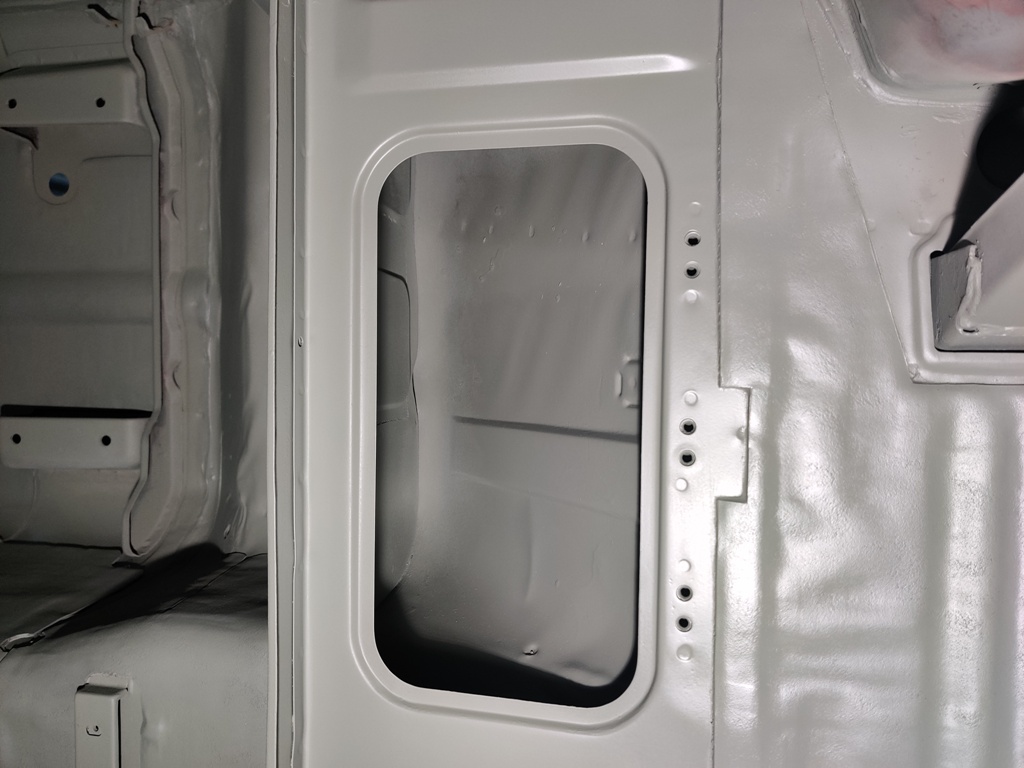
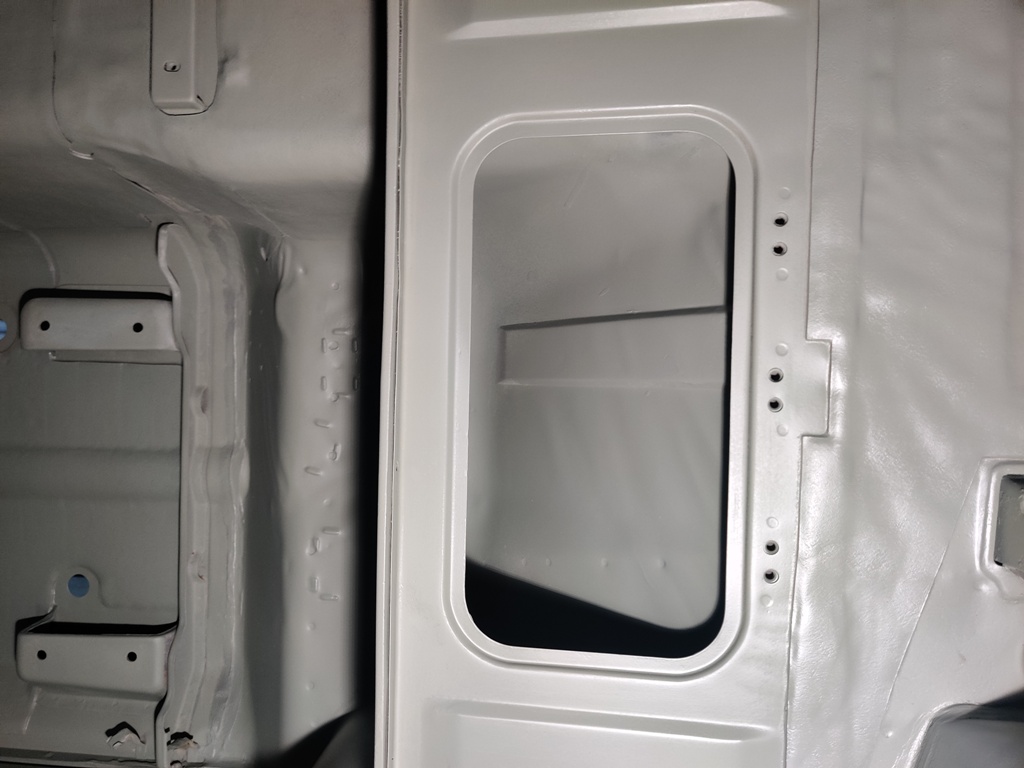
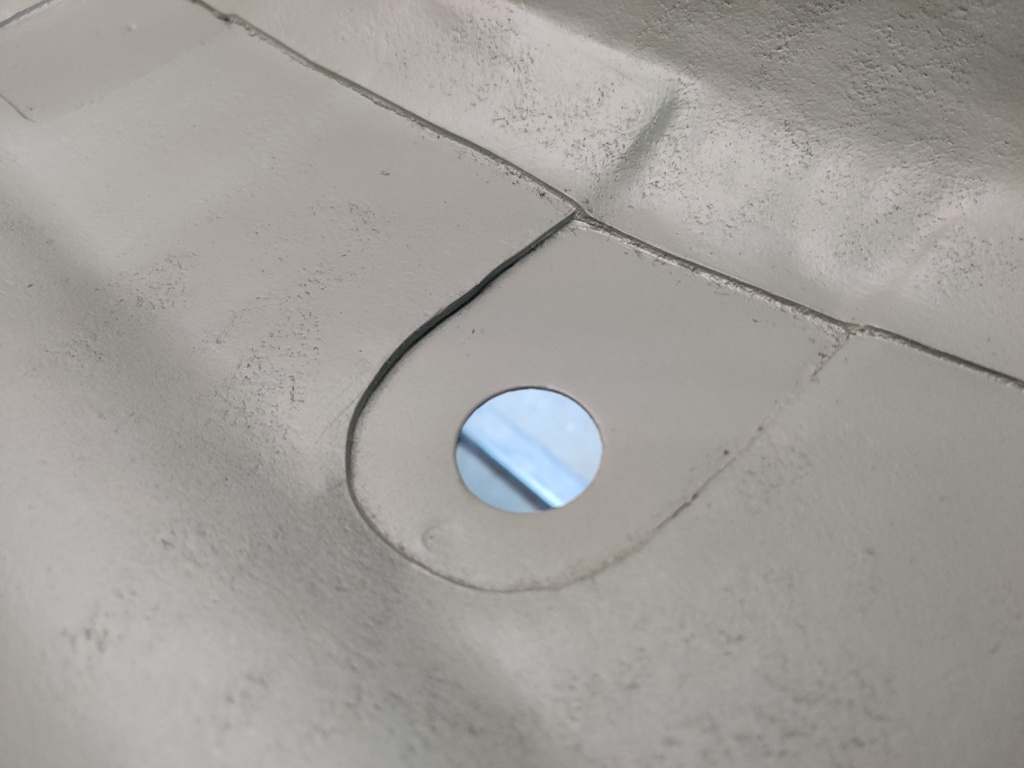
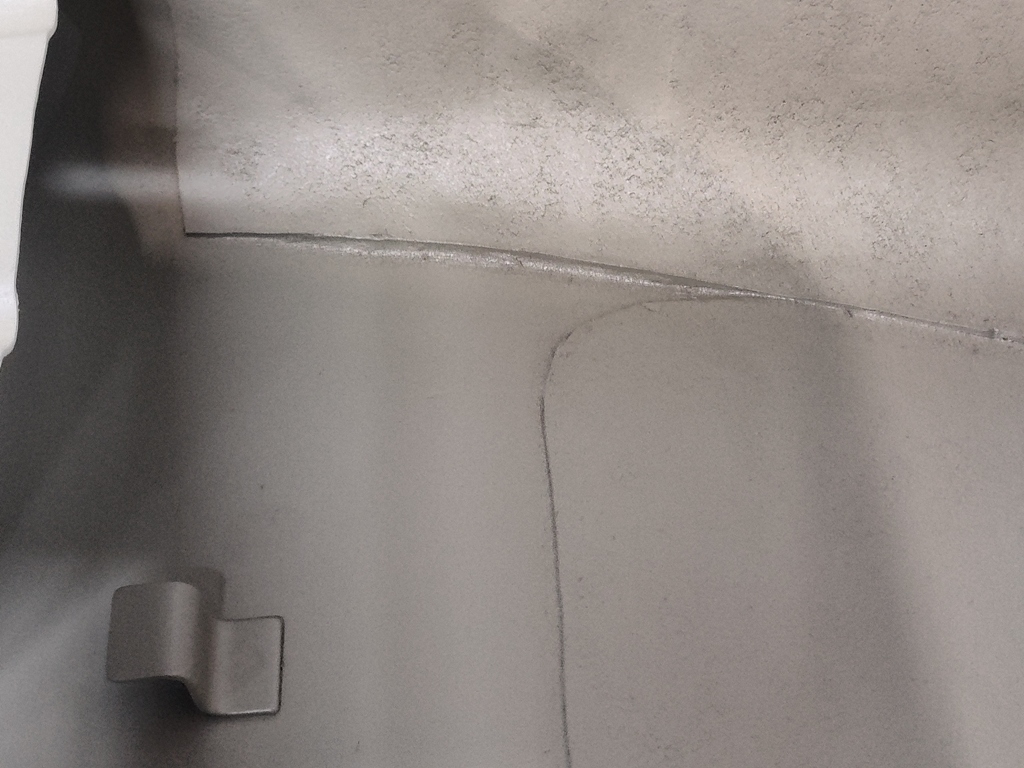
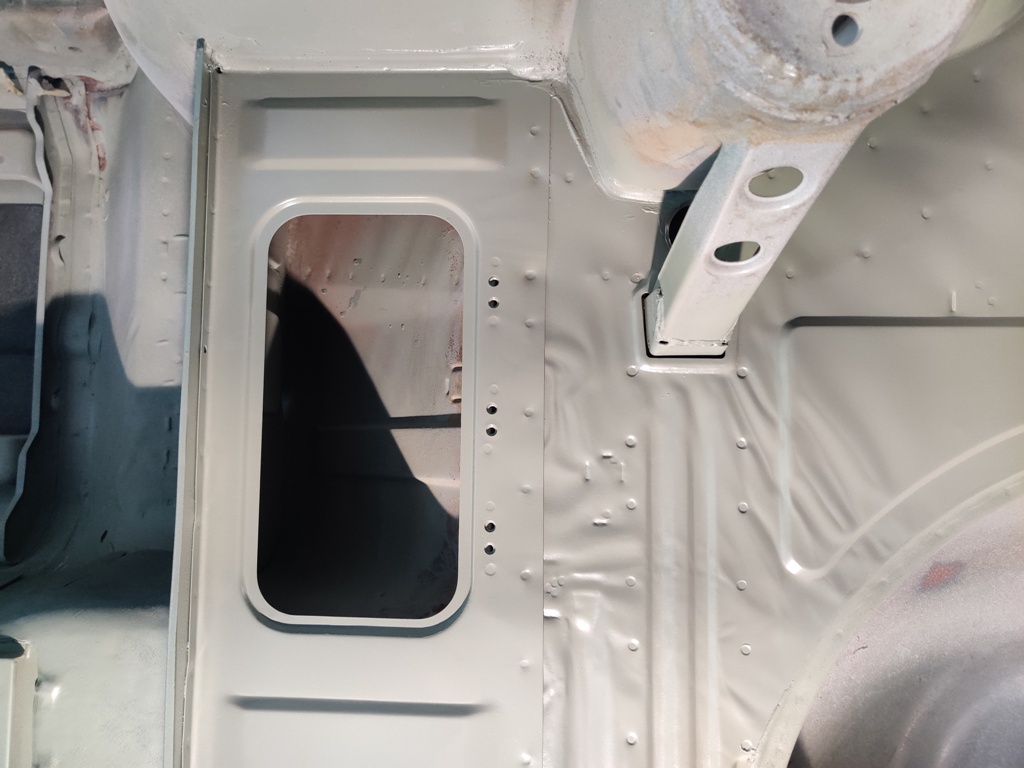
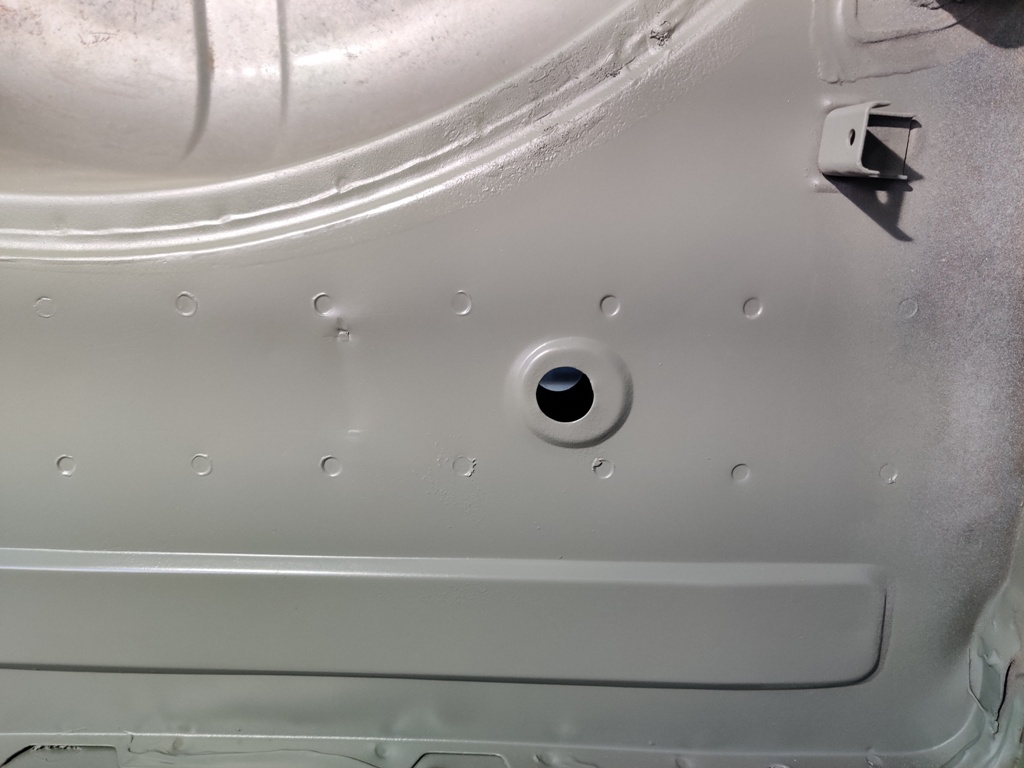
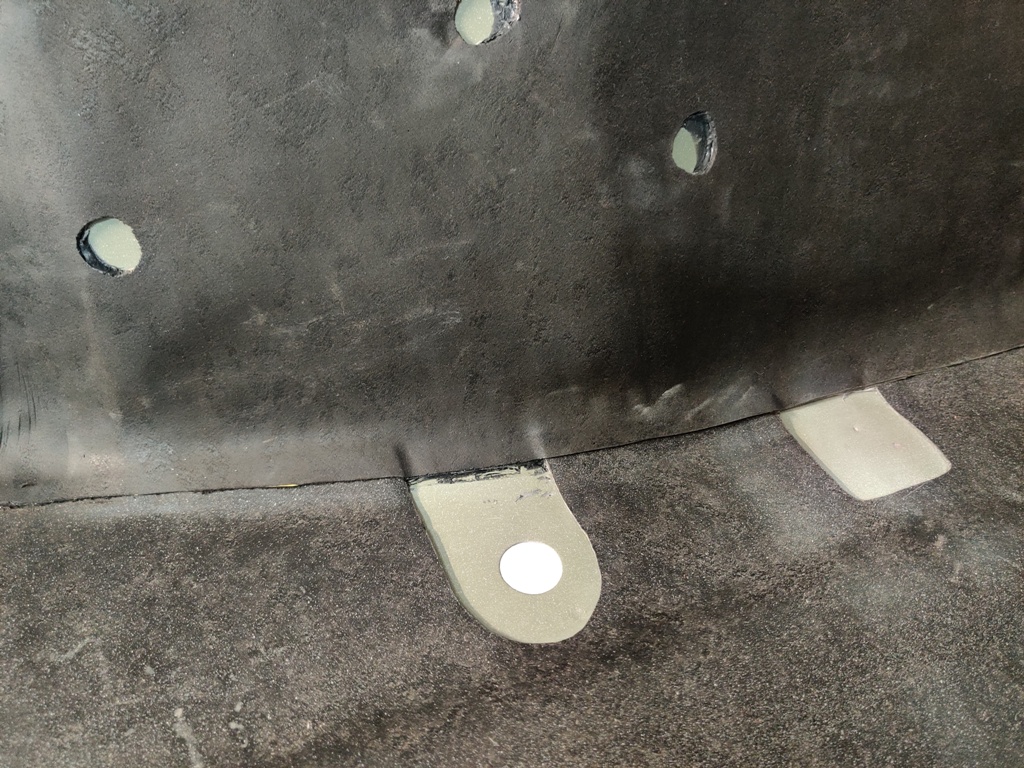
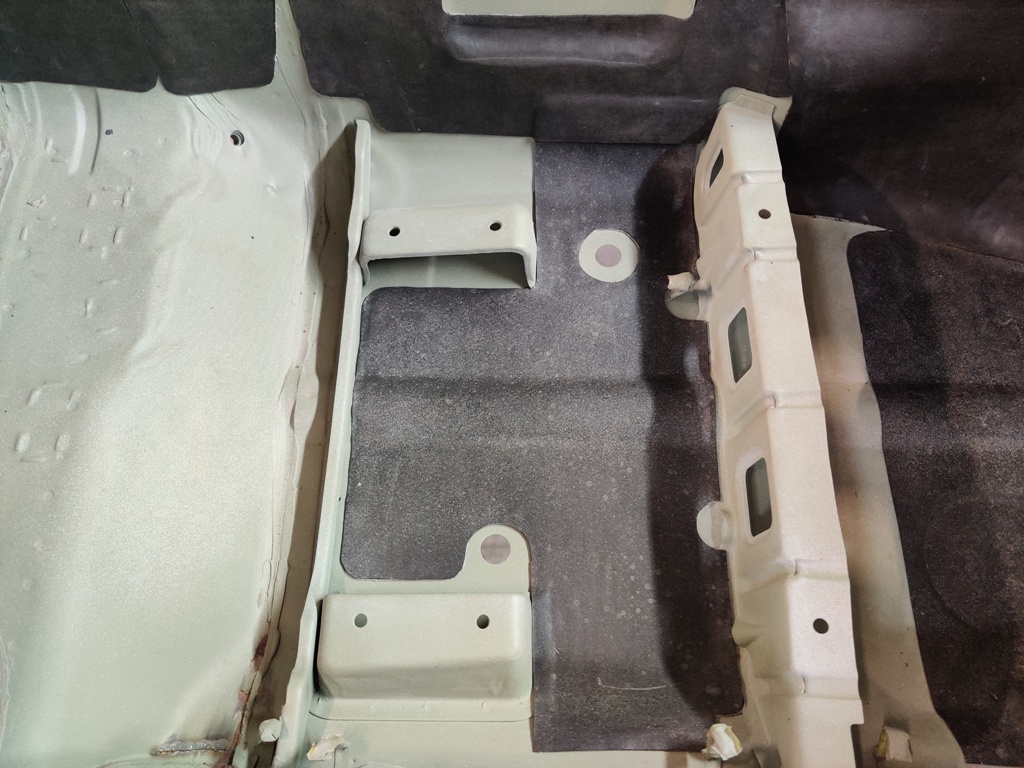
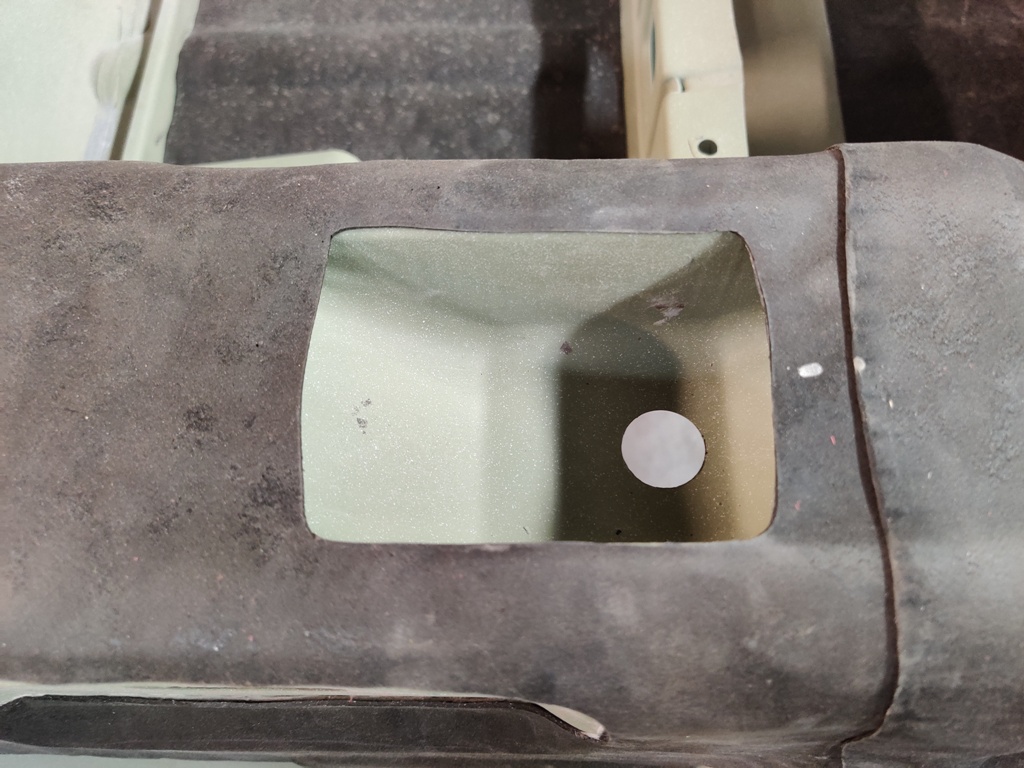
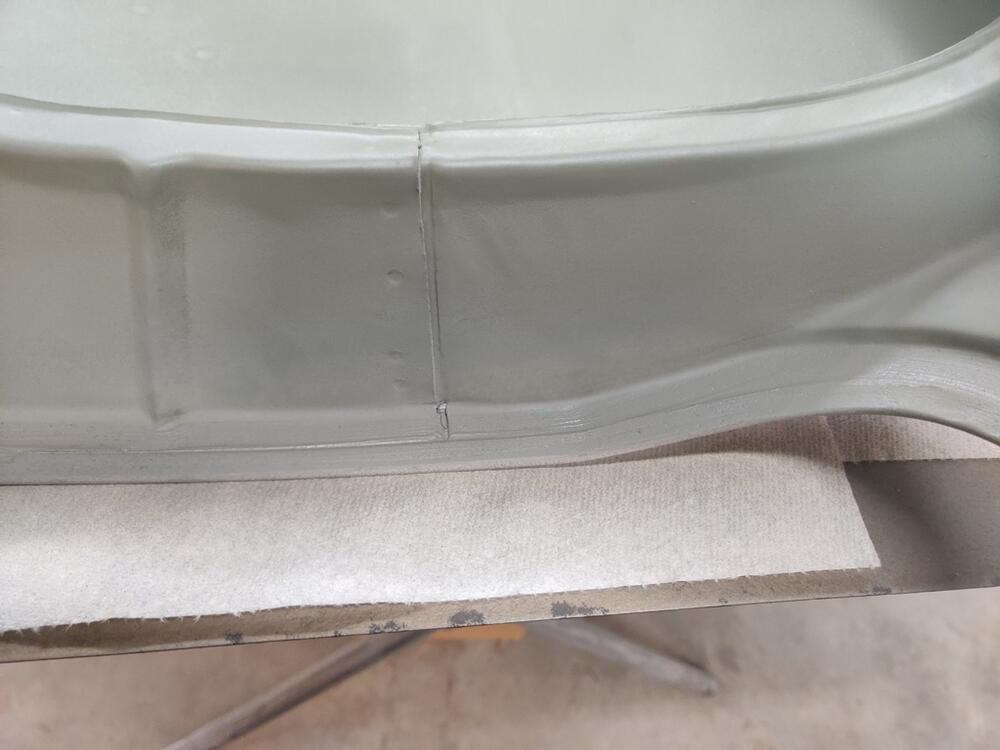
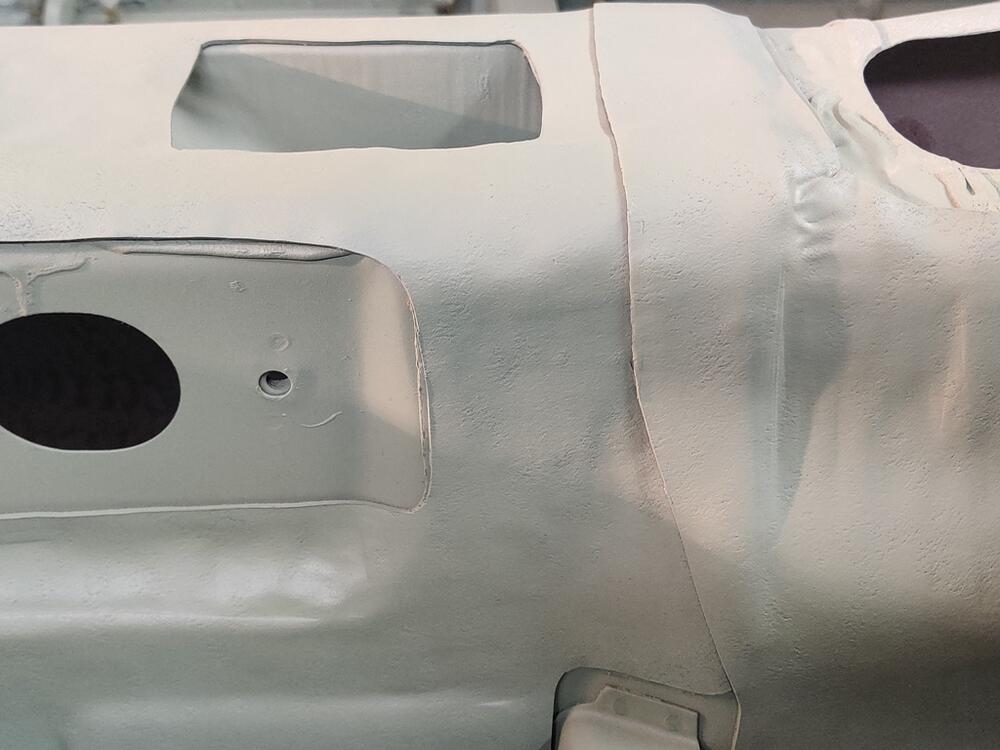
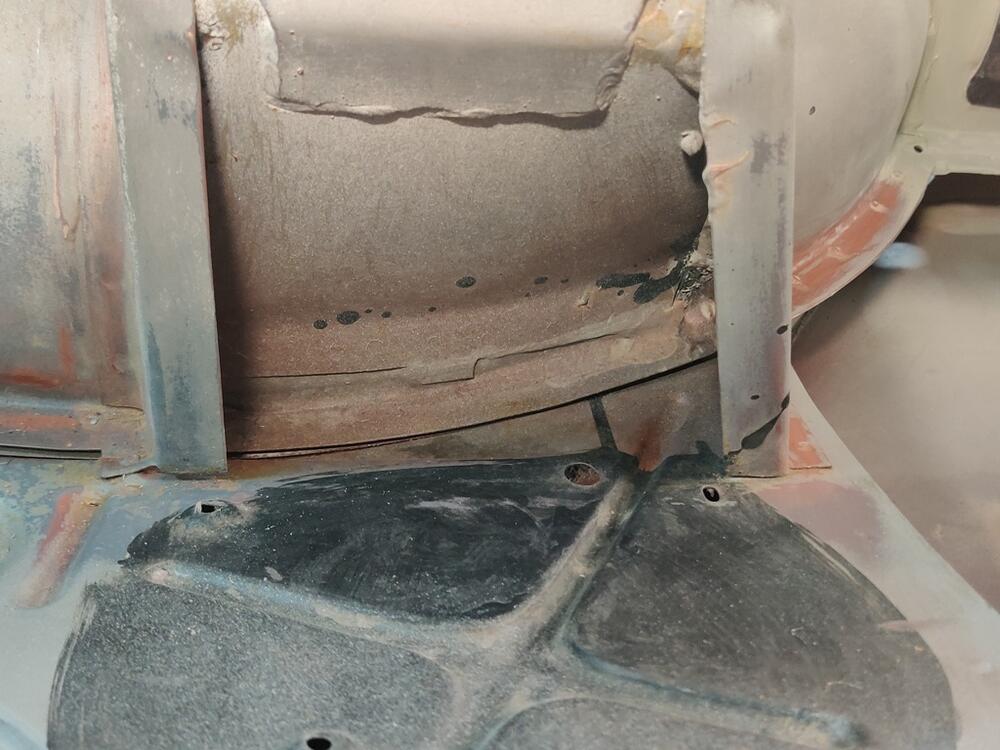
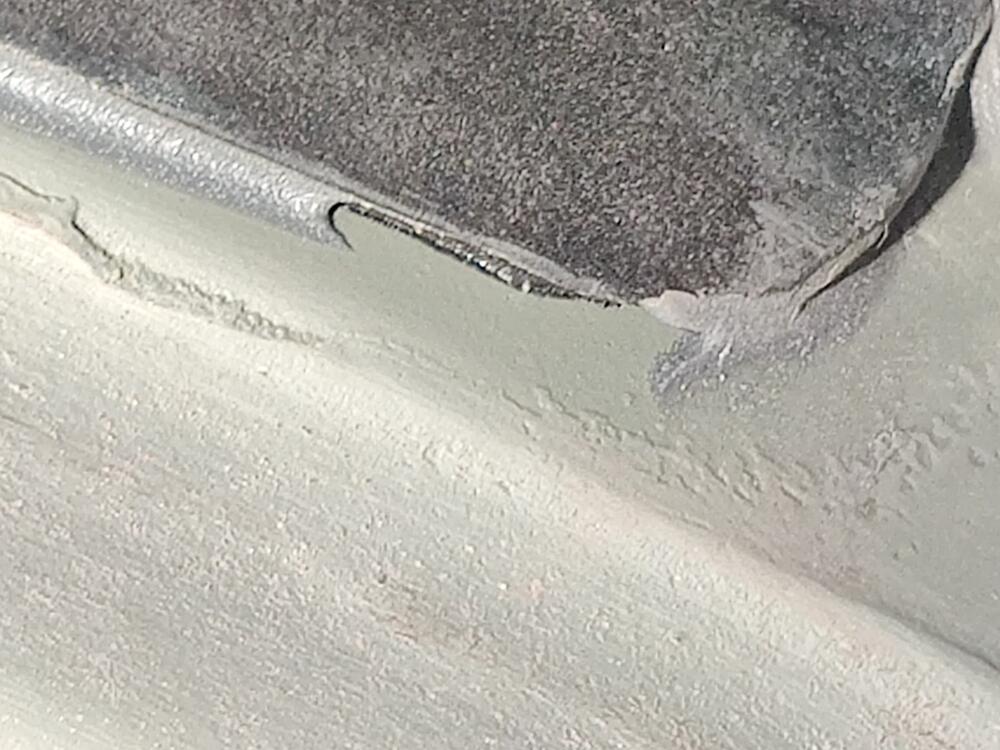
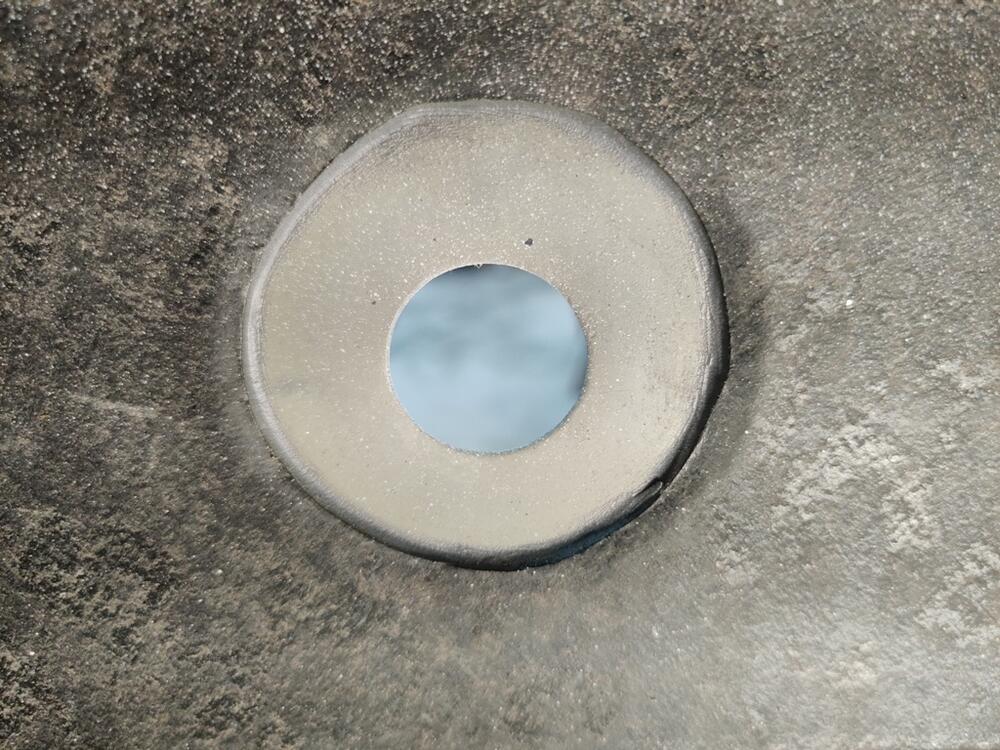
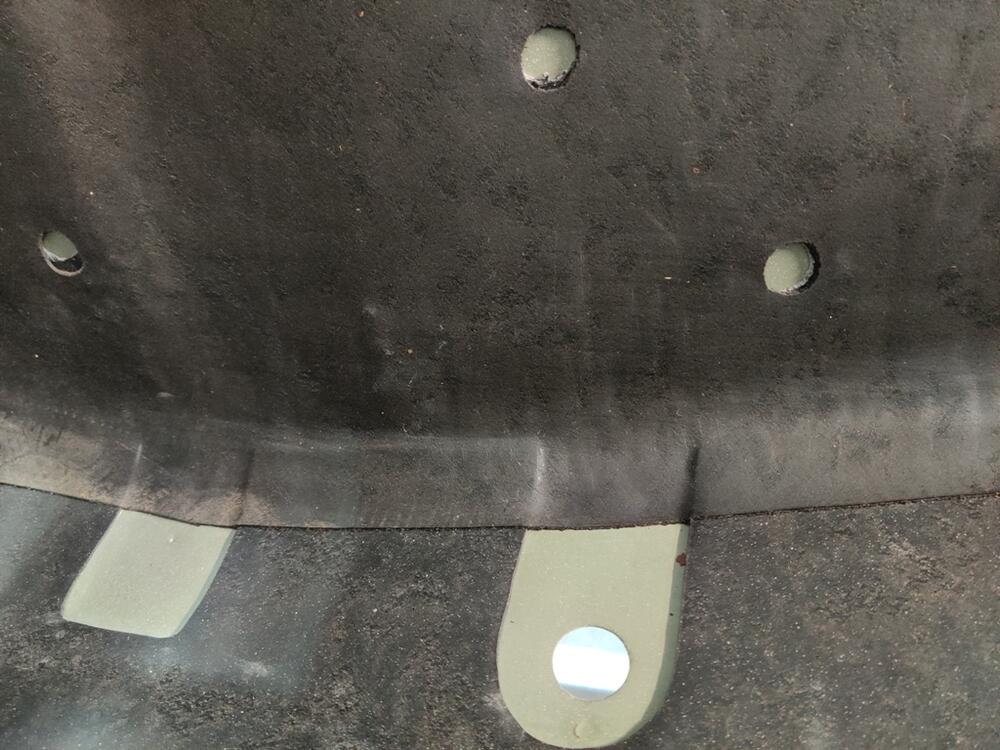
While I was doing the above work, I snapped these pictures which clearly show evidence of how water came into the car from the quarter panel vents. The hole in the quarter panel has this "U" shaped plate behind it which has some sealer not very well applied to the edges where it meets the inside surface of the quarter panel: In the bottom right hand portion of this photo, you can see where water ran down from the vent to the junction of the inner fender wheel well and the quarter panel. The car is at 90 degrees on the rotisserie with the left side of the car facing the floor: It seems wise to apply more seam sealer to the "U" shaped piece to make sure it doesn't let water in along its edges. That said, the top of it is open. So, it is not a good idea to hit that vent with a stream from a hose. 🙂 I will be be applying some spray on sound deadener to the inside surfaces of the quarter panel. However, before that, I will be prepping and addressing any suspicious areas of factory sealant to ensure no water can get in to cause trouble. *edit - I also noticed today that the bottom of the three holes that hold on the Z emblem is located below the bottom of the "U" plate, whereas the two others are contained within it. So, the bottom hole is more problematic for letting water in for what that is worth.

-
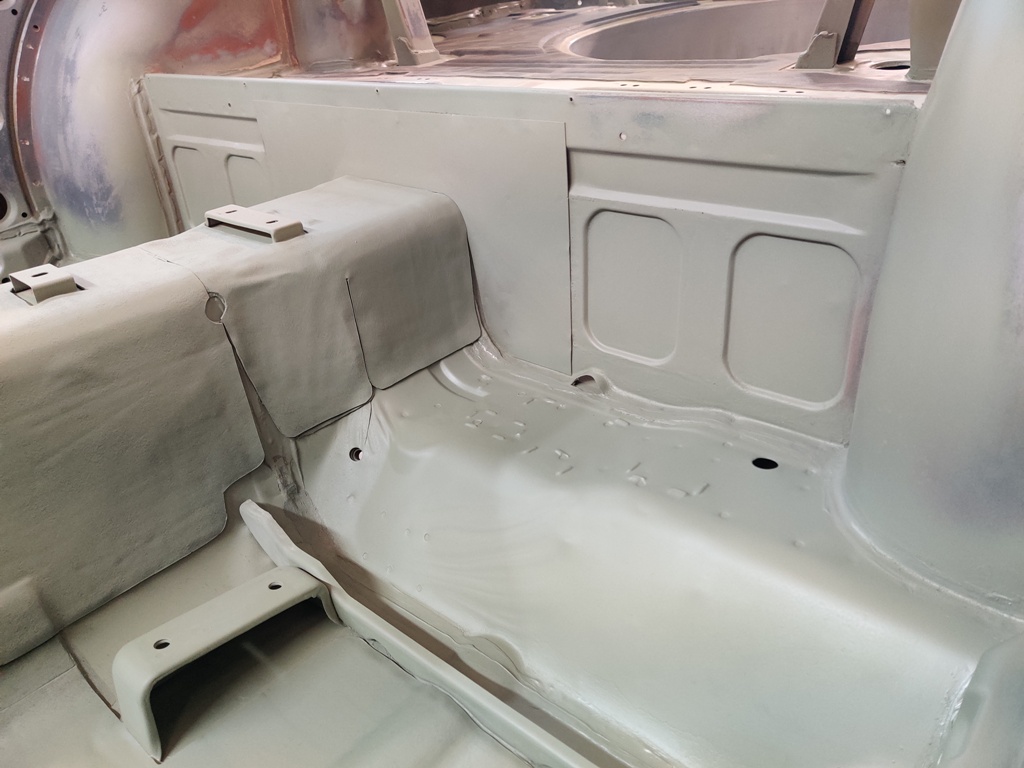
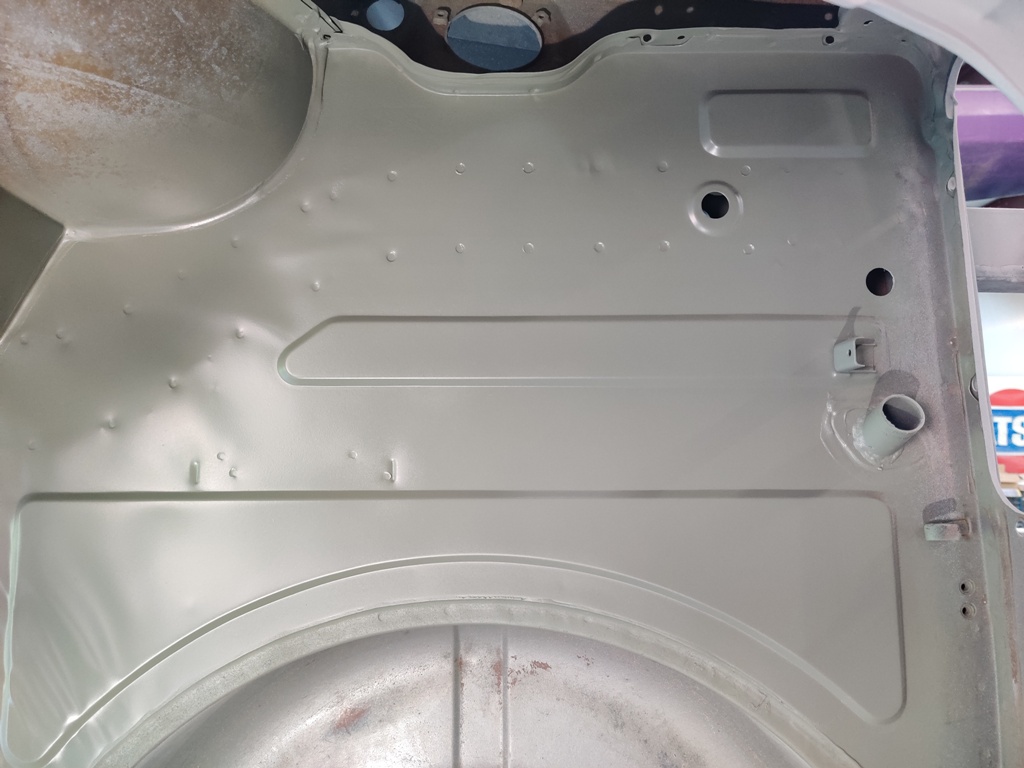
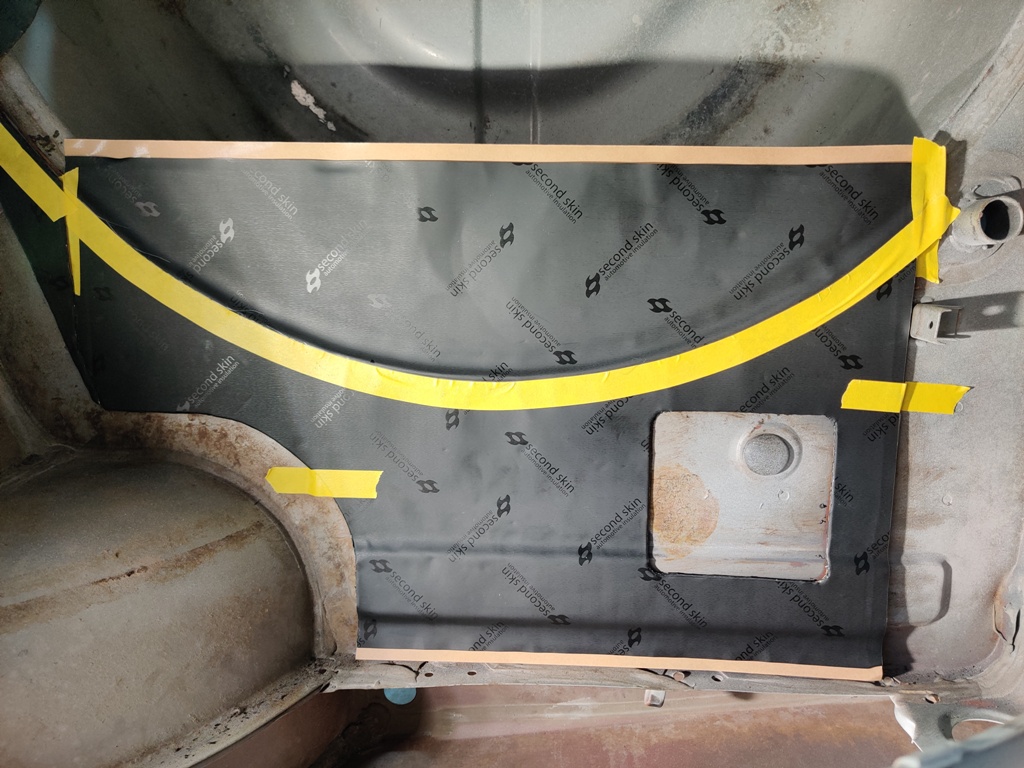
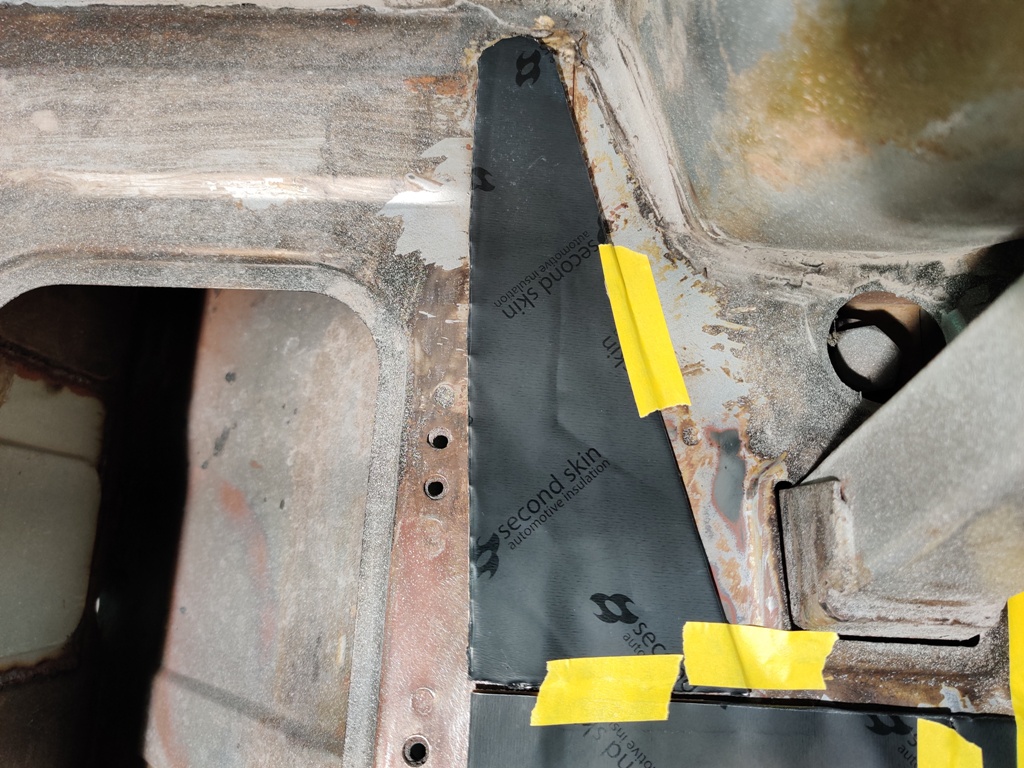
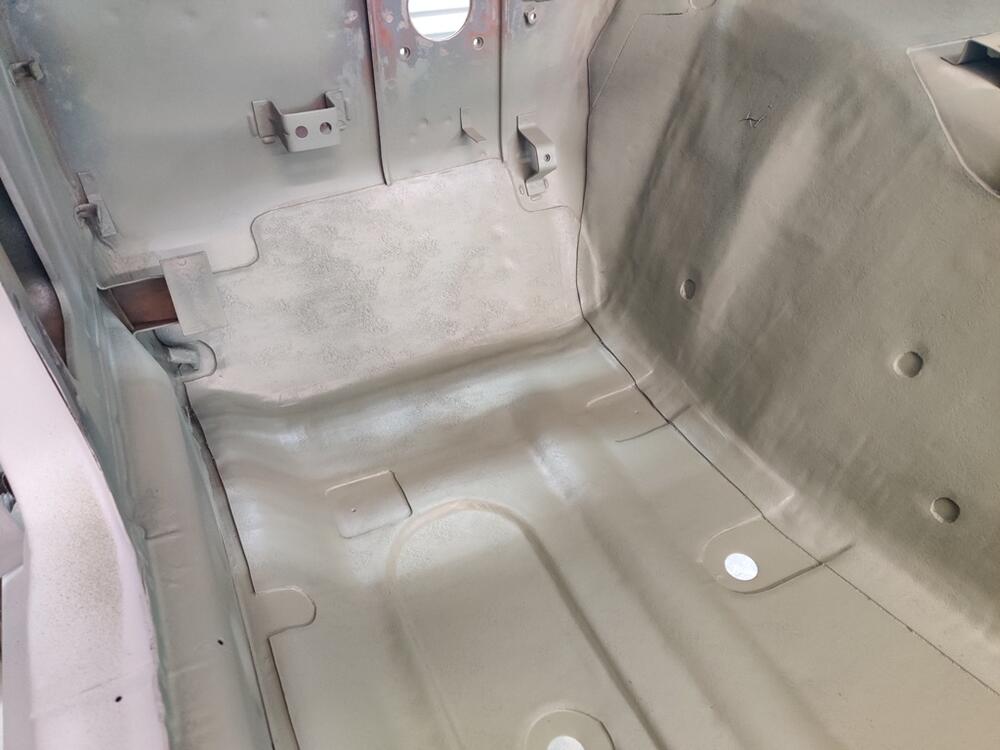
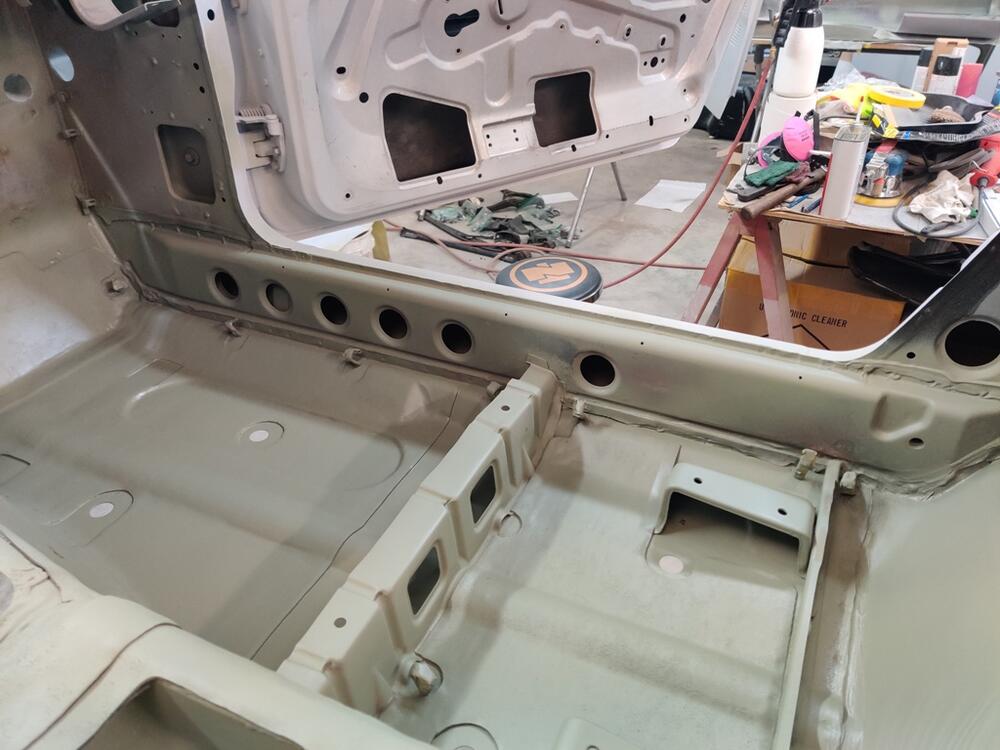
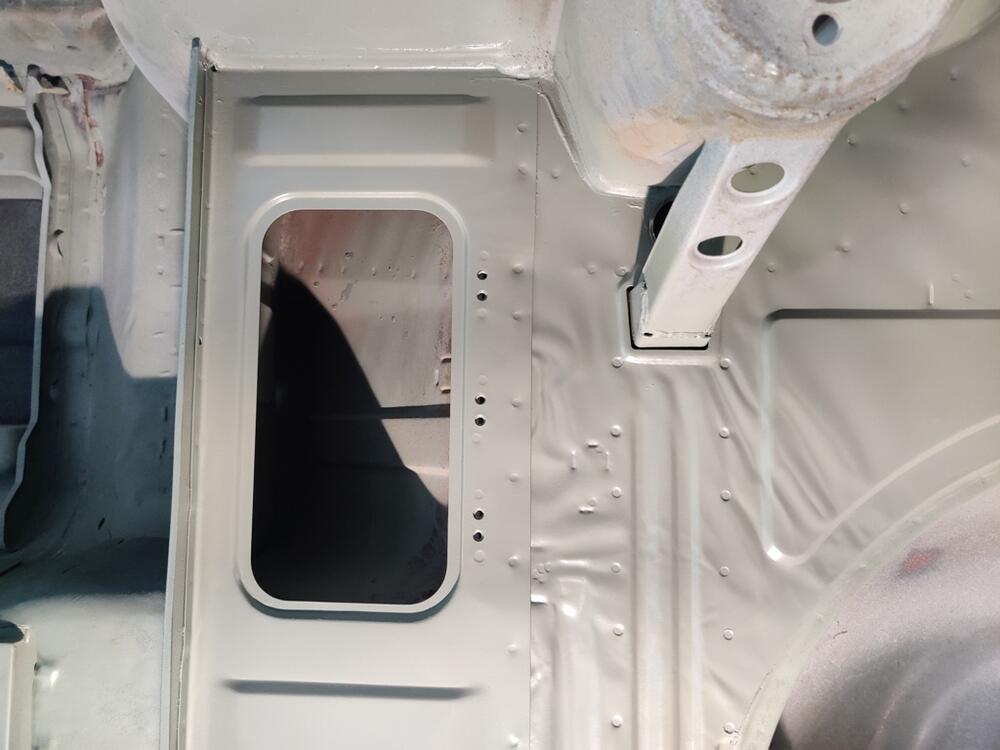
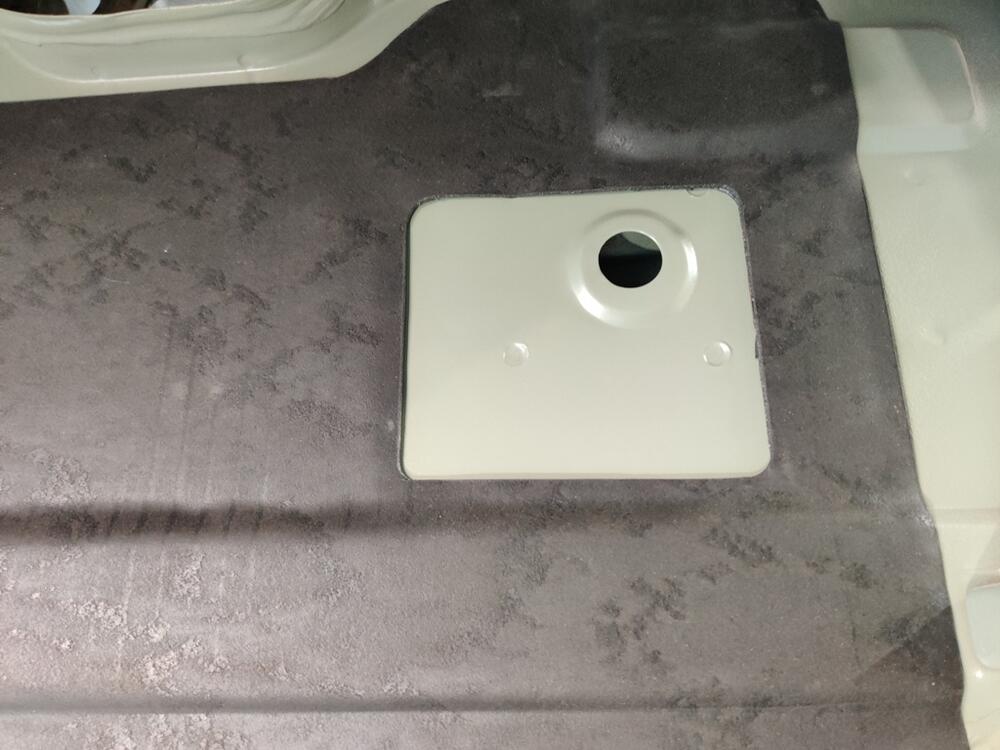
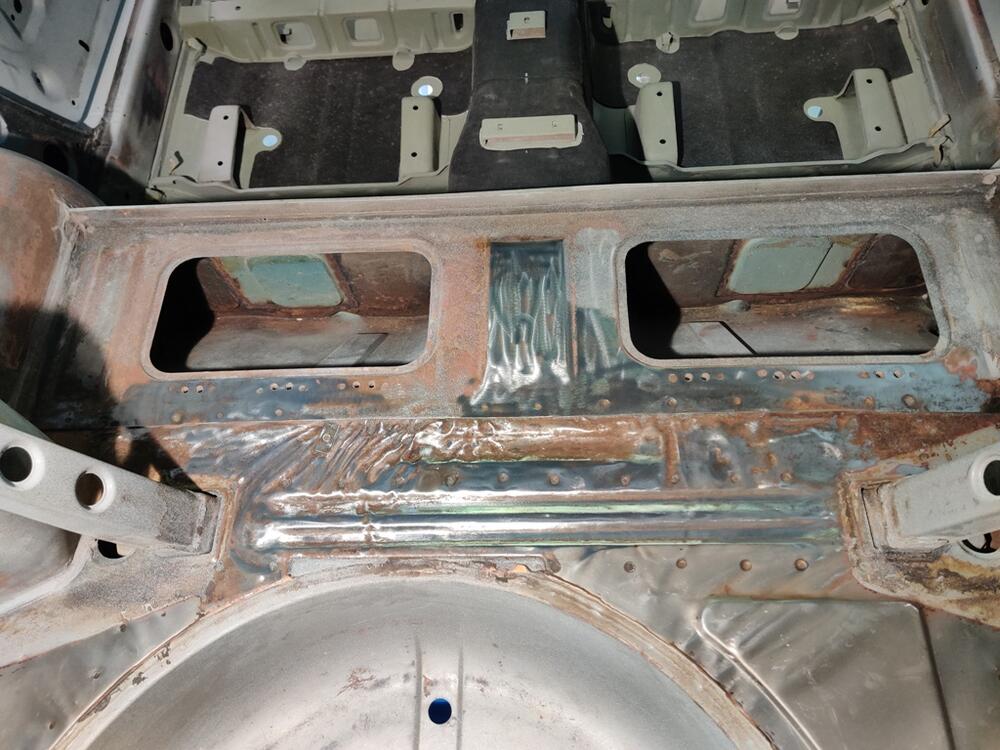
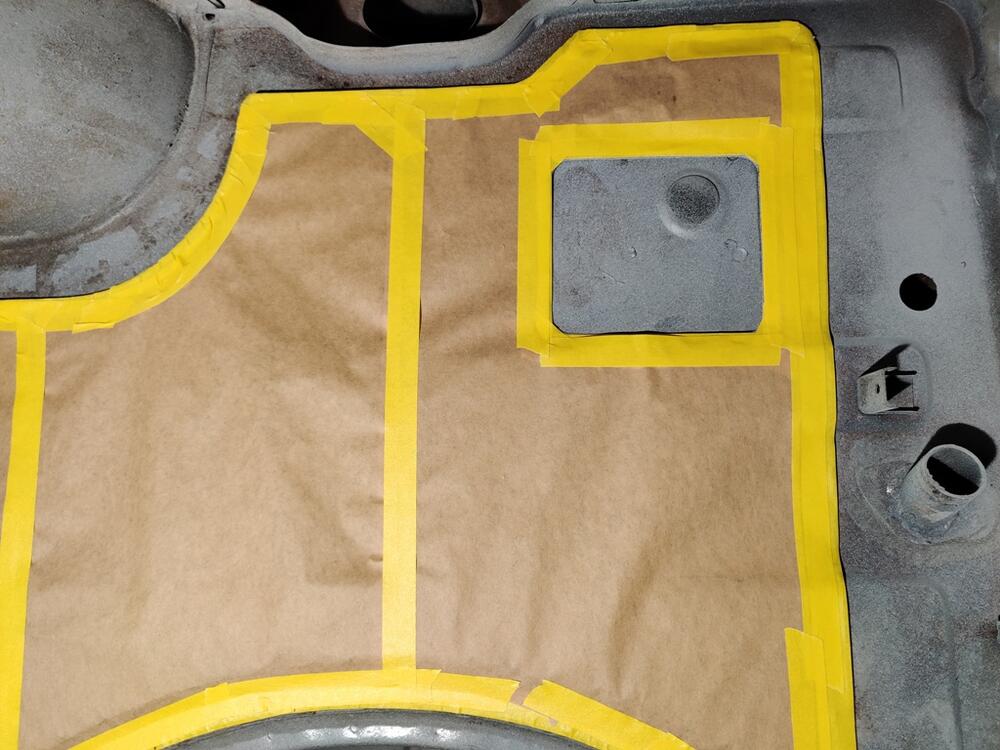
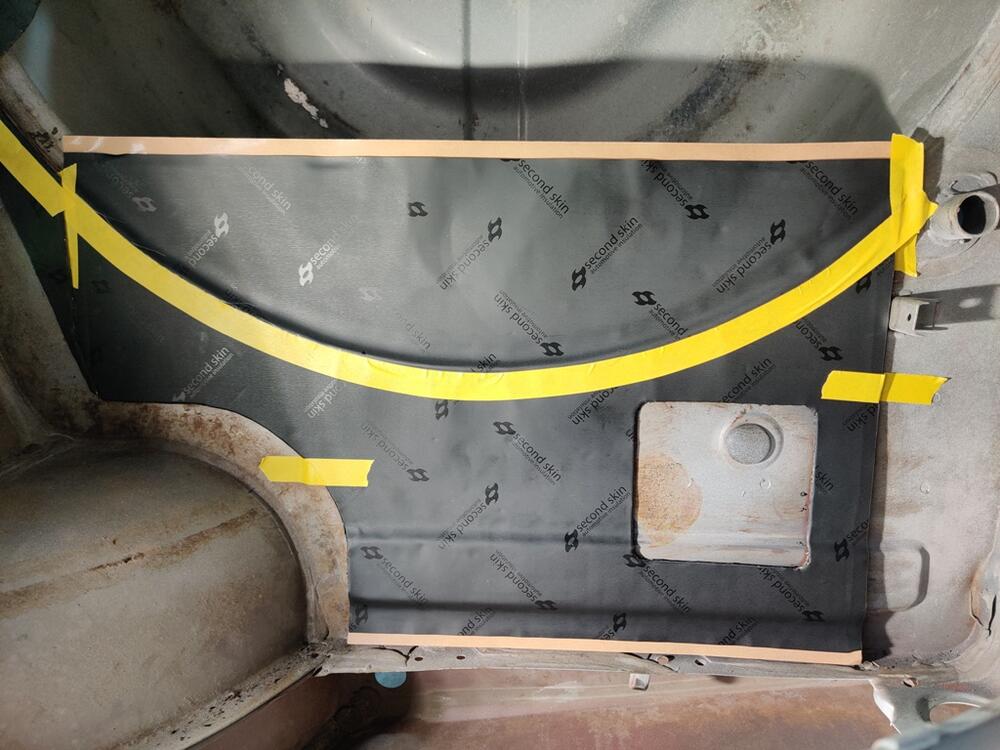
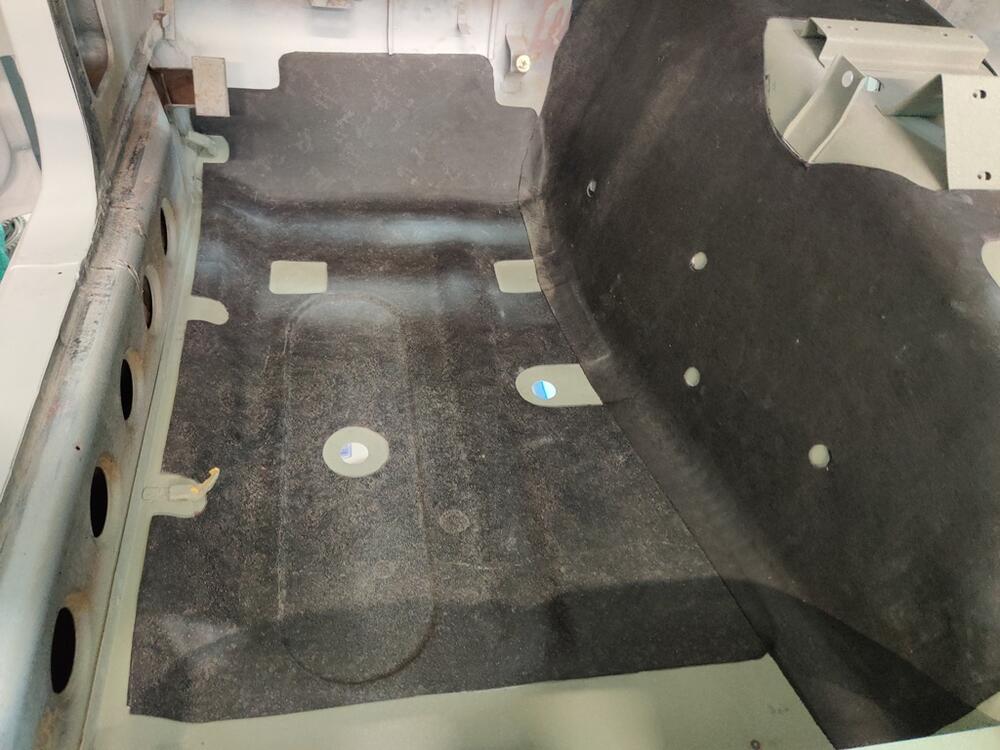
I picked back up on the work in the rear hatch area. I removed the remaining portion of the old sound deadening mat and found a bit of rust under it. I tried to remove it with a wire brush on a 4.5" grinder, and some hand sanding, but when you have the ability to strip with a "sand" blaster, everything else feels inferior when considering the result. Unfortunately, sand gets everywhere, so time for clean-up becomes a major factory. I should have stripped the rear hatch floor at the same time that I did the passenger compartment floor. I would have saved a lot of time in the long run. After sand blasting, I sprayed epoxy primer to the bare metal: I then applied the Second Skin pieces which I fabricated last weekend. The adhesive on this butyl rubber sound dampening is very strong. You have to be very careful when it first contacts the car to have it positioned correctly. After those were all in place, I used the backing paper from them as templates for the factory type of insulation. These templates are more accurate than my initial paper templates. When cutting the factory mat, I made the cutline about 3/32" outside the template edge. This makes the factory type mat a touch bigger and allows the edges to radius over/around the second skin mat for a slightly better look in my opinion. Finally, the effort to replicate the factory sound deadening mat is nearly complete, just a bit more to do at the firewall. I will be applying a 3M flexible seam sealer to all of the edges so that water can't get under it anywhere in the future. I am pleased with how it turned out. It is difficult, in my opinion, to distinguish it from the factory applied original, however it has the benefits of more modern technology - butyl rubber, strong adhesive, metal foil for heat shielding. The factory type stuff on top which looks nicer though and conforms to compound curves more easily. The resulting sound deadening is noticeably better.


-
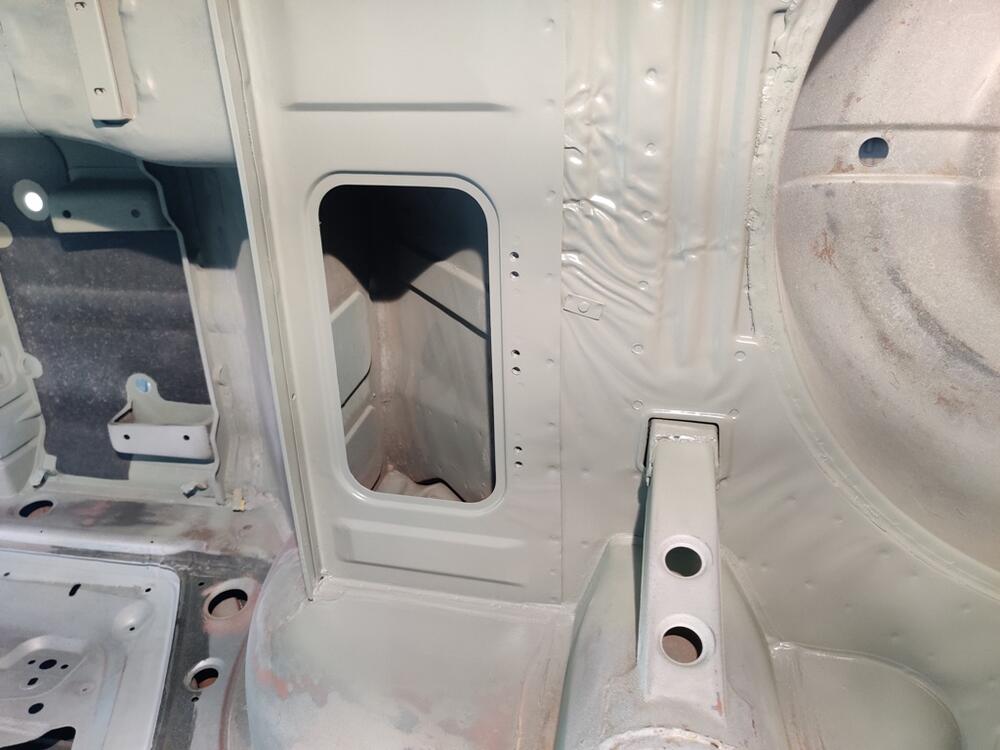
Thanks! This past weekend I started on the hatch floor area. In looking at the templates you created, I realized that those are for a series 1 car. So, they differ a bit from my series 2. Once again I had to do some investigative work, looking closely at clues on my car to decipher where the original sound deadening mat was. My car still had the mat present behind the shock tower, but the portion between and in front of the shock towers had been removed by a prior owner. After careful removal of some kind of black coating, likely applied by this same owner, I was able to see where the original mat use to be. The original silver paint outlines where it was. I started applying tape so I could make a template: The outline was taped off. Then masking paper was used to fill in the outline. Next, I removed the remainder of the factory sound deadening. Then, I used the template to cut the Second Skin mats. The adhesive backing is still in place on each mat. Fitment was done first with each mat held into position by using masking tape. Next, I will properly strip the hatch floor so it is prepped for a coat of epoxy primer.


-
Decided to switch over to installing more "tar mat". Where I left off was with the passenger compartment floor surfaces finished with both a layer of Second Skin mat and a layer of factory mat cut and installed. I had only installed the Second Skin on the tunnel. So, cut and installed the factory mat on top of that on the driveshaft tunnel. I didn't take as many pictures showing step by step progress, as this is a repeat of sorts of similar prior work. A bit of finishing work is needed for the front tunnel piece where it meets the fire wall. After that, all that is left is the rear hatch area.


-
Top notch, Mike! Well done. I haven't taken the time to make my own template for the hatch area yet. The other ones I have already done and mostly installed replacements (linked if anyone would like to check that out). I will benefit from your work and sharing here. Thanks very much.
-
Ah. Yeah, I can see that. I like your solution. I will take some extra care with gluing the pads in place and will apply sealant around the edges of the foam to keep water from getting in under them.
-
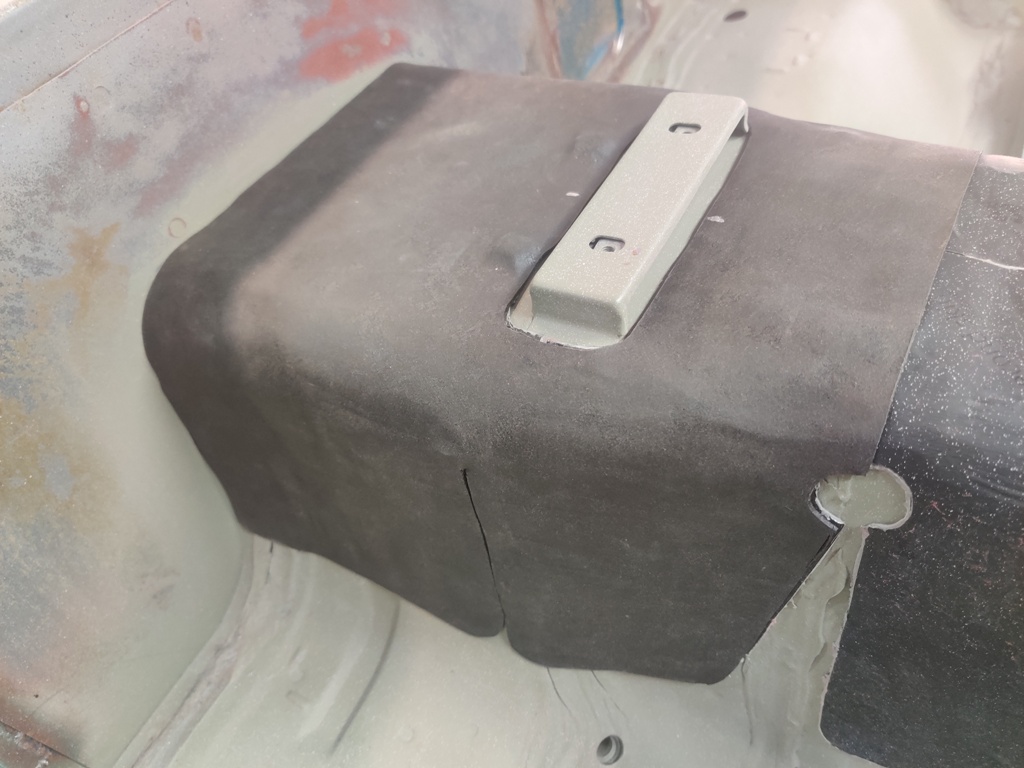
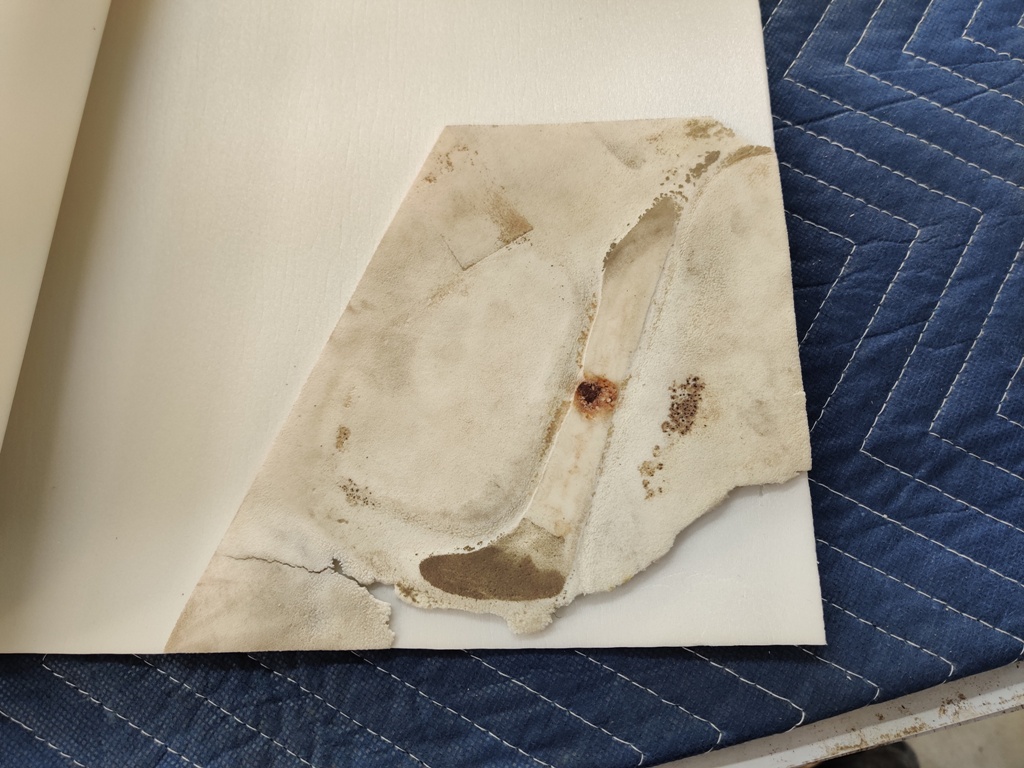
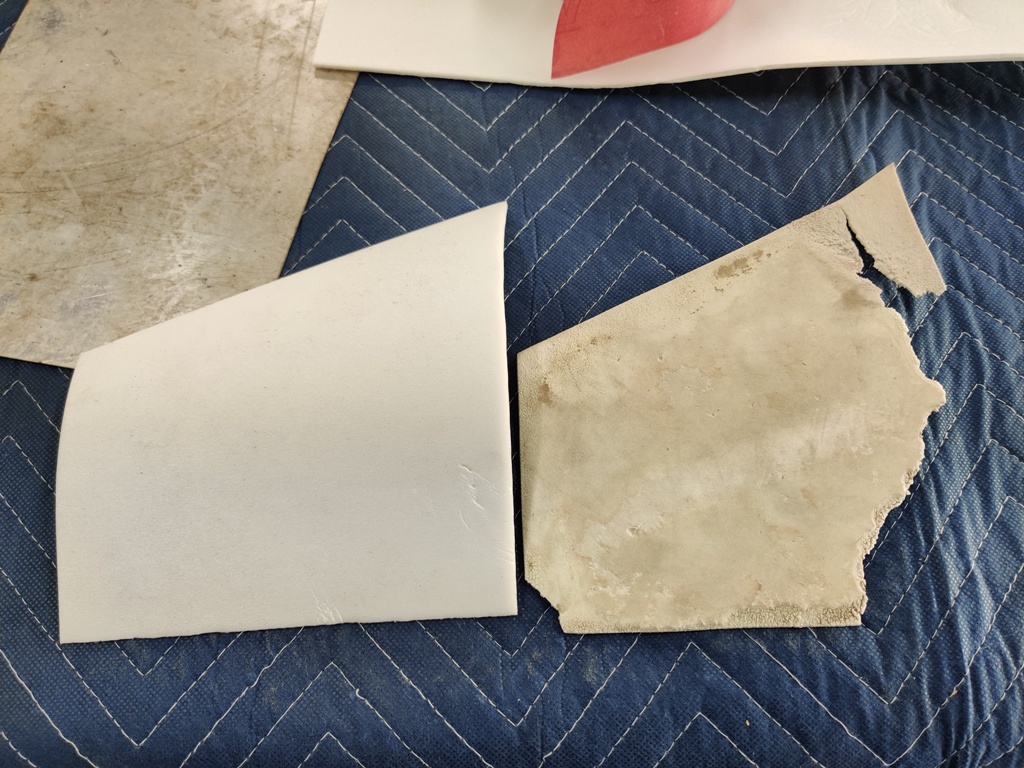
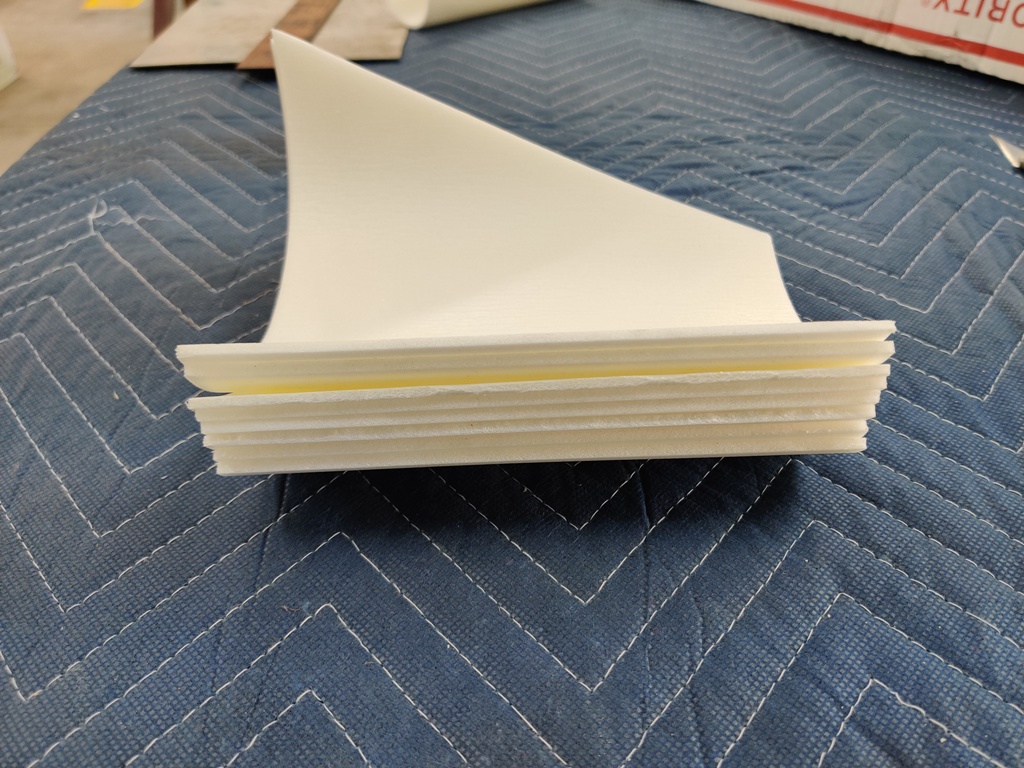
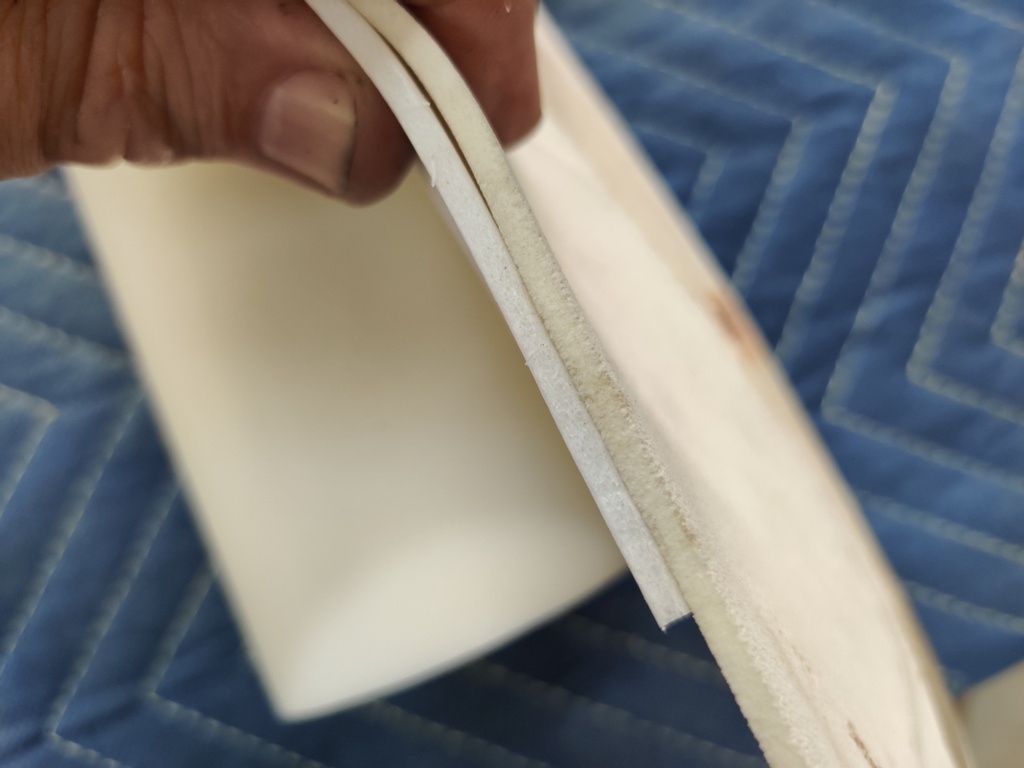
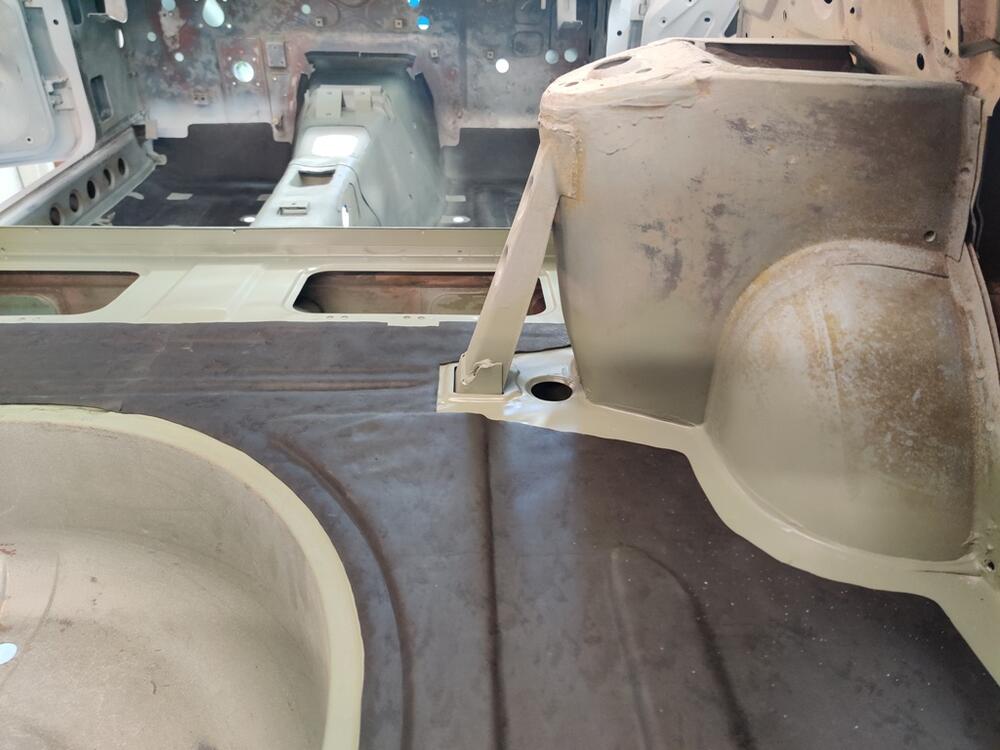
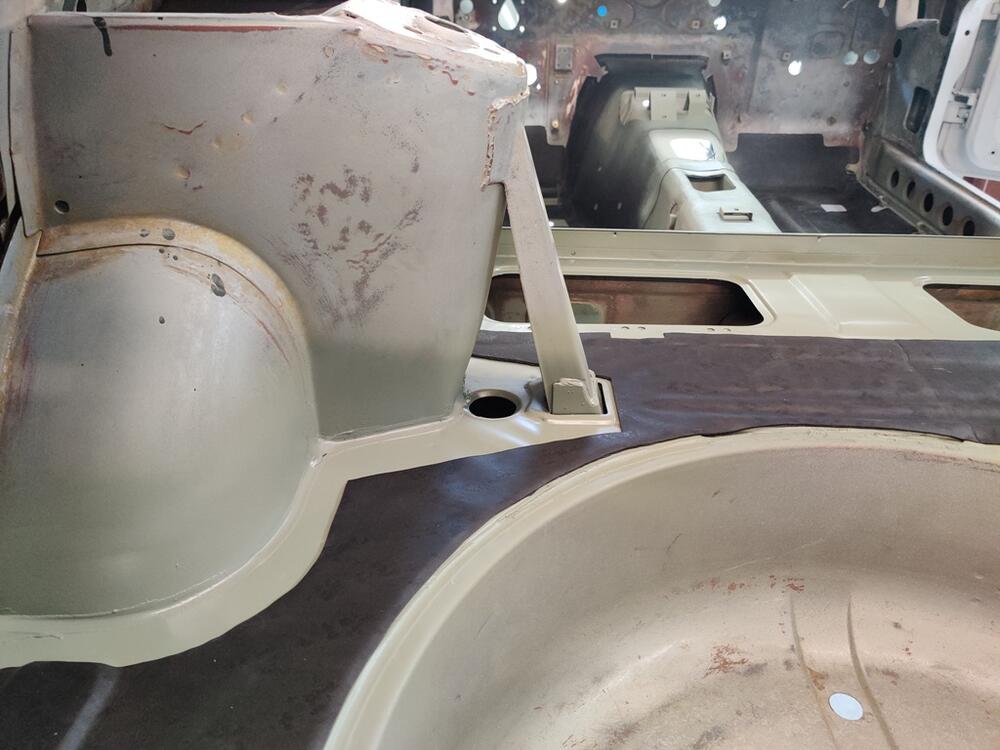
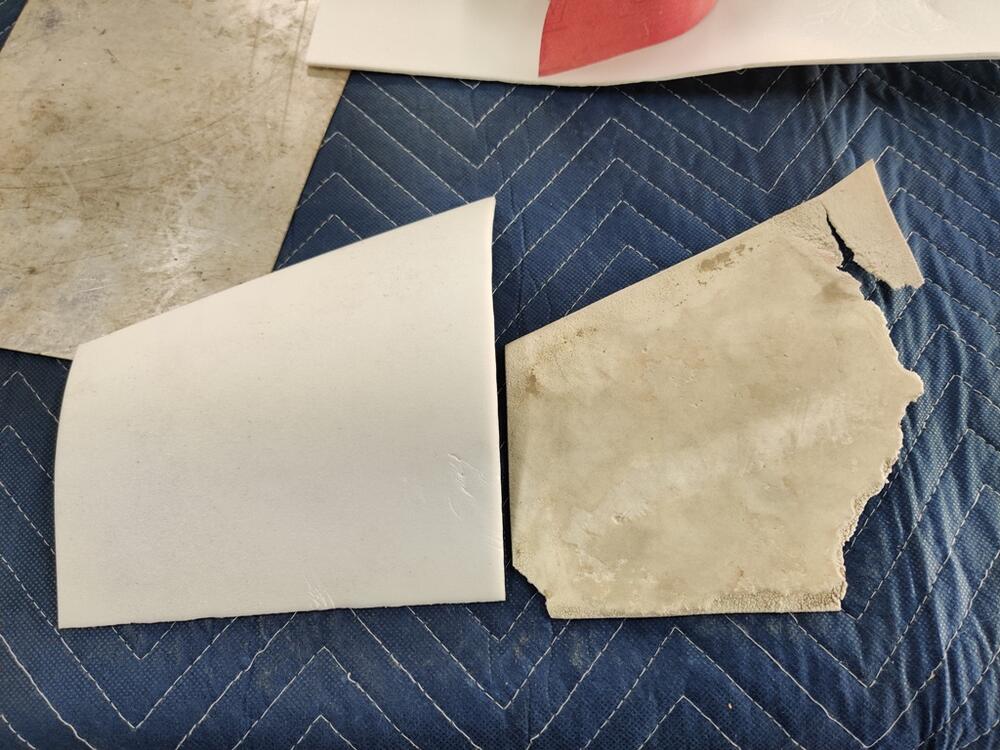
I took a break from working on parts/hardware prep this weekend and worked on a few other projects. My plan is to finish up with that prep and send everything off for plating in a week or two. When I get everything back, I have some sheet metal that needs to be bolted to the car a final time before commencing on the last round of priming and blocking. Some areas of panels "move" significantly when they are bolted in place. This is true of the fenders, and especially the cowl panel... which brings me to a cool little project I did this weekend. From the factory, Nissan installed some closed cell foam under the flat corner areas of the cowl panel of my car. It wasn't there on very early cars, but was a production change. This foam sheet is sandwiched between the unibody and the cowl panel eliminating an "air gap" which can cause the panel to vibrate. I am quite pleased to say that I have found replacement foam that I honestly can't tell apart from the original, other than it is new of course! It looks the same, feels the same, and has the same density (to the best I can feel). I made up some replacement pieces today: Old for first pic... then old on top of the new sheet for the second pic... and pic showing thickness of old stacked on new: It's great when something goes so well. I made some extras. If anyone is interested in a set, let me know. Be aware that if you've done final body work or paint on your cowl panel without your foam pads, installation of these will likely move your panel somewhat. Best to utilize them during final bodywork prep. When I get the hardware back from being re-plated, I will be able to bolt on the cowl panel with these new foam supports which will positively locate the flat areas of the panel so that I can proceed with the final sanding required to get it prepared for paint.


-
Another possible source is Motorsport Auto. https://www.thezstore.com/page/TZS/PROD/classic08f03/40-2691 I have read that there are two manufacturers of replacement foam. I confirmed with the person I spoke with at Motorsport Auto that the version they sold me was made (or sold) by Distinctive Industries, makers of a good quality replacement re-upholstery seat kit also. You want to be sure to use both the seat kit and foam from the same manufacturer to avoid issues with fit. I believe the other manufacturer is "Seatz".
-
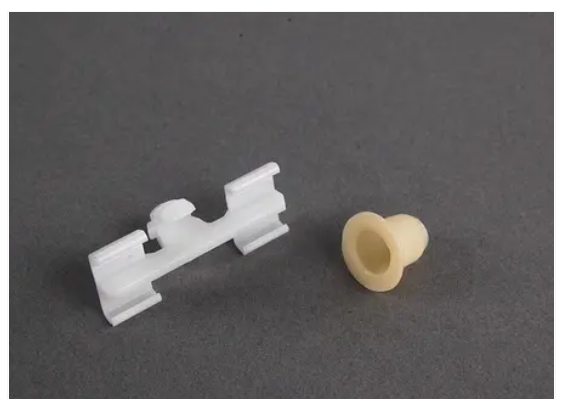
Ha! Some of it is obsessive - no doubt. I appreciate your input. My first car was a 4-door 510. Being just 16, it was a prized possession, and I used to wash it about every week. Water got into that car and under the floor mats something fierce. One day, to trace the sources of the leaks, I set up a hose so that water showered down heavily on the car. After about 20 minutes, I got inside and looked to see how water was getting in (I had removed the kick panels and floor mats, etc.). I was quite surprised to see that a main point of ingress was one of the bolts clamping the LF door hinge to the car. A steady stream of water was wicking along the bolt threads from outside to inside the car and running downward from there, collecting into a pool on the floor. Interestingly, though I thought the windshield seal might be leaking, it was not. I also recall finding that if I pointed a spray of water from the hose at the c-pillar vents, water would fly in... it would get directed upwards by the internal part of the vent, and then drop down onto the trunk floor, where gravity would direct it to the lowest area under the rear seat bottom. When I restored my first 240z in 1993, I had to reconstruct the dog leg areas of the car with new metal. A few weeks after I got the car painted I was shocked, and upset to find standing water in the dog legs of that car. I couldn't figure out how it was getting in and just drilled a hole in the bottom of the dog leg area so the water that was collecting there would drain out. For this car, I'd like to know that when I wash it, or if I get caught in a thunderstorm with it, no water will enter through the emblem holes and dribble down into the dog legs, or down into the back edge of the rear hatch. Newer cars tend to utilize water proof solutions like this BMW clip, which utilizes a rubber plug, of sorts: Given my previous experiences, I figure I might as well address these known water entry points.
-
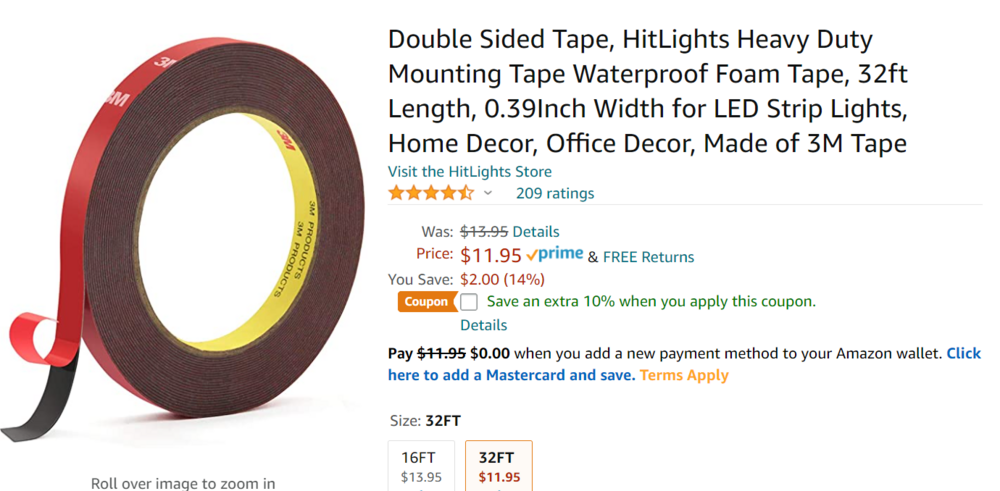
Instead of the tubular clips? Hmmm. Or maybe just make a gasket of it around the posts and still use the tubular clips. I've blobbed on clear silicon before and crossed my fingers that it sealed. It makes a bit of a mess. I am looking for something I can be more sure of getting a waterproof seal. Are you thinking this? https://www.3m.com/3M/en_US/p/d/b40069443/ Or maybe this?
-
One of my goals for the car I am restoring is to address points of entry for water into the body of the car. If you look at the design that was originally used for the emblems on the car, (hatch panel and quarter panel in particular), it is obvious that water enters through the holes in the panel. I've been thinking of a way to seal them. These may be a good option. I am thinking of continuing to use the factory metal clips on the posts of the emblems, but to put these on and heat shrink them around the clips. I think I will give it a try on a test panel. I need to come up with a few other things for my order with McMaster-Carr.