Site will be going down for maintenance today

inline6
 Subscriber
-
Joined
-
Last visited
Everything posted by inline6
-
 I have been an avid Datsun enthusiast for several decades now. I have accumulated a ridiculous number of hours looking for parts. I've probably logged thousands of hours on Ebay. I have search Craigslist, even utilizing special Google searches to search different locations across Craigslist nationwide. I have "searched" Facebook, joined Facebook groups specializing in Datsun... I have searched Google high and low. I have found various sites that sell Datsun parts. I have looked through as well as searched many of those sites which I found via Google. I have used Datsun forums, their classified sections, etc. I have used Datsun car clubs, contacts I made via those clubs... I have used Datsun forums, and their classifieds. I am a Datsun parts searching expert. I am sure many of your are as well. So, I'd like to throw a few questions out to fellow Datsun part seeking experts and amateurs alike and see what y'all think. I realize that pricing is a pretty big topic. So, I think a bit more restriction of the discussion would be helpful. Let's not talk about used parts. Let's not talk about parts which are new, but are quite probably if not for sure discontinued and no longer available. Let's just talk about new parts which are not backordered. I think the scope can include aftermarket parts, as long as these are commonly available from more than one vendor (and orders can be fulfilled). And the scope can include OEM Nissan parts, which are brand new, and available from Nissan of North America. Why are prices of these new parts, in this day and age of the internet, so wildly varying from one vendor to the next or from one dealer to the next? Take for example, OEM Datsun parts which are still available as one classification. Why the hell is there such a wide range of pricing for the same readily available part? Are the people pricing them at much higher prices than others idiots? Ignorant? Both? Or, are they the smart ones?
 -
I heard from Steve at Precision Plating yesterday. They will be plating my parts in about a week. I am excited to get them back soon and hope they look amazing.
-
Yikes 🥶. That car looks to have had an extensive going over, and the quality doesn't seem to be worthy of the price to me. But what do I know?
-
I am happy for you - job well done. It is nice to see hard work, and wisdom with regard to hiring a photographer, editing the video, etc. pay off for you.
-
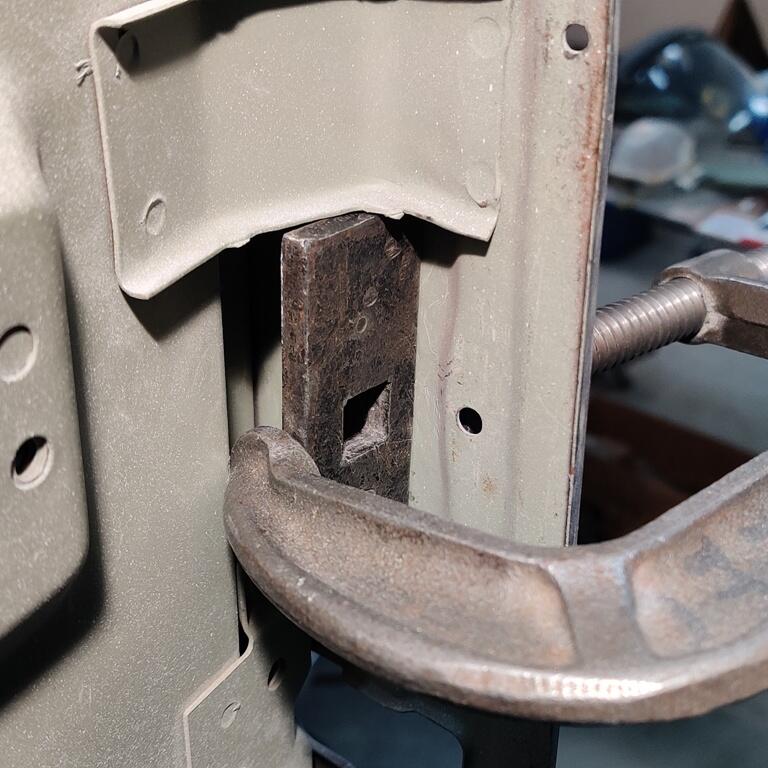
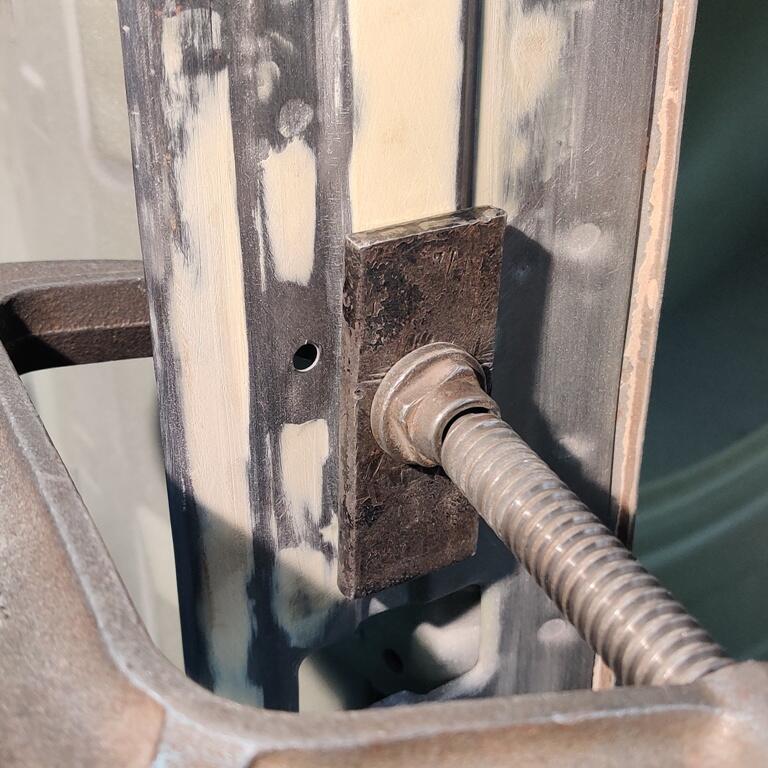
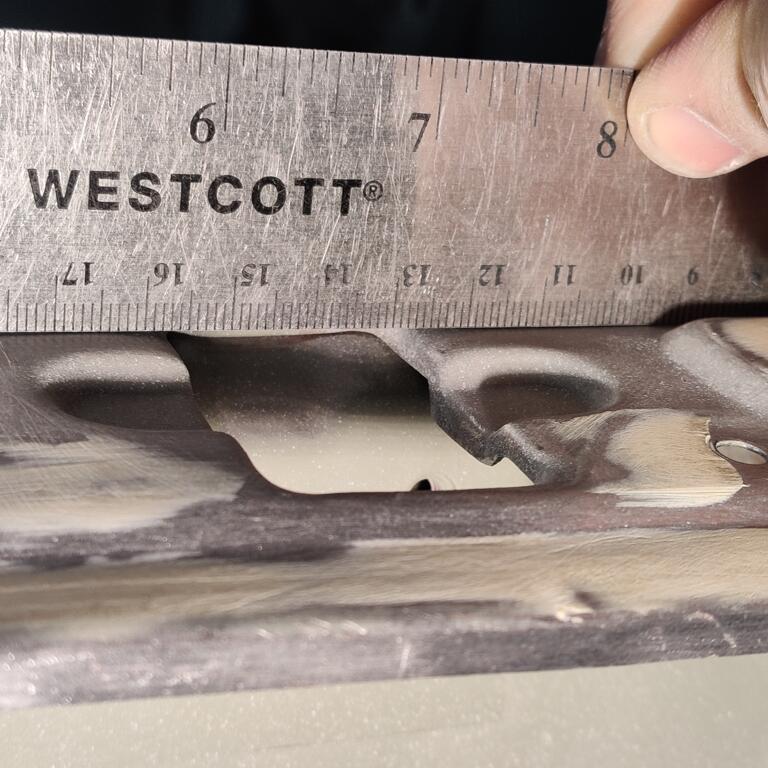
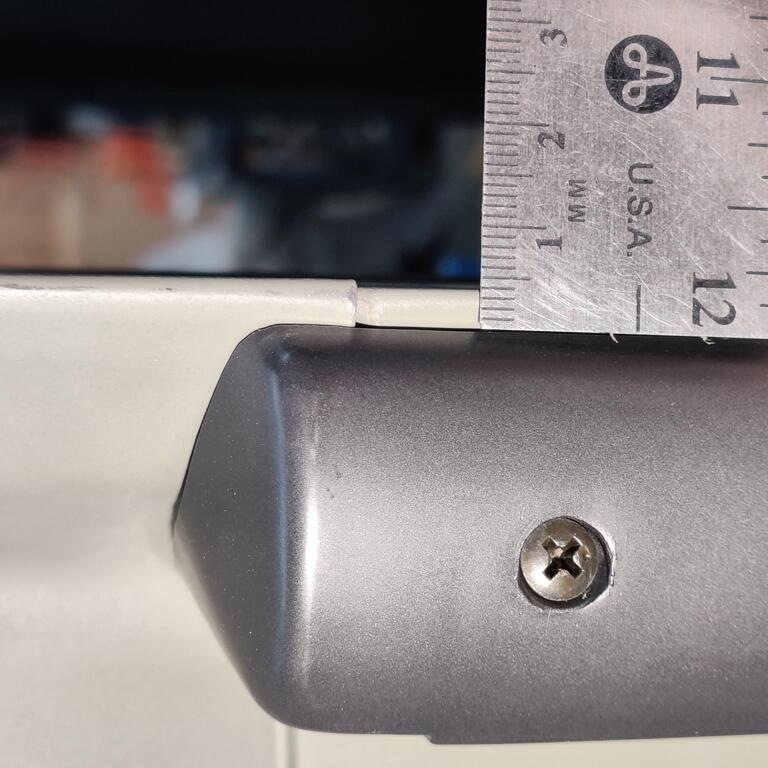
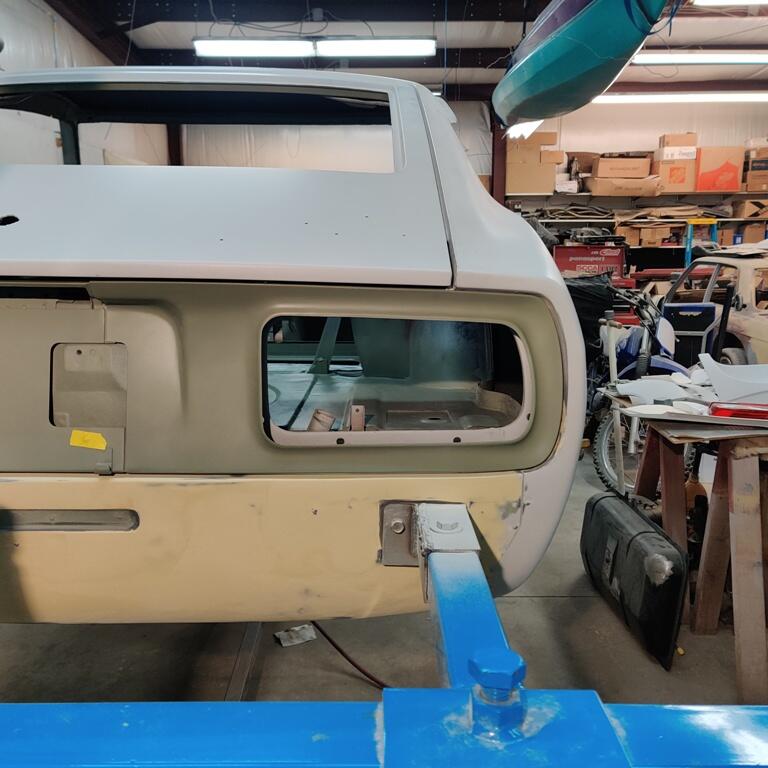
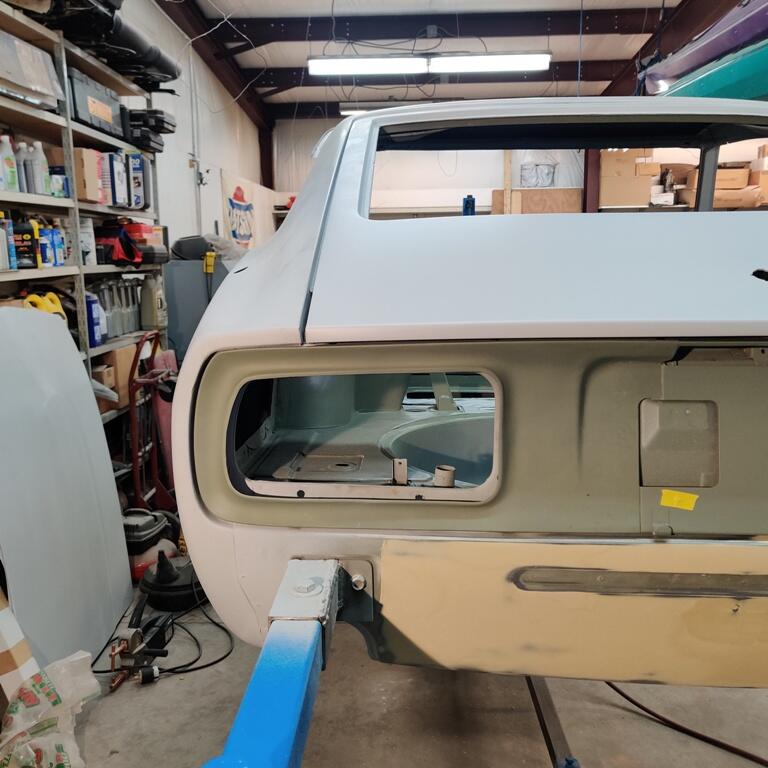
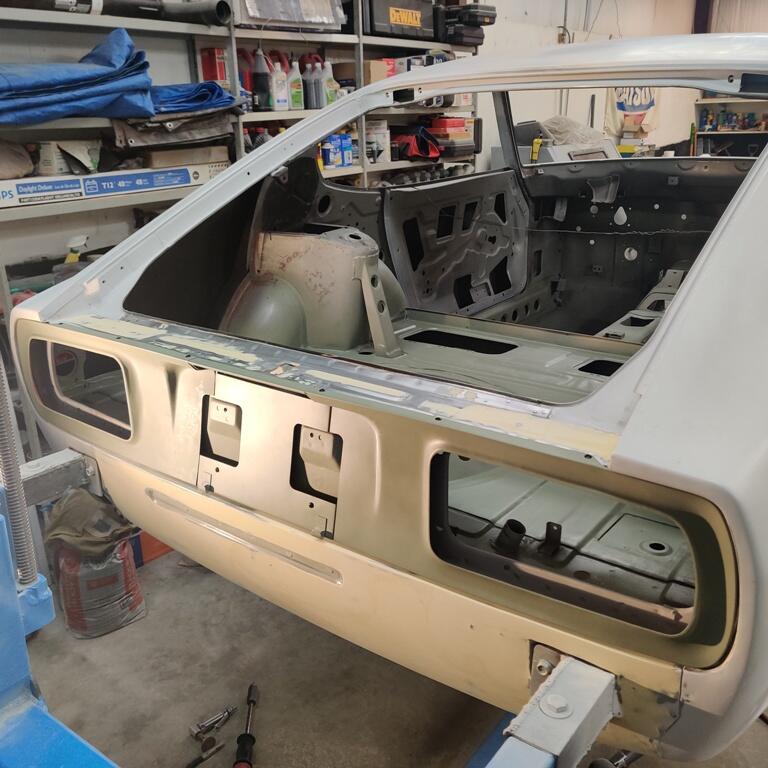
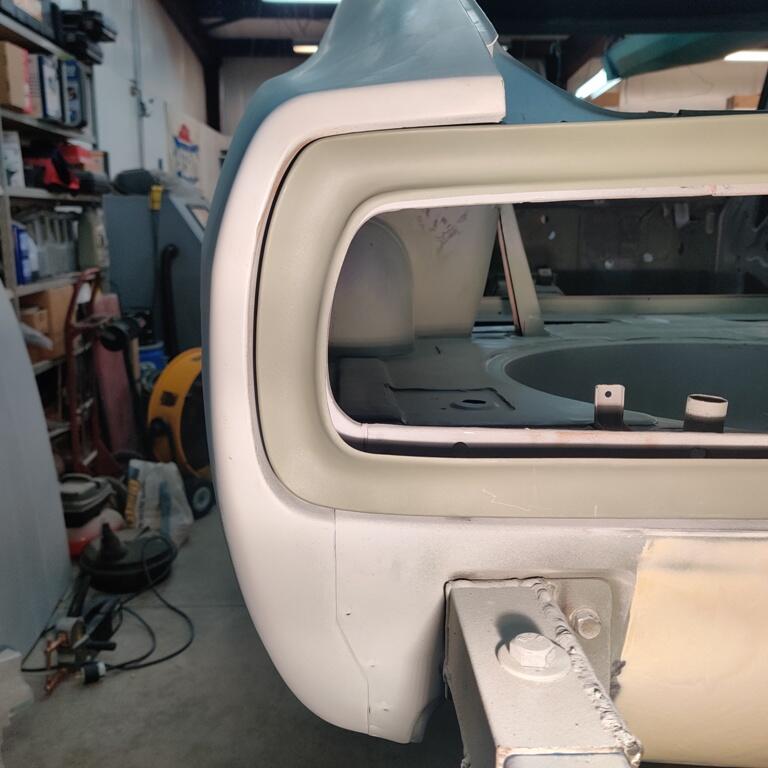
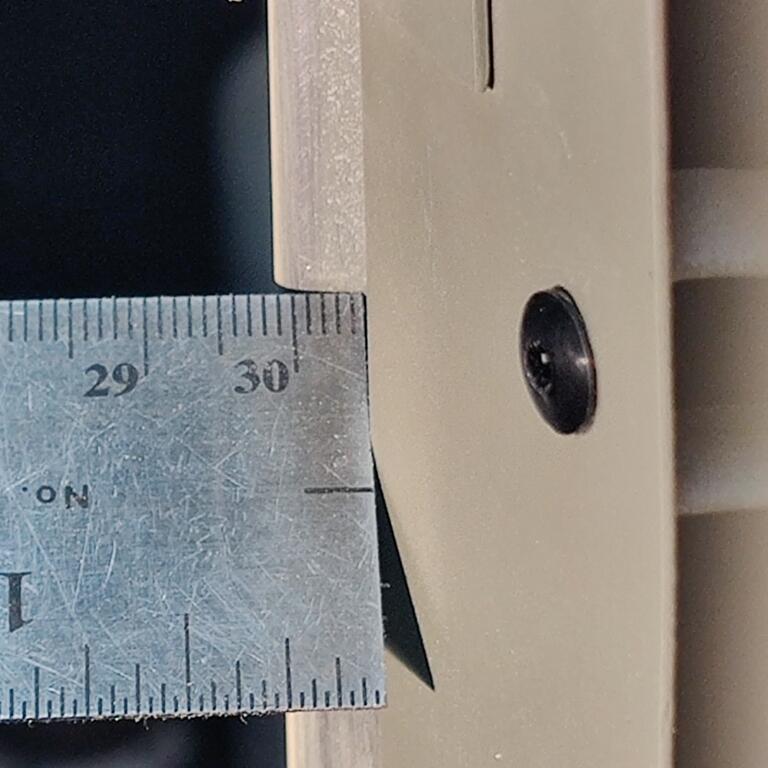
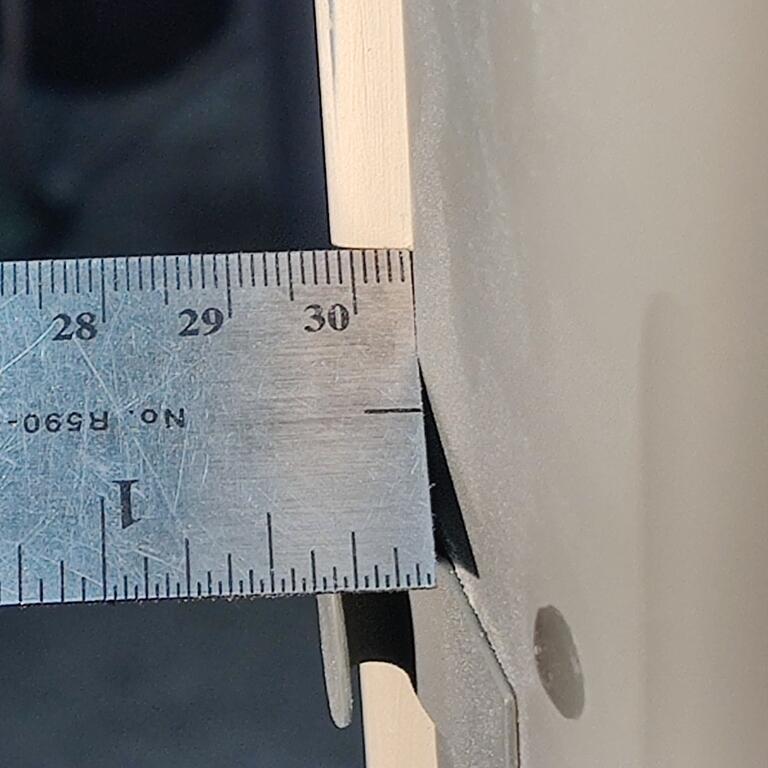
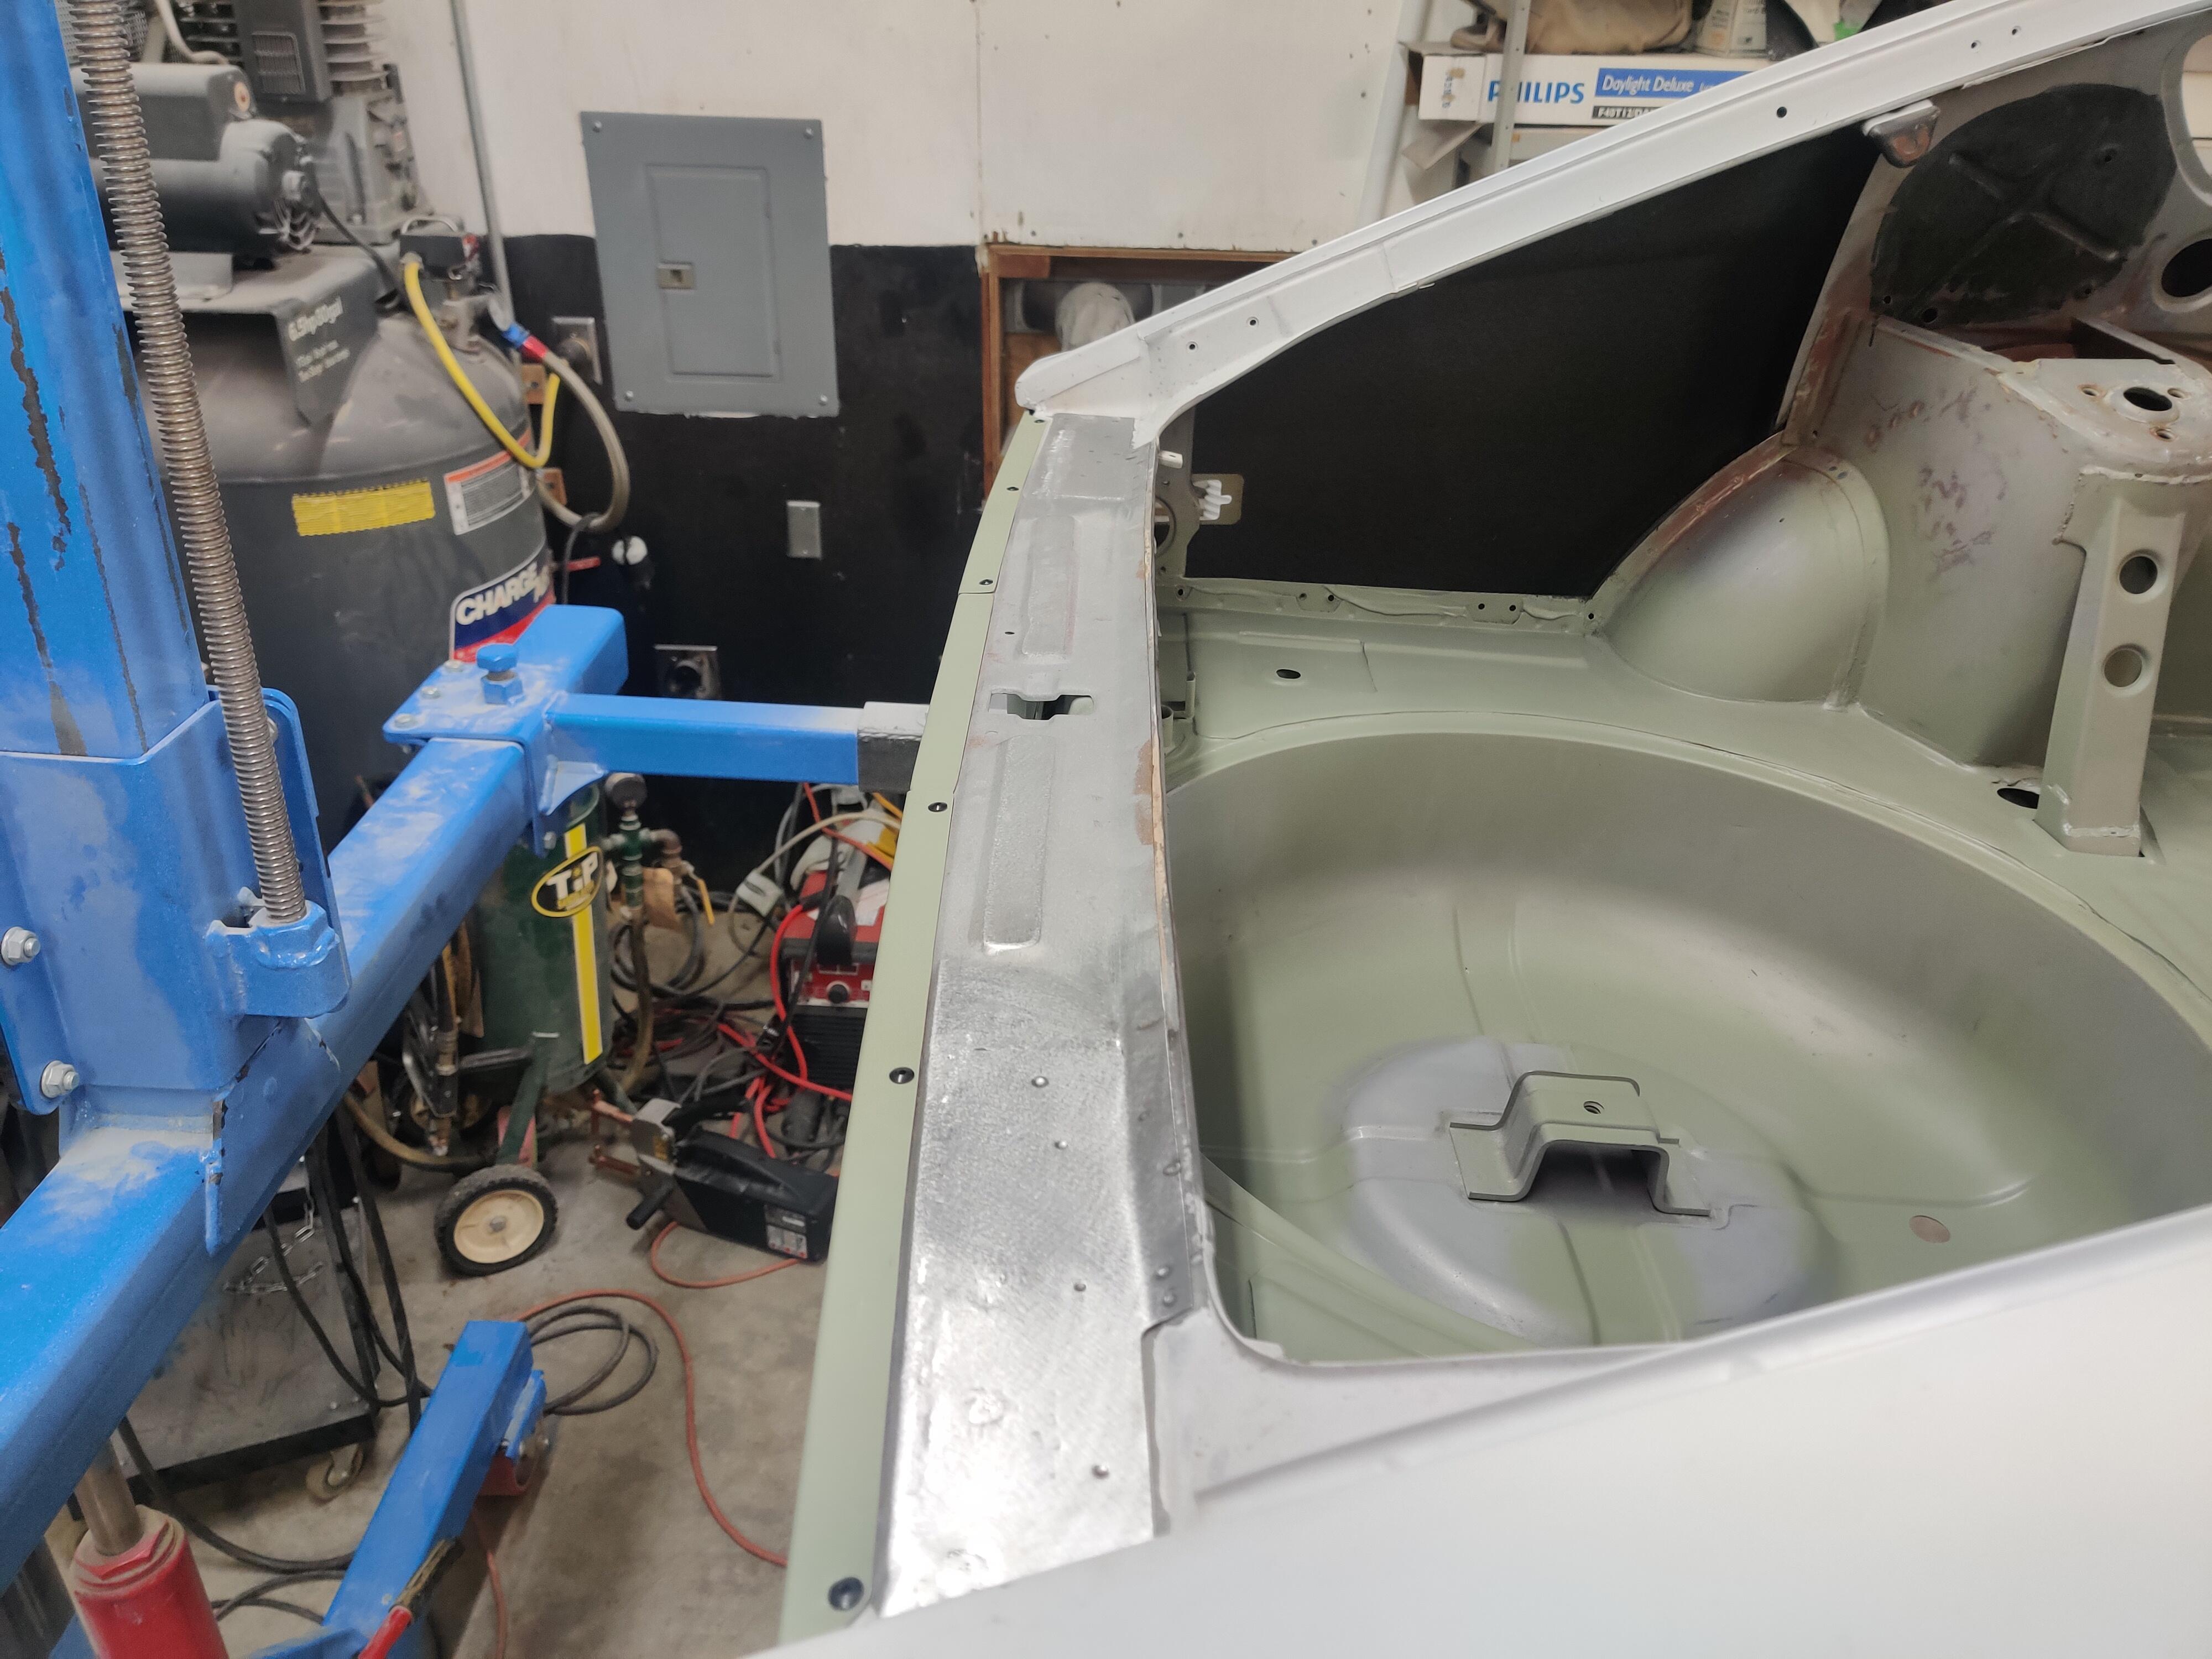
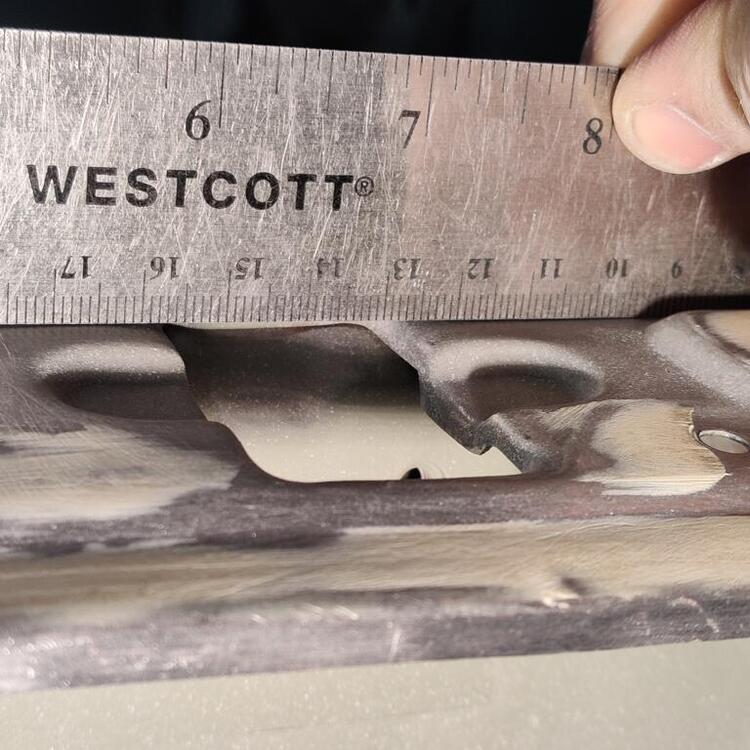
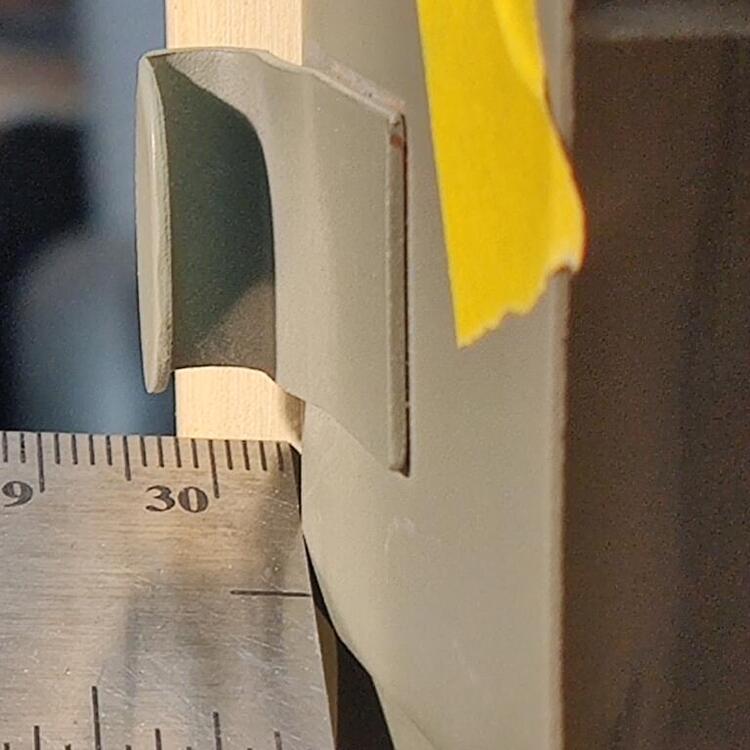
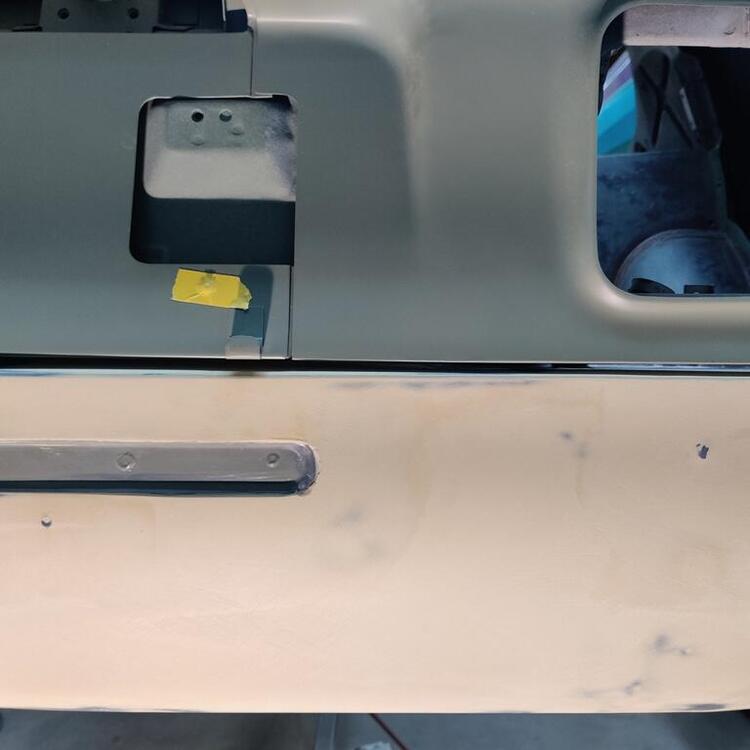
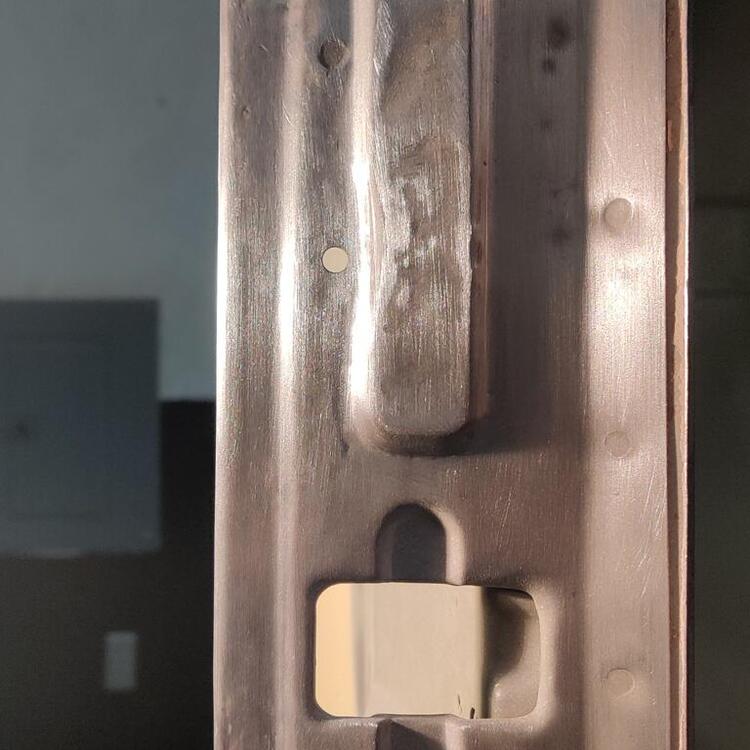
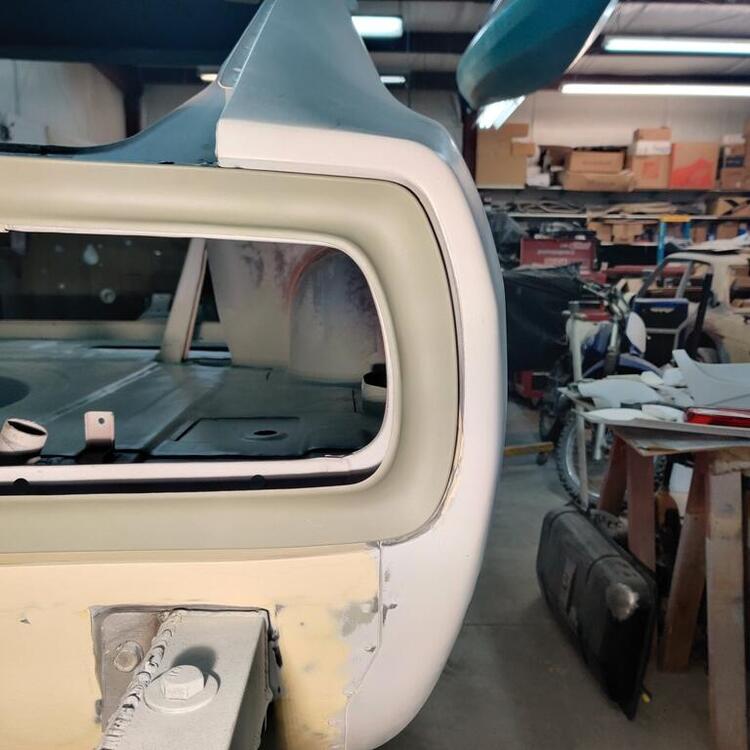
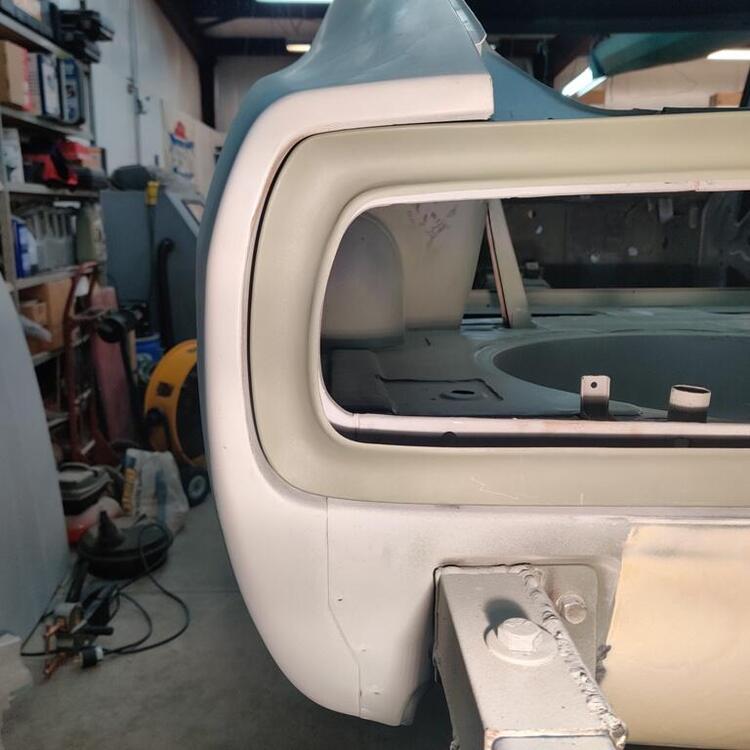
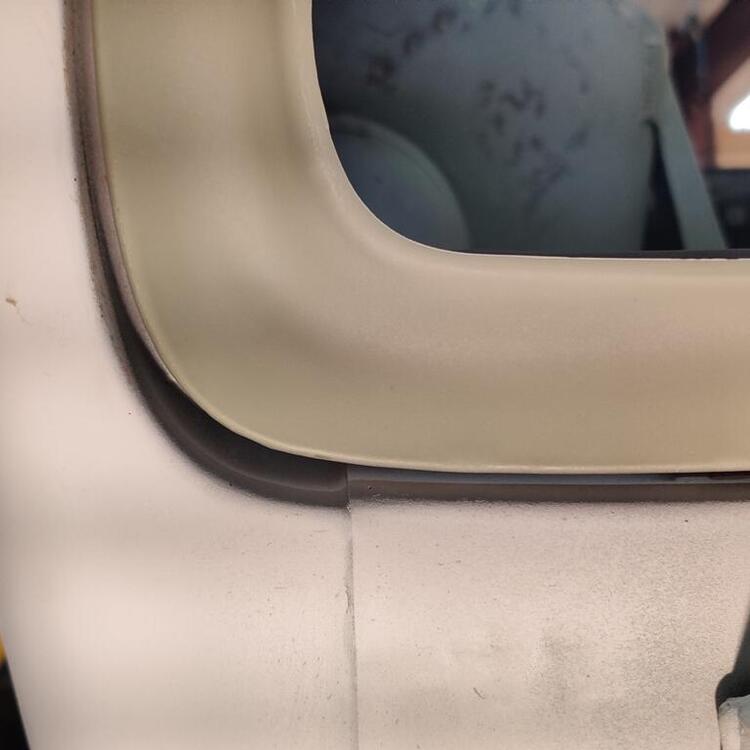
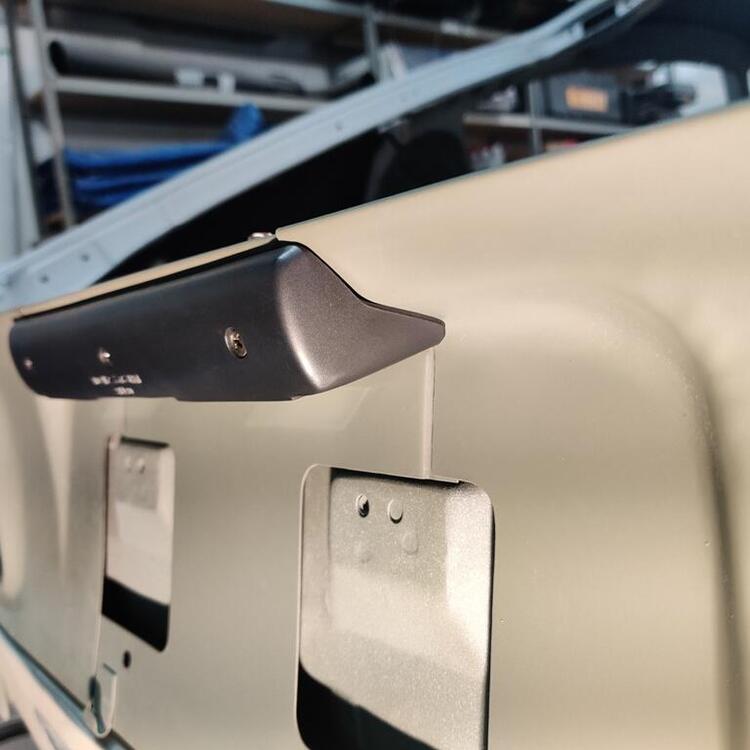
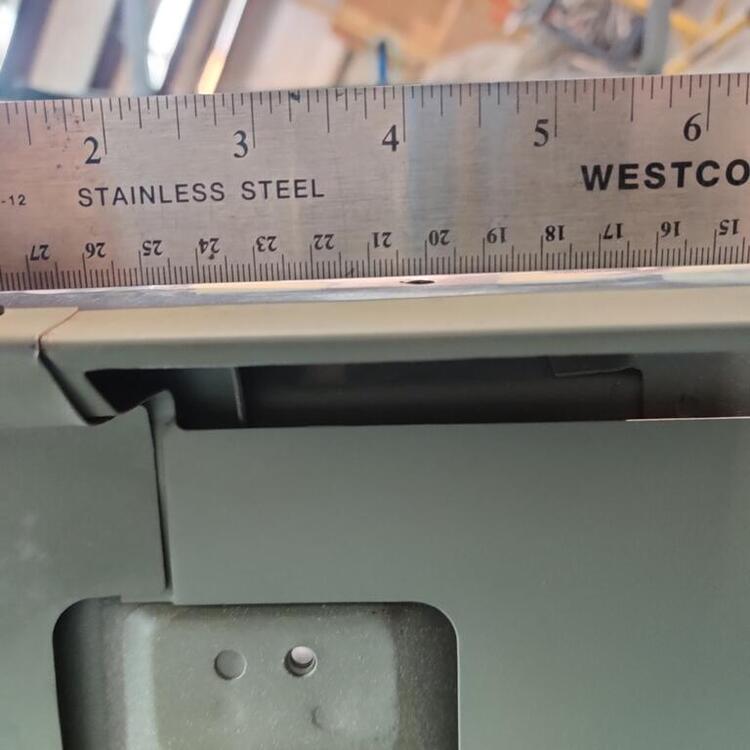
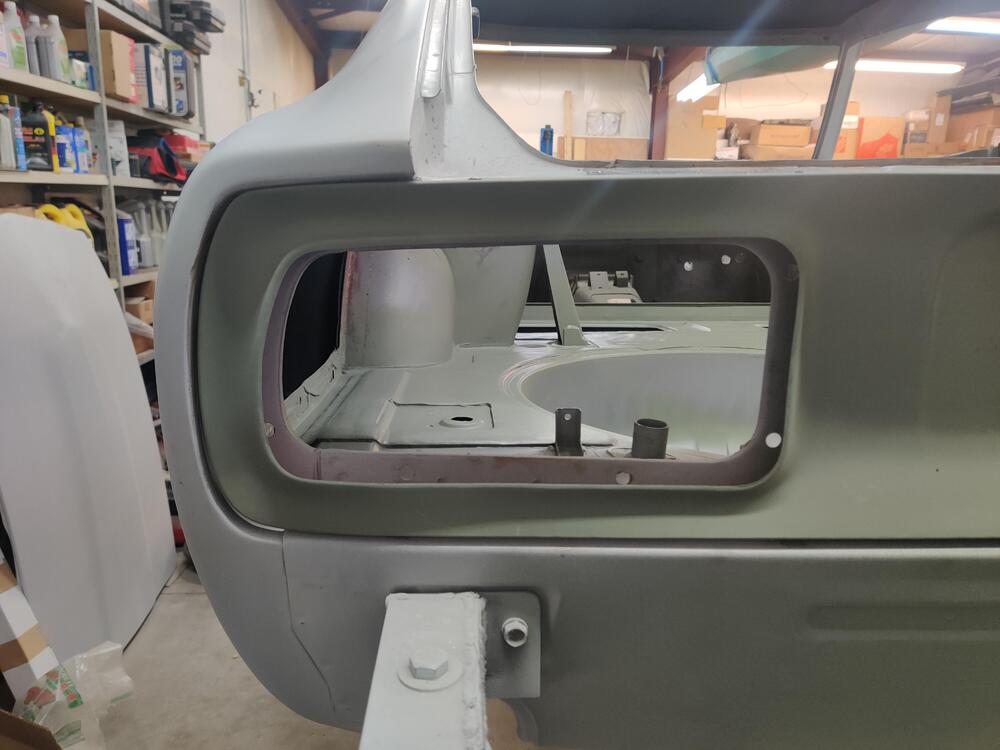
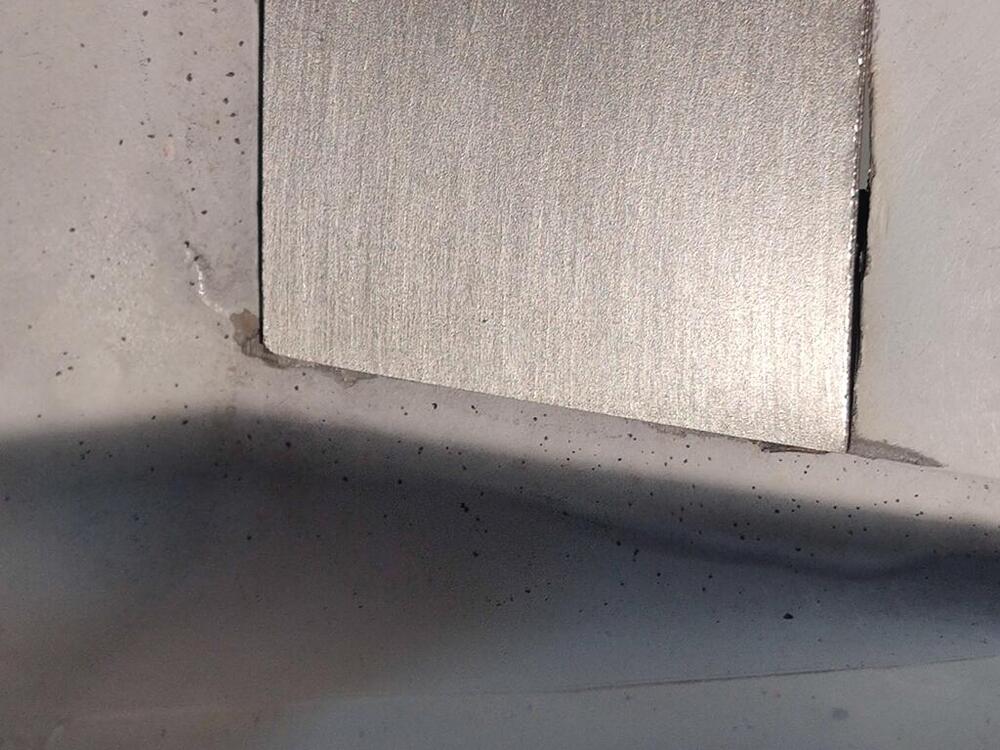
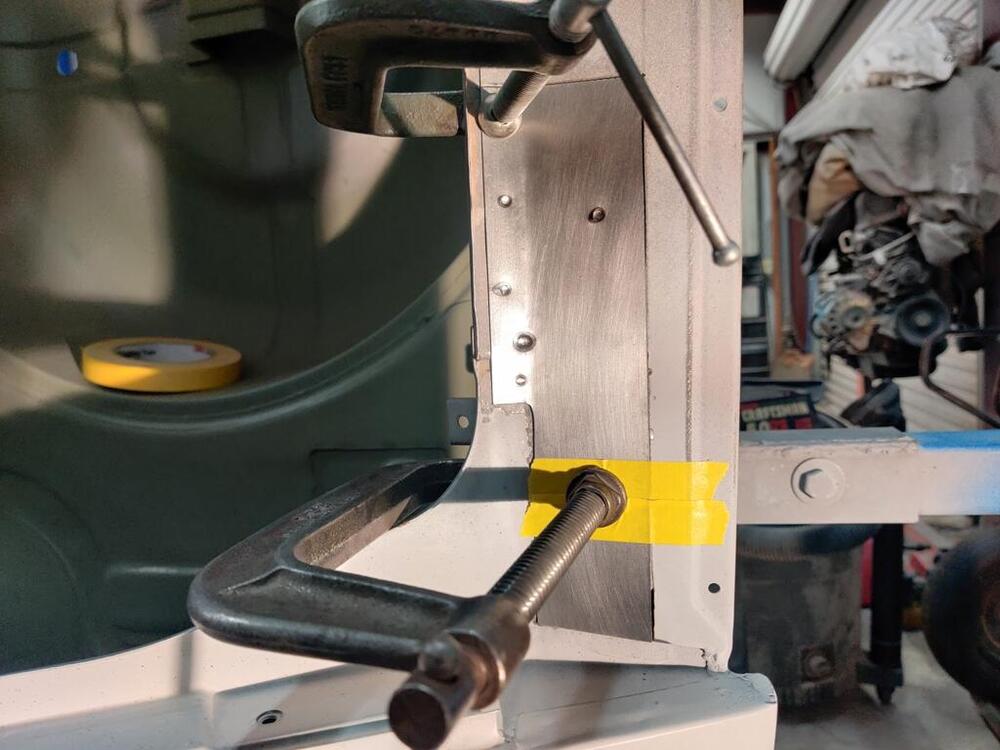
I had today off from work, so I worked on adjusting the tail light panel to make the trim panels and license light fit better. A straight edge laid across the hatch latch opening revealed a slight gap on the left side. Because the top panel of the tail light panel is not flat, I used sections of flat bar and a good quality C clamp to persuade the low spot upward. The hole just to the left of the flat bar in the third pic is the license light (left) mounting hole. After raising that up, I had improved things by about 1/32". I reinstalled the license light and the measurements on each side were equal. Unfortunately, I still had a gap between the license light assembly and the left tail light panel (first pic). The right side still fit nicely (second pic). Given that the license light was level, I pointed my attention at the left tail light panel. A little work with hammer and dolly and the "ledge" was brought downward to meet the license light assembly (third pic): Here is the license light assembly after finishing the fitting work: Next, I turned my attention to the bottom of the three trim panels. I measured the depth of the middle license panel at the left, center, and right - the right side was pushed in by 2 mm compared to the left and middle. So, I had to work a bit on the "stand off" to which the right side of the license panel secures. It was still not 100% right, even with the work I had done on it originally (it was squashed a bit when the car was hit). I was able to straighten it out the needed amount so that the depth readings were the same: left, middle, and right. Finally, I test fit the hatch and looked at the gaps at the top and bottom of the three panels: The fitting of all these bits took many hours, however, I think I finally have it. Next, I will pic back up on filler work on the tail light panel and get that looking really nice.


-
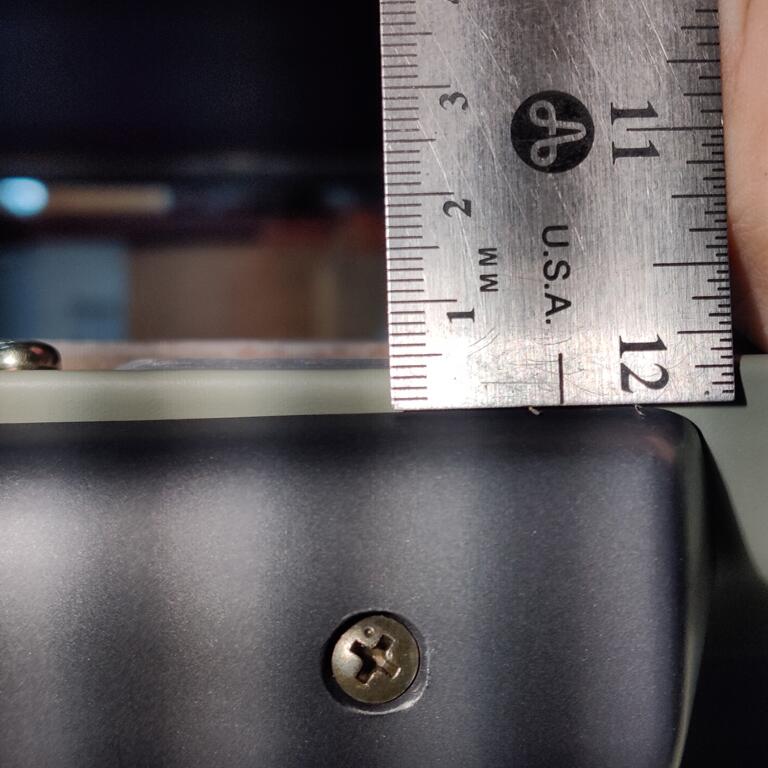
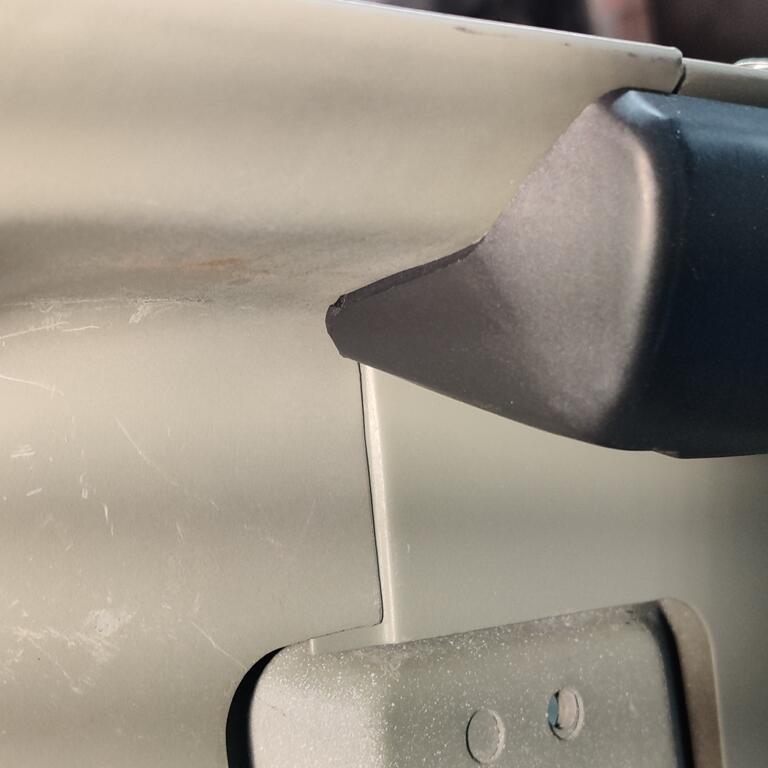
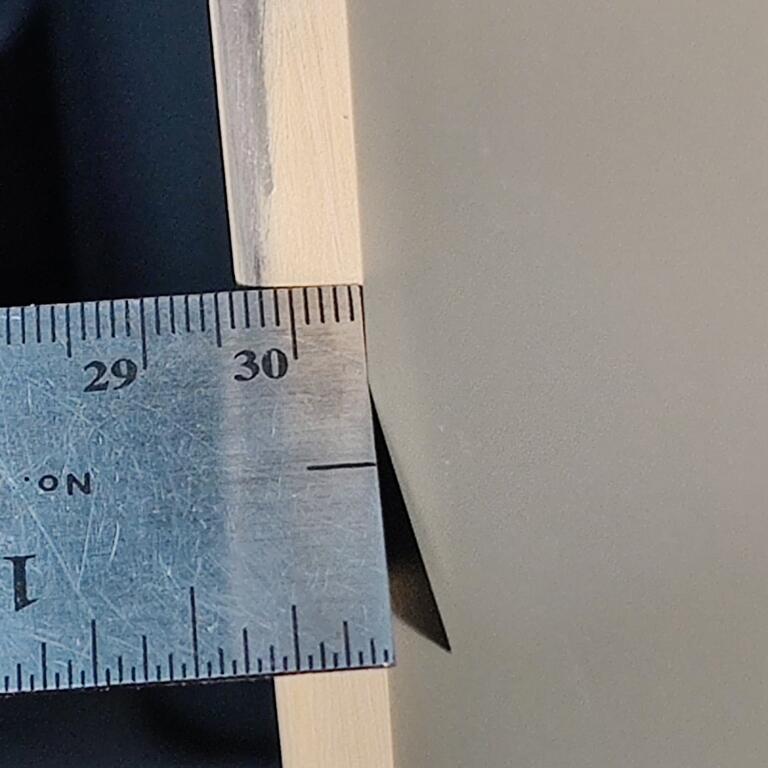
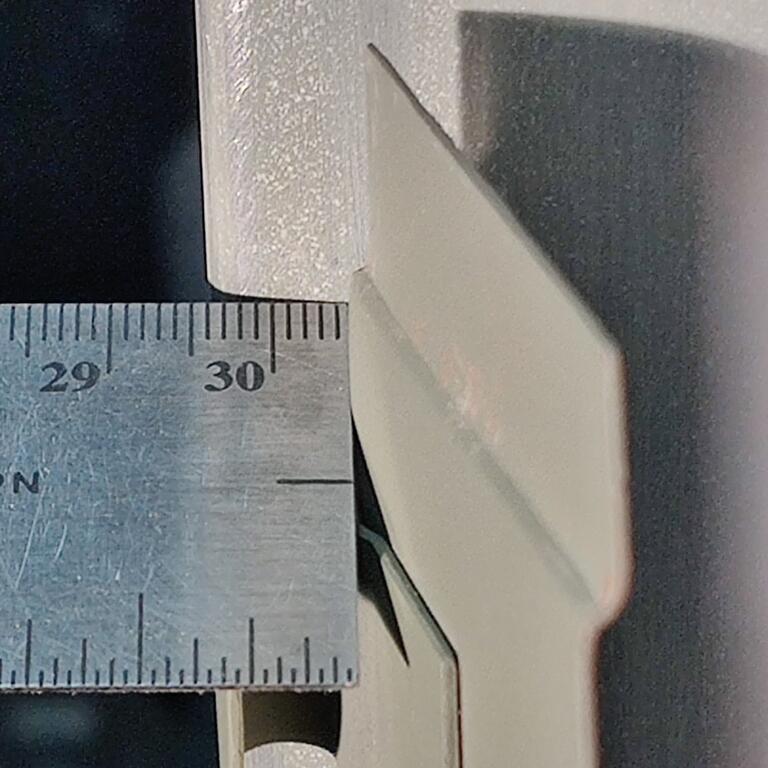
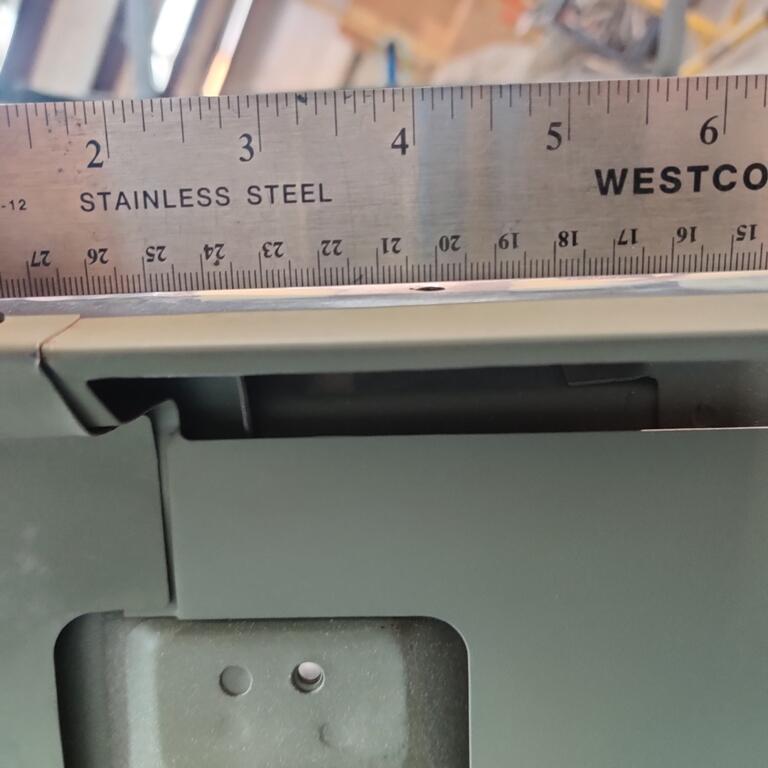
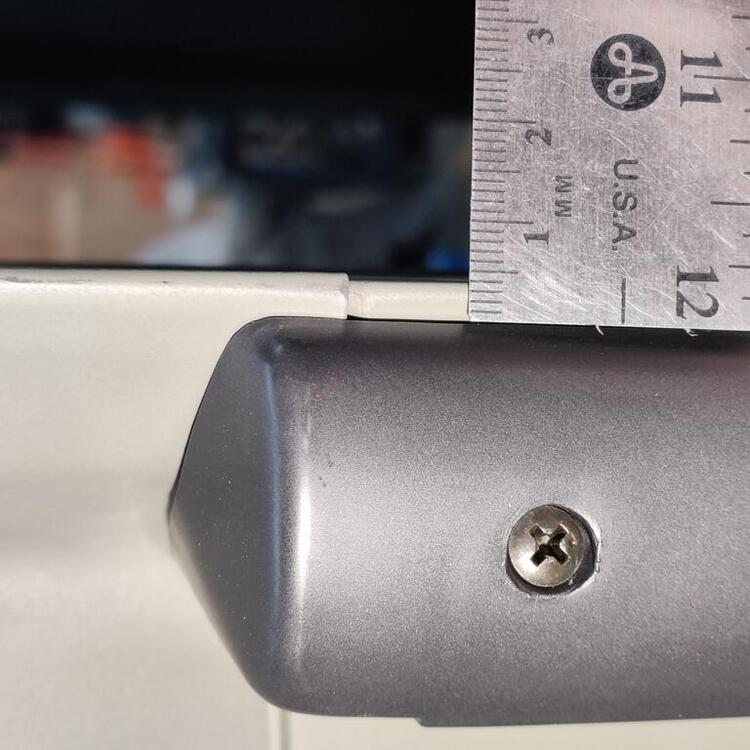
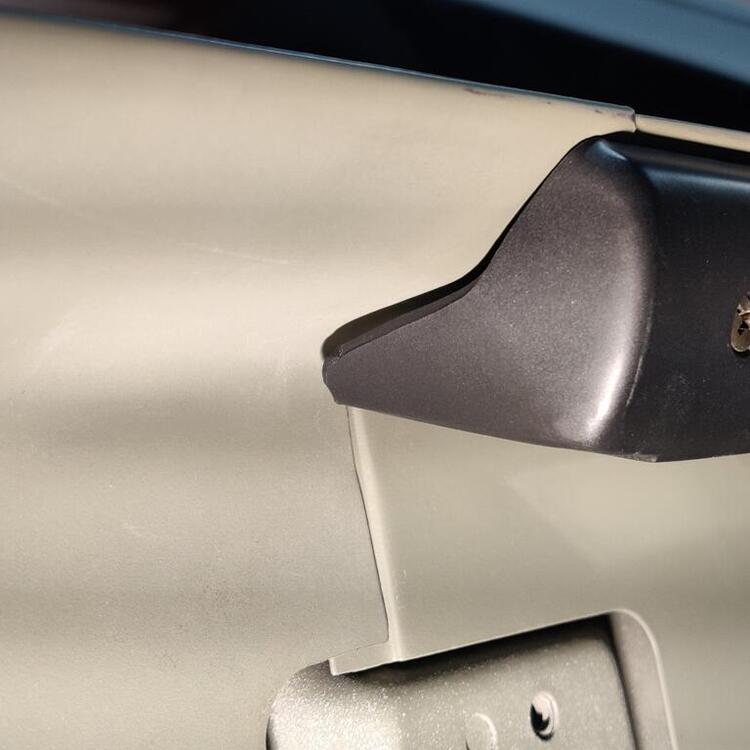
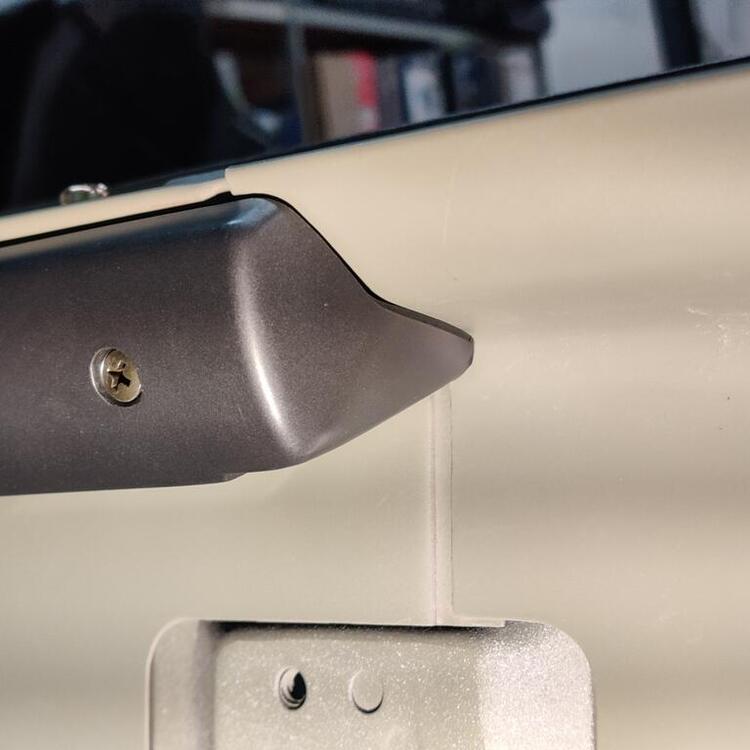
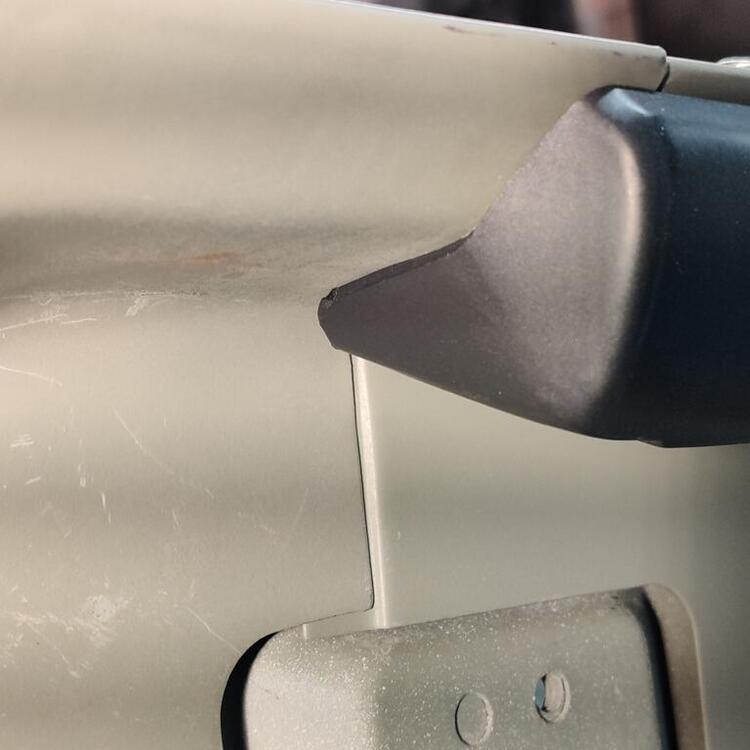
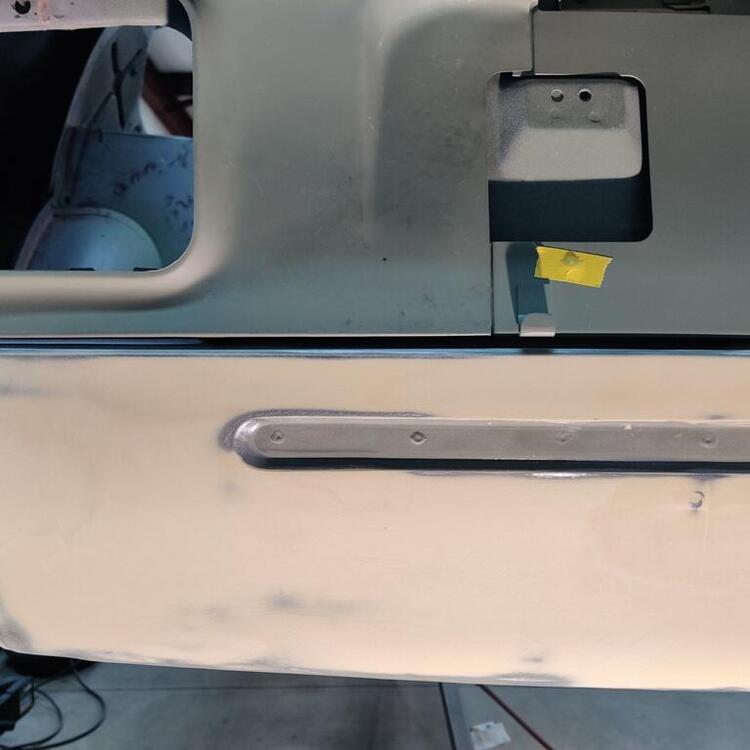
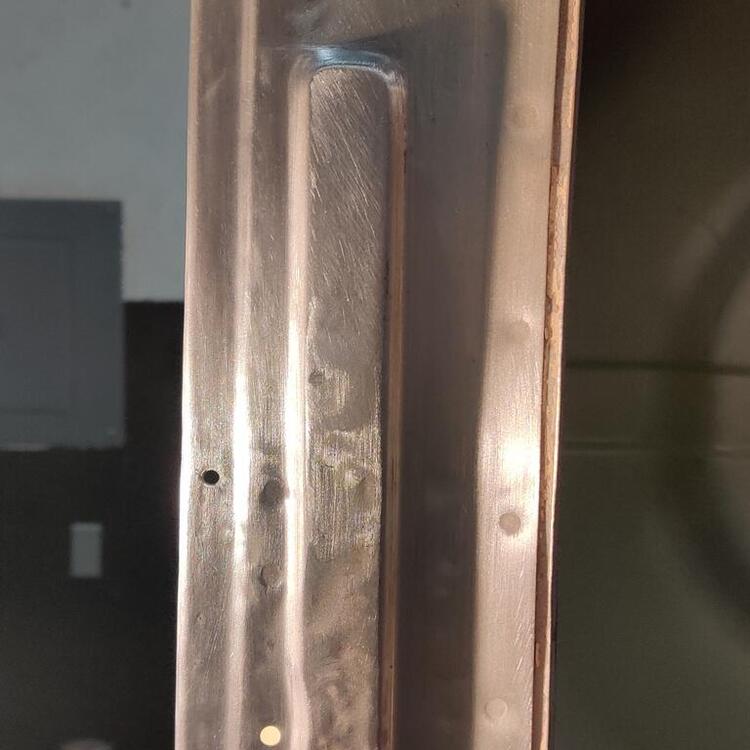
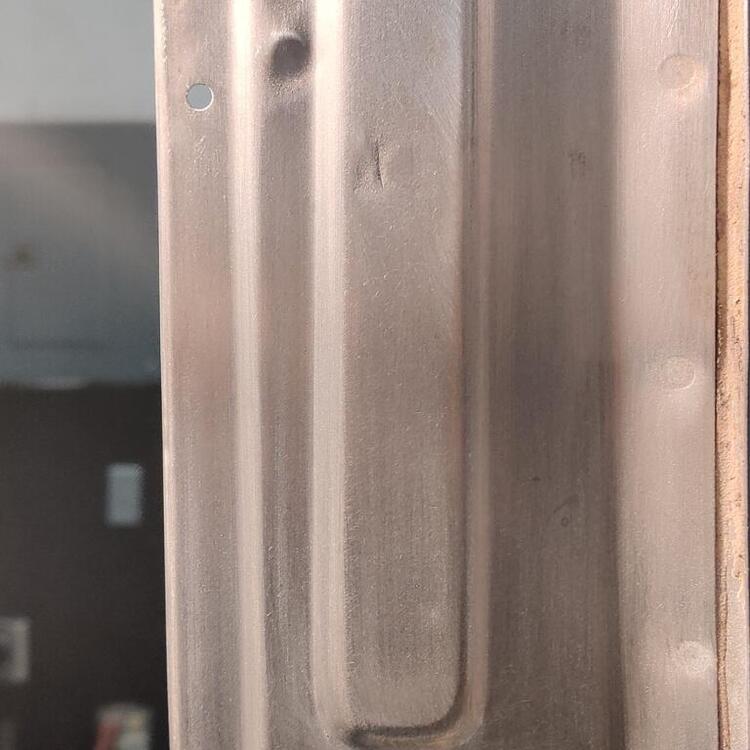
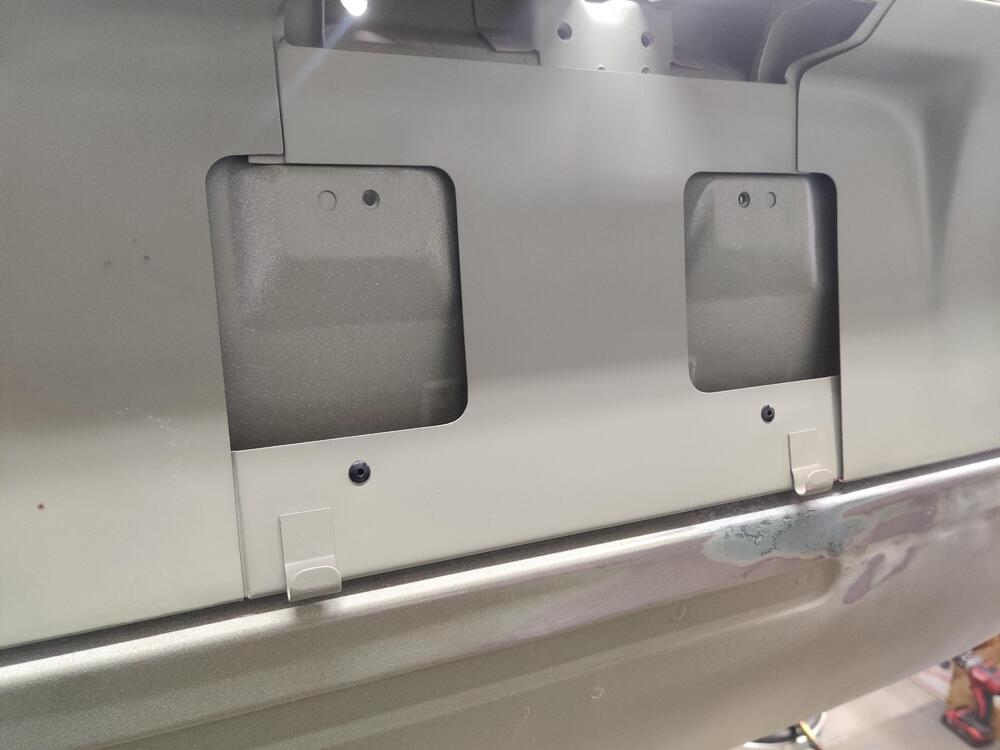
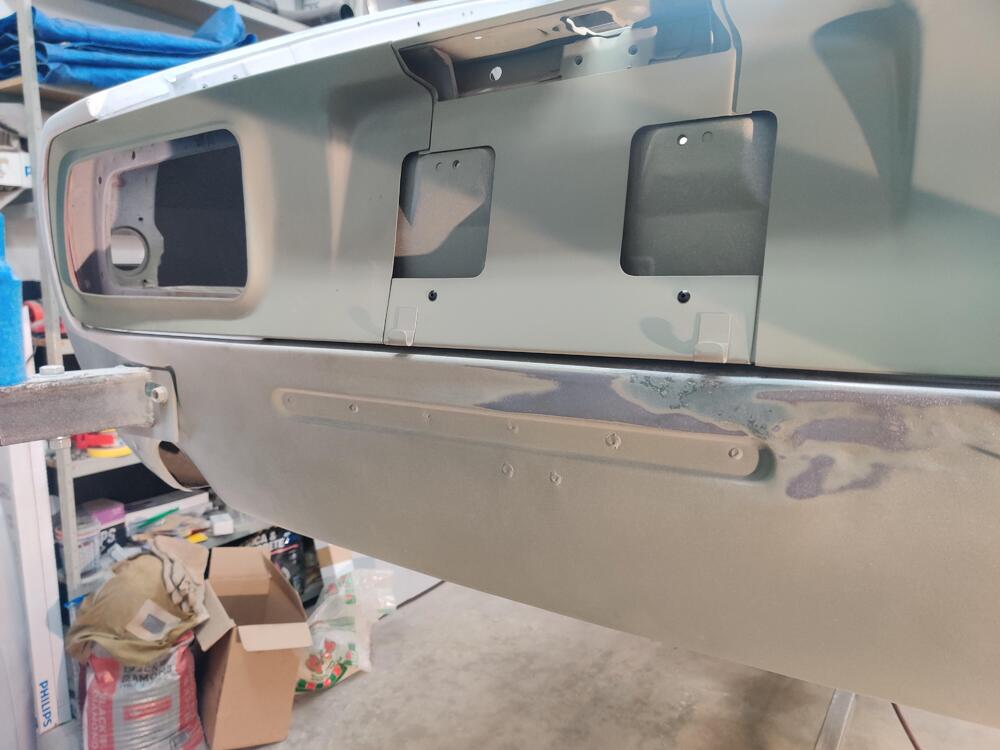
Picking up on the tail light panel, I applied some filler and worked further on the tail light trim panel fit. I also got out the new old stock (nos) license light assembly to check its fit. I am glad I did because I have a fit problem. I did not expect it, but better to find out now than after paint. It is wise to check panel fit as body work is done, especially in areas that it is known that a car was damaged. This is a new learning for me that I discovered during the restoration of this car. Using a bright LCD light at a 90 degree angle helps show high and low areas: The tail light trim panels are pretty flimsy pieces of metal, generally speaking. Over 50 years, they likely have taken some abuse and therefore, it is a really good idea to get them to fit perfectly before covering them (and the car) in paint. The gap between the right panel (first pic just below) and the quarter panel (right edge) is a tad narrower than the same gap on the left panel to the quarter panel. Also, it is hard to see (third pic just below), but the bottom edge of the three trim panels (left, right, and license) does not stay in line with the sheet metal on the car. In the center, the body of the car sticks out a bit more than on the two ends. Because this car was hit in the rear lightly, I am checking all of the fit and adjusting. These two pics are of the left and right side of the center, license plate trim panel. There are small sheet metal stand offs that locate the bottom of the panel away from the body. A .5 mm difference was measured - so I need to adjust it. While I am at it, I want to make sure the gap around the left, bottom and right edges of the three panels is as uniform as possible. The left lower corner (third pic) is inconsistent and much wider than... the right lower corner (first pic). There was no damage to the car in these inside corners, so this fit is "factory". The second and third pic show the width of the gap along the bottom. It looks pretty good. The license plate light doesn't fit very well at the moment. Glad I tested fit. The top edge of the panel needs some adjusting to bring the left side mounting screw area upwards a bit: More hours down, and more to go for sure on this area.


-
Not every day you can buy a 12k mile 240z in really nice condition. I didn't want it so I could show it or drive it though. I thought it was worth a shot to try to get it for a price that would leave room to cover the cost of the work it needs to take it to condition 1 or 2 level and then sell it for a profit. That car is most likely going to be a trailer queen (or stored in someone's private collection) from now on anyway. I was thinking of bidding again just before pwest and steamboatenthusiast hit the gas. Oh well. CW240Z72 - Your car is off to a strong start!
-
Ok, I'm in.
-
Thinking of bidding.
-
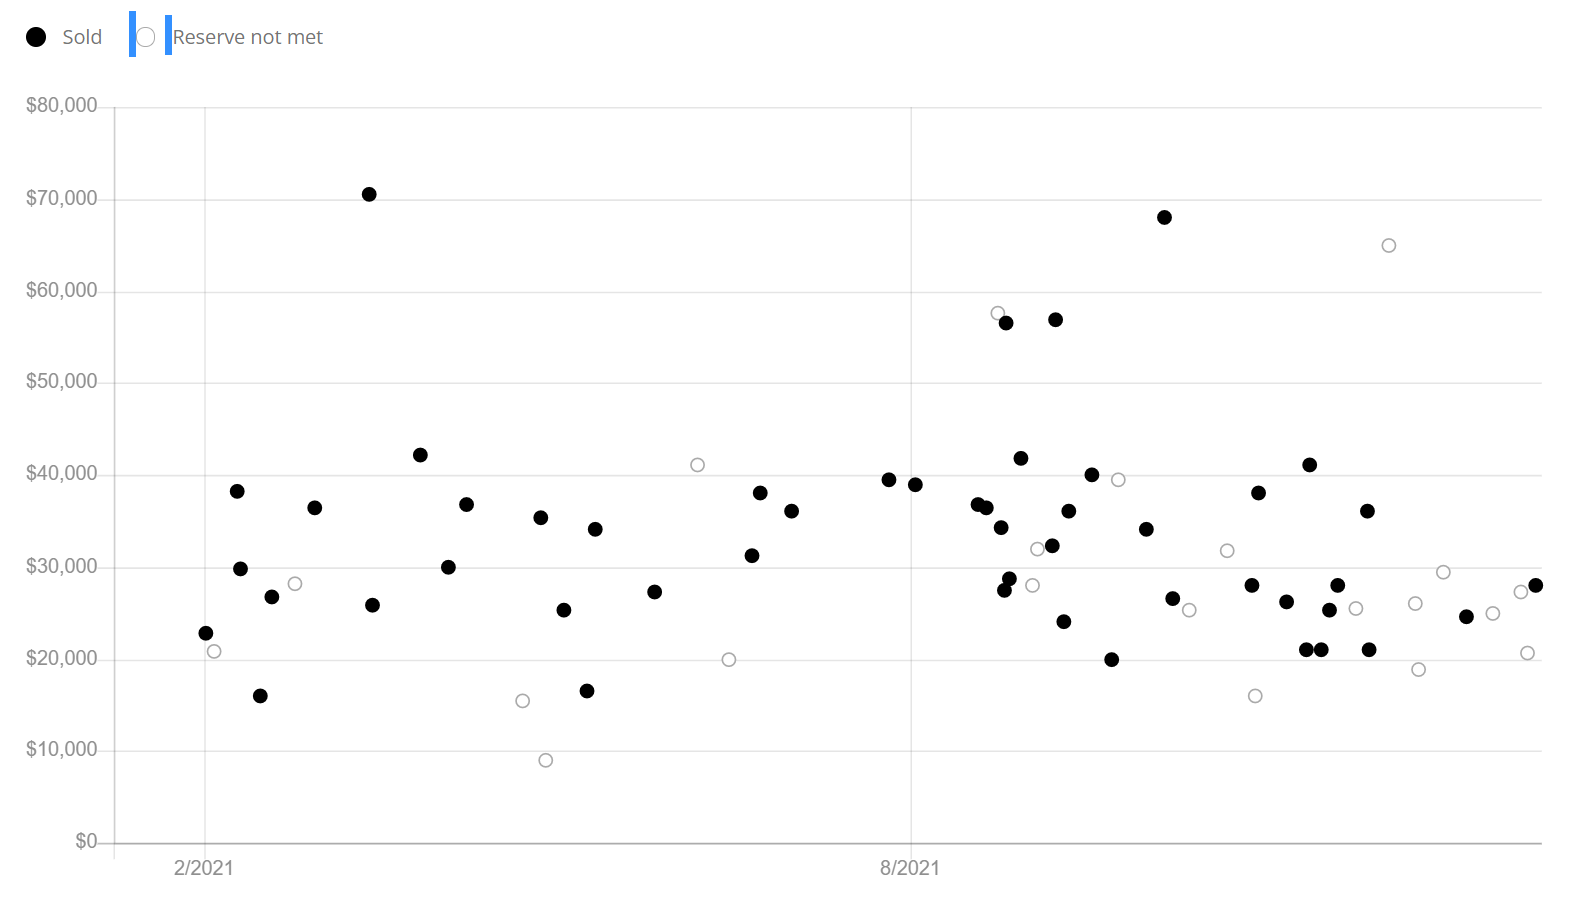
Judging strictly by looks at the chart BAT supplies (chart below filtered for last year of 1969-1972 240z's only) values may be coming down a bit off of their highs. Of the last 11 69-72 cars, only one broke into the $30-40k territory - 7 were reserve not met. Probably many factors in play (holidays, cars not as high a quality, etc.) but I think the values have receded a bit. For an auction, It only take a two or more determined buyers though, so anything might happen.

-
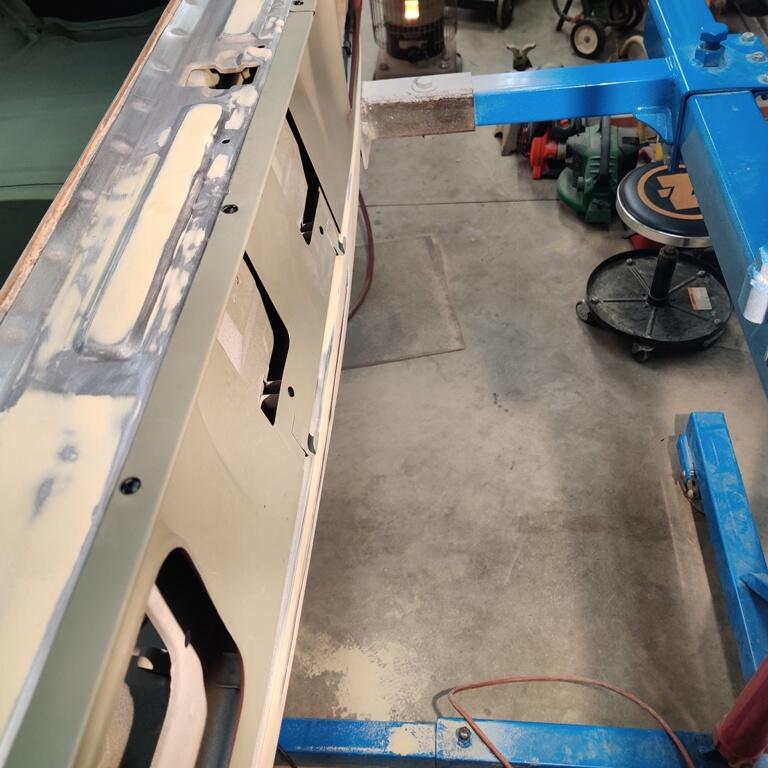
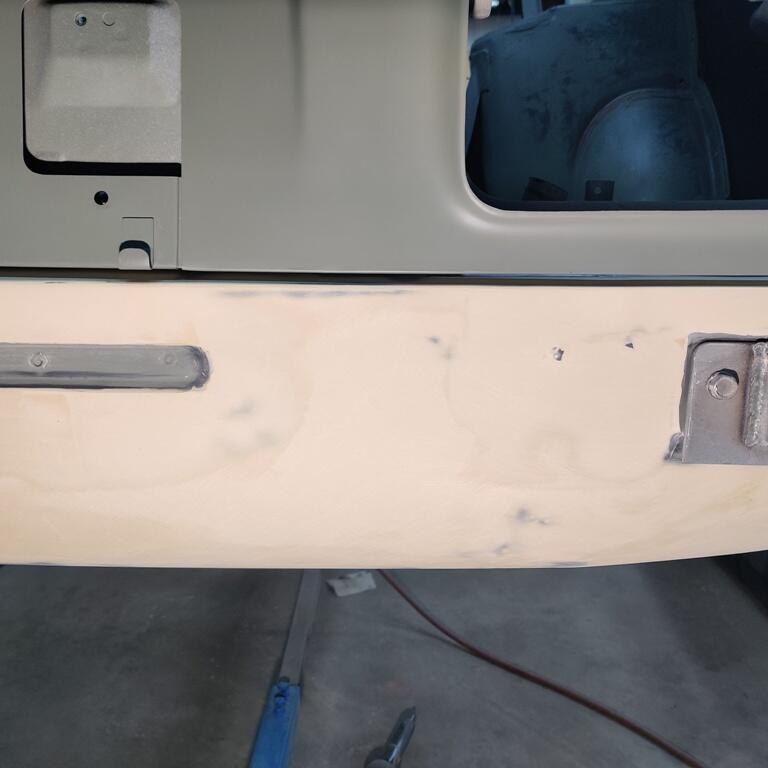
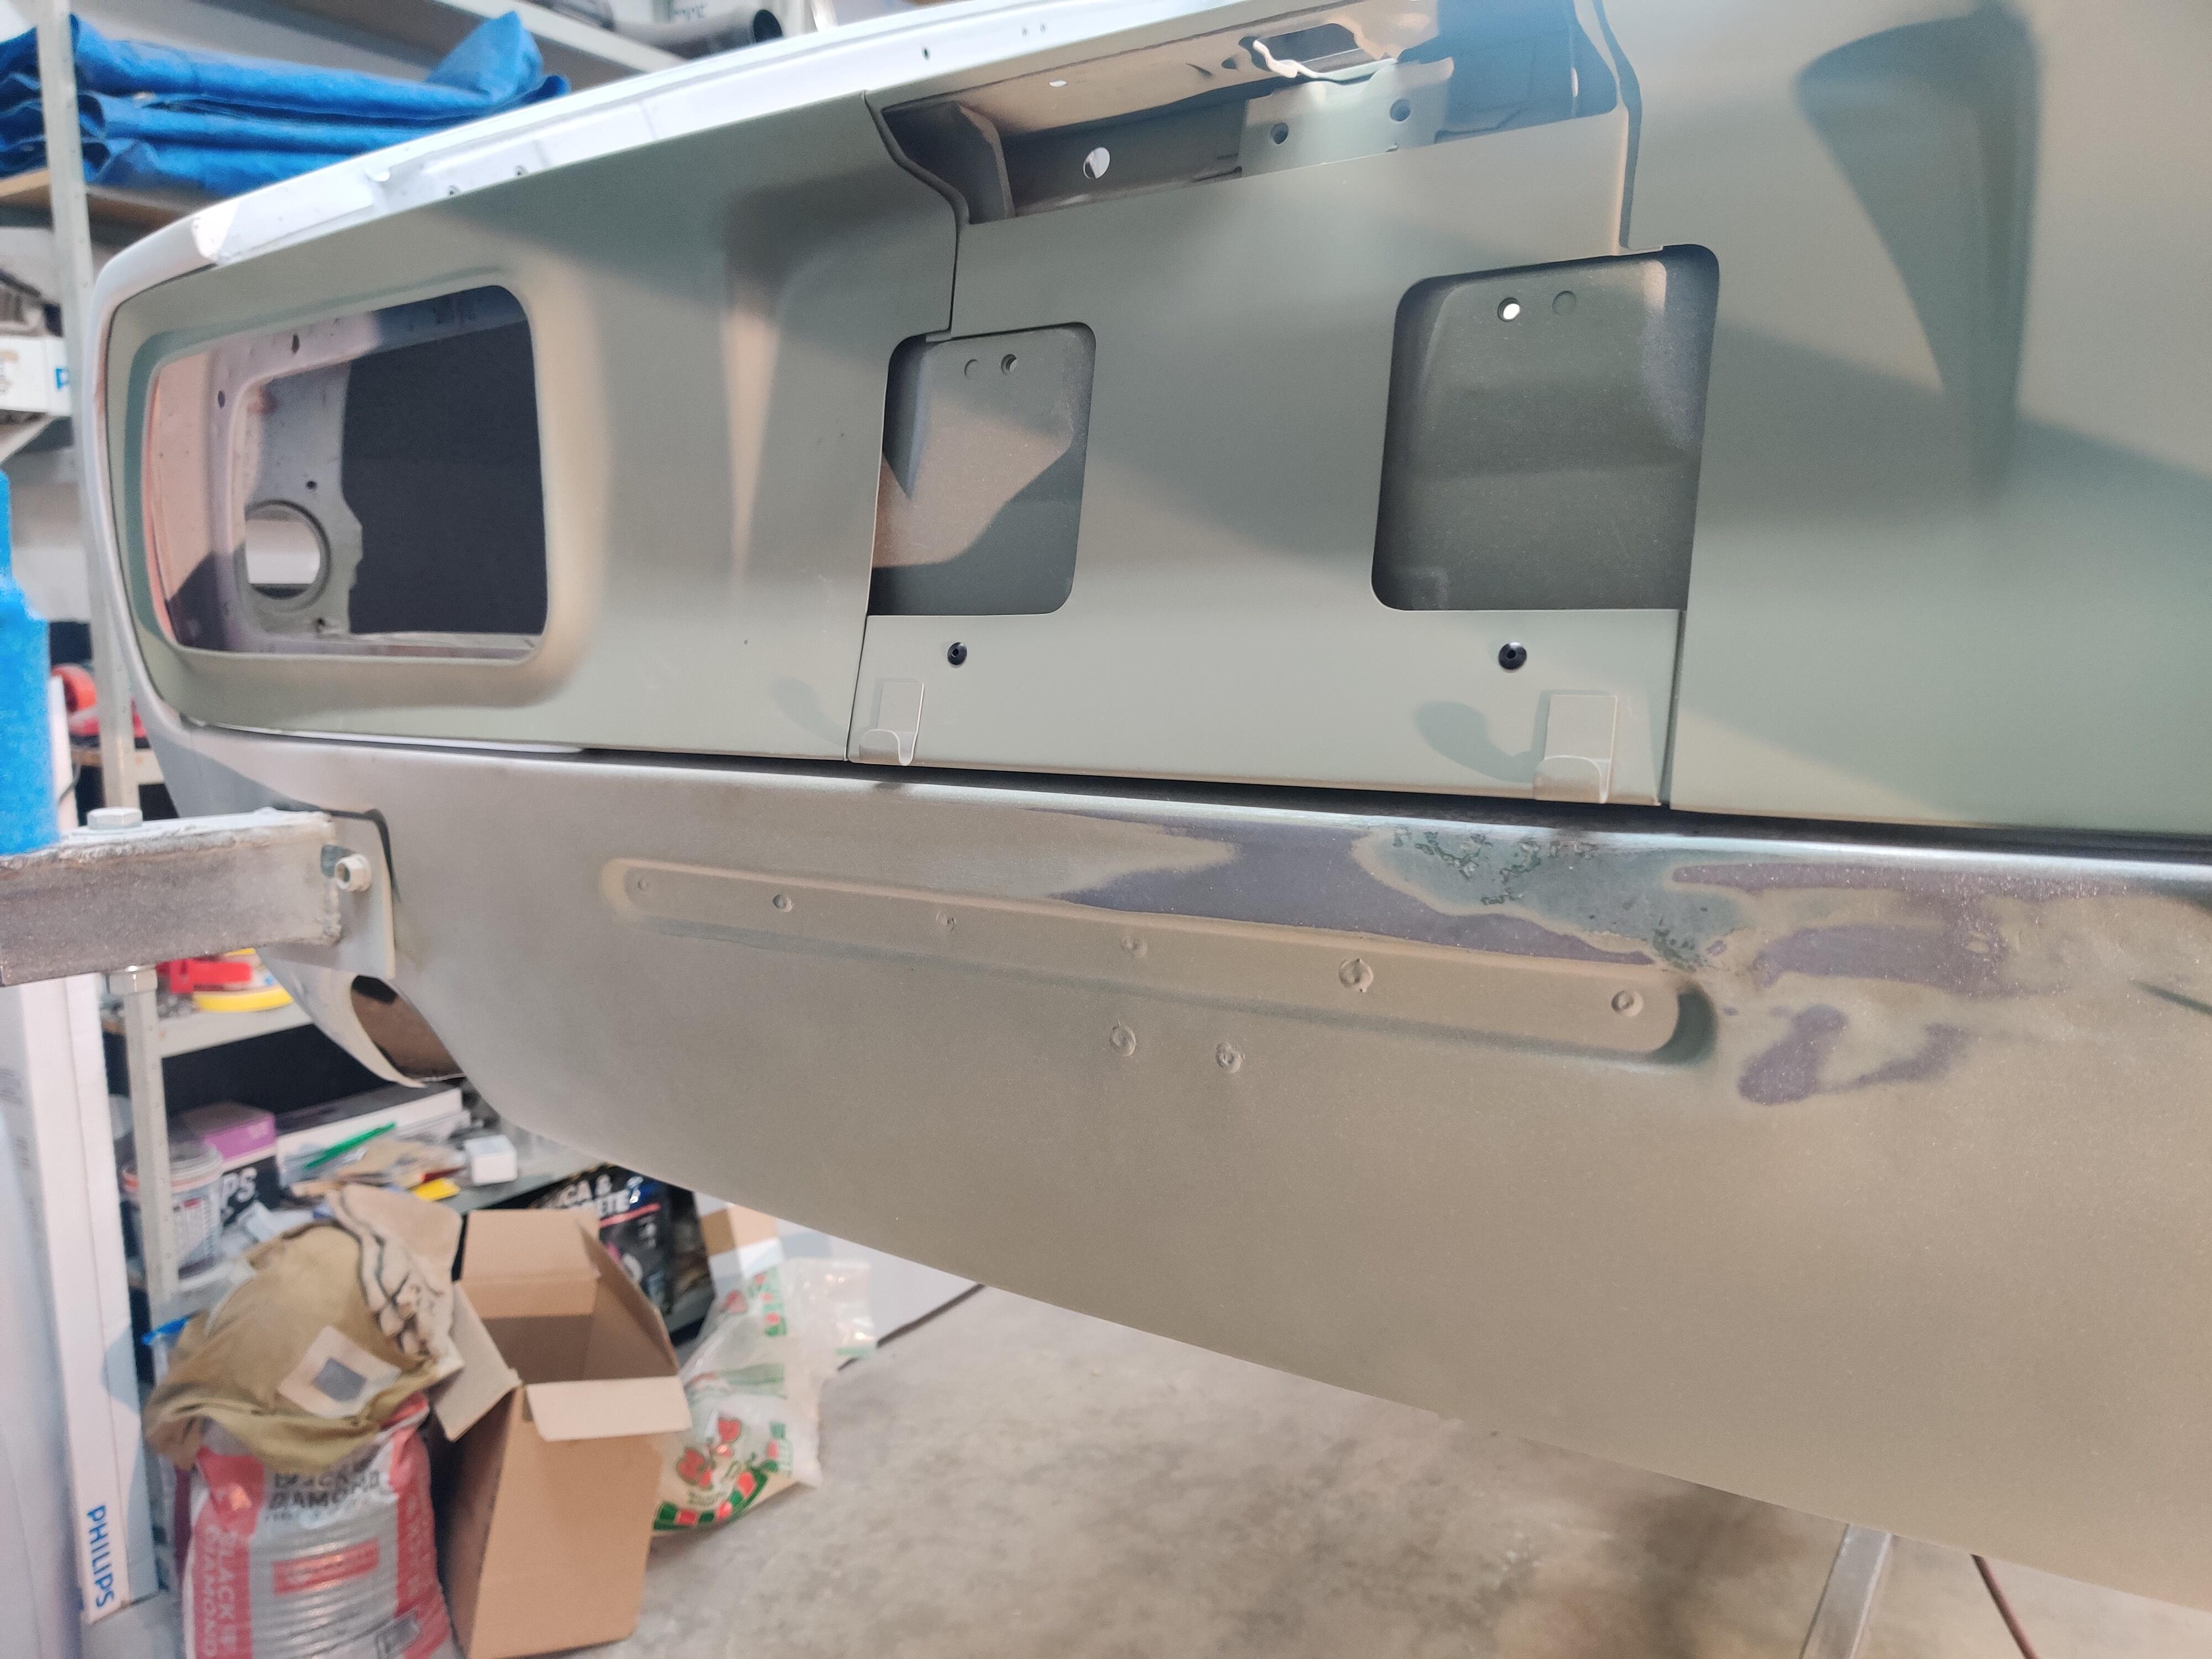
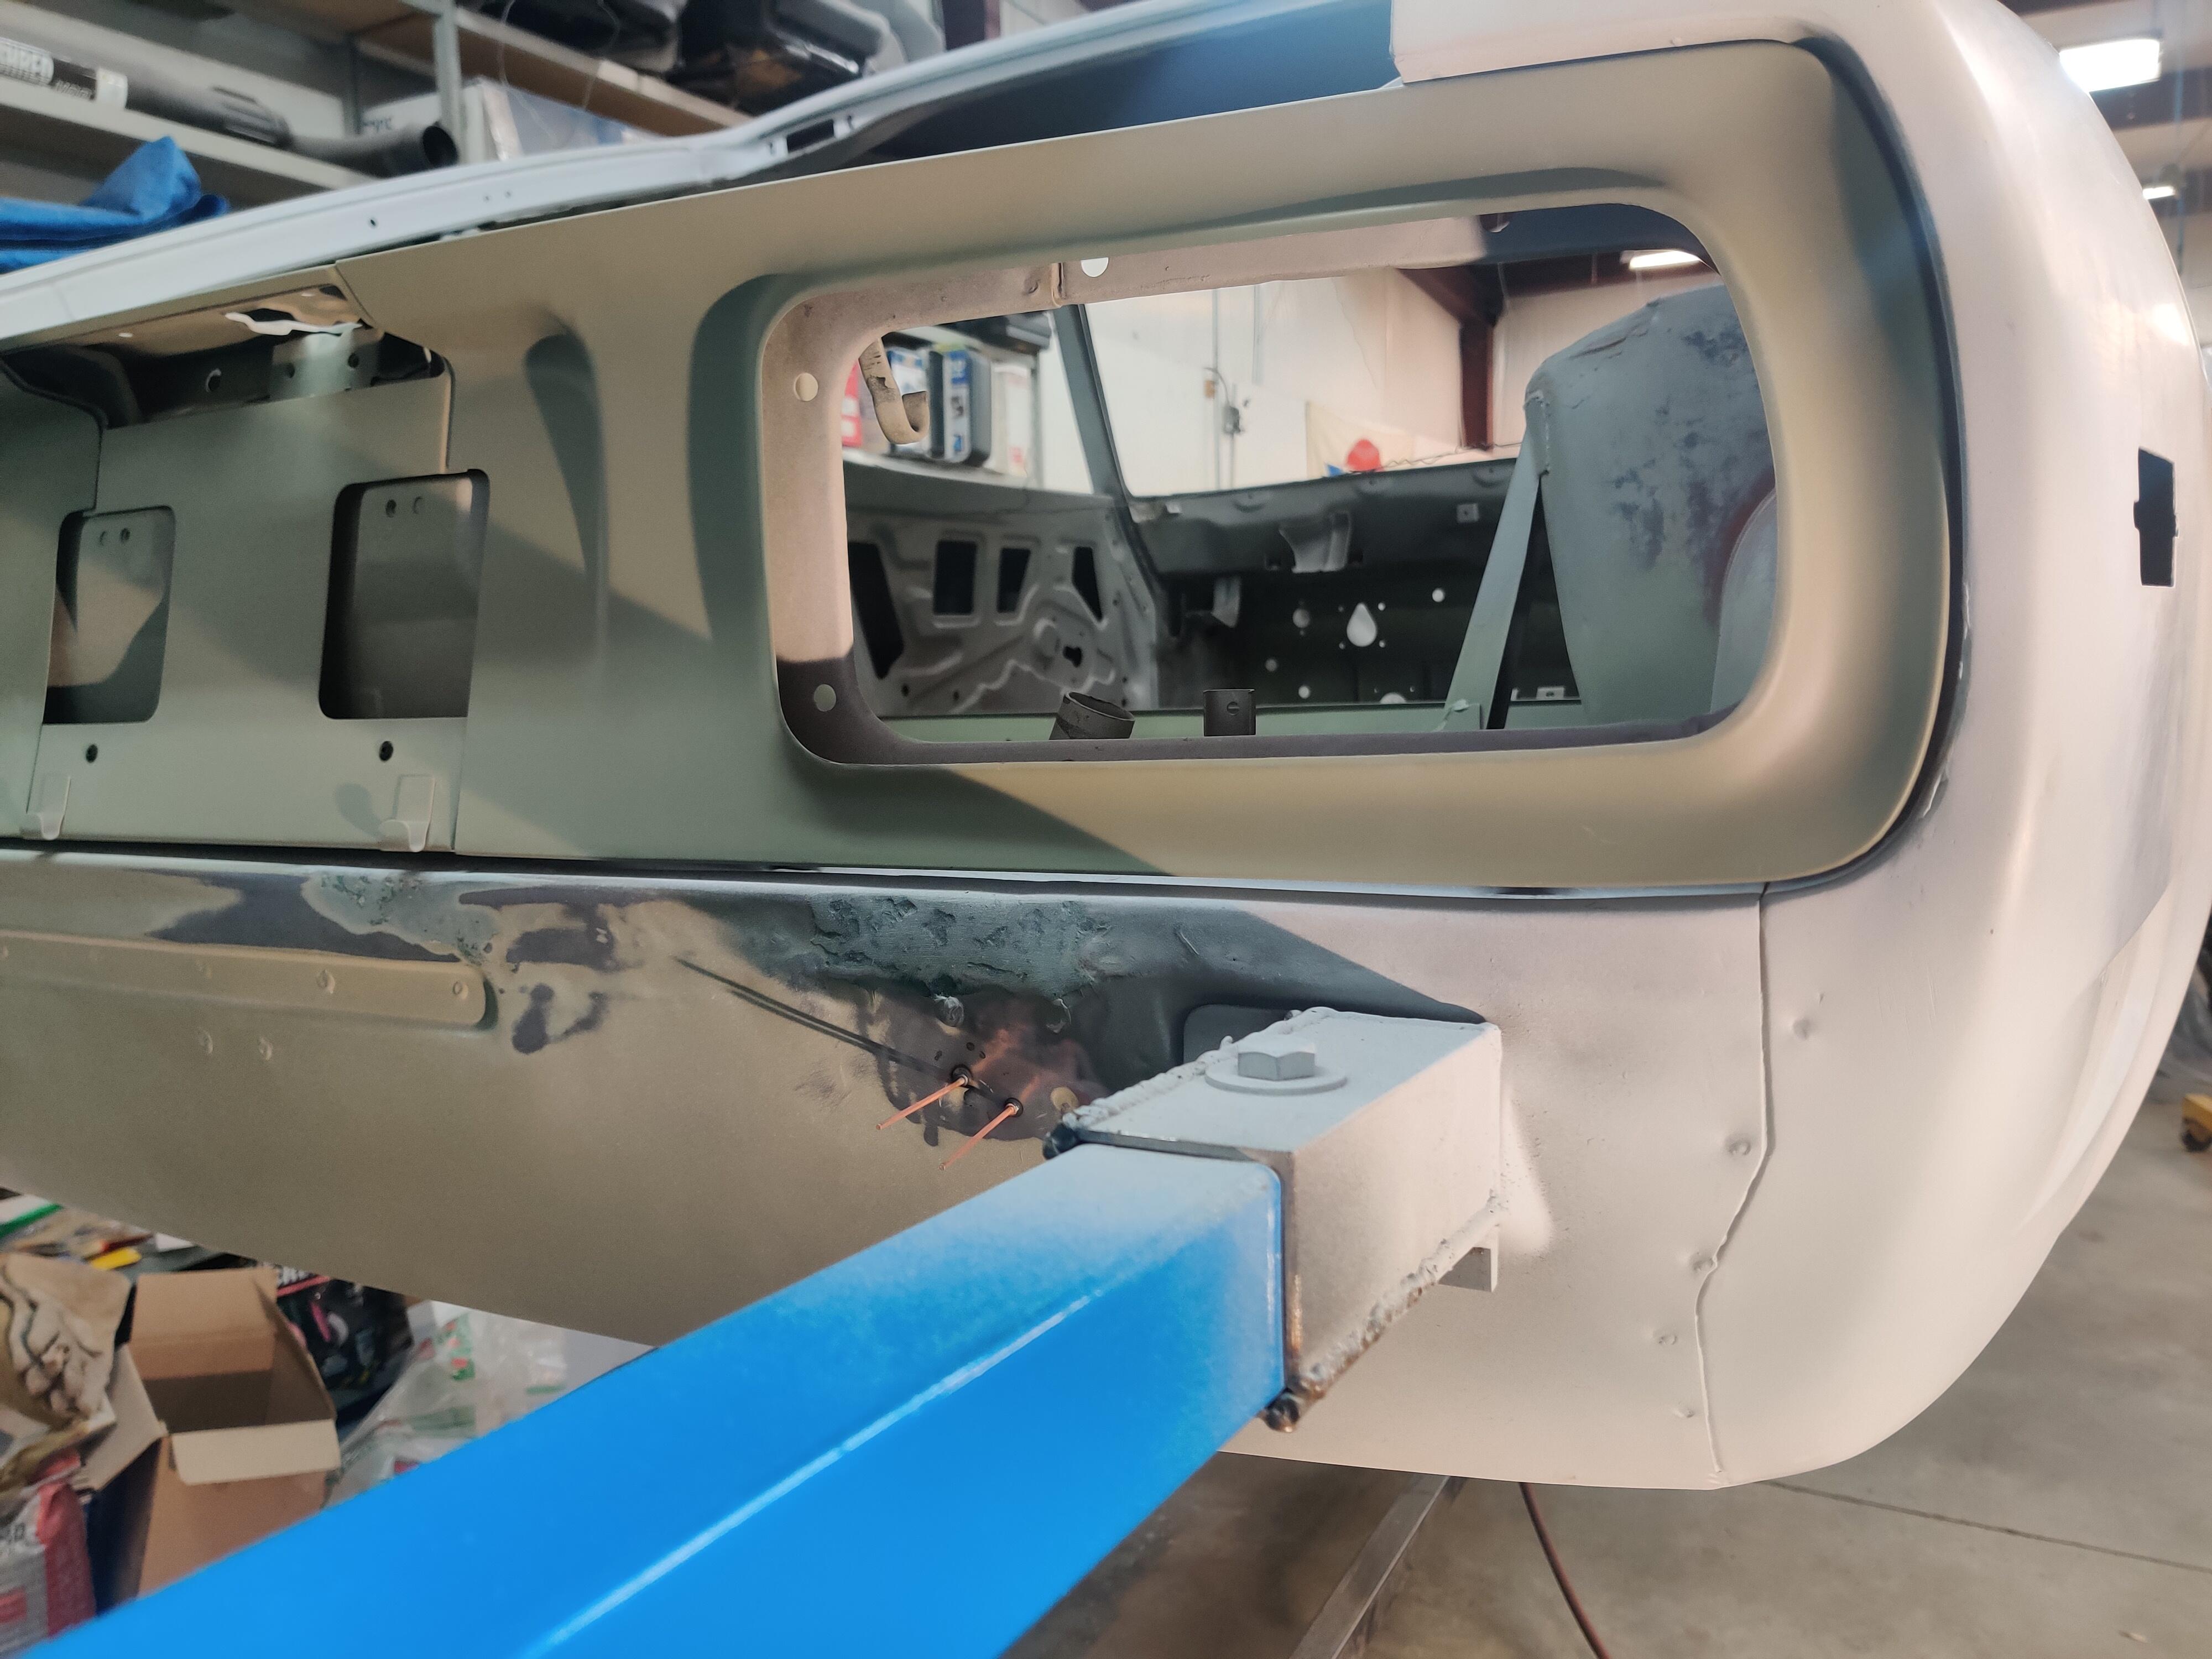
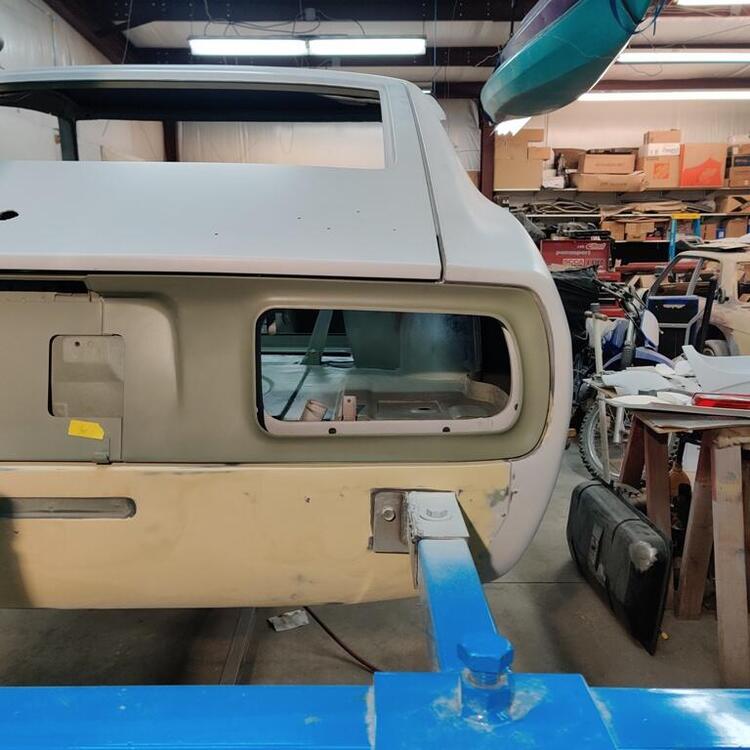
I finished the repair to the right side of the tail light panel today. Then I grabbed the tail light trim panels and the new plastic rivet-like fasteners (note the size of these original parts - some people use the wrong fasteners here) and worked on fitment. It is best to test fit and massage things now rather than after paint. Generally, the fit of my panels is good, however I have been able to improve it. The tail light finisher panels are made of thin metal and are easily tweaked. This car was tapped from behind, so I am making sure to spend time here to make things right. I used a small belt sander to clean up the edges of the panels... in some areas I removed material from the edges to improve the fit where the tail light panels overlap with the car body. I have many hours of hammer and dolly work in the tail light panel. I even had to shrink parts of the panel below the bumper line. In fact, I will also need to do some shrinking around the top left corner of the right tail light opening. It is pushed in a bit and is "oil canning" when I move it back where it belongs. I believe it got pushed in a tad when the car was tapped in the rear.


-
Good stuff - another way to keep water from repeatedly wetting a vulnerable area on our Z cars. 🙂
-
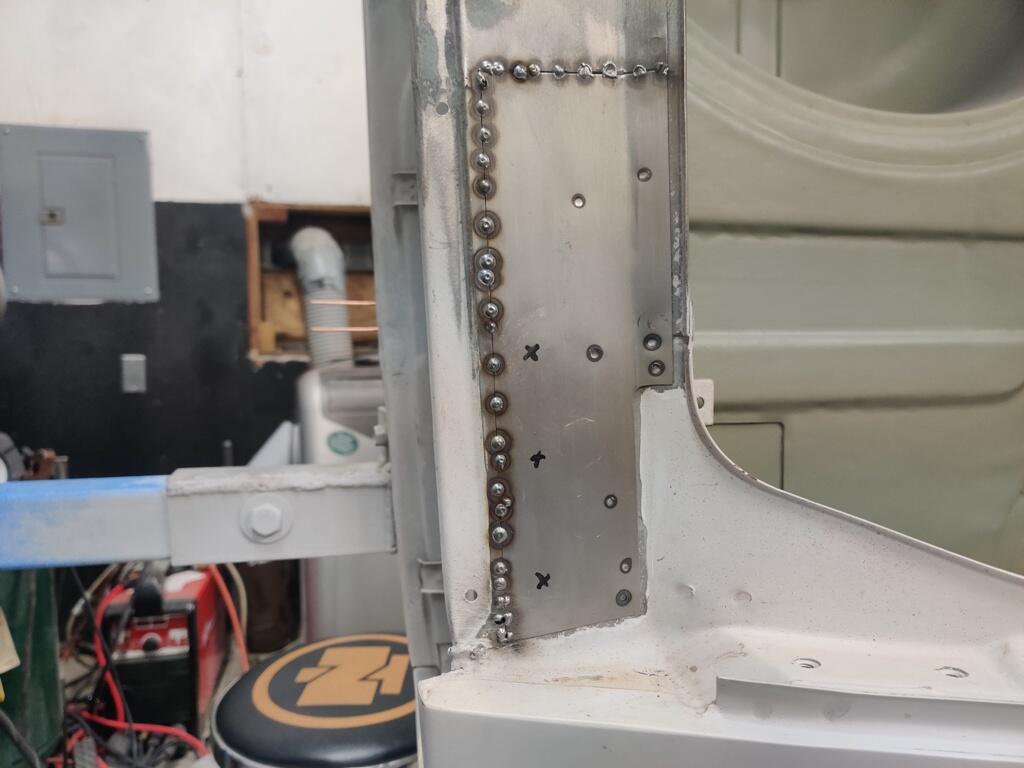
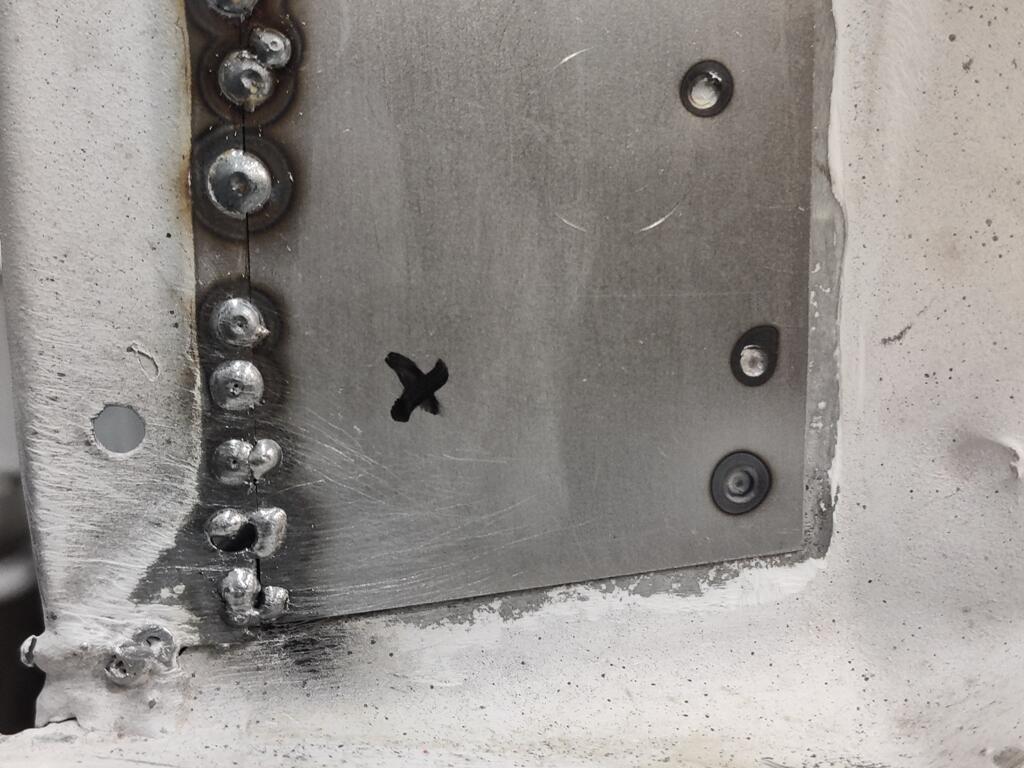
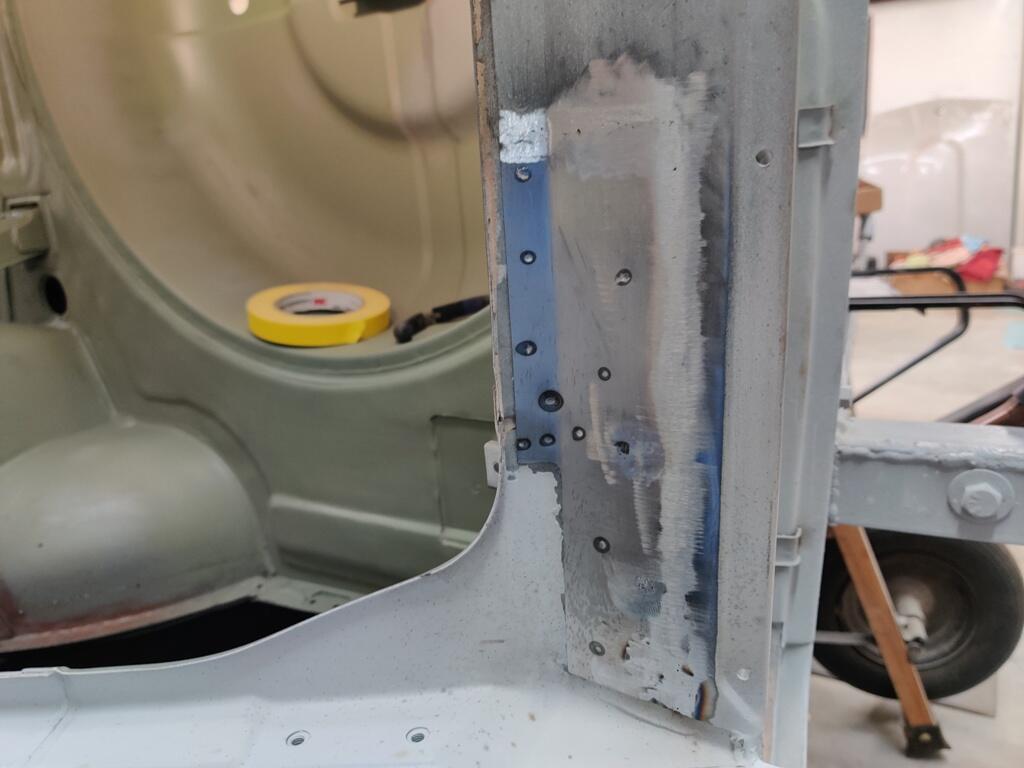
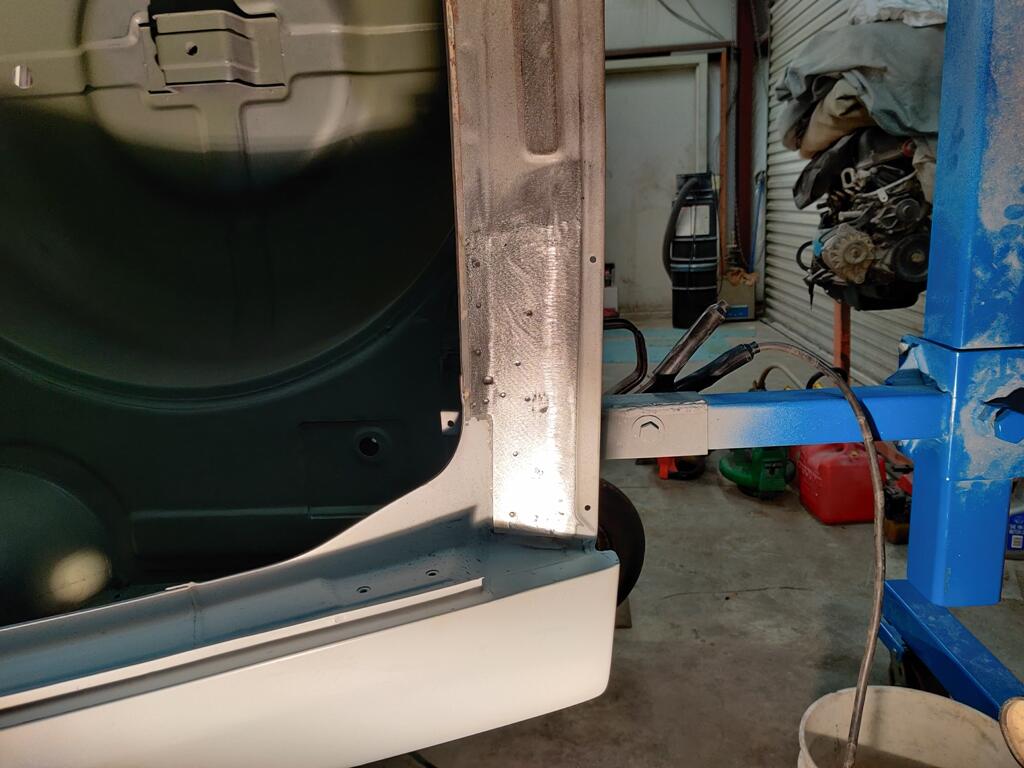
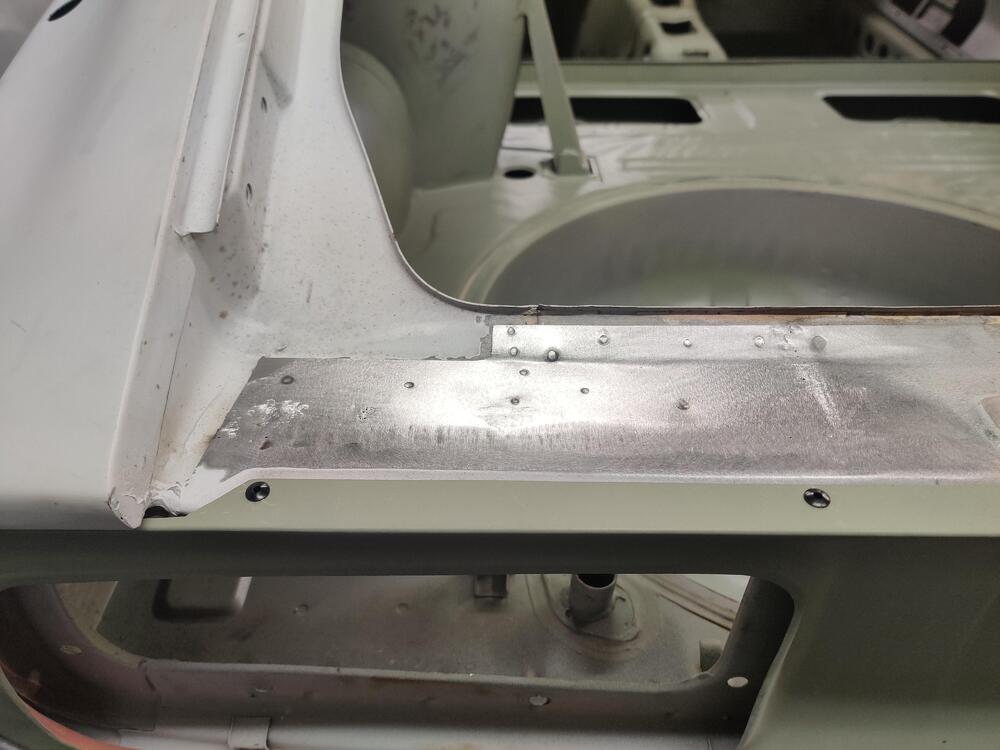
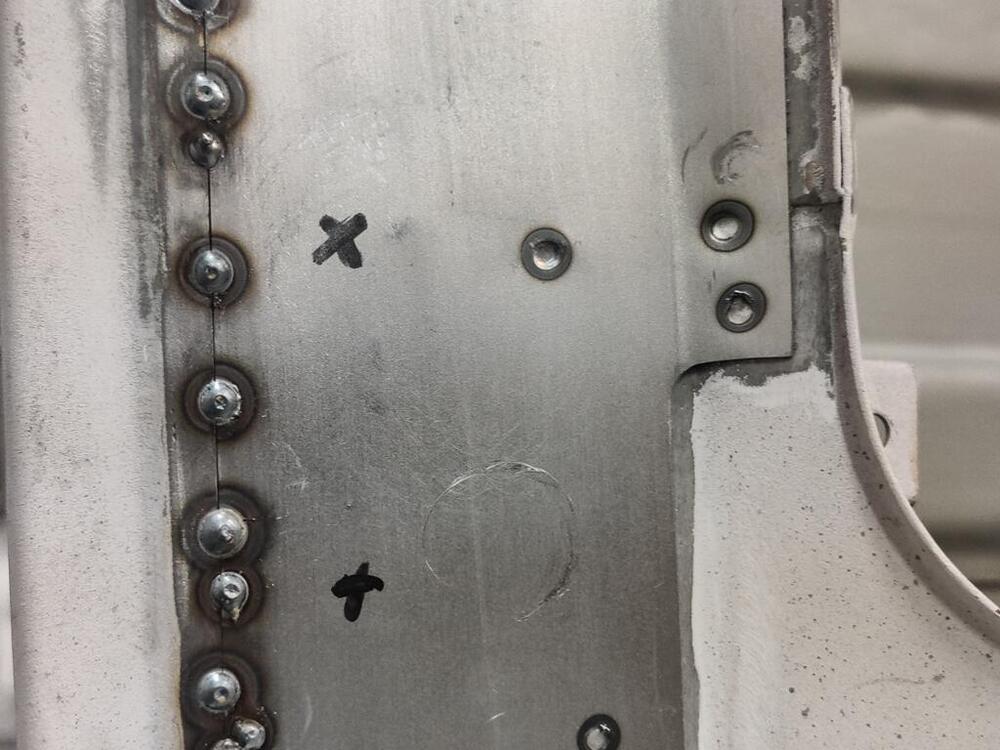
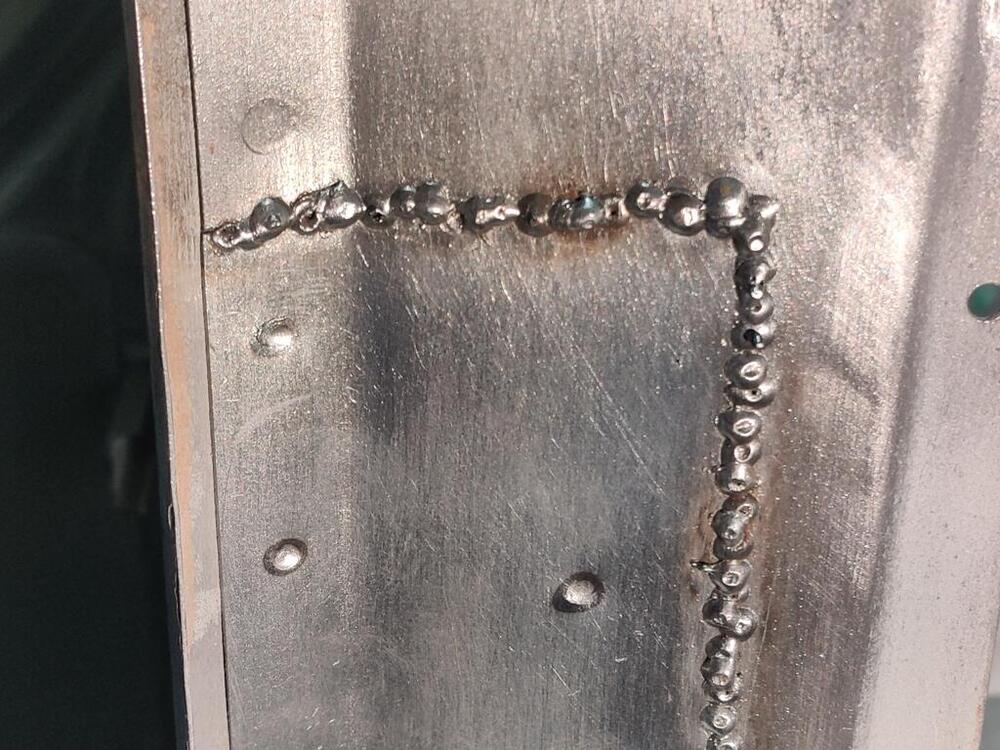
About 1.5 to 2 hours tonight to get the right side panel this far: Before finishing the welding and adding the rosette welds, I make sure the back edge line is right: A few close ups: Rightmost edge (bottom of the third pic in the set) is a tad off compared to the original, but a bit of seam sealer goes here and will cover that up without issue. "X" marks are where rosette welds will go. Wonder if the plating process has been started on my parts. But, I told them they could take their time. I've got many hours left of body work to invest in the tail light panel to bring it up to the same level as the rest of the car. Plus, I have plenty of other projects to keep busy with. Definitely starting to feel a lot closer to getting this thing painted. I will check in with the place I have in mind to paint it and see about getting the car painted in March or April.

-
Ah... that is pretty slick. A very smart and elegant solution.
-
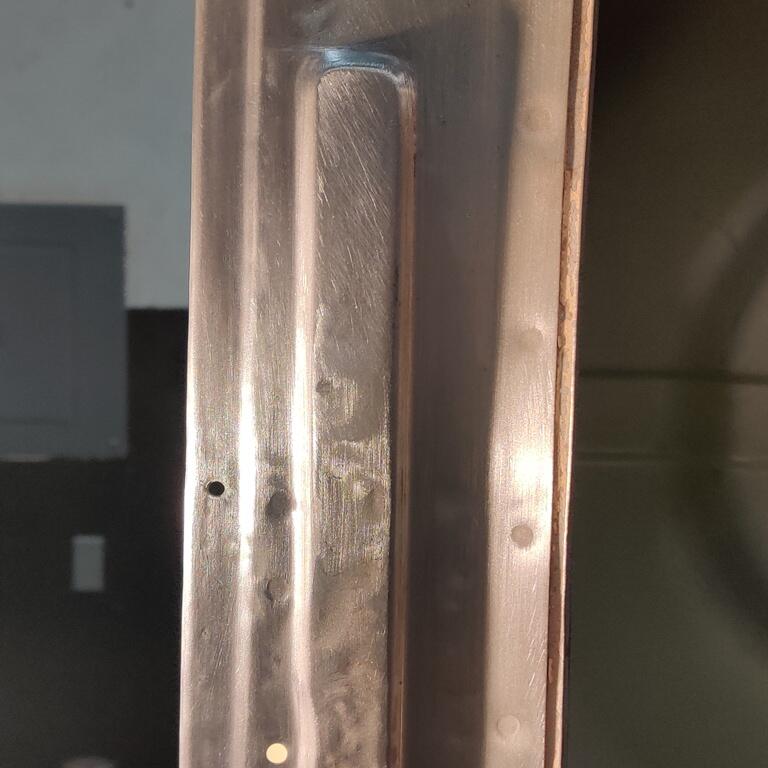
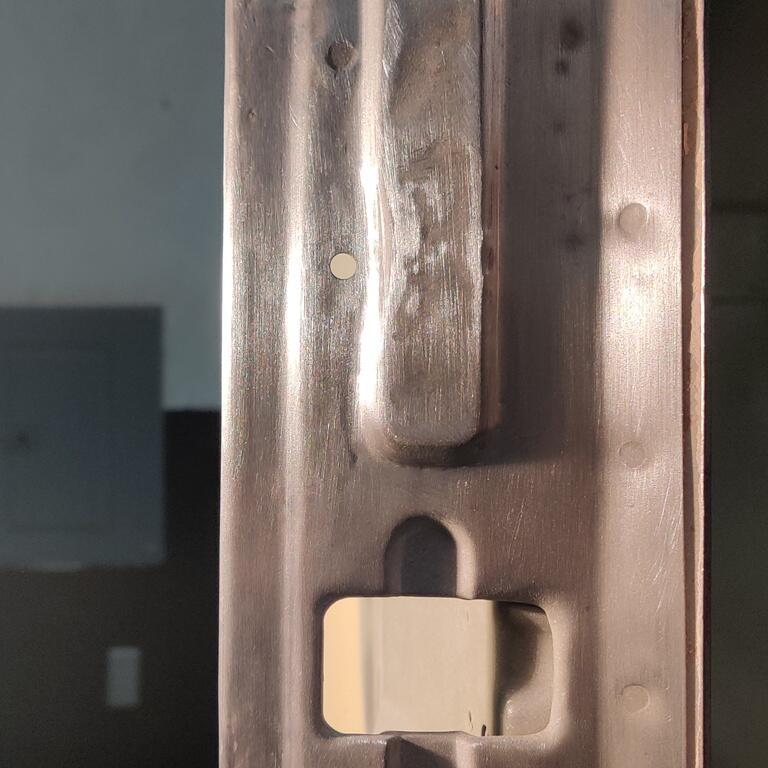
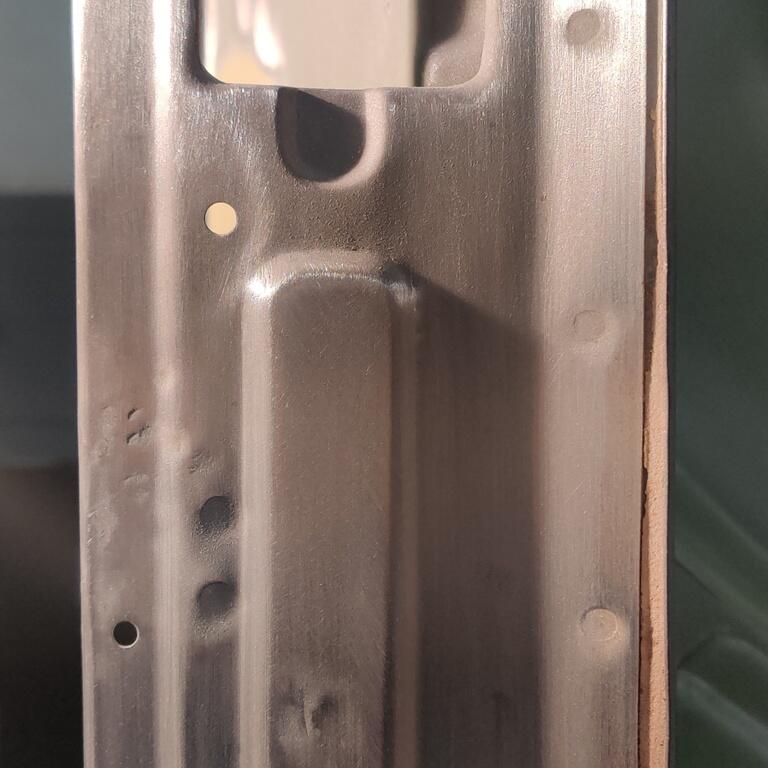
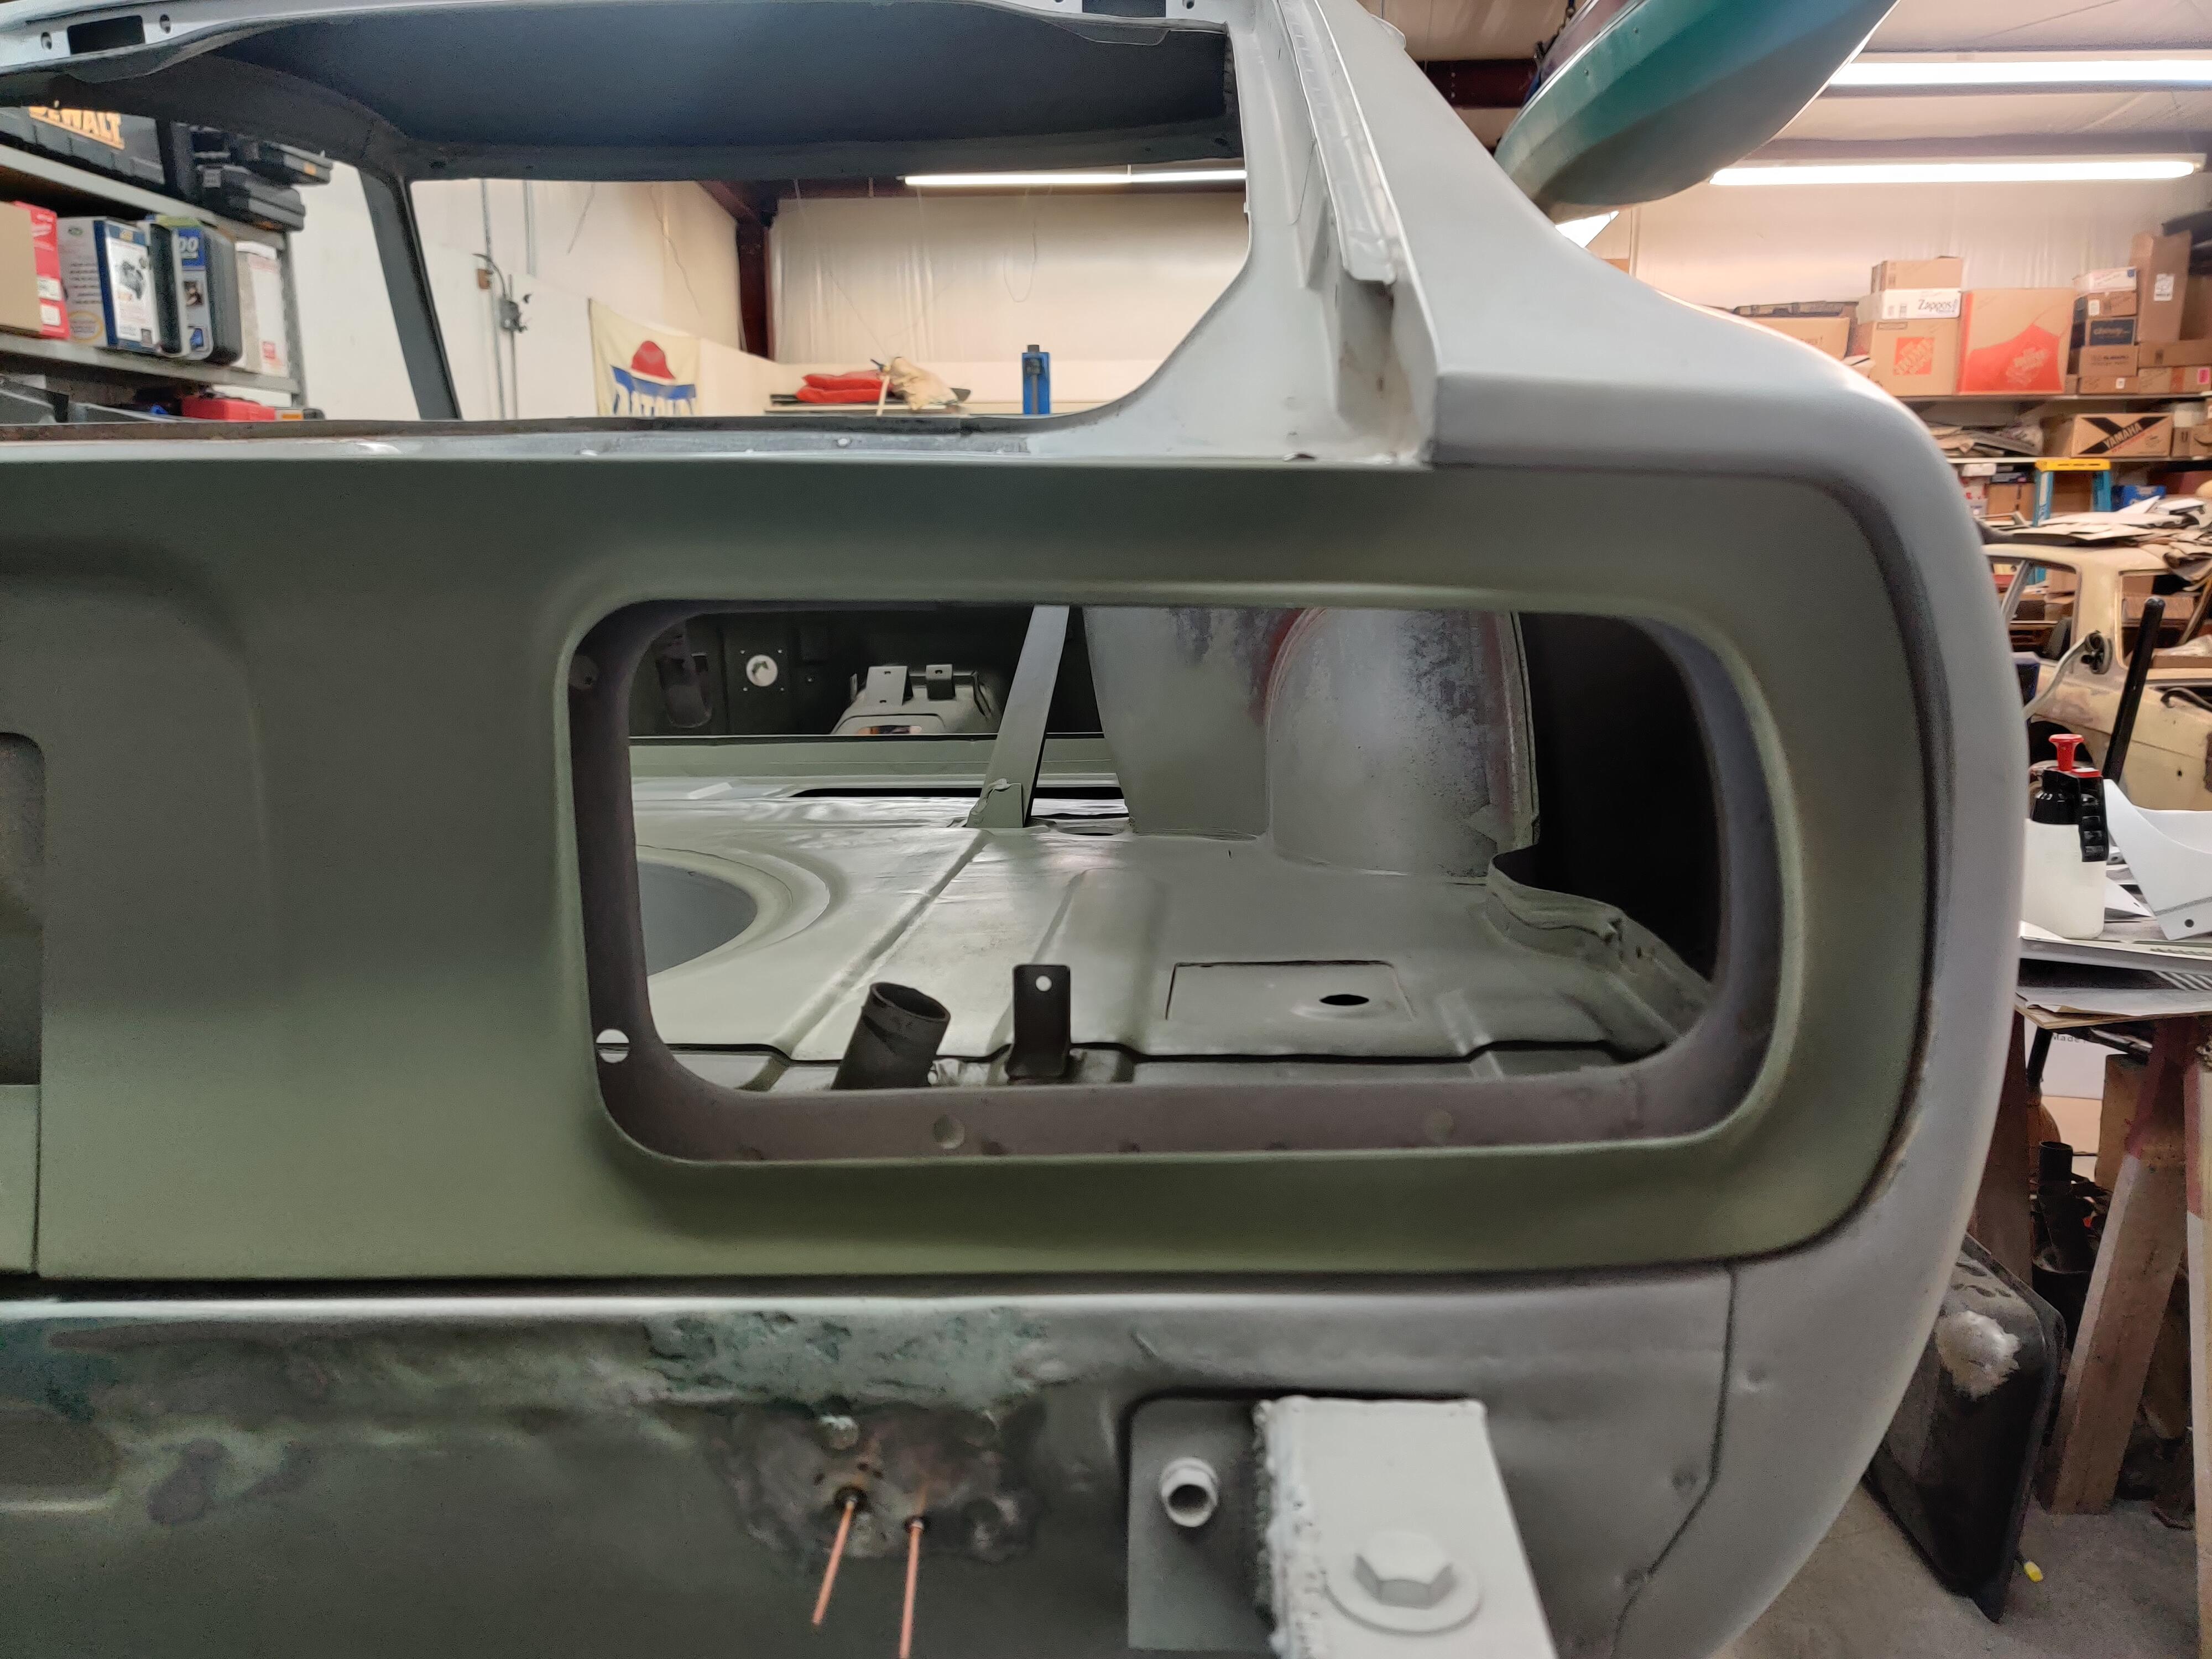
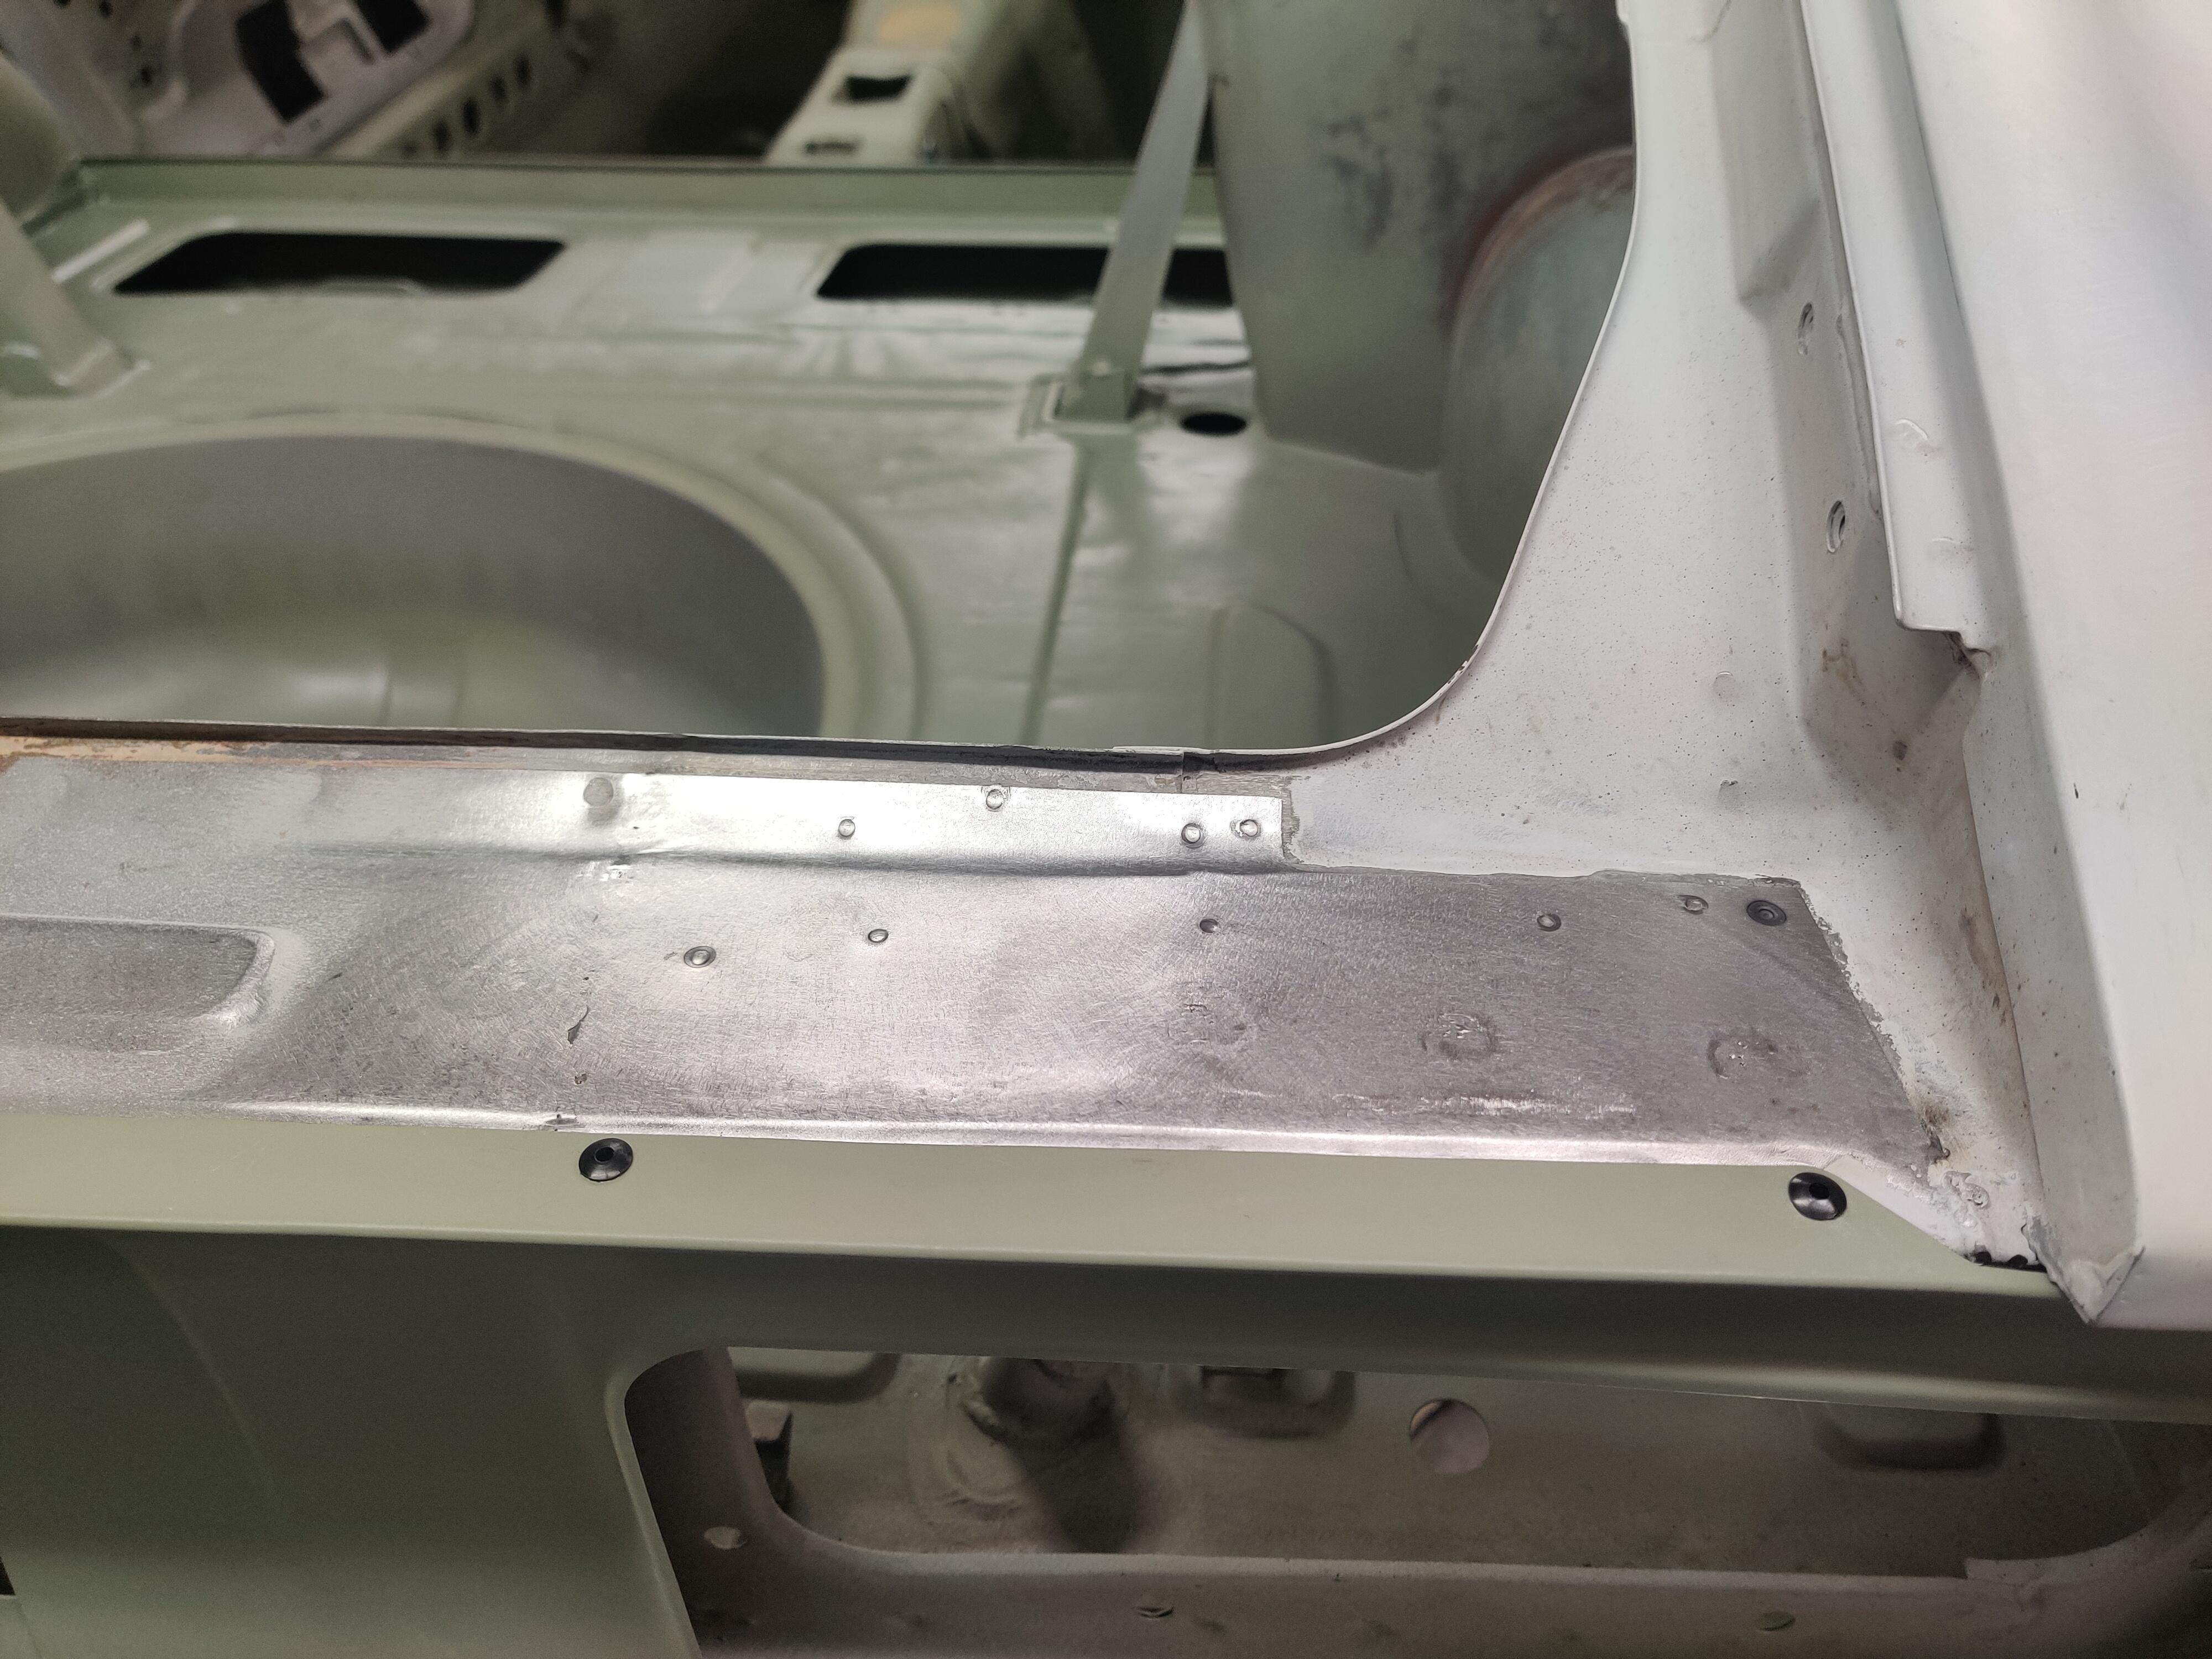
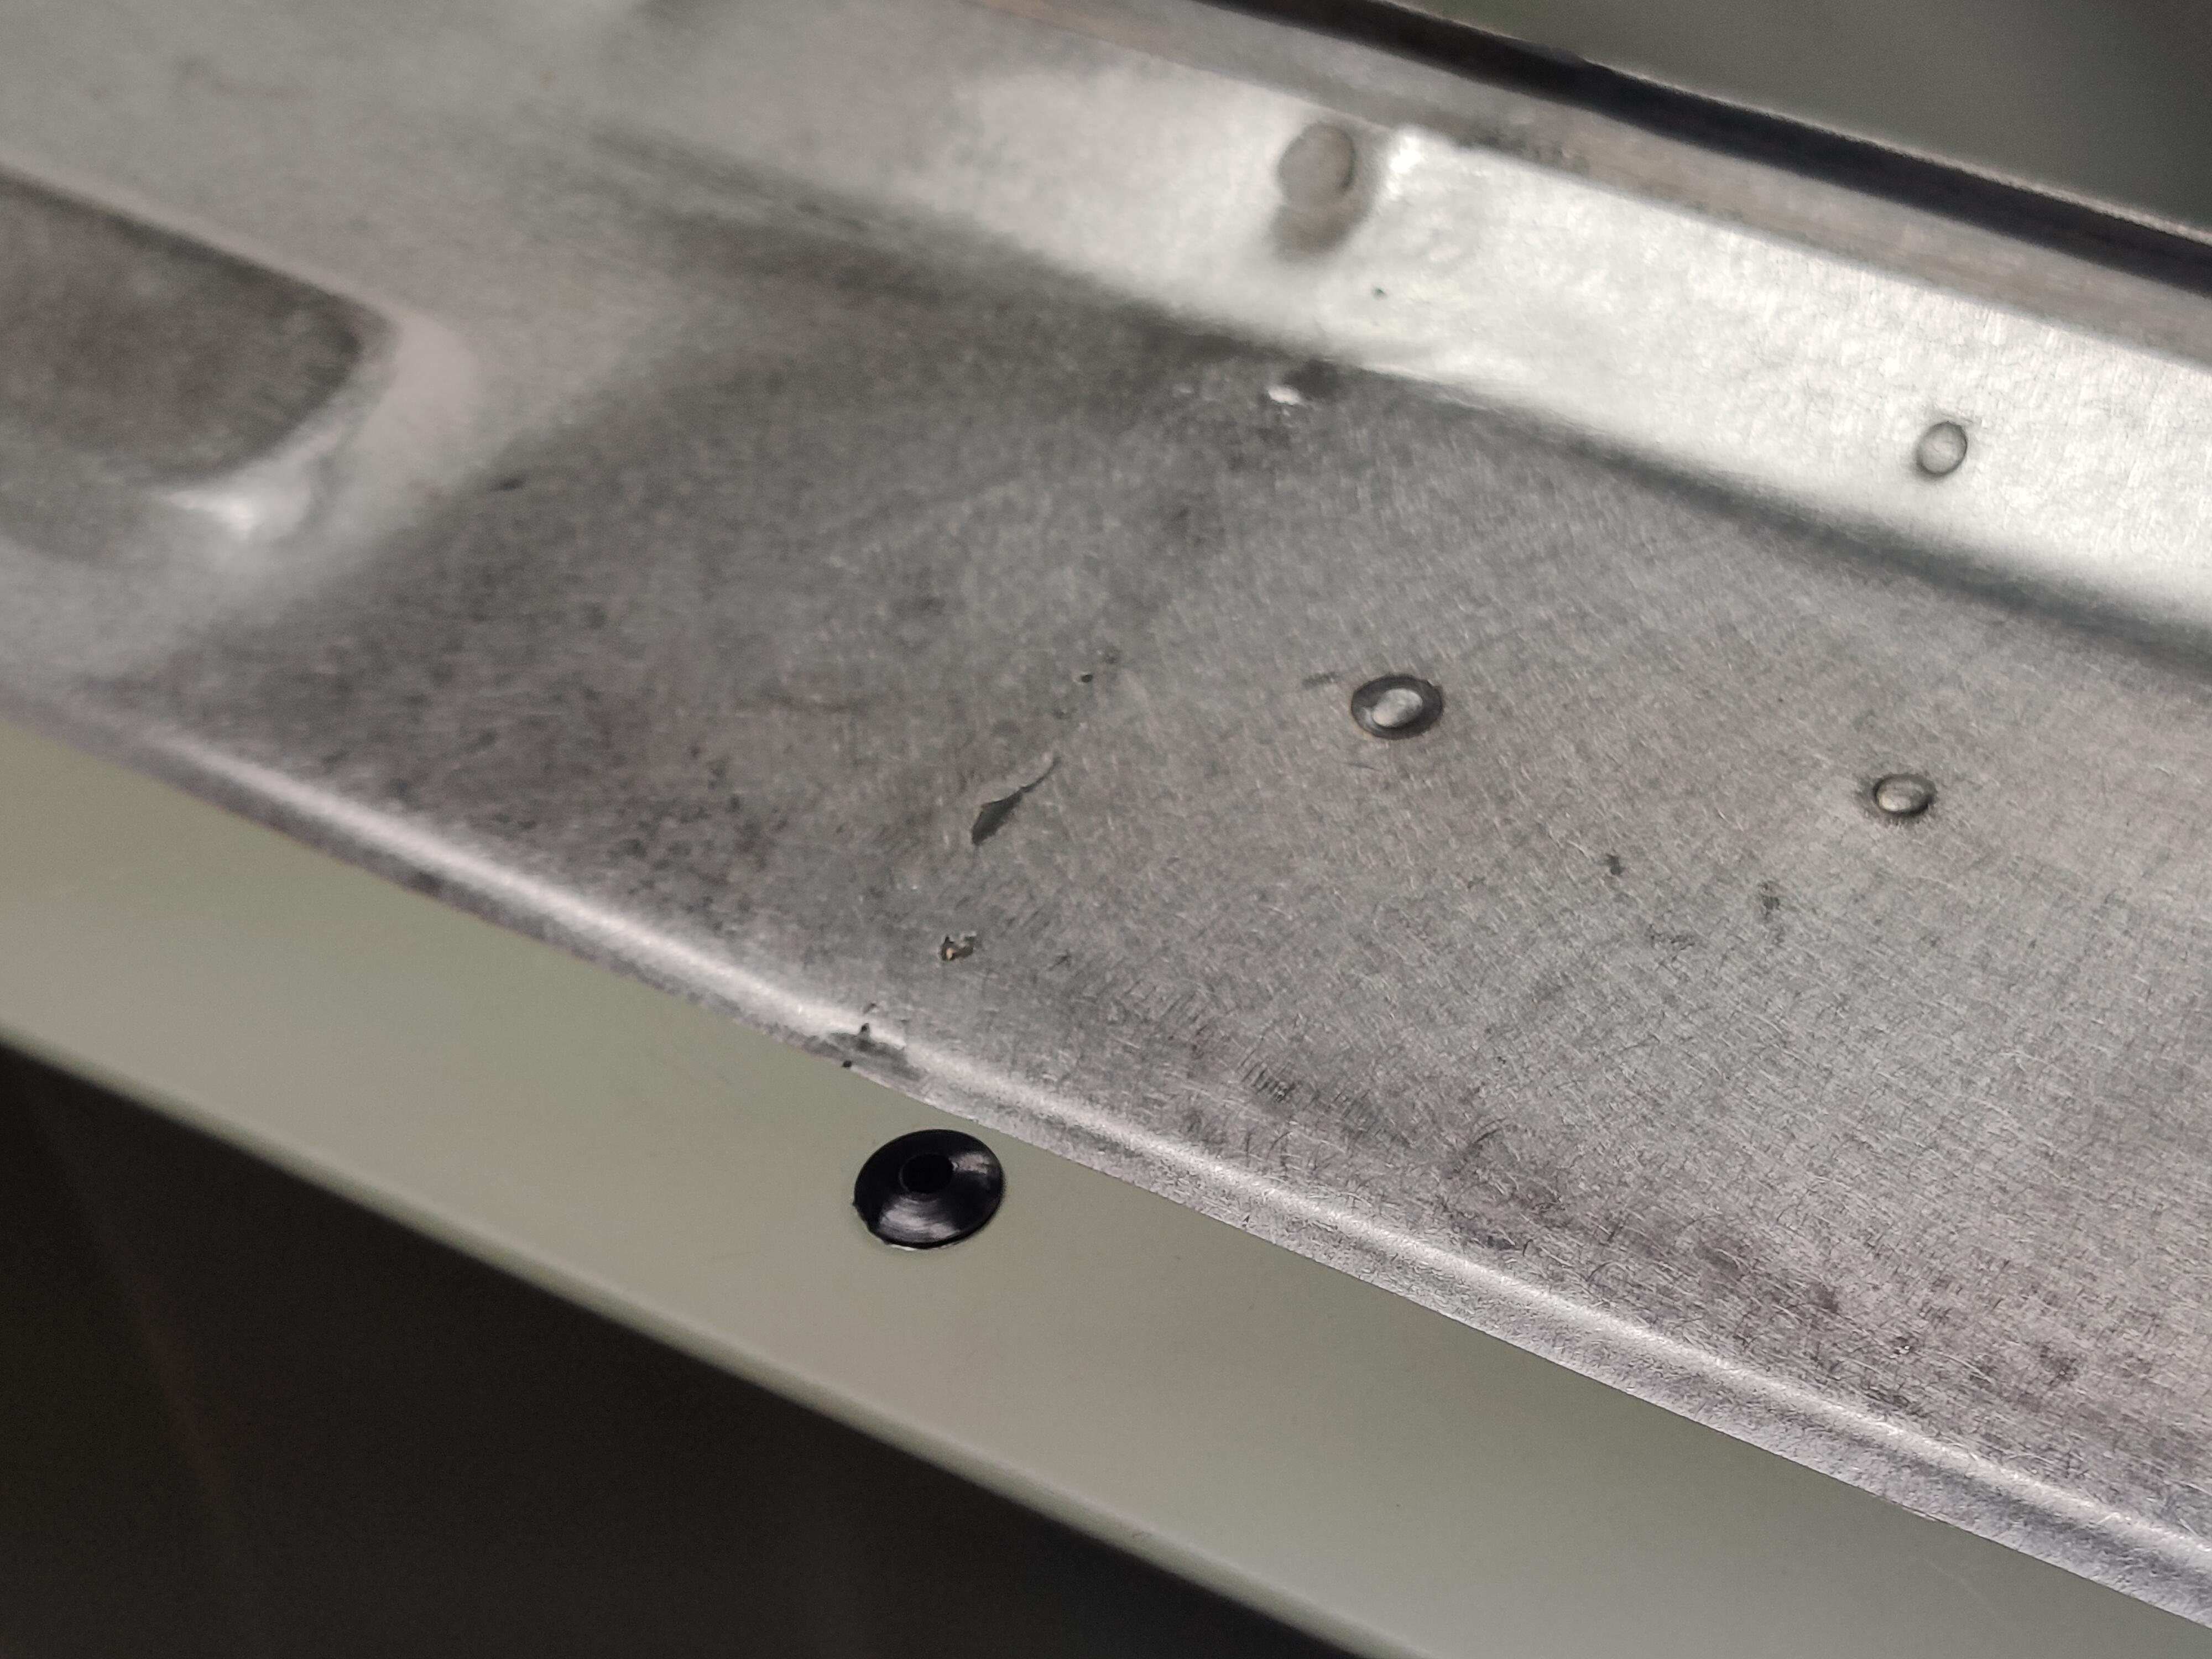
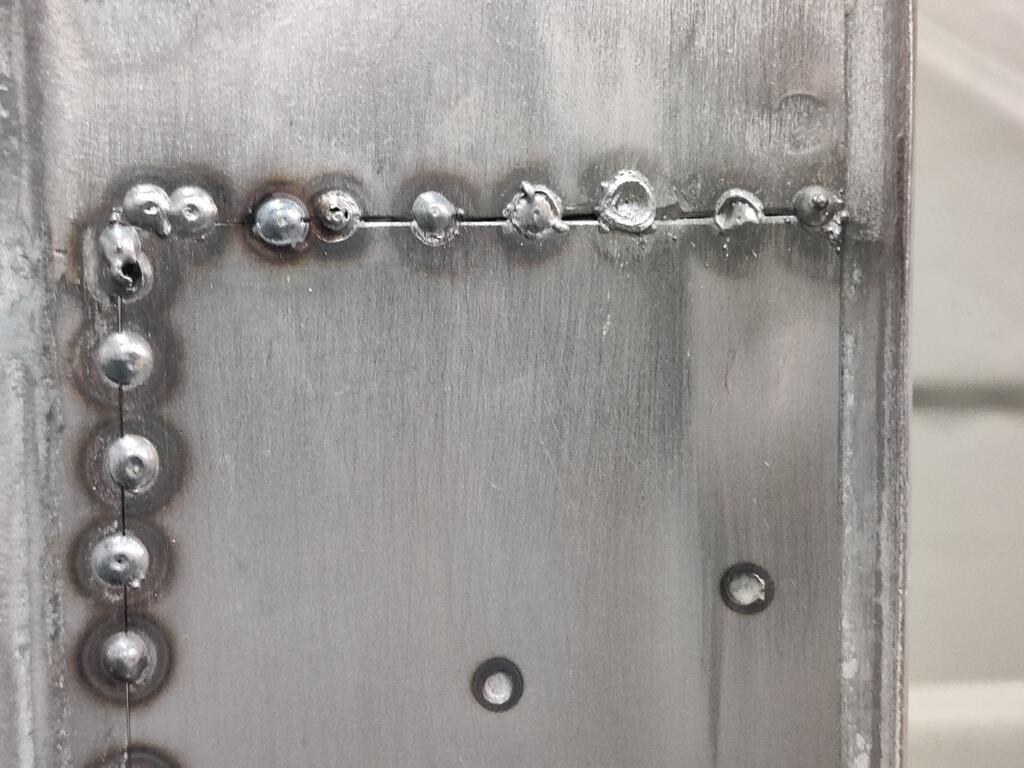
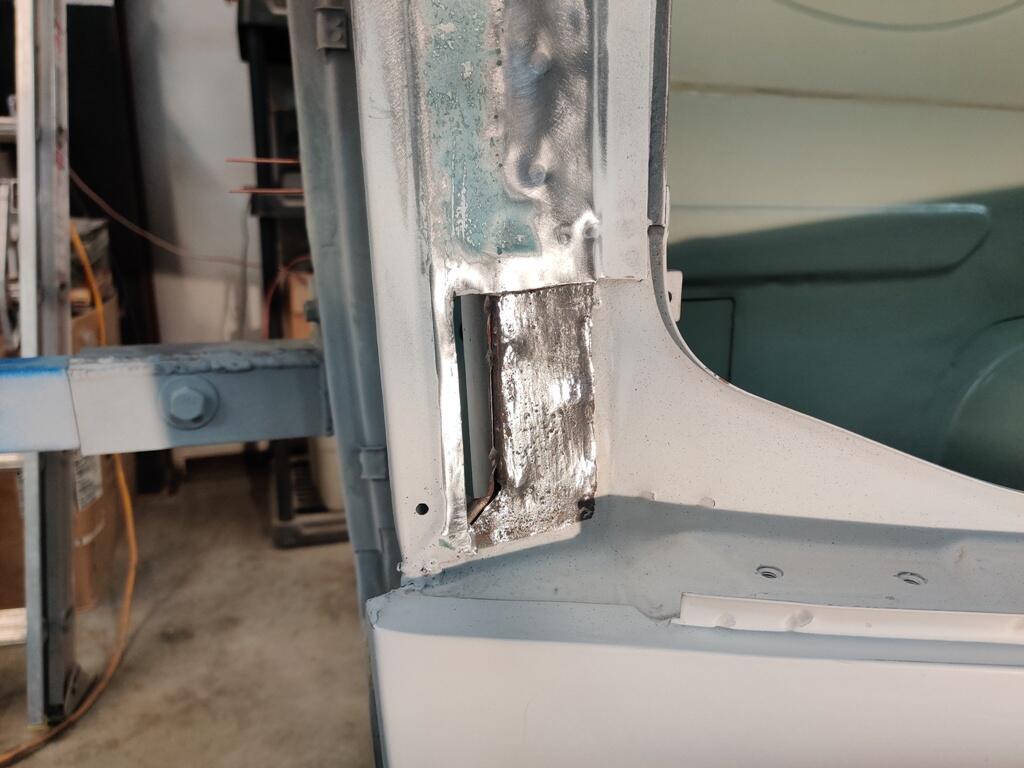
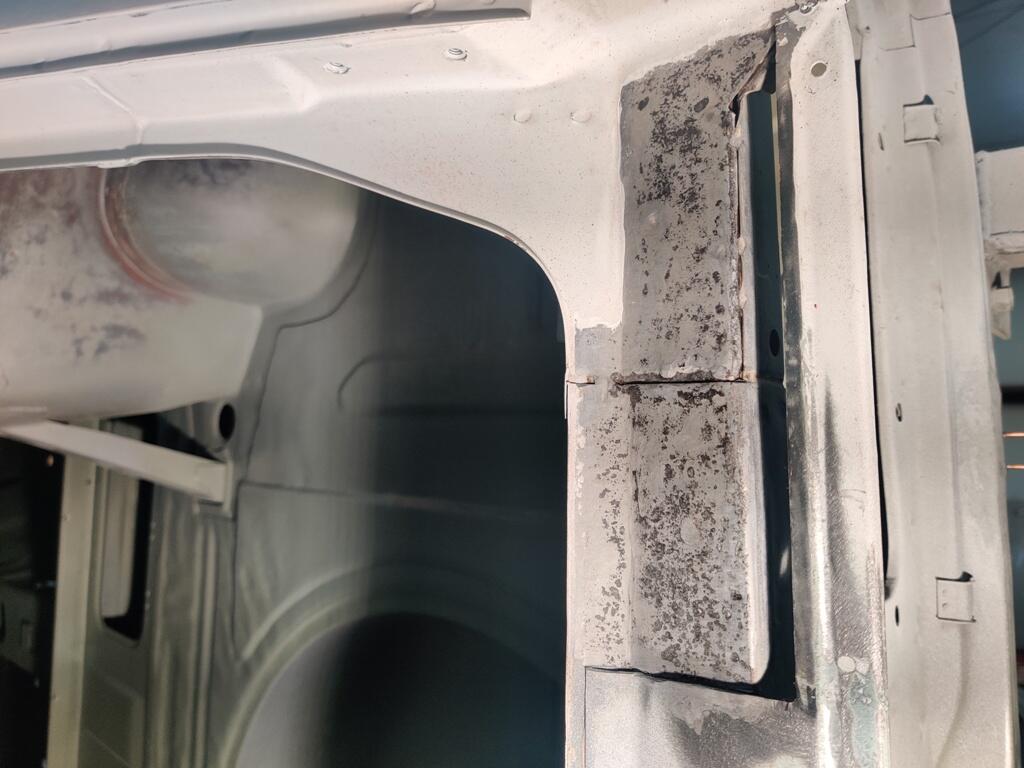
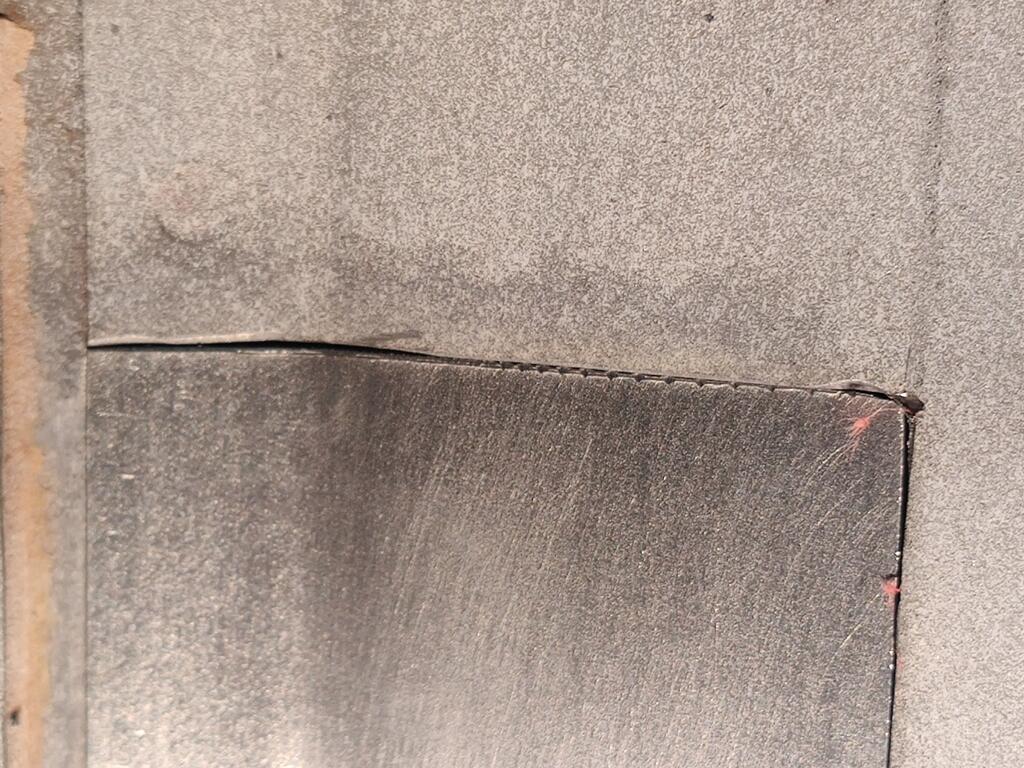
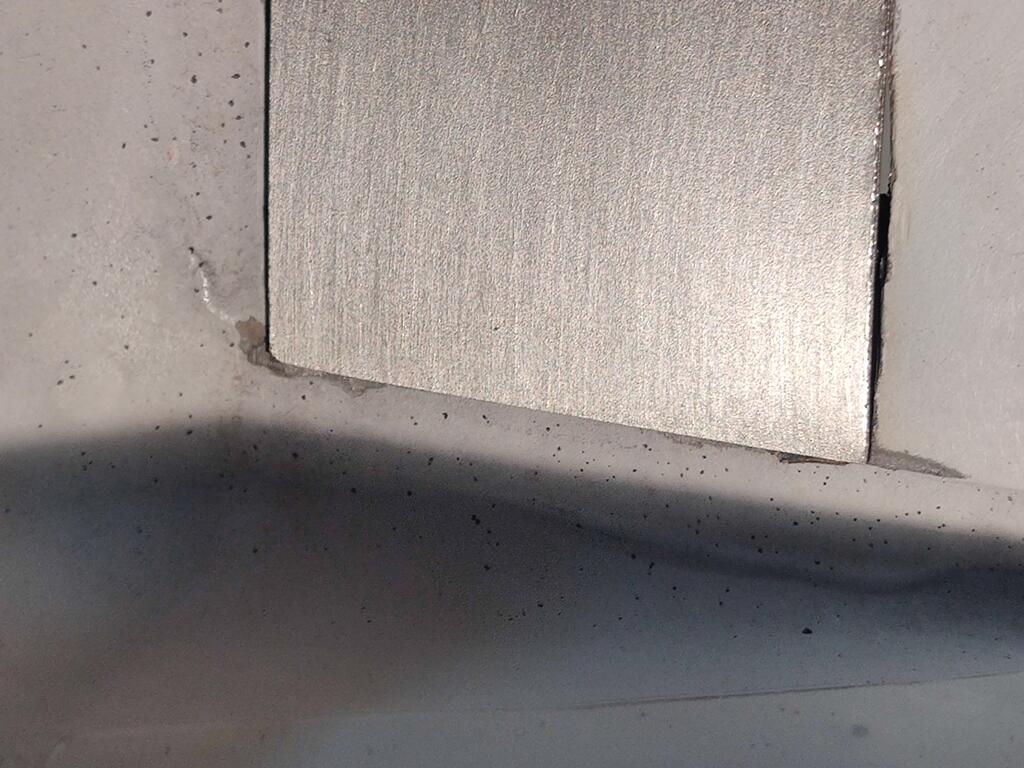
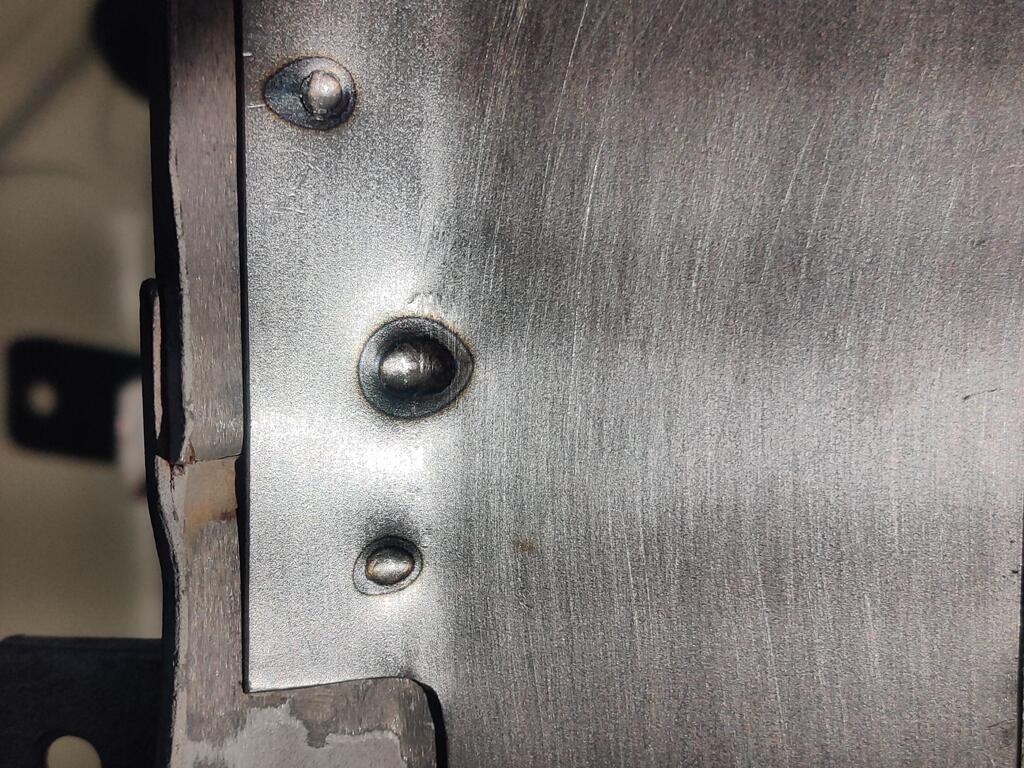
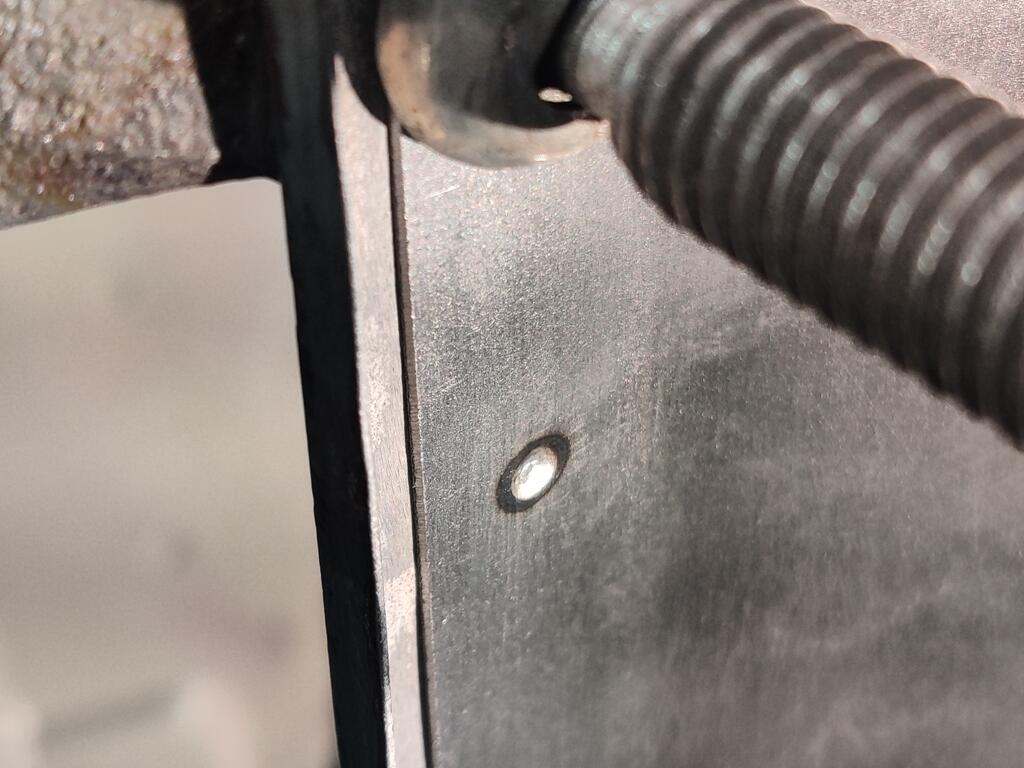
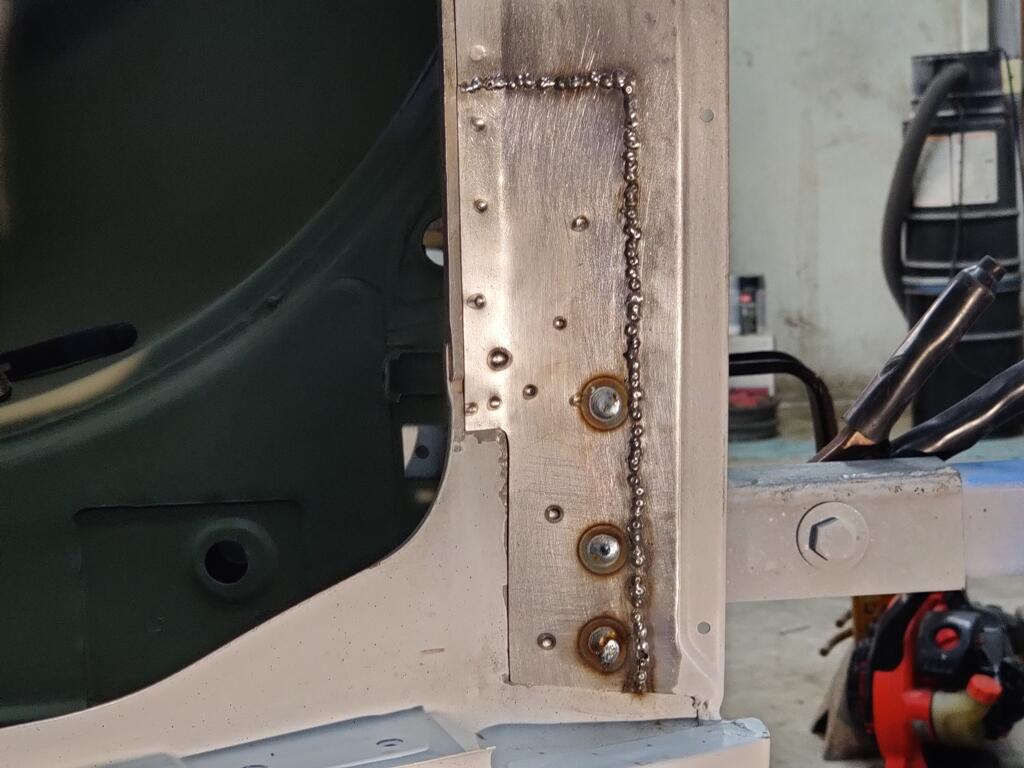
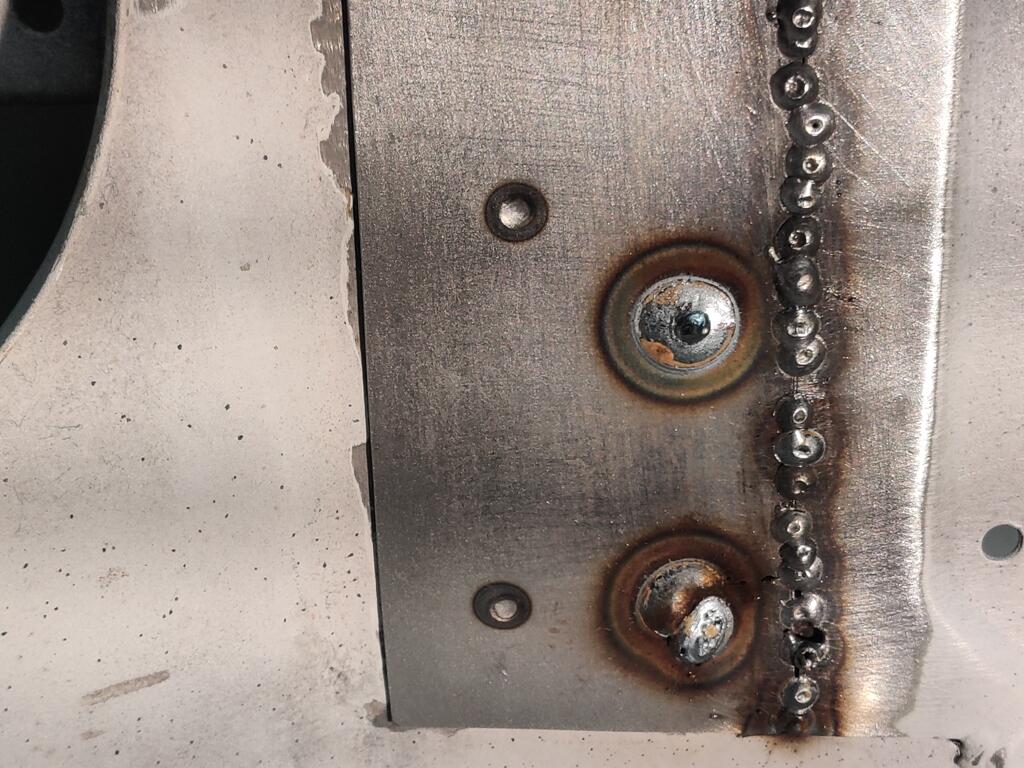
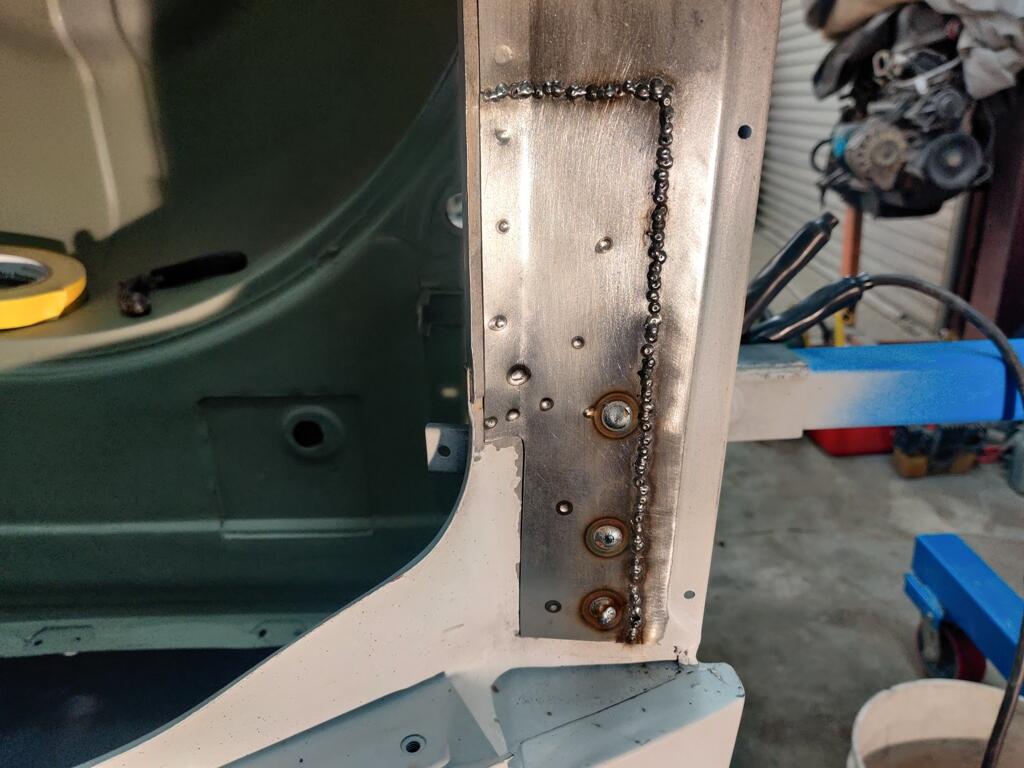
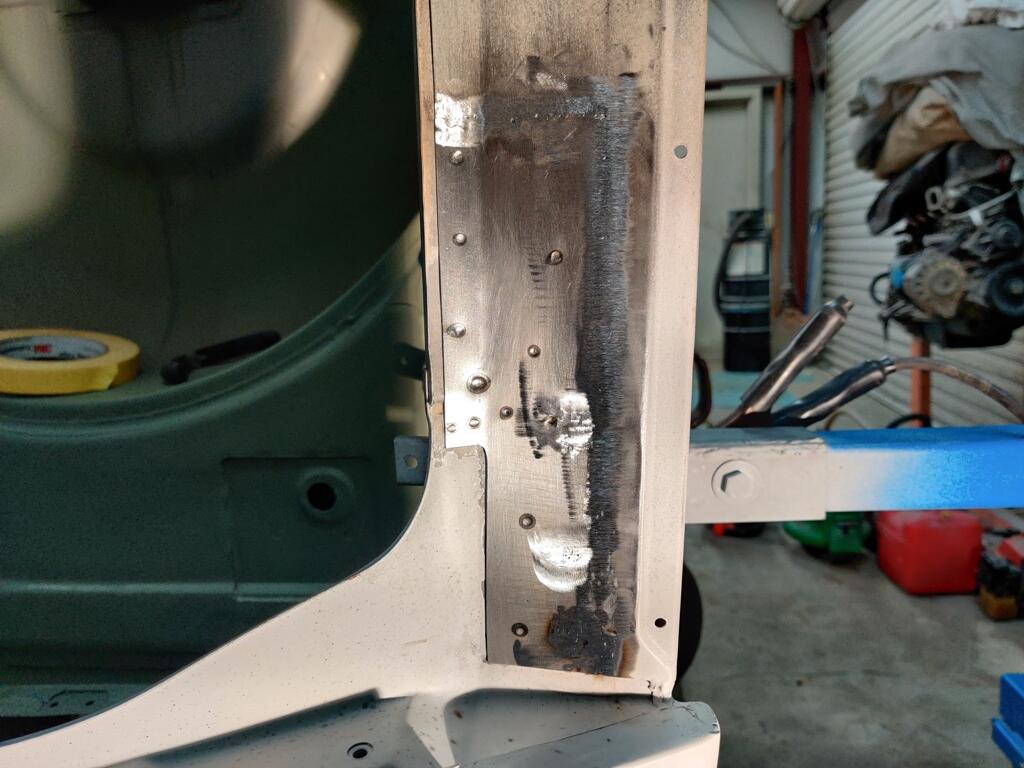
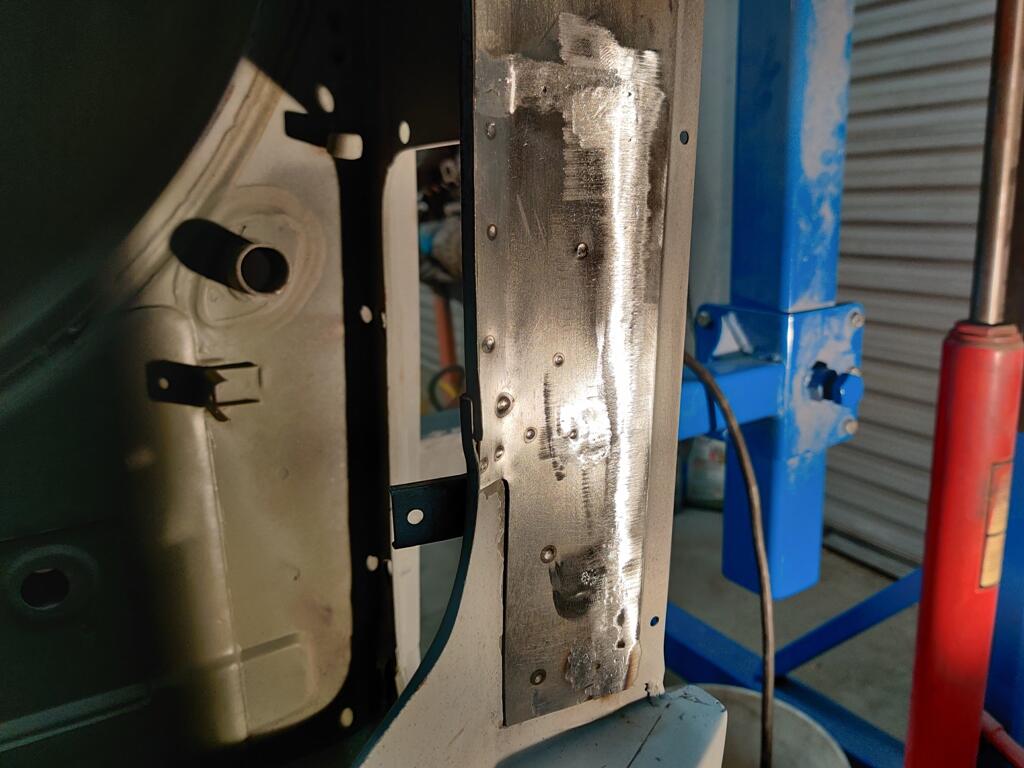
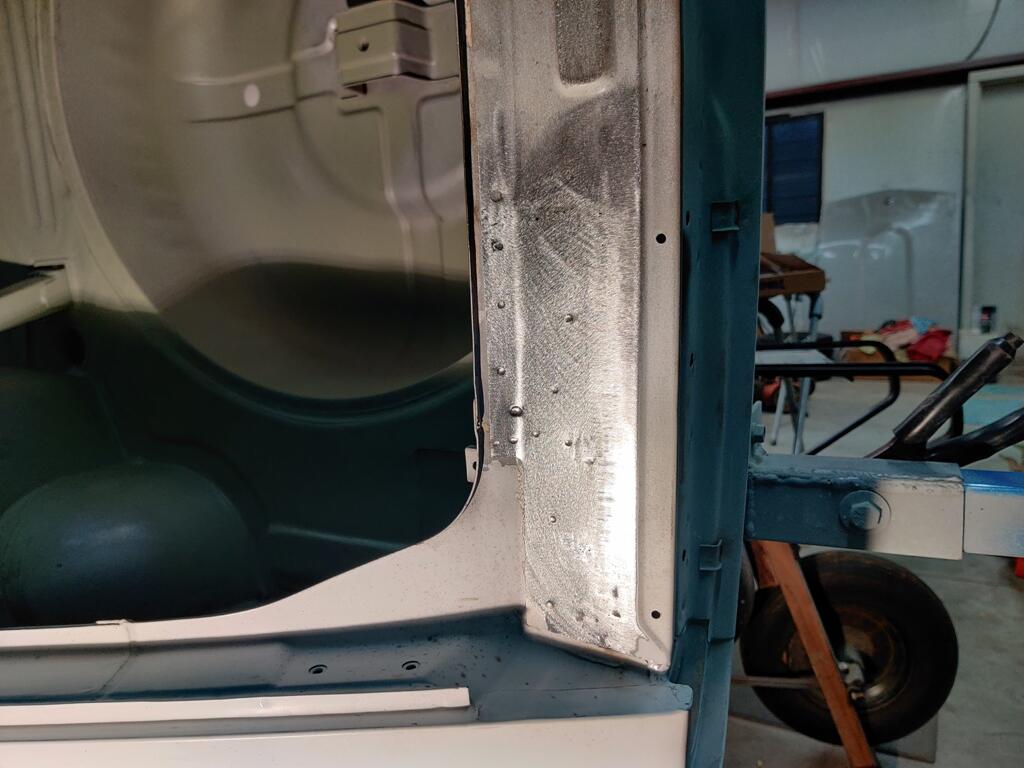
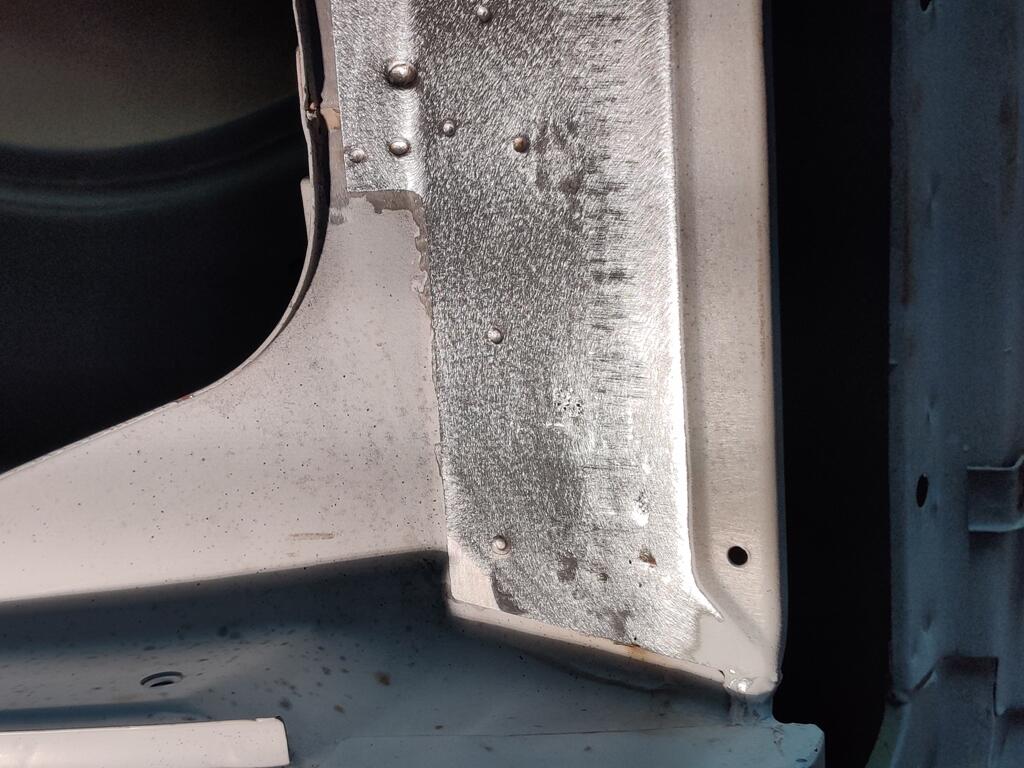
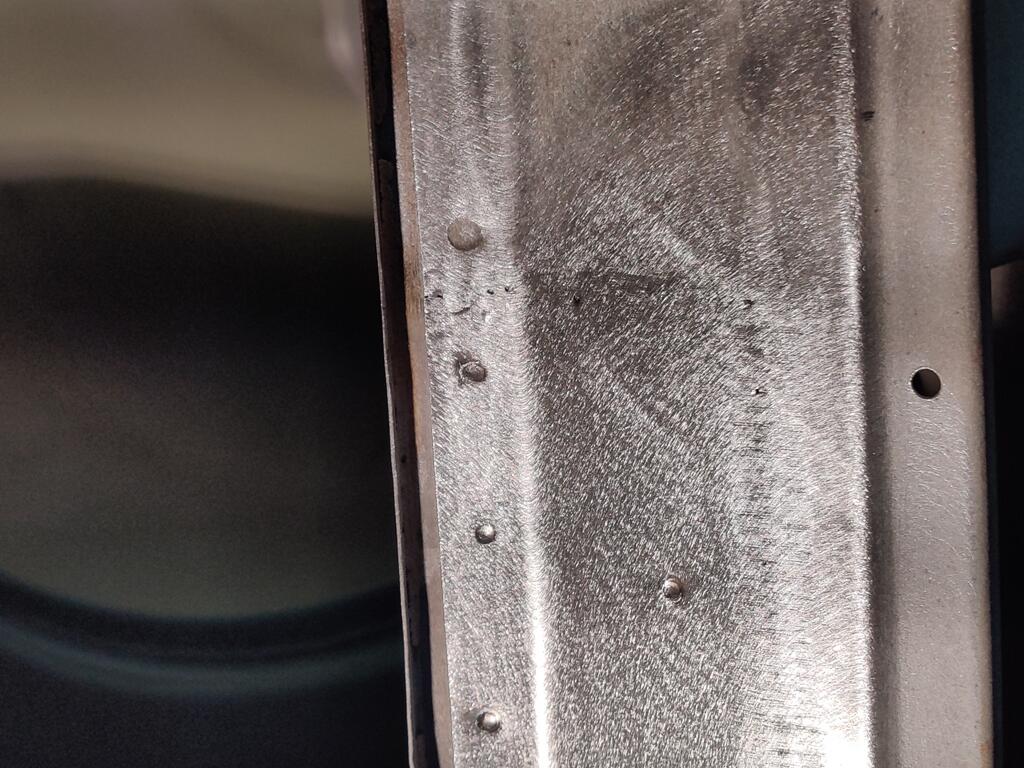
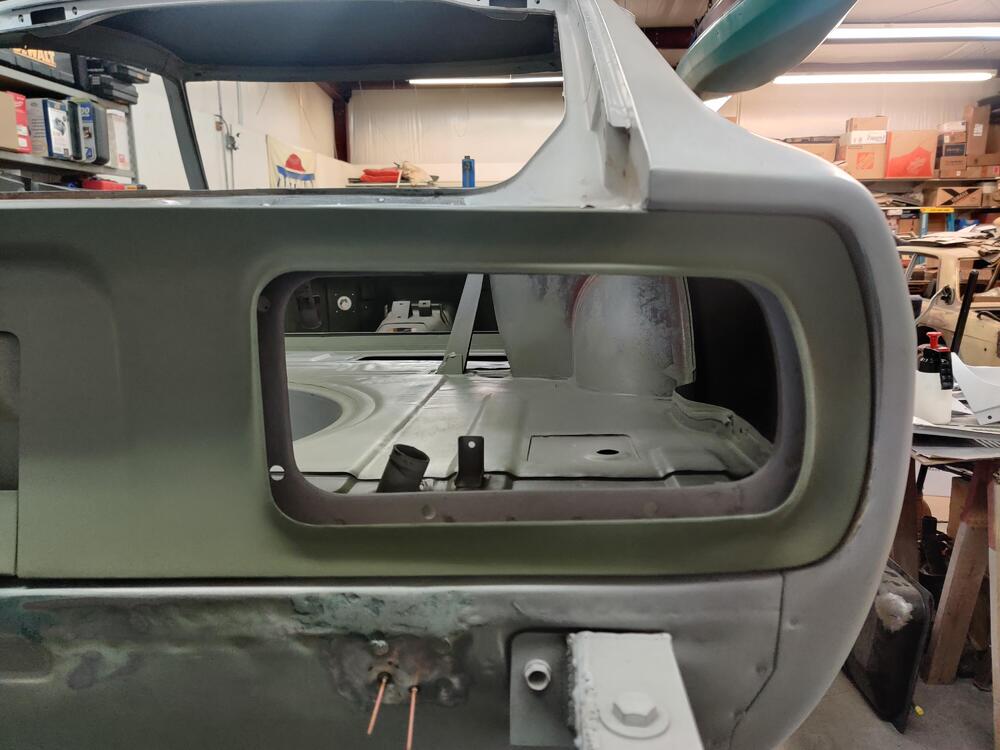
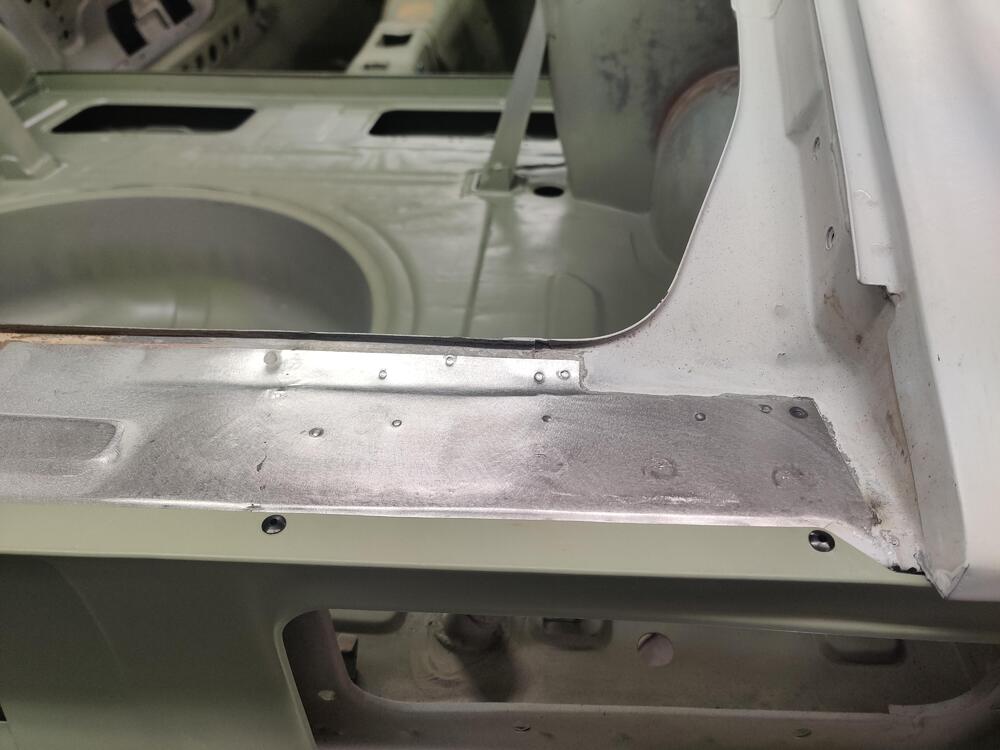
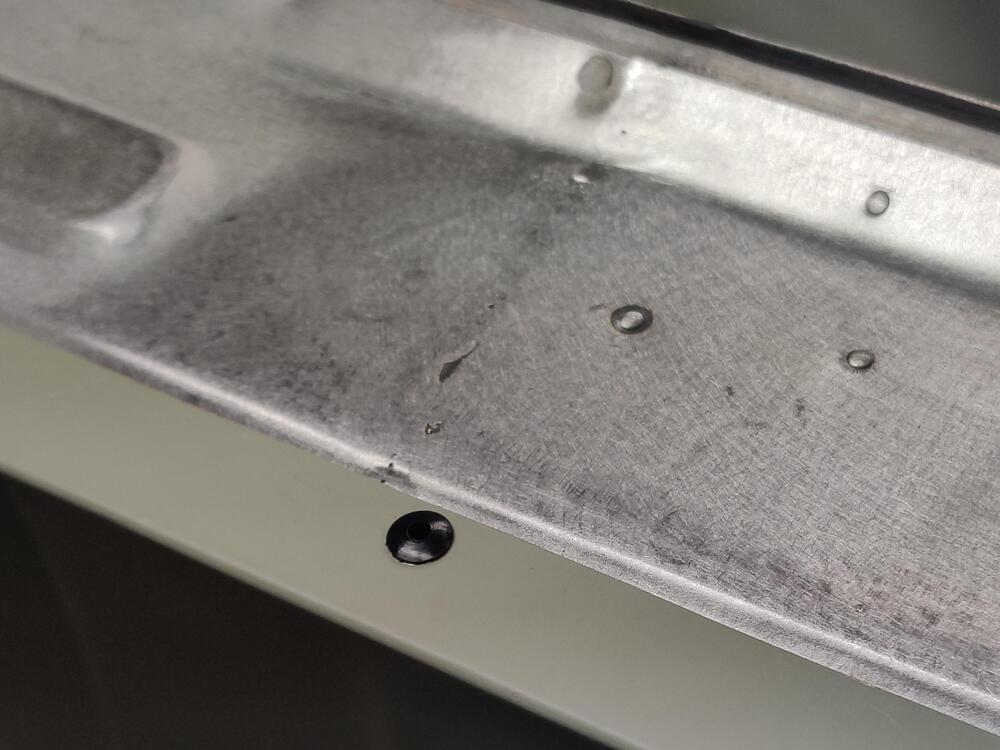
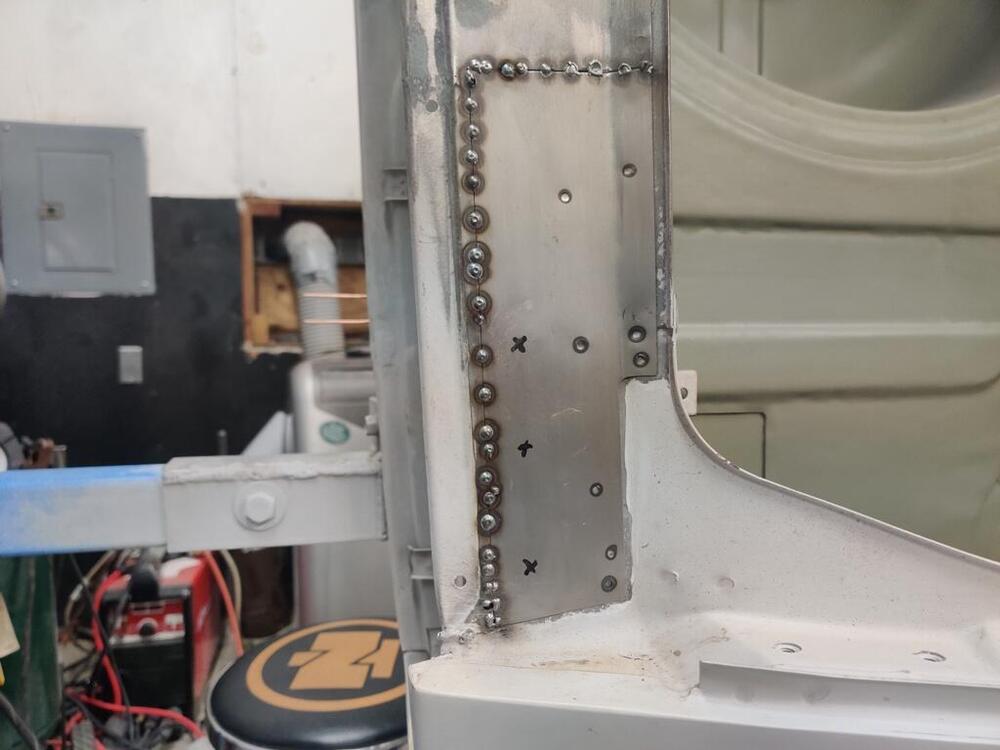
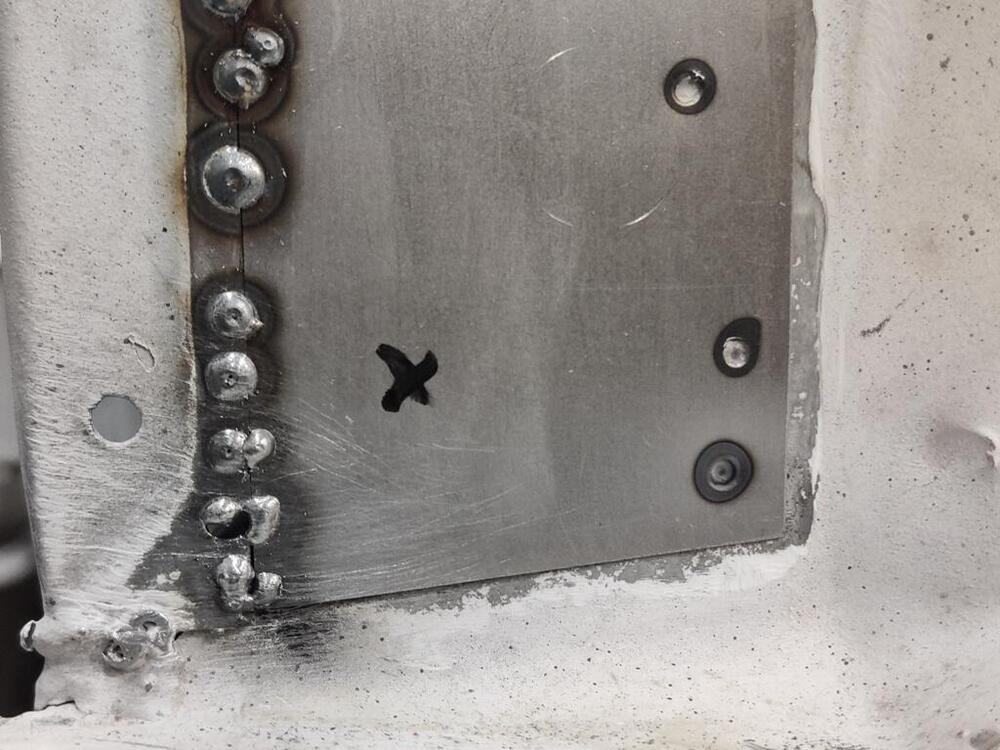
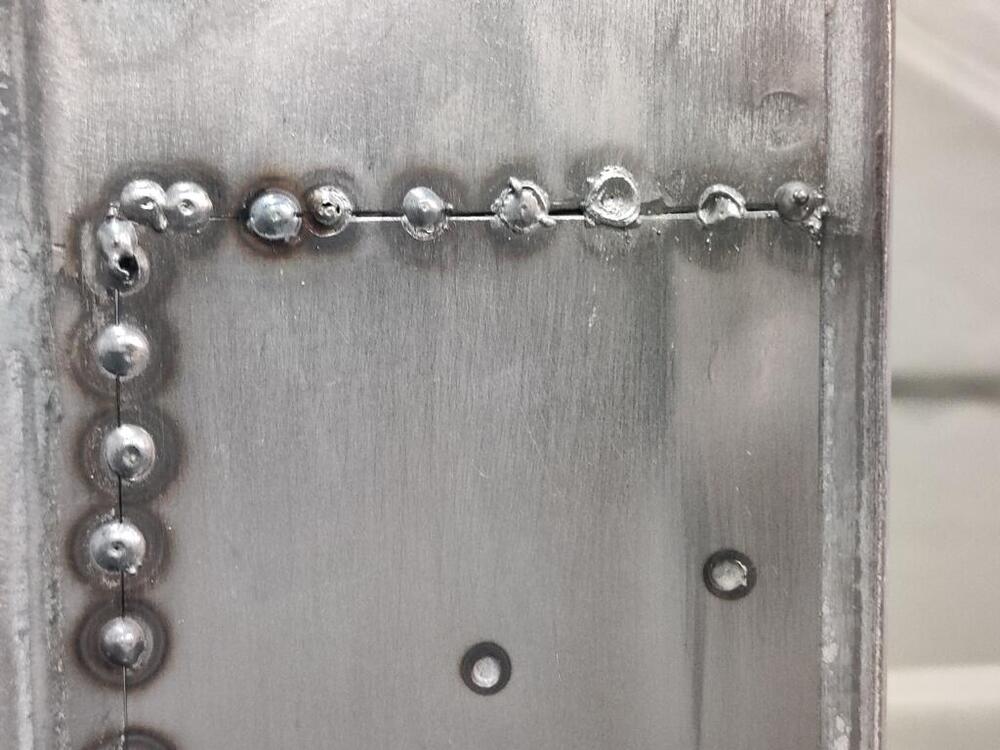
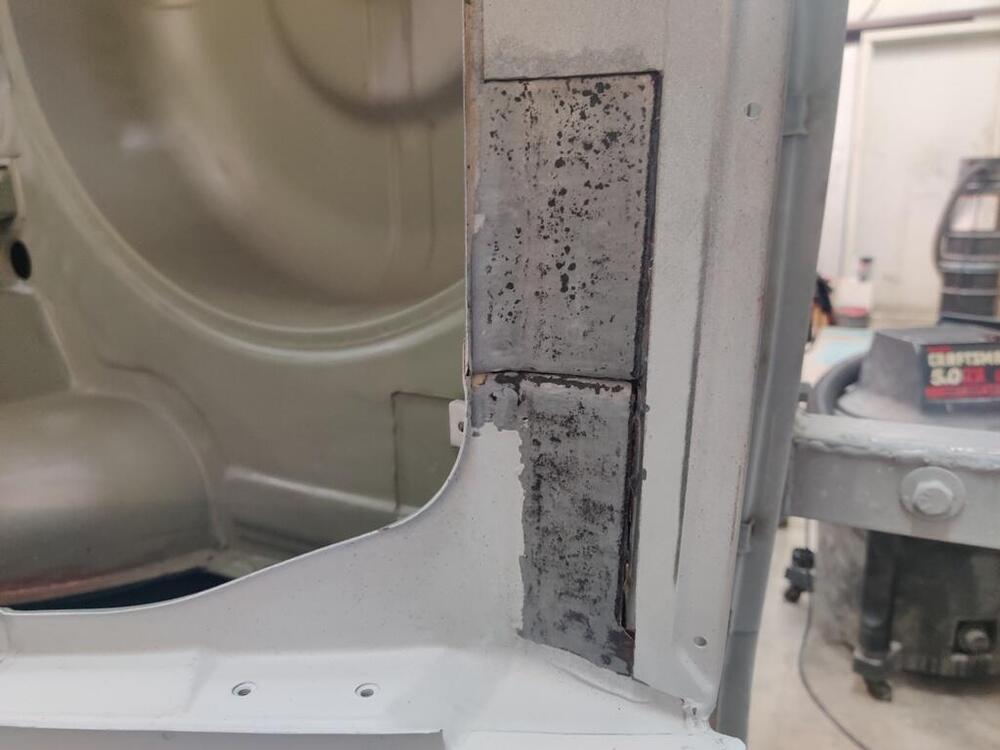
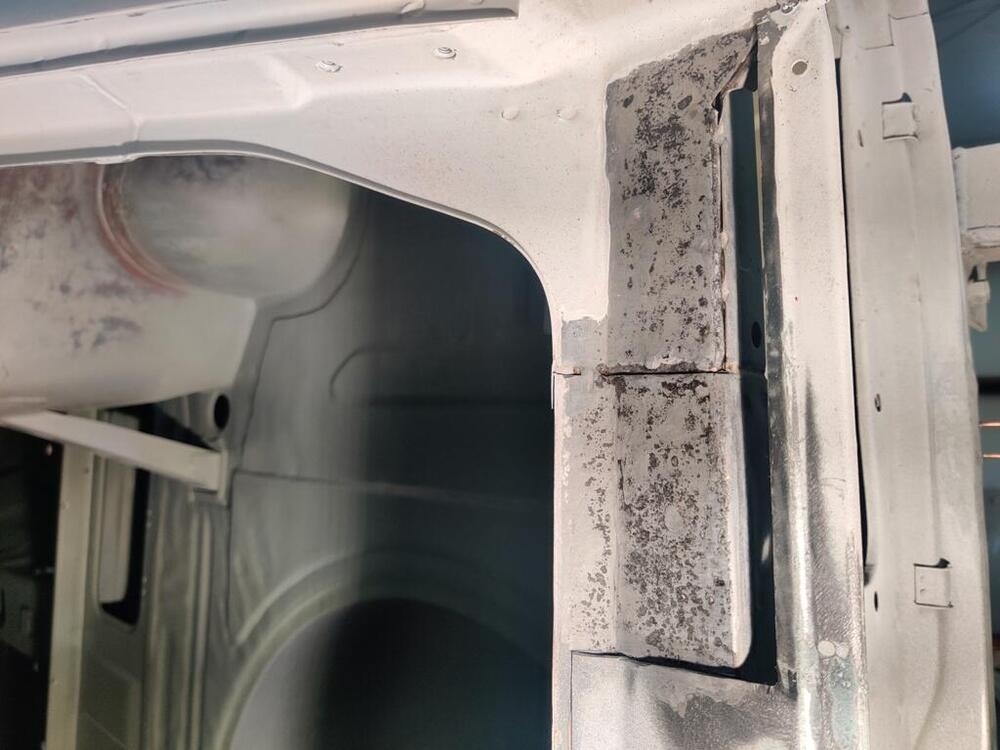
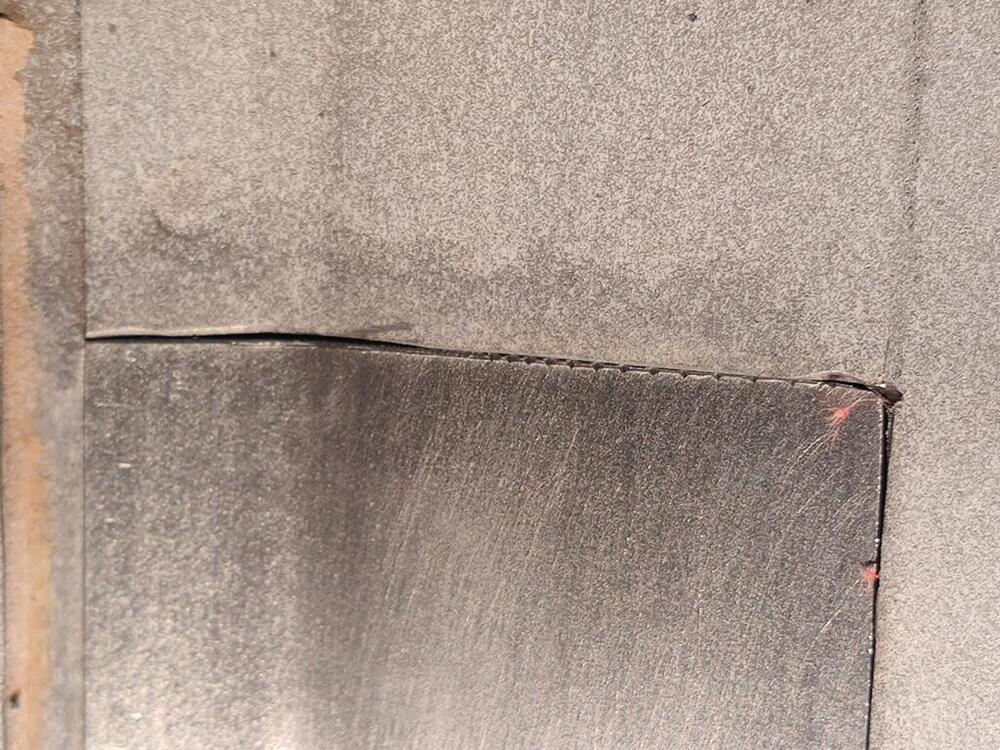
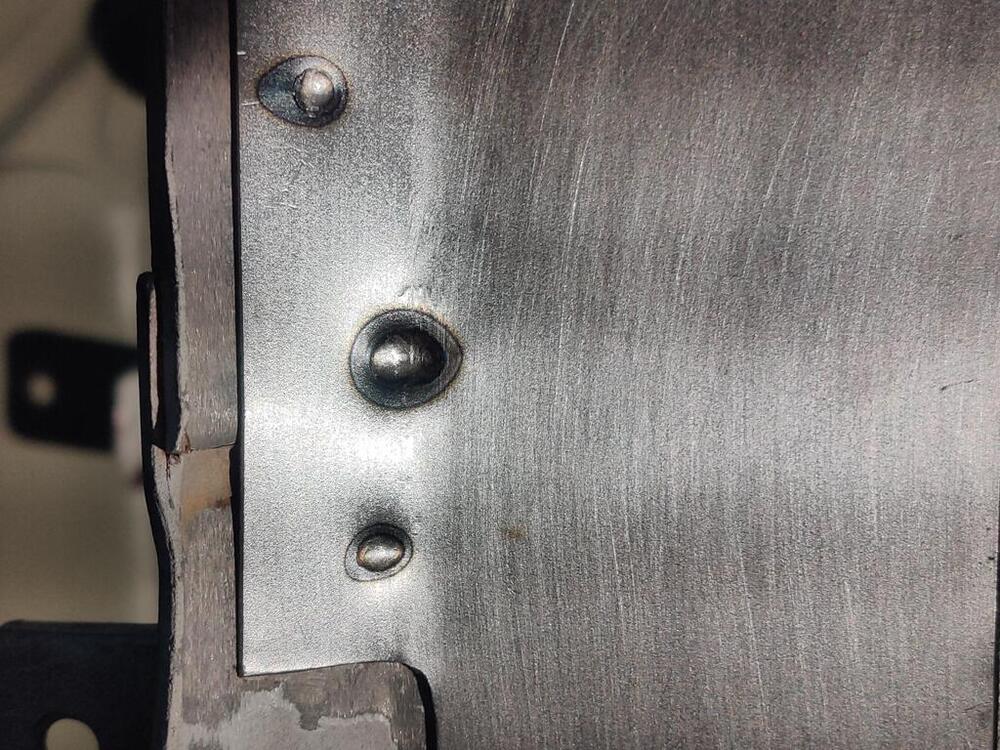
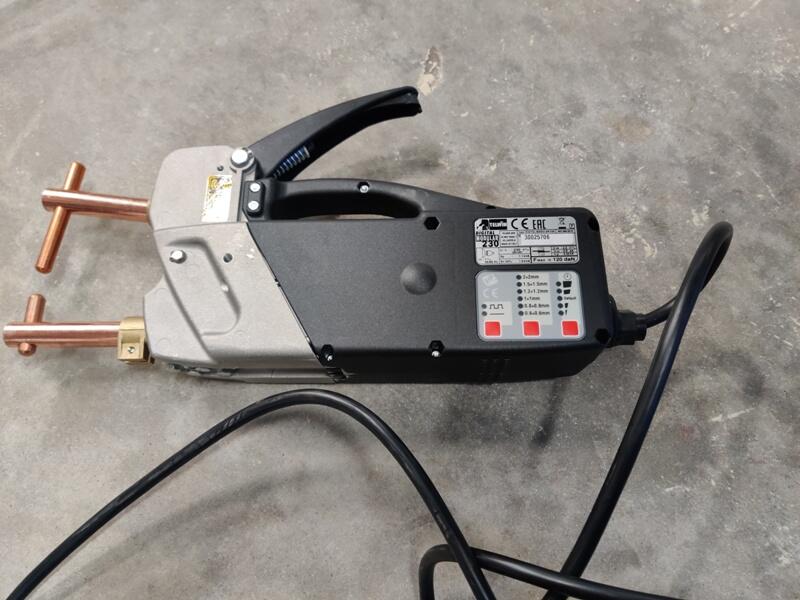
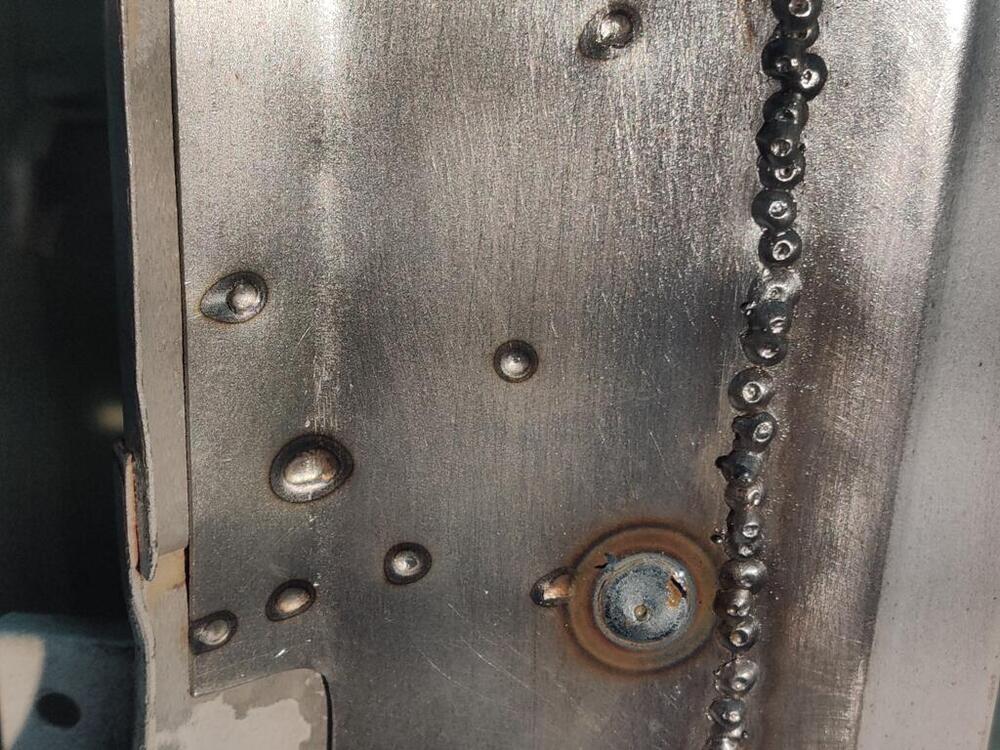
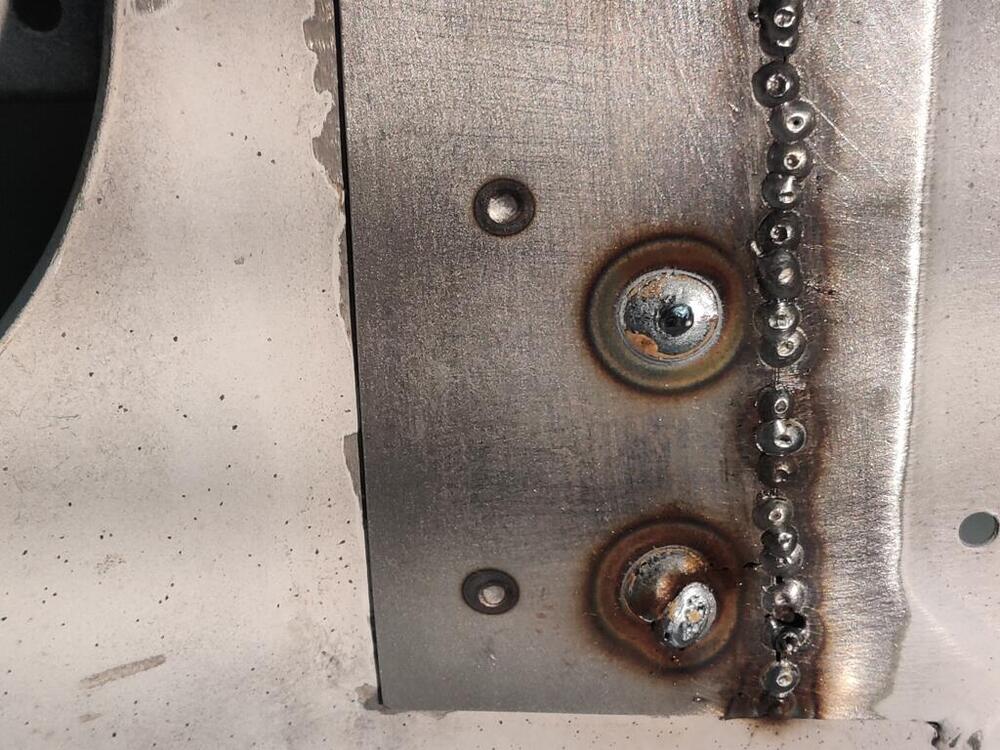
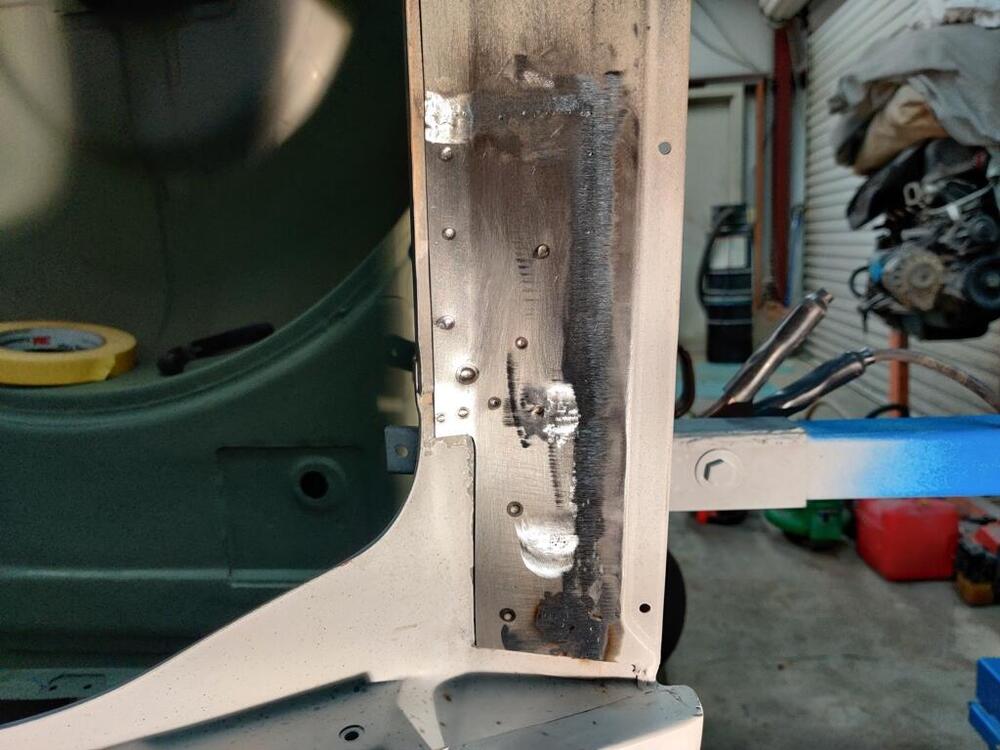
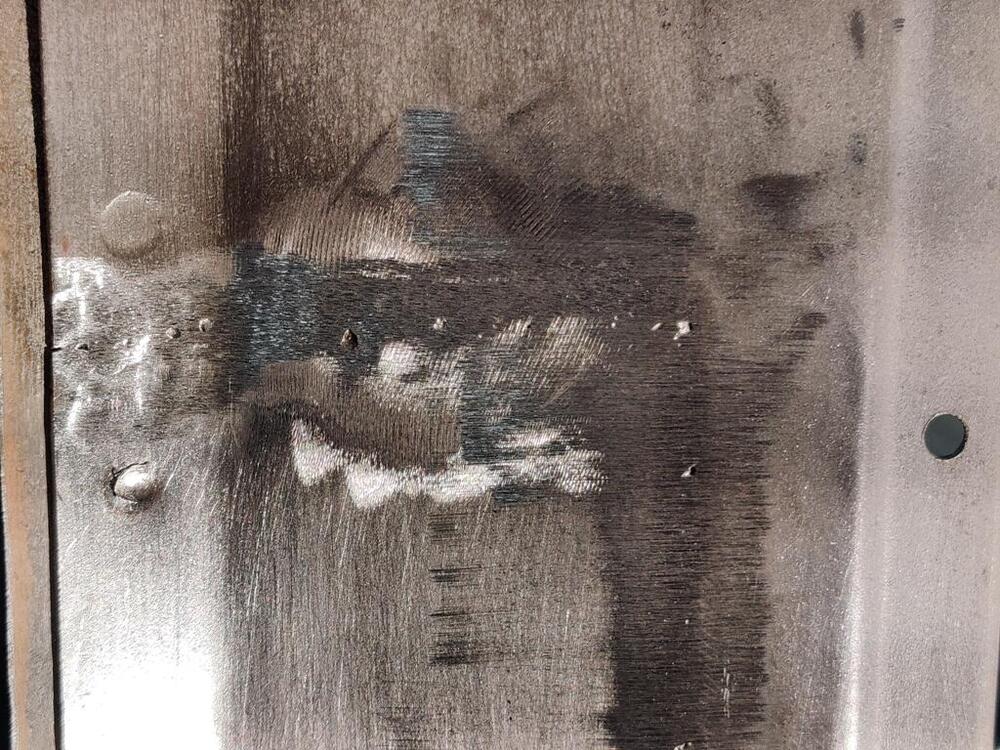
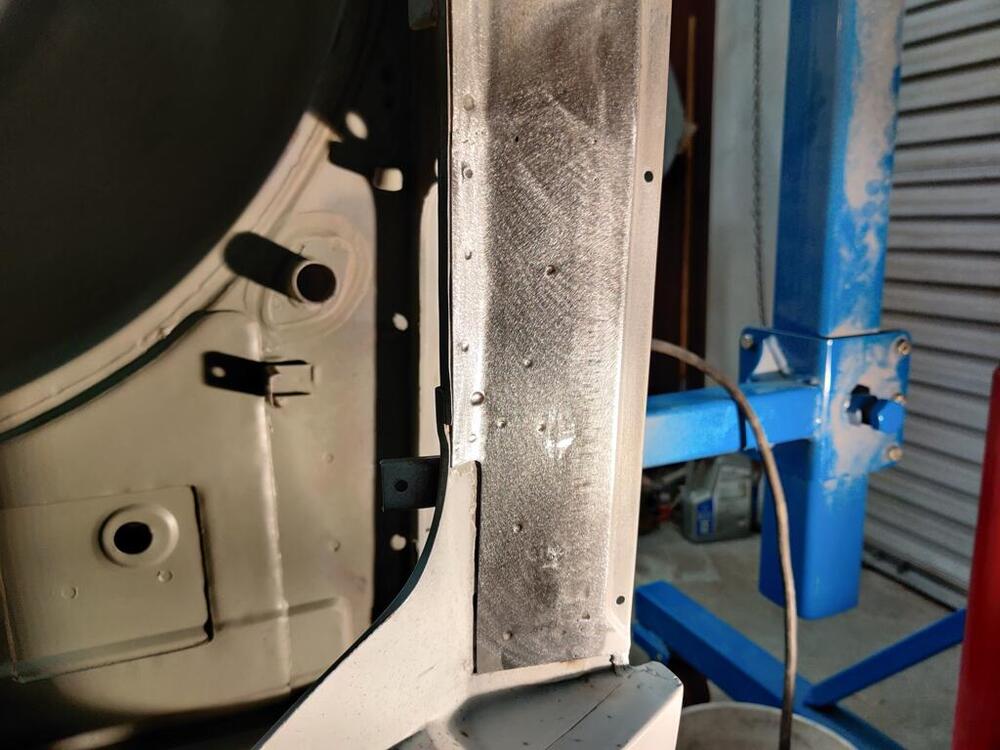
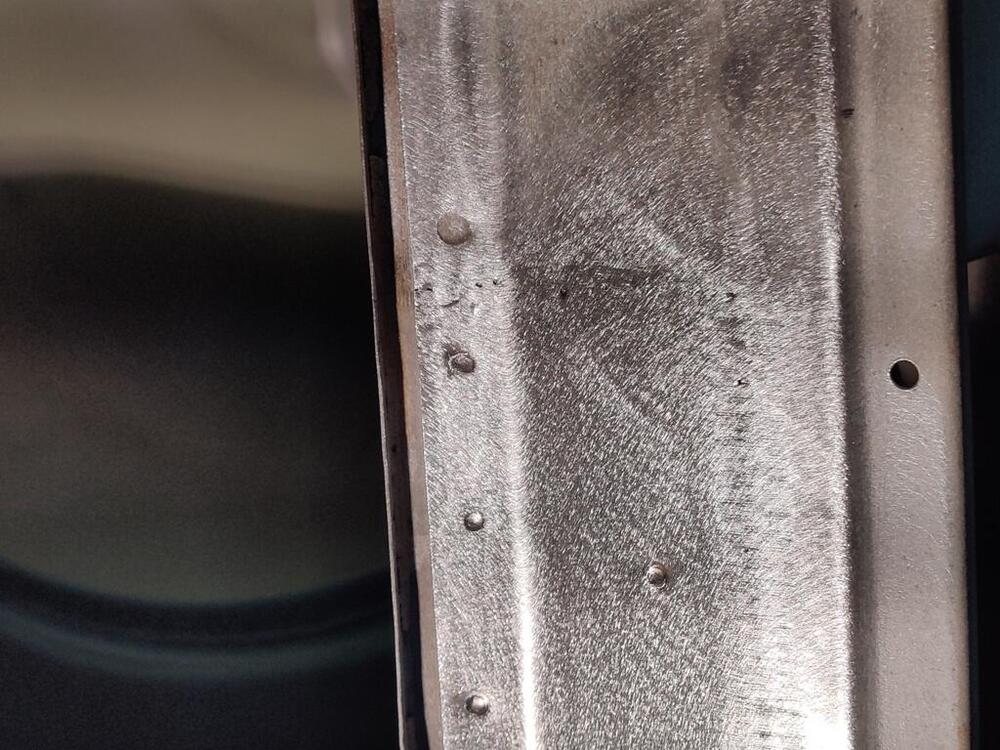
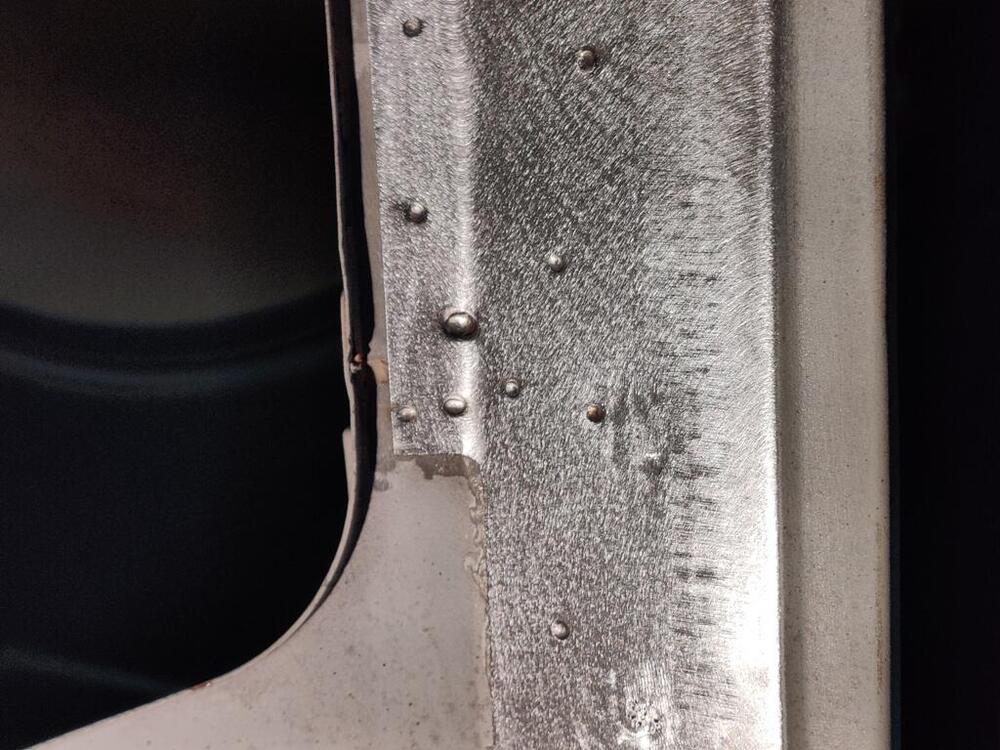
Good stuff. CAD skills to even a beginner degree are something I wish I had. While I thought I was done with metal work, I decided to revisit a repair I made to the tail light panel where it forms the ledge inside the hatch opening. My repair in the passenger corner was one of my early metal repair efforts on this car. As I am now focusing again on the tail light panel - it has received the least attention so far, I decided that the inside corner areas were not up to par with the rest of the car. Because the car received a light impact to the rear at some point, the sealer under the ledge had cracked, and gave an opening to moisture. So, in the hatch corners, the metal had obviously rusted in between the panels, causing the ledge (in the corners) to puff up a bit. This area on the left and right is what I am talking about: After cutting away the old panel sections, and grinding away the rusted metal, I used a chemical treatment to neutralize the remaining spots of rust. Then, I fabricated a patch panel. I spent extra time getting the fit as close to dead on as possible. Then, I decided to use the spot welder I bought (a while back now). It does a good job, for sure, but when I purchased it, I was hoping it would replicate the factory welds. Unfortunately, these spot welds are notably smaller in diameter. Still a cool tool though. It won't reach everywhere, of course, so I put a few rosette welds (large round welds next to the mig weld seam) to finish putting welds back in the factory locations. Most of these spot welds are in the factory locations, but I also put a couple of extra ones. 🙂 A whole bunch of pictures follow: After grinding away the extra, I used 80 grit on a DA Sander to give the entire repair area a nice texture. I feel better about this repair than leaving it the way it was. Now, I just have to repeat for the right side. It will take several hours.


-
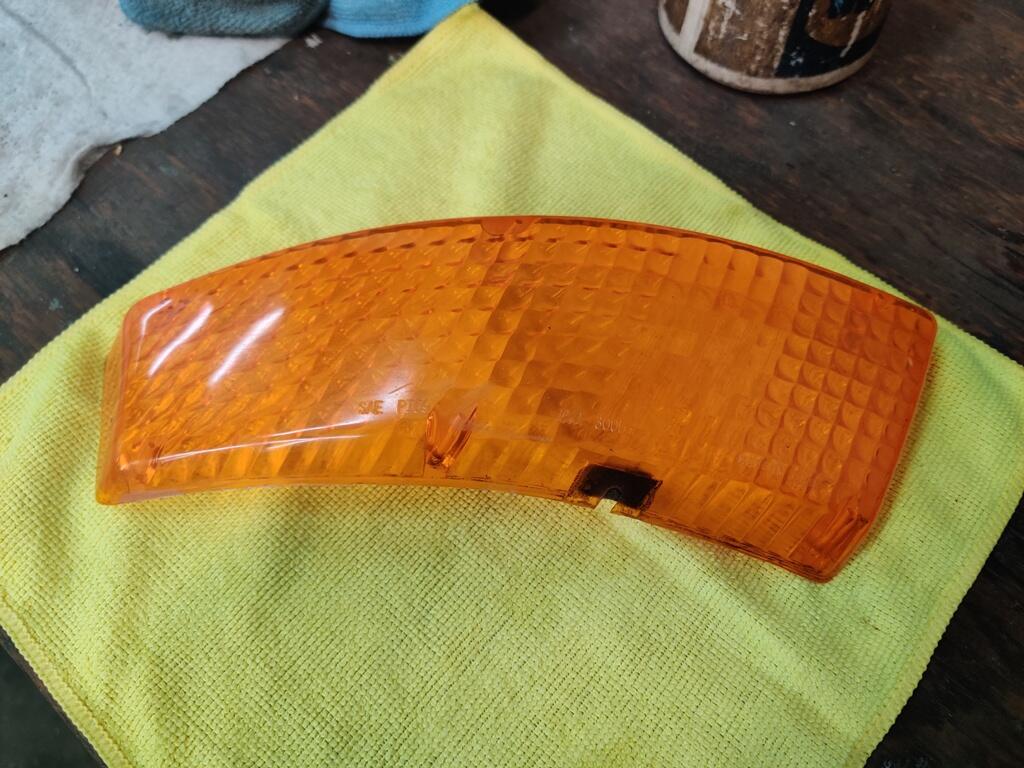
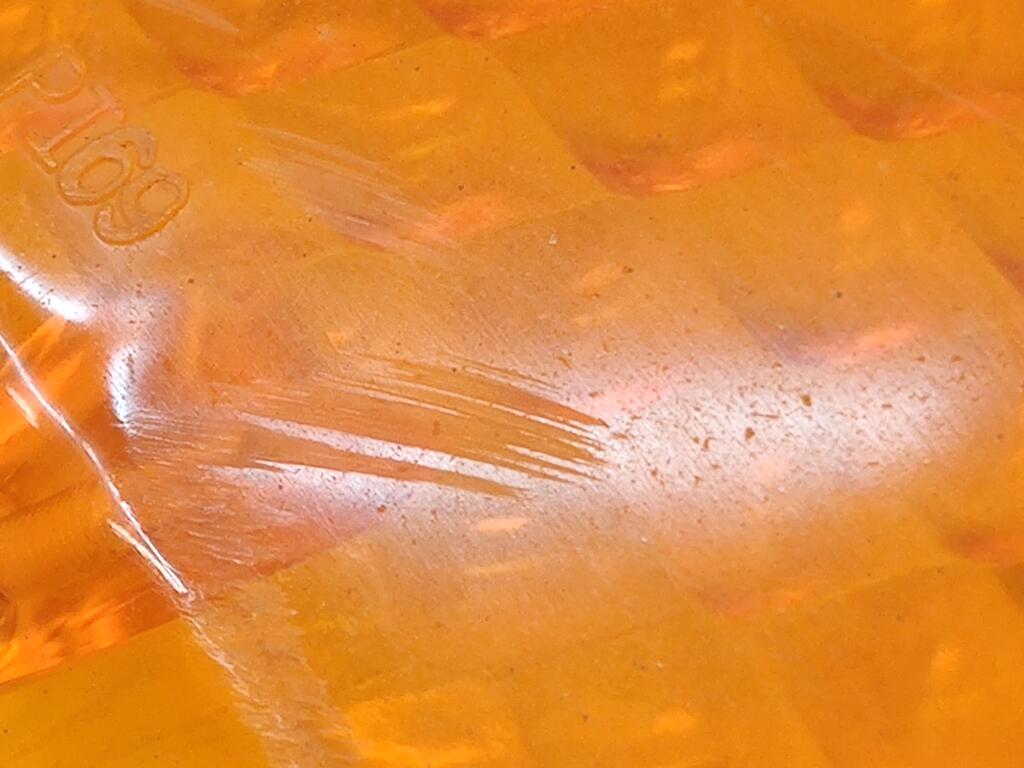
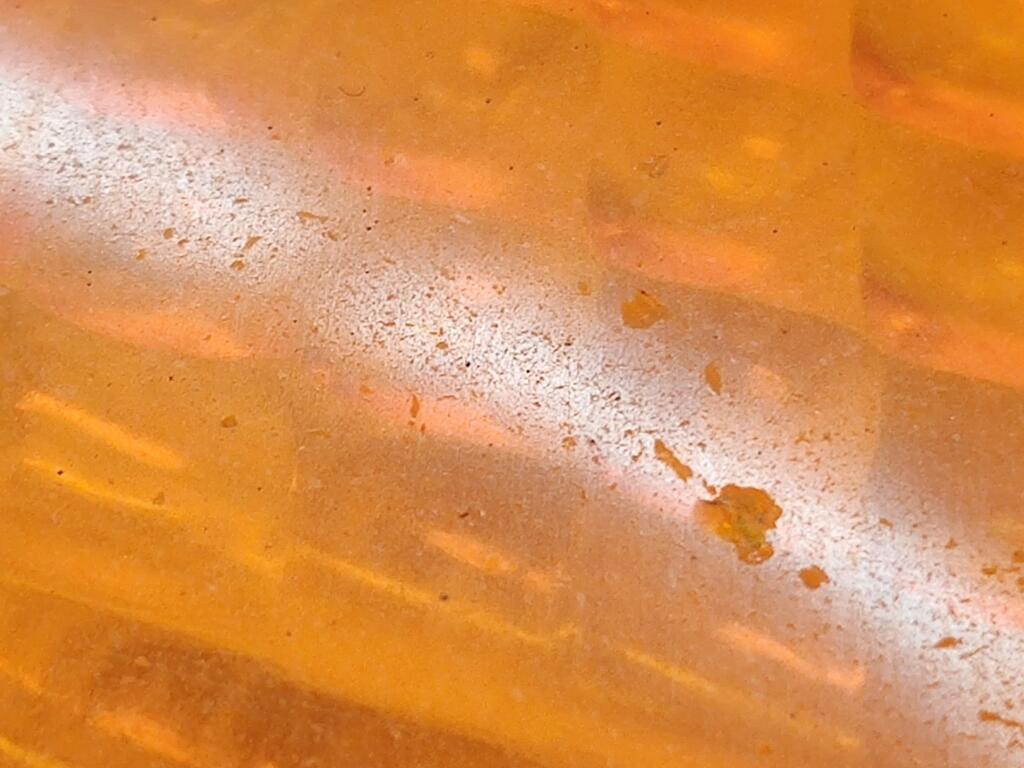
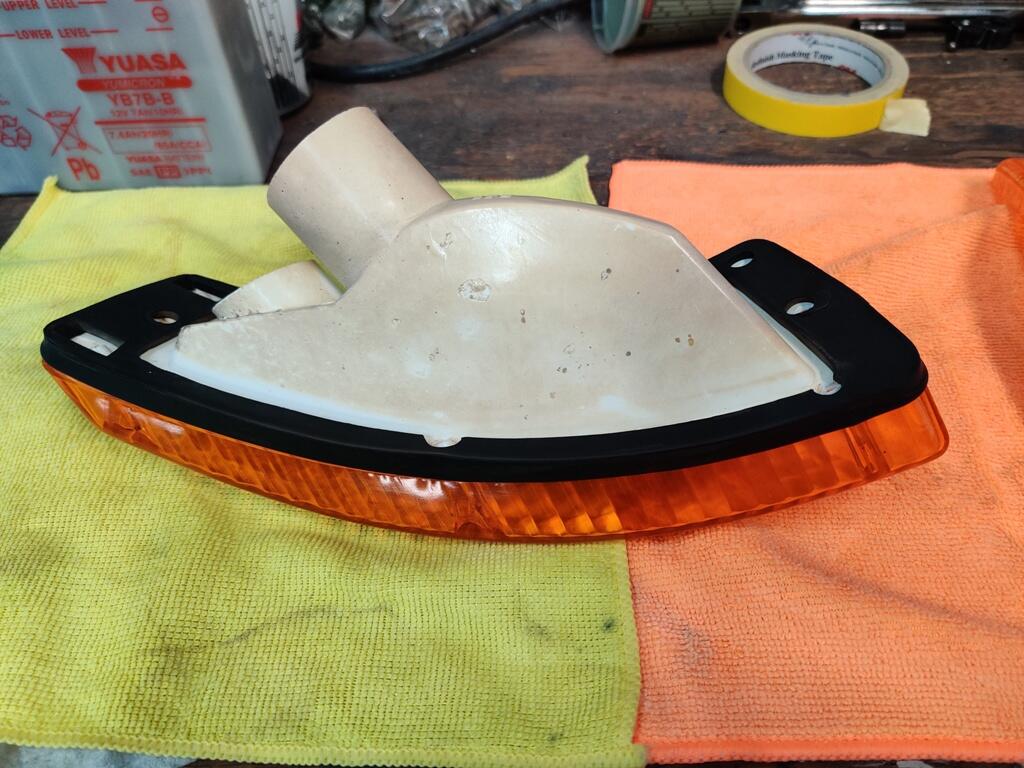
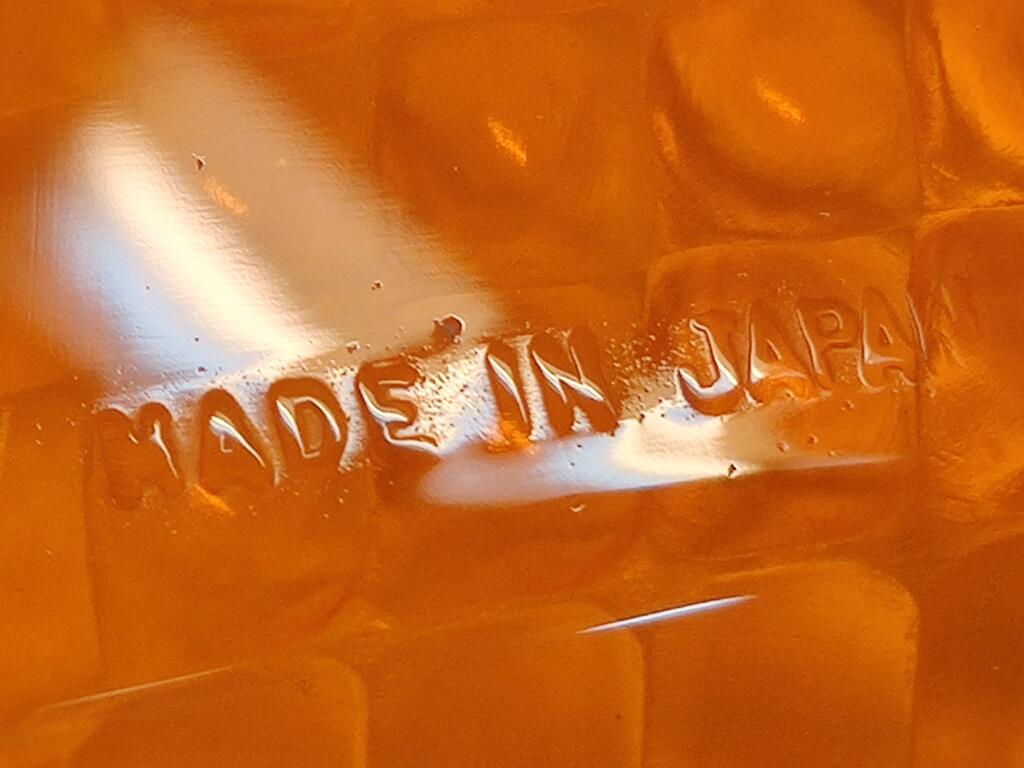
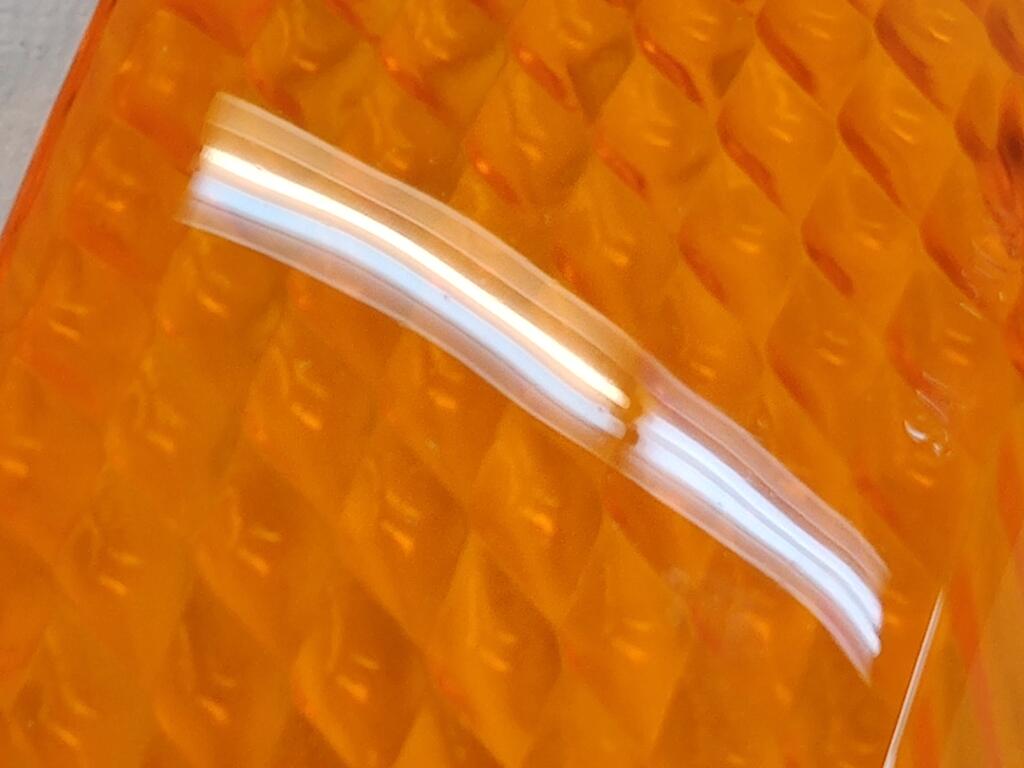
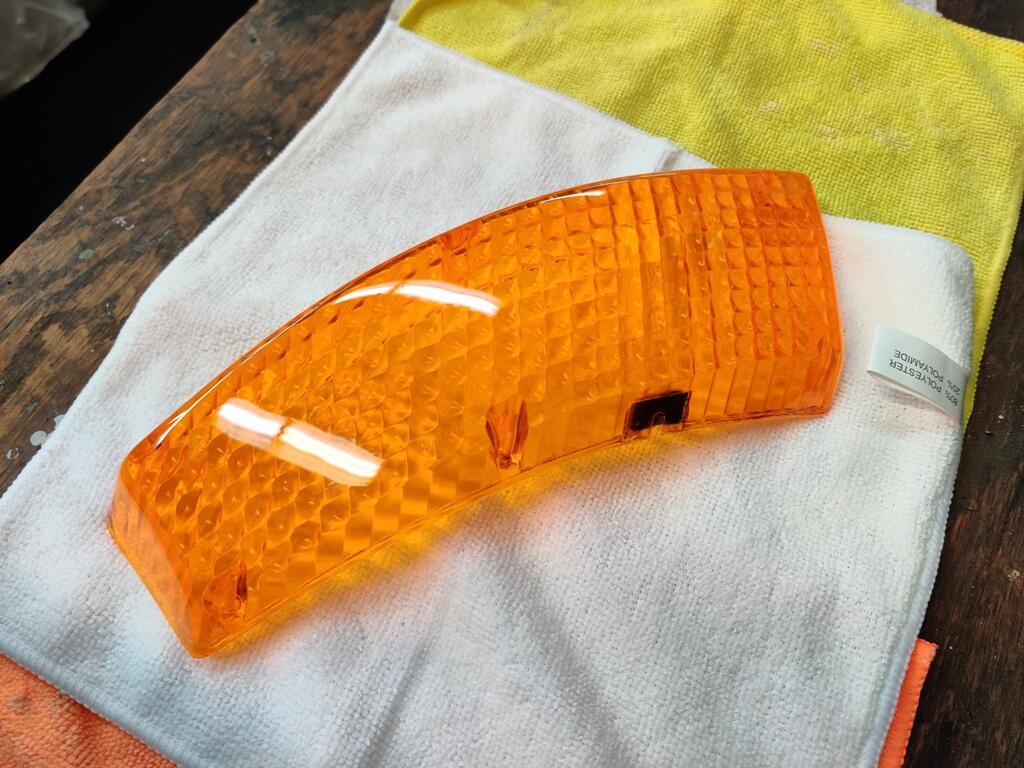
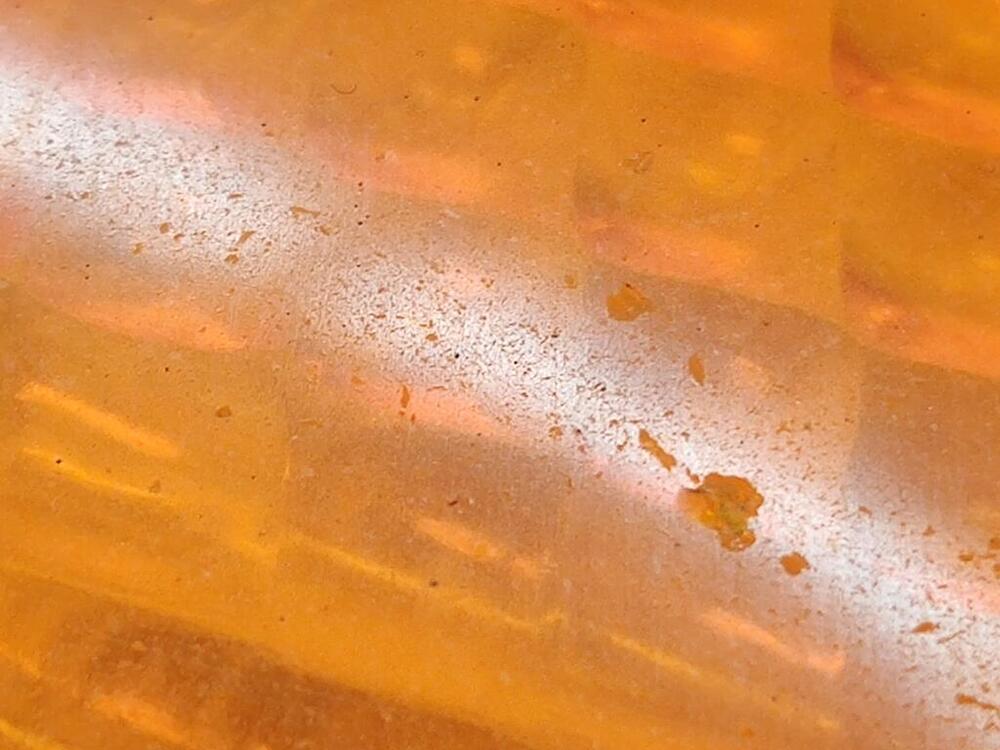
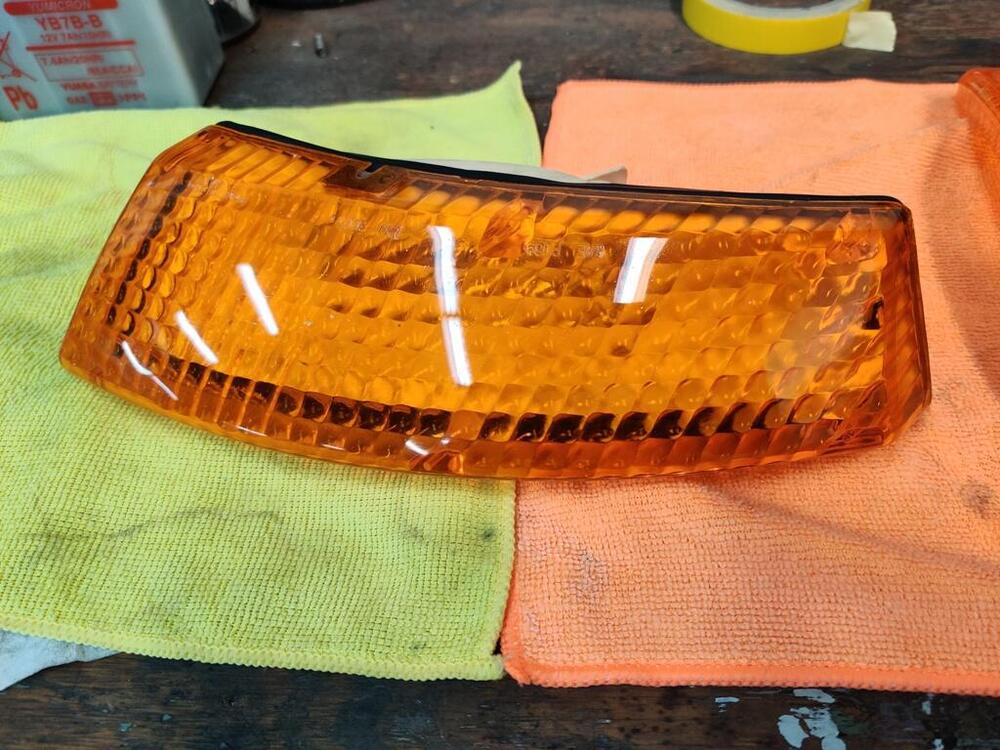
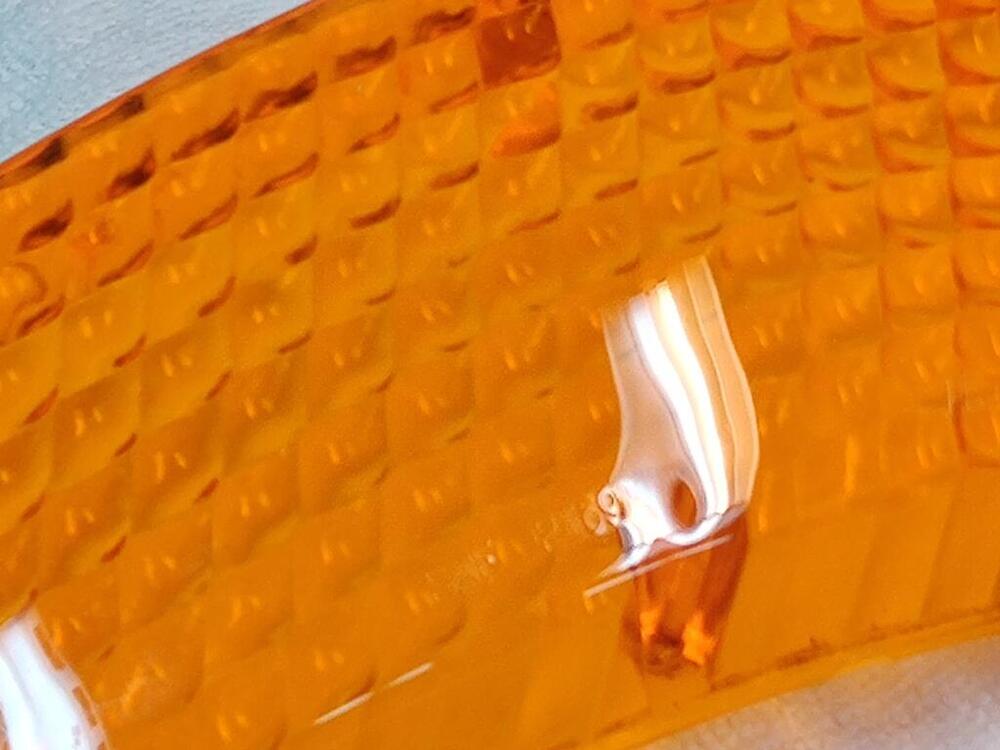
While waiting for fasteners to be re-plated, I find myself looking for little projects to complete. I went about restoring the front turn signal assemblies yesterday and today. These front lenses get a lot of abuse... essentially, they get sand blasted over time. These are likely original to the car. They look ok at 10 feet, but get up close and you can see they are quite dull. And, they have taken some impacts from rocks and road debris. The close ups were taken at 5X magnification. I used several grits of sandpaper and performed a wet sanding process. I started with 320 grit, then moved on to 600, 1000, 1500, 2000 and 2500. For the first two grits, I left tape in place to protect the lettering. After wet sanding, I buff with Meguiar's compounds and foam buffing pads. #83 first, then #7 "Show Glaze", using different buffing pads to keep from mixing. While I didn't achieve perfection, the results are pretty good. Next up will be the rear tail light lenses. They will be easy in comparison because they don't take the sandblasting impacts like the front lenses.


-
How do you get drawings like that? Is it some type of CAD software?
-
Purple power will do that to aluminum. You should be able to glass bead blast it, or possibly scotch brite it to remove the oxidation... and still use your old one.
-
Note that clicking "watch item" triggers the same thing. The ebay platform has functionality for sellers and they are reaching out to people who have expressed interest - they are more qualified leads after all. Some sellers do, and some do not extend discounts.
-
I looked around a bit on their site. Looks like the ultimate erector set. There are so many pieces! It would take me hours to look at what all is available and then figure out what I'd need.
-
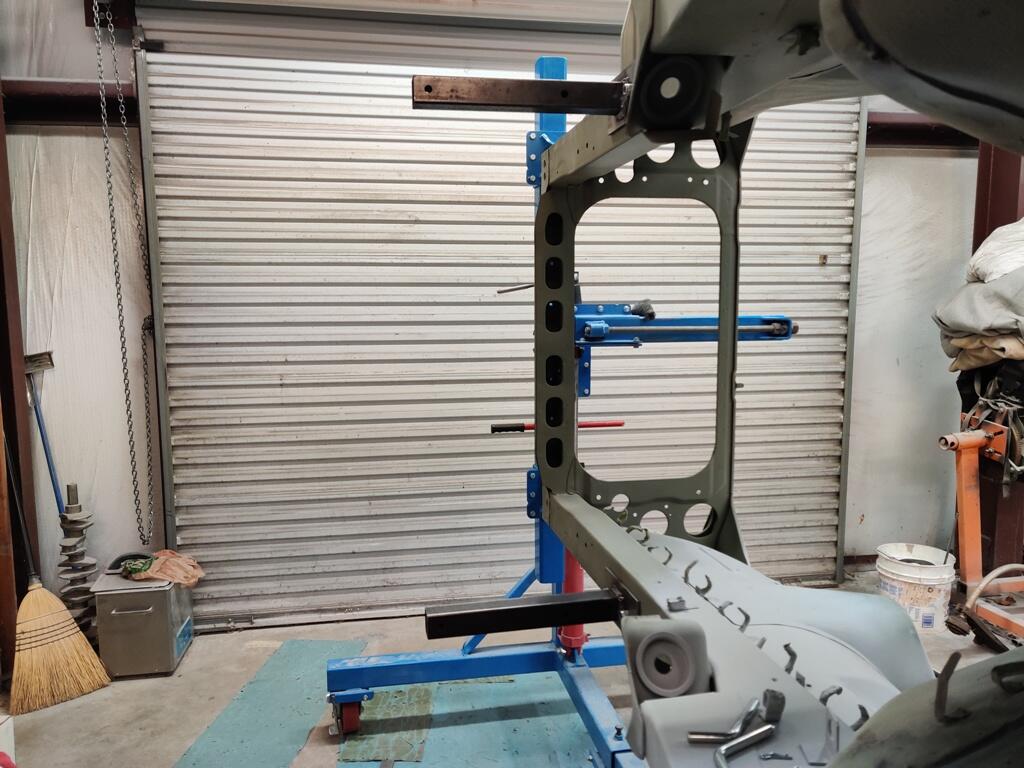
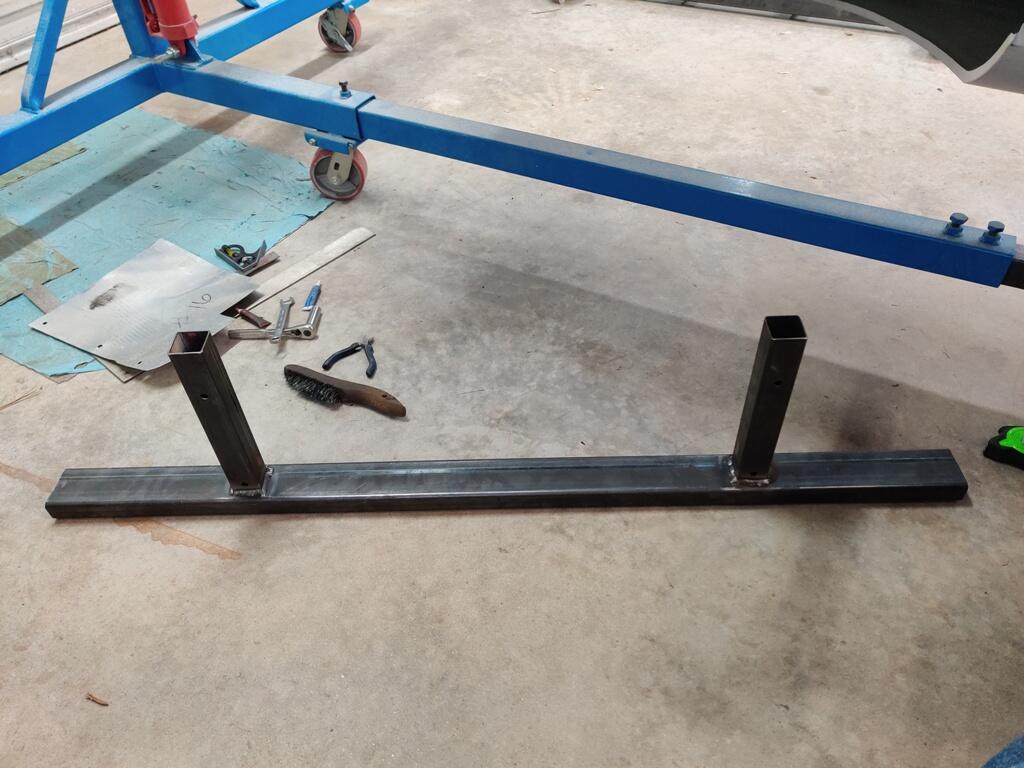
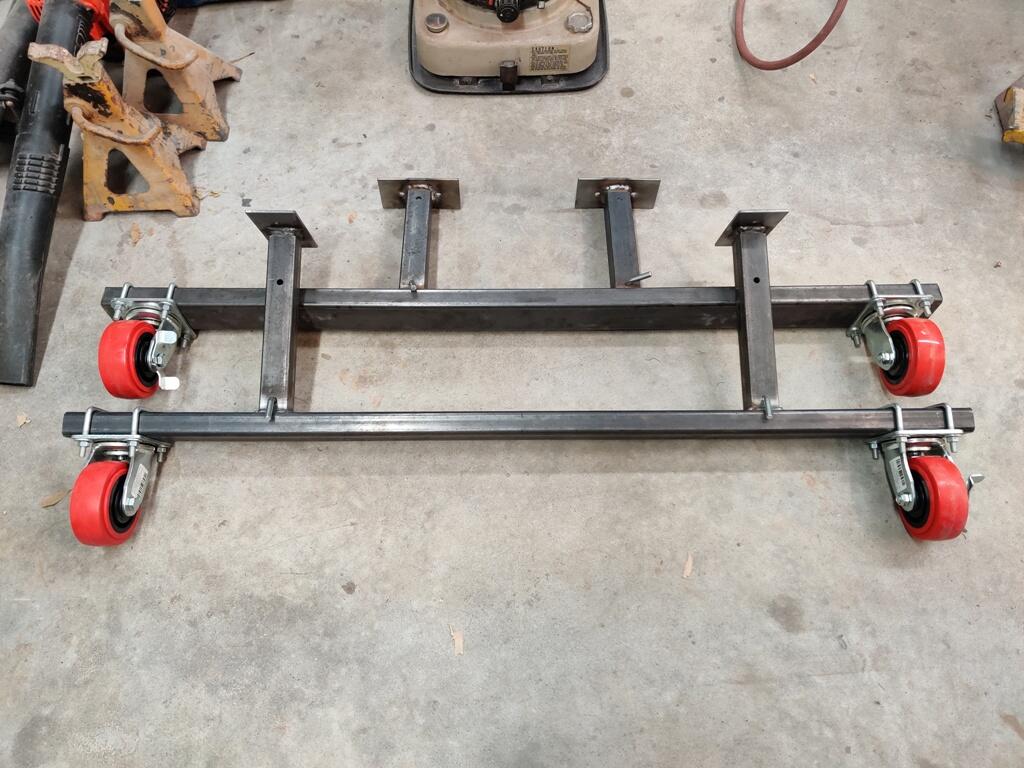
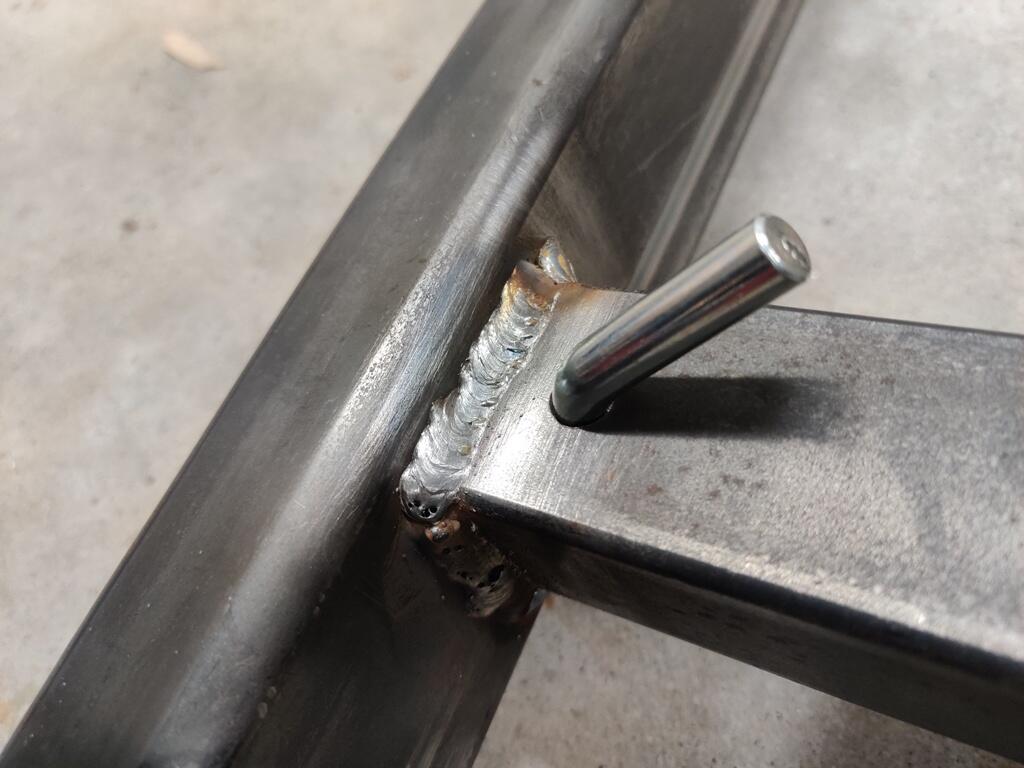
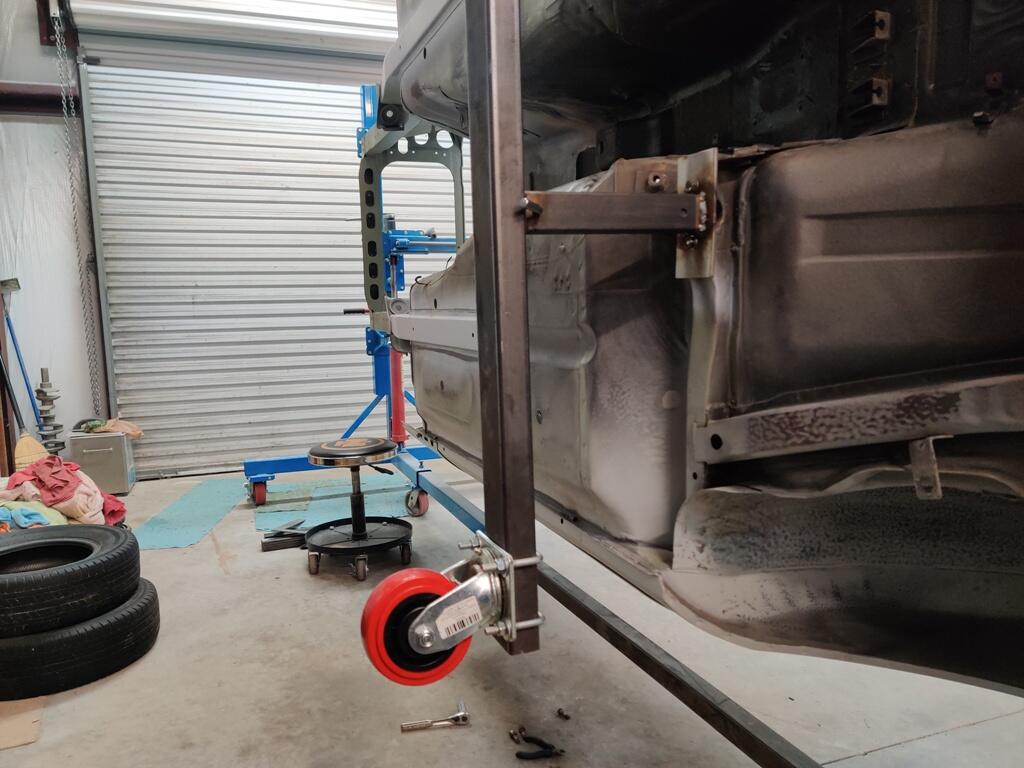
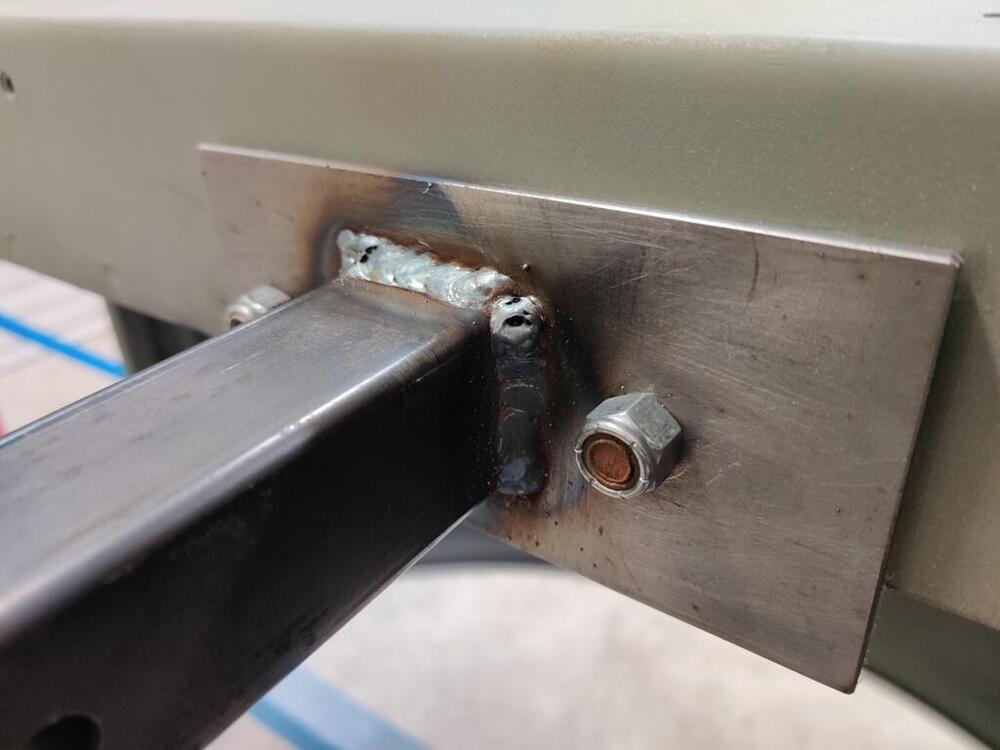
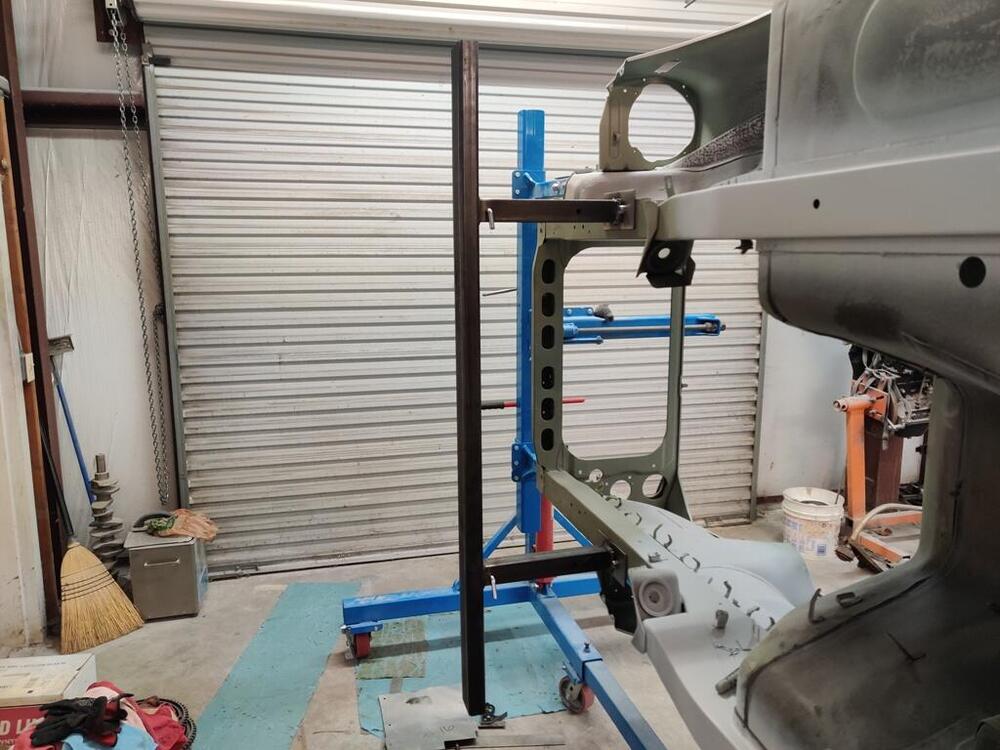
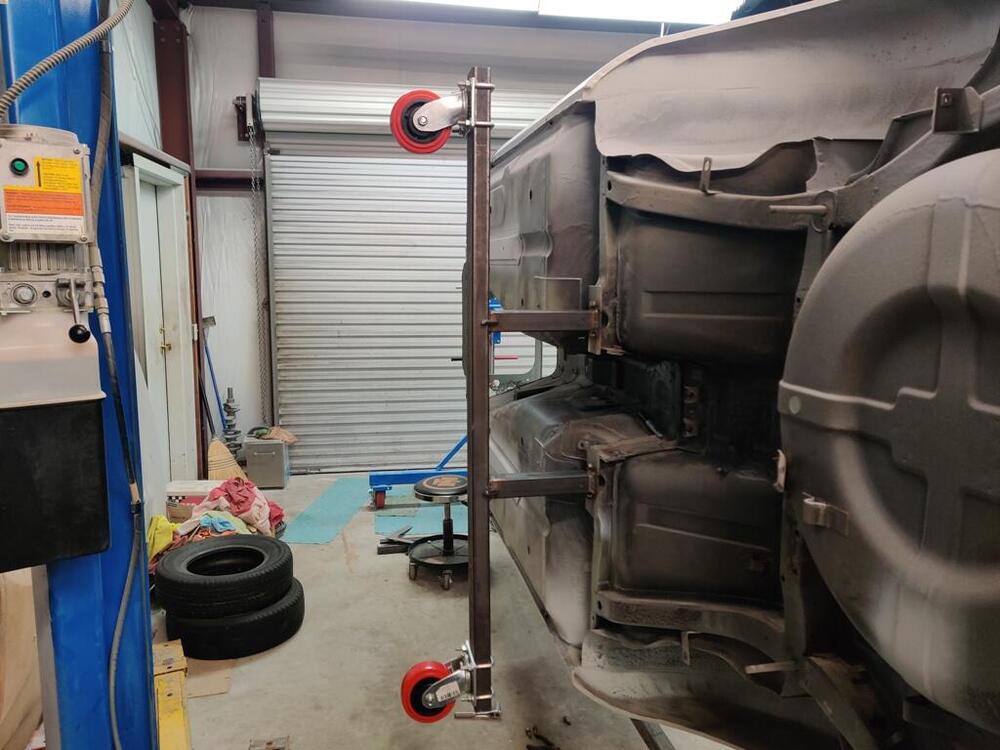
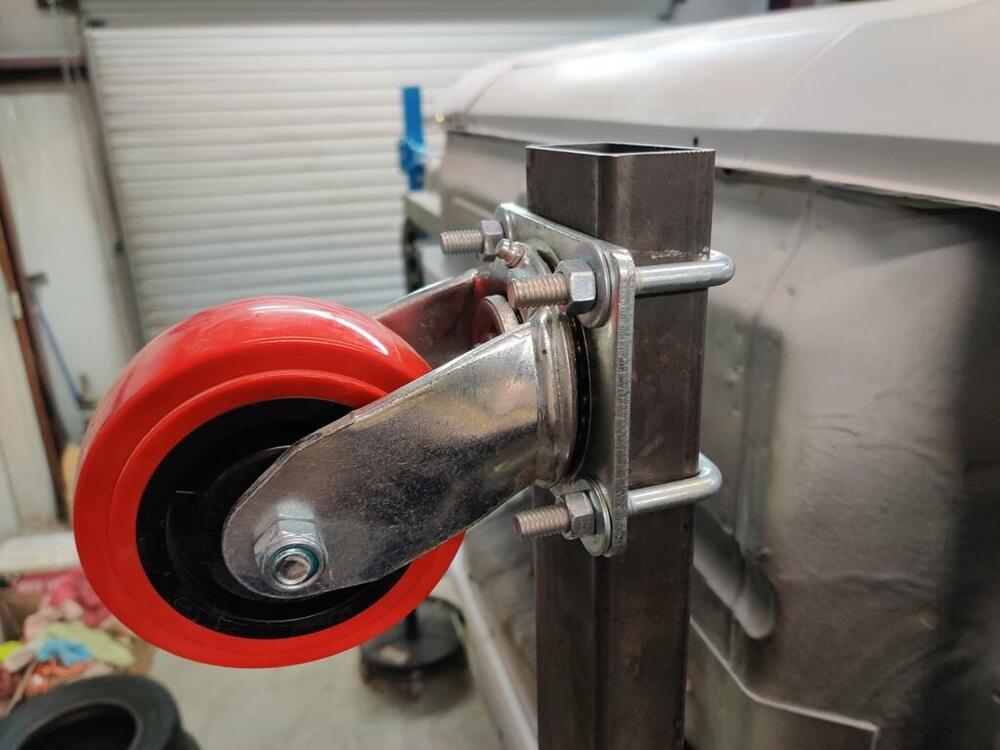
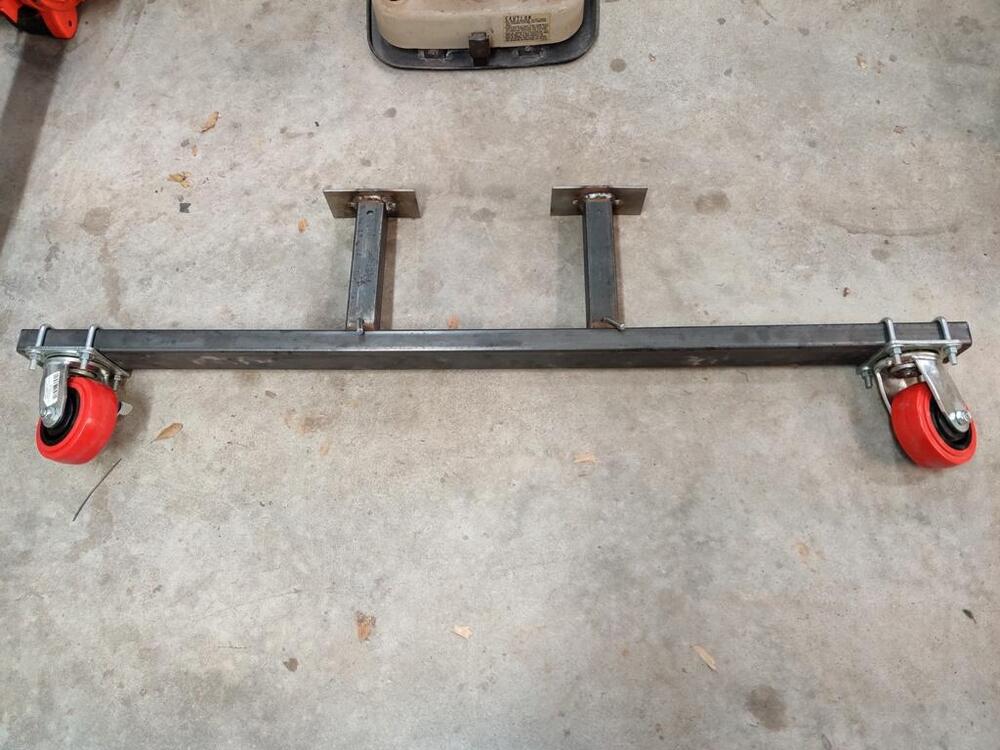
Today, I fabricated the front rolling frame assembly. The cross beam is thicker wall that the rear one - it is heavy. I didn't measure it, but the wall is about 3/16" - definitely thicker than the rear one which looks to be about 1/8" wall. When welding the square post to it, I had my little Miller Mig 90 maxed out. While welding, I would sit the end of the nozzle on top of the cross beam and wait and wait, and then kiss the edge of the square tubing and then back over the cross beam... and wait and wait, and then kiss the upright square tubing again. Easily spent 4 to 5 times as long trying to put heat into the cross beam to get penetration. The plates that mount to the car are nearly 3/16" thick. Though the welds could be prettier, I am confident they have good strength. It will be an exciting time when I get to use these as the car will be really close to being ready for paint. 😍


-
I happened across this and found it interesting. https://www.retrosoundusa.com.au/index.php?l=product_detail&p=363 Classic Auto Sound specialize in "turning back time" on your classic car radio. This conversion features music streaming & hands-free Bluetooth, AM/FM radio, USB & AUX inputs and more. The ultimate in period-look with today's technology. Anyone bought one?
-
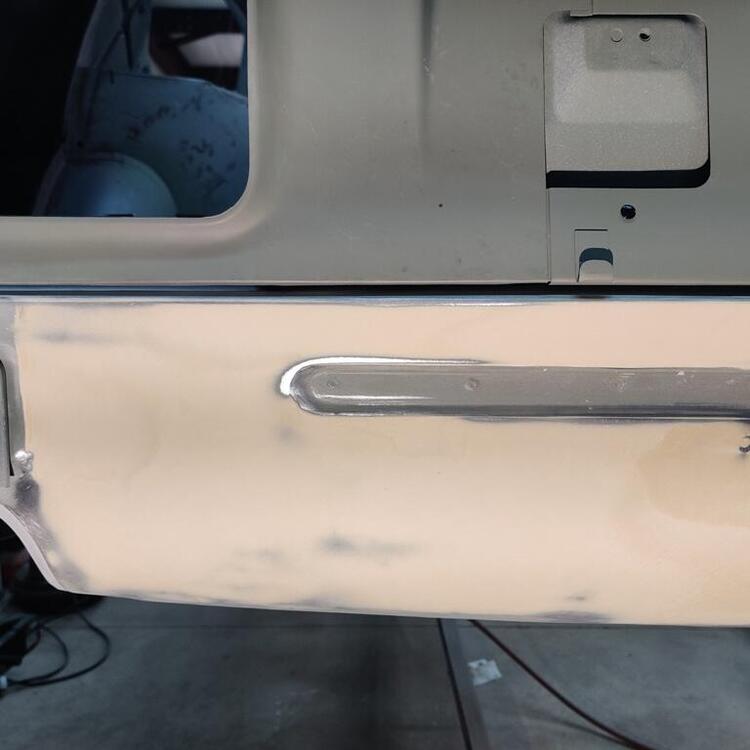
Hmmm. Maybe I should do that. I'm not ready to use these, won't be for a while longer. I'll have to look for suitable "drops" at my local metal store. Those are the leftover bits that they sell for a single rate by weight. Texas Precision Plating got my two shipments ok. Hope they turn my parts around in the early part of January. Once I get them back, I can bolt on inner fender supports, the fenders, and the inspection lids for the last time. Then, I can proceed with the last of the primer coats and final sanding on the fenders. There are still a few other areas to address with further bodywork, such as an area on the passenger door, and the rear tail panel. Getting closer to paint! While the car is at the paint shop, I plan to Black Diamond blast all of the black parts and prime and paint them. It would be easier to drop them all off at a powder coater. But, I figure epoxy primer and paint will be much more durable than the factory's original attempt, but look more authentic. I wish all of my efforts, all of this, was for an early VIN car for value reasons, but hey, 240z's in this good of a starting condition are somewhat hard to find.
-
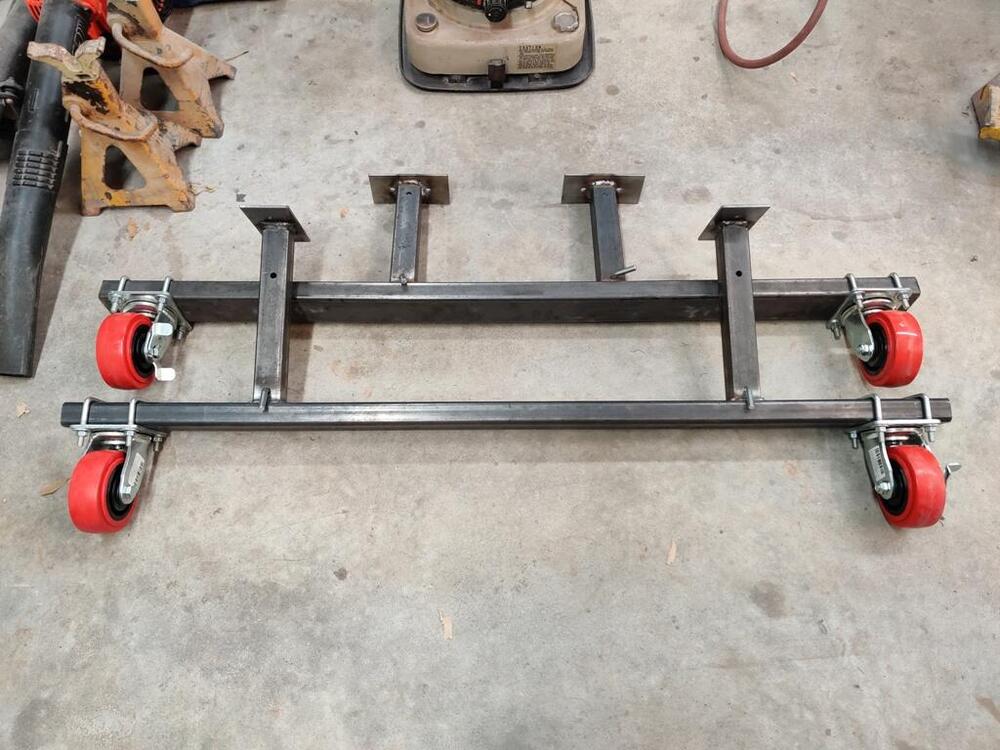
A bit more time invested, and I finished the rear one:

-
Only up for a week - in Roswell, GA. https://www.facebook.com/marketplace/item/596087028318399/ If you get in touch, tell her you saw the link that Garrett posted on the Z forum. 🙂 Garrett