


All Activity
- Today
-
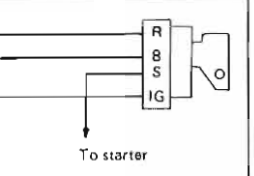
 Posed the question on the interweb and got this "AI generated" answer but it lines up with the automatic transmission info in the 1976 280Z FSM: "The inhibitor switch on a 1973 Datsun 240Z automatic transmission is located on the transmission itself. It is typically found on the right side of the transmission, where it controls the circuit for the reverse lights and the starter interlock system. The switch is responsible for ensuring the car can only be started when the transmission is in Park or Neutral, and it provides a closed circuit for reverse when the transmission is in reverse. For a 1973 model, the switch is specifically designed for automatic transmissions and is not present on factory manual transmissions." (We've had A/T Z cars in the shop and swapped out auto transmissions for manual transmissions, but I honestly don't remember the wiring at all.) The electrical schematic has it wired with 4 wires: B/Y, B/Y, RB, R. (B/Y for the start circuit and R & R/B for the reverse lights) The other relay in question is called "Seat Belt Relay" on page BE-2 of the FSM. Refer to "Fig. BE-1" item 17 "SEAT BELT RELAY (A/T MODEL ONLY)". The FSM shows that with 6 wires (as does the schematic - but the schematic does not label it "seat belt relay"): B/Y, B/Y, B/Y, B, G, G. (B is shown on the schematic as the GND symbol). BE-2 of the FSM shows the seat belt relay mounted on the firewall. Others, in other forums, do describe it as the "K-18". Those are the only ones I see related to the start circuit - I don't think the black box under the glove box should be involved. (Is it the ACC Relay?) And there's a post on ZCAR.COM: https://www.zcar.com/threads/not-the-inhibitor-relay-topic-again-1973-240z.424554/
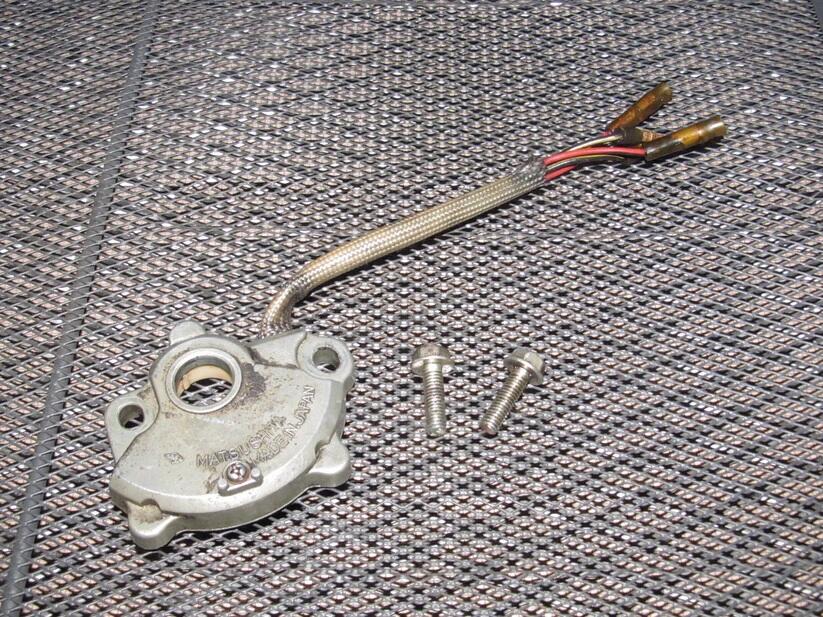
-
-
 This is the Jet Hot cast finish. Please excuse the slightly green cast which is the result of either lighting or camera user error. I like the color but more importantly it's extremely robust. After more than 25 years the exhaust manifold on my 280 still looks like it was just done. Hope this helps. Not a job one wants to do twice. PS This is the exhaust manifold from the Z used as the model for the Franklin Mint Z car
.thumb.JPG.976bac4323f6d9ea32a3d93c2c1d2dfe.JPG)
-

-

-
 I probably wouldn't coat a stainless header. Jet coat could probably be used though. I bought a Z story exhaust and really like it...
 -
 Pre-Fleetwood Mac Fleetwood Mac.
 -
 Hi Jon, Mechanic just confirmed he had advanced the timing to get a quick response in first gear with the hot coil. Should i retard it a little bit? If so how much?
 -
Here's a decent relay instructional video.
-
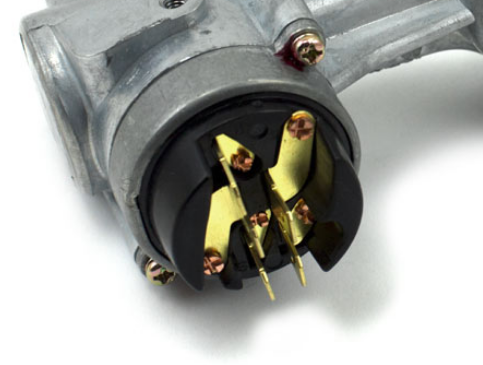
You can add a relay as cgsheen suggests, which will take the current to the solenoid out of the switch, or you can bypass all of the inhibitors and other safety features. I would start by checking for voltage on the wire that comes from S on the ignition switch when you turn the key to Start. If there's none there then you need an ignition switch. If you have voltage then you can add a relay or by pass each safety on the path to the starter solenoid. It would be best to also test under load, using a test light that draws some current, like a taillight bulb. I have found that the staked pins (copper color) can get loose and lose contact with the terminal. I had a 78 switch that would grab the starter then let go as I turned the key. The pin was loose. I fixed it with a hammer and a chisel. The terminals are marked with molded in letters. Look closely if you remove yours.
-
 If I do decide to do this, any suggestions on the proper coating? Started looking around and there's a bunch of options. I saw some internal methods using spray with a 360 nozzle and 2 ft hose that looked like it did a good job on the interior. Exterior seems pretty easy. @jfa.series1 That thing looks beautiful!
 - Yesterday
-
I got back in the shop today. Rear bumper is on. I don't like the fit but it's on for now... License plate light and hatch badges and I think the rear end is done Also worked on installing the leather pieces over the wheel arches I trimmed one of the last pieces and hemmed it with glue


-
That's a stainless system. Coating isn't required for longevity sake. Coating might help with heat issues
-
If I remember right, the Webers have an accelerator pump. So you can pump them a couple of times and omit the choke...provided they have fuel in the float bowls
-
 I am well pleased with the MSA Ceramic Coated Header and Premium Exhaust System I installed some 14 years ago. The fitment was spot on, the OE heat shield fit without bending or mods, no interference with the steering rod or frame rails. The supplied Turbo muffler was a bit loud and had some drone at 3k RPM, a 12" resonator I later installed cured that and softened the sound a bit. A local shop I use was very impressed with the overall design and exceptional quality of the entire system.
-
 Thanks for the info CG! I have an automatic. I also found nothing regarding the inhibitor switch in the FSM but read about it online. My first thought was I needed a new inhibitor switch. I purchased one with no difference. I then thought the relay switch under the passenger side dash may be the issue since it is making clicking noises when putting the key in the start position. I have cleaned and visually checked all the connections. Ignition connector looks great. Now I'm wondering about the actual ignition switch. I just checked with the ignition switch in the on position, the relay under dash gets power. When you turn the key to start position, power is lost at relay & the relay clicks. I assume the ignition in start position is now cutting the power to relay and which prevents it going to inhibitor switch. I am thinking of replacing ignition switch since it's not expensive. A side note the wipers are now coming on intermittently when I have the key in the on position even though I have them off at stalk and now they won't work from stalk with the key in the on position. By the way the coil is getting power. Thoughts?
 -
 Hi all. Its been a bit since I've been here and even did anything with the car, life seems to throw obstacles at times. I've been ramping up to start thinking about my next project and headers / exhaust is probably on the menu. Over the last year I've dipped in and out of here contemplating what it would be, even had an idea of how I would do it but never settled on anything. Low and behold I get a new item notification from RC: https://resurrectedclassics.com/products/stainless-steel-dual-exhaust-system-s30z-240z-260z-280z-datsun-1970-1978-polished Its a polished (but uncoated) header with end to end pipes muffler resonator hangers etc. Seems like a true dual exhaust so I guess its 3-2? States its a bolt on to standard block and all the standard hanger locations. For a quasi-newbie DIY type guy like myself this seems like it would be something I can tackle in my make shift garage without any "professional help". From my research previously its been pretty clear a coated set would be best for heat and longevity so that's my first concern. Of course there's the cost concern too as this seems a bit pricey compared to putting an end to end system together from various components but that may be more work and or require a shop trip. There's also the MSA end to end package I guess which I was contemplating as DIY as well with or without coating. Opinions on this would be appreciated. Ignoring the cost factor (I know I know) what about this would be a pro/con if I were to get this and maybe some VHT to coat it myself?
In a 1973 240Z the start signal (battery voltage) is delivered through a Black/Yellow from the Ignition Switch directly to the Starter Solenoid in the MANUAL transmission version. In the AUTOMATIC transmission version it feeds through an INHIBITOR SWITCH (a control and/or relay box) which assures the automatic transmission gear selector is in the proper position for starting. The Inhibitor Switch system IS NOT DESCRIBED in the Factory Service Manual (at least that I could find). A starter relay is fairly simple - it uses the "start signal" (battery voltage on the B/Y wire) for the relay coil POSITIVE and the coil NEGATIVE is simply grounded. The supply to the relay switch is directly from the battery and the switch output goes to the starter solenoid. SO, the ignition switch activates the relay, which delivers voltage straight from the battery to the starter solenoid. The manual start circuit is so simple I'm wondering if you have an auto trans frame... But, could be your ignition switch, fried wiring or connector.
Hi all. Its been a bit since I've been here and even did anything with the car, life seems to throw obstacles at times. I've been ramping up to start thinking about my next project and headers / exhaust is probably on the menu. Over the last year I've dipped in and out of here contemplating what it would be, even had an idea of how I would do it but never settled on anything. Low and behold I get a new item notification from RC: https://resurrectedclassics.com/products/stainless-steel-dual-exhaust-system-s30z-240z-260z-280z-datsun-1970-1978-polished Its a polished (but uncoated) header with end to end pipes muffler resonator hangers etc. Seems like a true dual exhaust so I guess its 3-2? States its a bolt on to standard block and all the standard hanger locations. For a quasi-newbie DIY type guy like myself this seems like it would be something I can tackle in my make shift garage without any "professional help". From my research previously its been pretty clear a coated set would be best for heat and longevity so that's my first concern. Of course there's the cost concern too as this seems a bit pricey compared to putting an end to end system together from various components but that may be more work and or require a shop trip. There's also the MSA end to end package I guess which I was contemplating as DIY as well with or without coating. Opinions on this would be appreciated. Ignoring the cost factor (I know I know) what about this would be a pro/con if I were to get this and maybe some VHT to coat it myself?
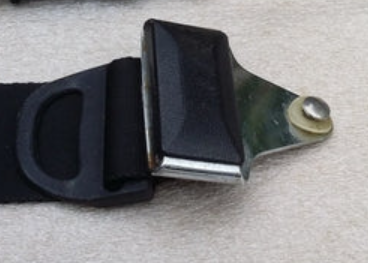
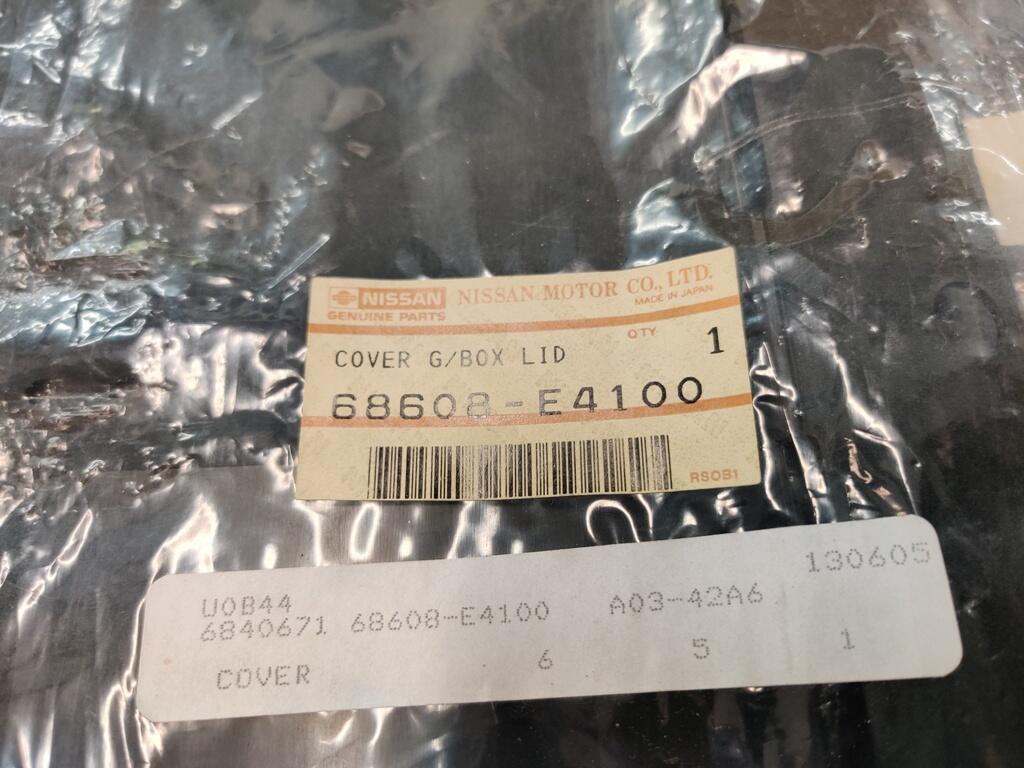
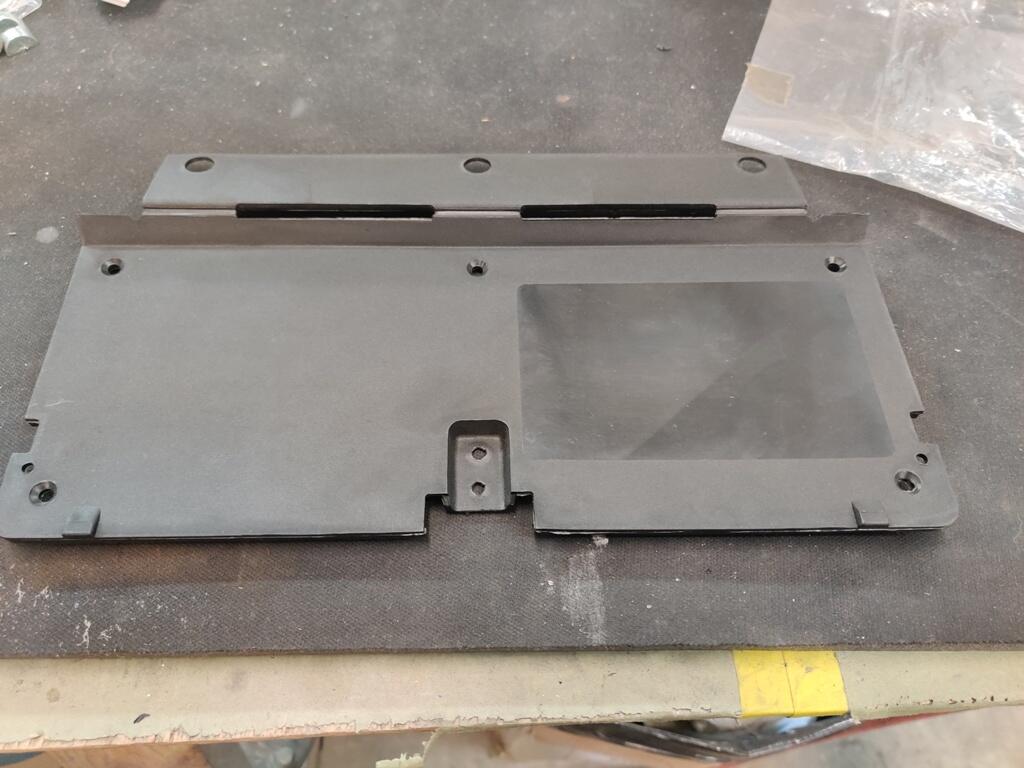
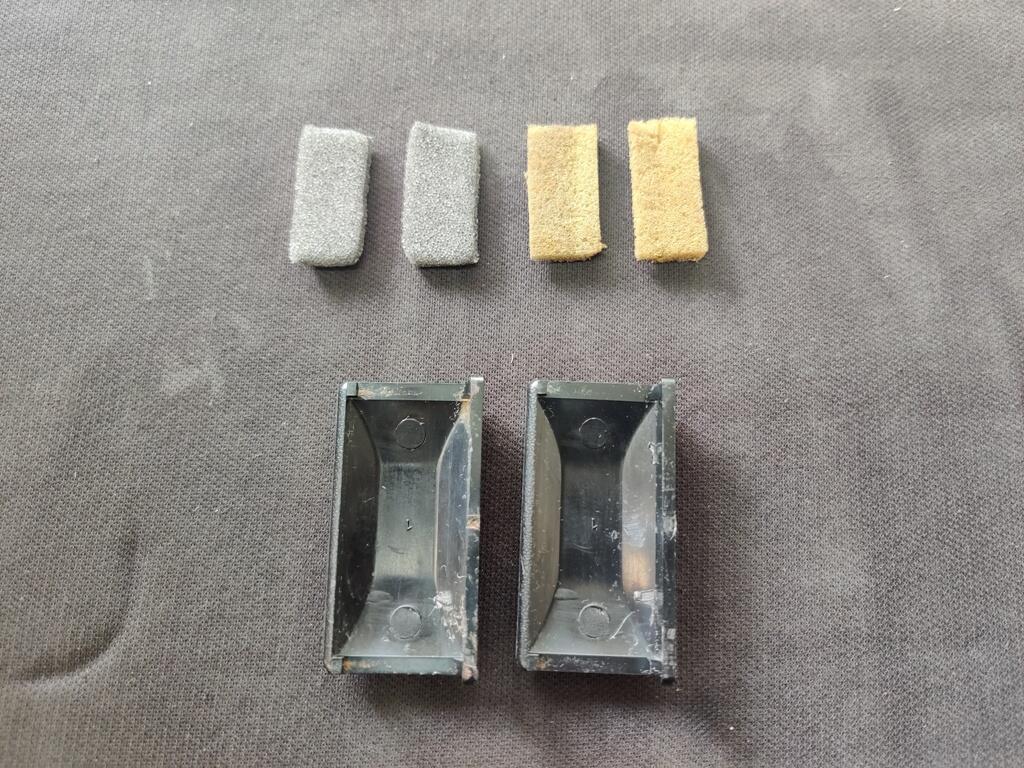
In a 1973 240Z the start signal (battery voltage) is delivered through a Black/Yellow from the Ignition Switch directly to the Starter Solenoid in the MANUAL transmission version. In the AUTOMATIC transmission version it feeds through an INHIBITOR SWITCH (a control and/or relay box) which assures the automatic transmission gear selector is in the proper position for starting. The Inhibitor Switch system IS NOT DESCRIBED in the Factory Service Manual (at least that I could find). A starter relay is fairly simple - it uses the "start signal" (battery voltage on the B/Y wire) for the relay coil POSITIVE and the coil NEGATIVE is simply grounded. The supply to the relay switch is directly from the battery and the switch output goes to the starter solenoid. SO, the ignition switch activates the relay, which delivers voltage straight from the battery to the starter solenoid. The manual start circuit is so simple I'm wondering if you have an auto trans frame... But, could be your ignition switch, fried wiring or connector. While I have turned much of my attention to my other 240Z recently, there are still quite a few things on the to do list for this car. One of them was replacing the glove box hinge/panel. My old one had broken at one of the three hinge areas. I was lucky enough to find a NOS one. Having recently replaced the decal on the original one with a new decal, I had to procure another new decal, and put in on this new panel. I still have some alignment issues to work out before the glove box will shut properly. The Vintage dash that is the car requires a bit of trimming of foam and vinyl on the lower edge of the glove box opening to allow the hinge to operate properly. Another small item on my list was to install these plastic seat belt buckle trim plates (old foam on the right, new on the left, which I glued to the center backside of the trim: These go here on the 1971 belts: I used a heat gun to warm them up quite a bit before snapping them into place, which went without issue thankfully. I still have a bunch of details like this that need to be completed. I would like to swap out the headlights bulbs for some other Koito H1 type ones that I found which look more like the originals. There are various other markings I'd like put in place to replicate factory ones (paint markings). I also would like to get the original wheels refinished and get some stock sized tires mounted on them. The original hub caps that I have are very nice, but if I can get better results with the paint color experimentation, matching the original much better than my efforts thus far, I will refinish them. I still haven't done anything to address the lean condition that I am experiencing. So, that is still on my list. After about 4 rounds of pulling the valve cover off to adjust the valves (the valve noise was much more than I can recall with my other L series engines), I figured out part of my problem. I have generally been adjusting valves with the engine cold, but sometimes when it was kind of warm as well. I was sure it would tighten up as the engine got warm. What I have found instead is the the lash clearance actually grows a bit when the engine warms up. The specification for my camshaft is .006" on the intake and .008" on the exhaust. I started off with setting the clearance at that spec with the engine completely cold. I then found that the lash was a bit larger with the engine lukewarm and a bit larger still with the engine hot. Seeing this, and after resetting lash a couple of times prior with no improvement, I decided to use .005" and .007" while the engine is cold instead. With that I achieve notable improvement.


 Zspert, Care to share your opinion of a closer to “right” color? Will be traveling this road shortly… Amazon has a can of graphite heading my way already. I do wonder is there consensus for color of the manifold, that will last a few dozen/hundred heat cycles.
My now closed shop generated 4 Gold medallion stock 240 recipients. We tried 2 different finishes for exhaust manifolds. One was a finish like you're using and the others had Jet-Hot cast finishes. In EVERY case the judges (?) said the finish was incorrect and deducted points. Our last Gold Medallion car was judged (?) to have a steering wheel finish which was "too shiny". Go figure!!!
Zspert, Care to share your opinion of a closer to “right” color? Will be traveling this road shortly… Amazon has a can of graphite heading my way already. I do wonder is there consensus for color of the manifold, that will last a few dozen/hundred heat cycles.
My now closed shop generated 4 Gold medallion stock 240 recipients. We tried 2 different finishes for exhaust manifolds. One was a finish like you're using and the others had Jet-Hot cast finishes. In EVERY case the judges (?) said the finish was incorrect and deducted points. Our last Gold Medallion car was judged (?) to have a steering wheel finish which was "too shiny". Go figure!!! Have you looked into “OER” carburetors from Japan. Eiji @Datsun Spirit uses them exclusively. I’m going to run a set on my engine he built. My understanding is there design is a mixed hybrid of Mikuni & Weber.
 That's quite understandable as those of us "up North" don't drive our beauties in the winter and those of us "down South" probably have temperatures that allow for choke-free operation the year round. But maybe someone in the Northwest uses them and it would certainly be good to have this knowledge available on CZCC, Of course, because Webers and Mikunis have completely different operating mechanics from our SU carbs, coupled with changes in fuel compositions since the 1970s, it could be that cold start units simply are obsolete.
 For your possible reference, 1970 FSM Figure BF-3 ('Standard body dimensions') gives these as 331mm and 320mm.
.JPG.4b07a84c858d04a667bb62f7bdec0dea.JPG)


Important Information
By using this site, you agree to our Privacy Policy and Guidelines. We have placed cookies on your device to help make this website better. You can adjust your cookie settings, otherwise we'll assume you're okay to continue.