


Topics Last Week
Showing topics, images, events and files posted in for the last 7 days.
- Past hour
-

- Today
-

-
 I probably wouldn't coat a stainless header. Jet coat could probably be used though. I bought a Z story exhaust and really like it...
 -
 Pre-Fleetwood Mac Fleetwood Mac.
 -
 Hi Jon, Mechanic just confirmed he had advanced the timing to get a quick response in first gear with the hot coil. Should i retard it a little bit? If so how much?
 -
Here's a decent relay instructional video.
- Yesterday
-
I got back in the shop today. Rear bumper is on. I don't like the fit but it's on for now... License plate light and hatch badges and I think the rear end is done Also worked on installing the leather pieces over the wheel arches I trimmed one of the last pieces and hemmed it with glue


-
If I remember right, the Webers have an accelerator pump. So you can pump them a couple of times and omit the choke...provided they have fuel in the float bowls
-
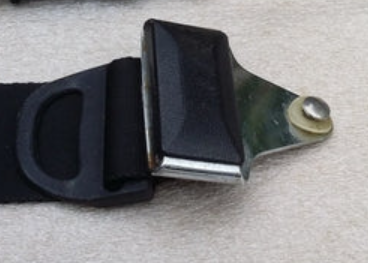
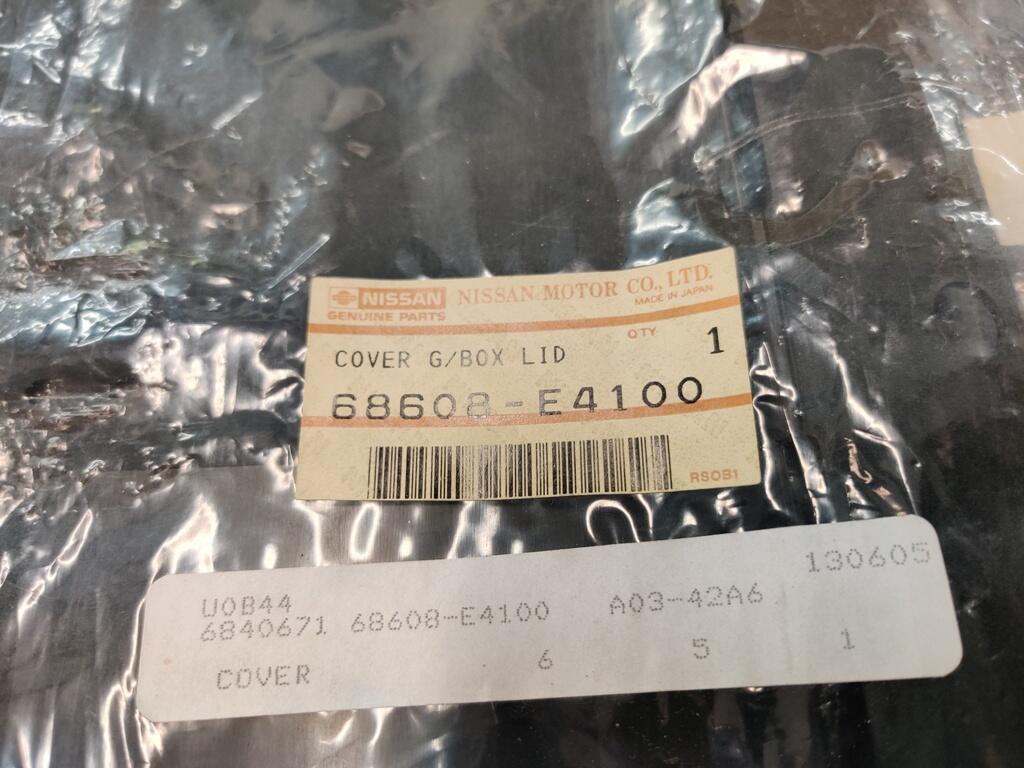
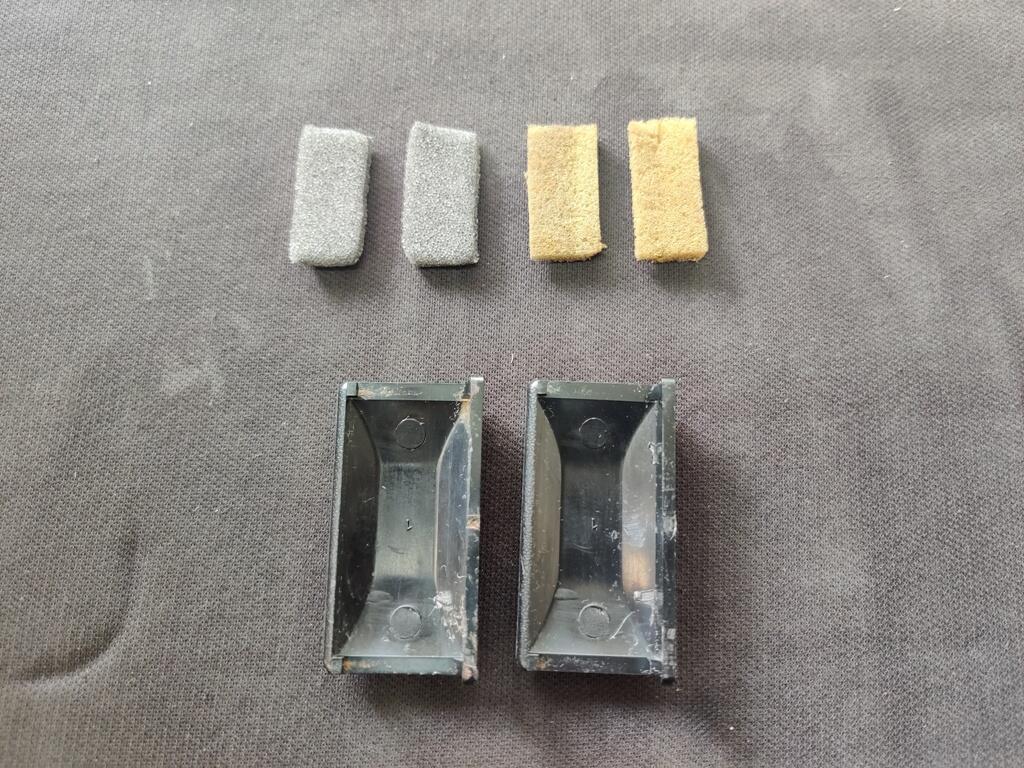
 While I have turned much of my attention to my other 240Z recently, there are still quite a few things on the to do list for this car. One of them was replacing the glove box hinge/panel. My old one had broken at one of the three hinge areas. I was lucky enough to find a NOS one. Having recently replaced the decal on the original one with a new decal, I had to procure another new decal, and put in on this new panel. I still have some alignment issues to work out before the glove box will shut properly. The Vintage dash that is the car requires a bit of trimming of foam and vinyl on the lower edge of the glove box opening to allow the hinge to operate properly. Another small item on my list was to install these plastic seat belt buckle trim plates (old foam on the right, new on the left, which I glued to the center backside of the trim: These go here on the 1971 belts: I used a heat gun to warm them up quite a bit before snapping them into place, which went without issue thankfully. I still have a bunch of details like this that need to be completed. I would like to swap out the headlights bulbs for some other Koito H1 type ones that I found which look more like the originals. There are various other markings I'd like put in place to replicate factory ones (paint markings). I also would like to get the original wheels refinished and get some stock sized tires mounted on them. The original hub caps that I have are very nice, but if I can get better results with the paint color experimentation, matching the original much better than my efforts thus far, I will refinish them. I still haven't done anything to address the lean condition that I am experiencing. So, that is still on my list. After about 4 rounds of pulling the valve cover off to adjust the valves (the valve noise was much more than I can recall with my other L series engines), I figured out part of my problem. I have generally been adjusting valves with the engine cold, but sometimes when it was kind of warm as well. I was sure it would tighten up as the engine got warm. What I have found instead is the the lash clearance actually grows a bit when the engine warms up. The specification for my camshaft is .006" on the intake and .008" on the exhaust. I started off with setting the clearance at that spec with the engine completely cold. I then found that the lash was a bit larger with the engine lukewarm and a bit larger still with the engine hot. Seeing this, and after resetting lash a couple of times prior with no improvement, I decided to use .005" and .007" while the engine is cold instead. With that I achieve notable improvement.


-
 Zspert, Care to share your opinion of a closer to “right” color? Will be traveling this road shortly… Amazon has a can of graphite heading my way already. I do wonder is there consensus for color of the manifold, that will last a few dozen/hundred heat cycles.
 - Last week
-
 Your work is getting results. Congratulations! Keep on marching.
 -
Edit - the author apparently didn't know that the history was documented and easily verified. @Carl Beck From his web site - 1975 - Sold to Kenneth E. Logan D.D.S. - L.A., Calif.. Driven for a couple years then stored away. 1998 - Sold to Michael W. Pretzer. Michael decides to continue his education and sells to Carl Beck. 1999 - Purchased by Carl Beck - who will restore it to original "BRE Racing Trim" 2007 - Restoration to "As Raced" condition completed
-
BOT.... btw.. Matt have you finished your car?
-

 I agree, that's what I used on all the vinyl and firewall pads. I don't know why I didn't use it on the weatherstrip......I was amazed after 50 years, it just peeled right up and didn't harm the vinyl in any way, still pliable.
Good looking bird!
I agree, that's what I used on all the vinyl and firewall pads. I don't know why I didn't use it on the weatherstrip......I was amazed after 50 years, it just peeled right up and didn't harm the vinyl in any way, still pliable.
Good looking bird! Known to challenge The Hackenthorpe Book Of Lies for top dog status.
I'm taking a year off from life. 99% of the bad ones are from pushing to fast to get back to work. Not me, I enjoy being at home.
Known to challenge The Hackenthorpe Book Of Lies for top dog status.
I'm taking a year off from life. 99% of the bad ones are from pushing to fast to get back to work. Not me, I enjoy being at home. Check MSA. This morning they had the aftermarket ones on clearance.
 I'm curious as to what the culprit is. Was it the distributor, ignition module? Was it even an electrical problem? I had a problem once with my 72 240z that would stall when going down the freeway. I would start it, it would run again. I ended up putting a Tee fitting in the fuel line from the fuel pump and ran a pressure gage inside the car through the window. Turned out when the engine would quit, there was no fuel pressure. The steel fuel line from the engine to the tank had rust in it. I actually got it cleared by running a wire through the fuel line. So, what happened? Jim
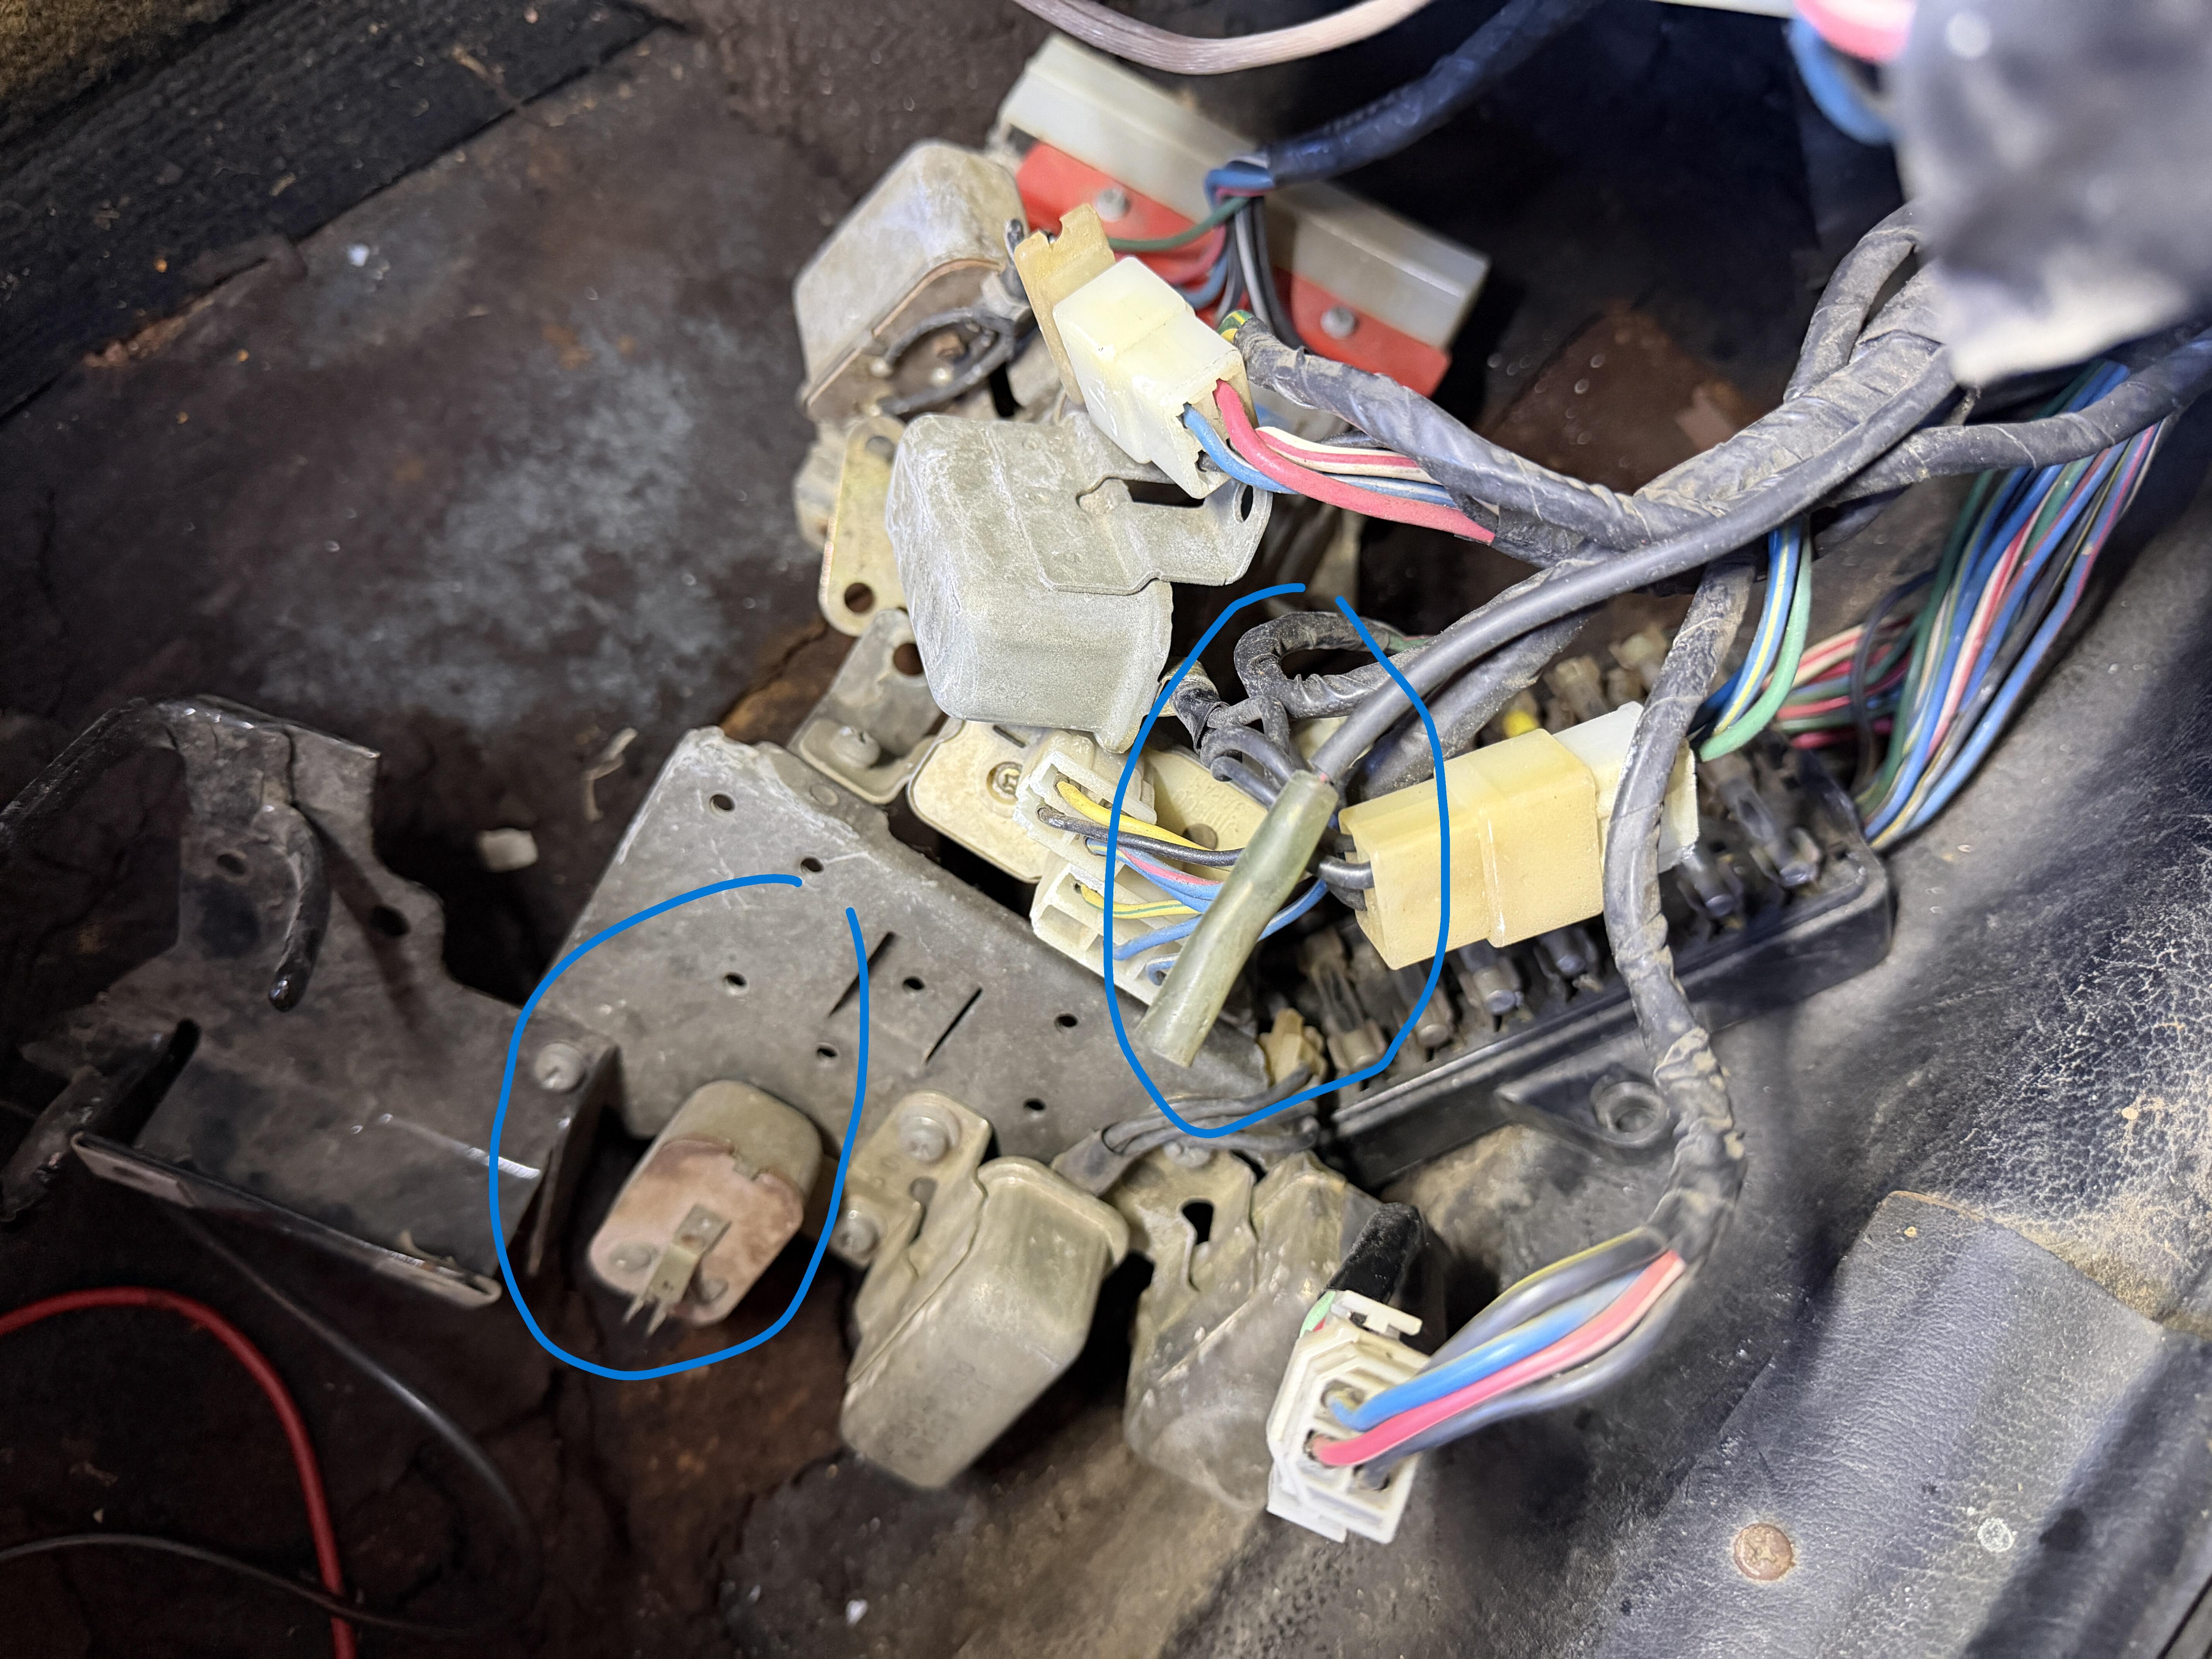
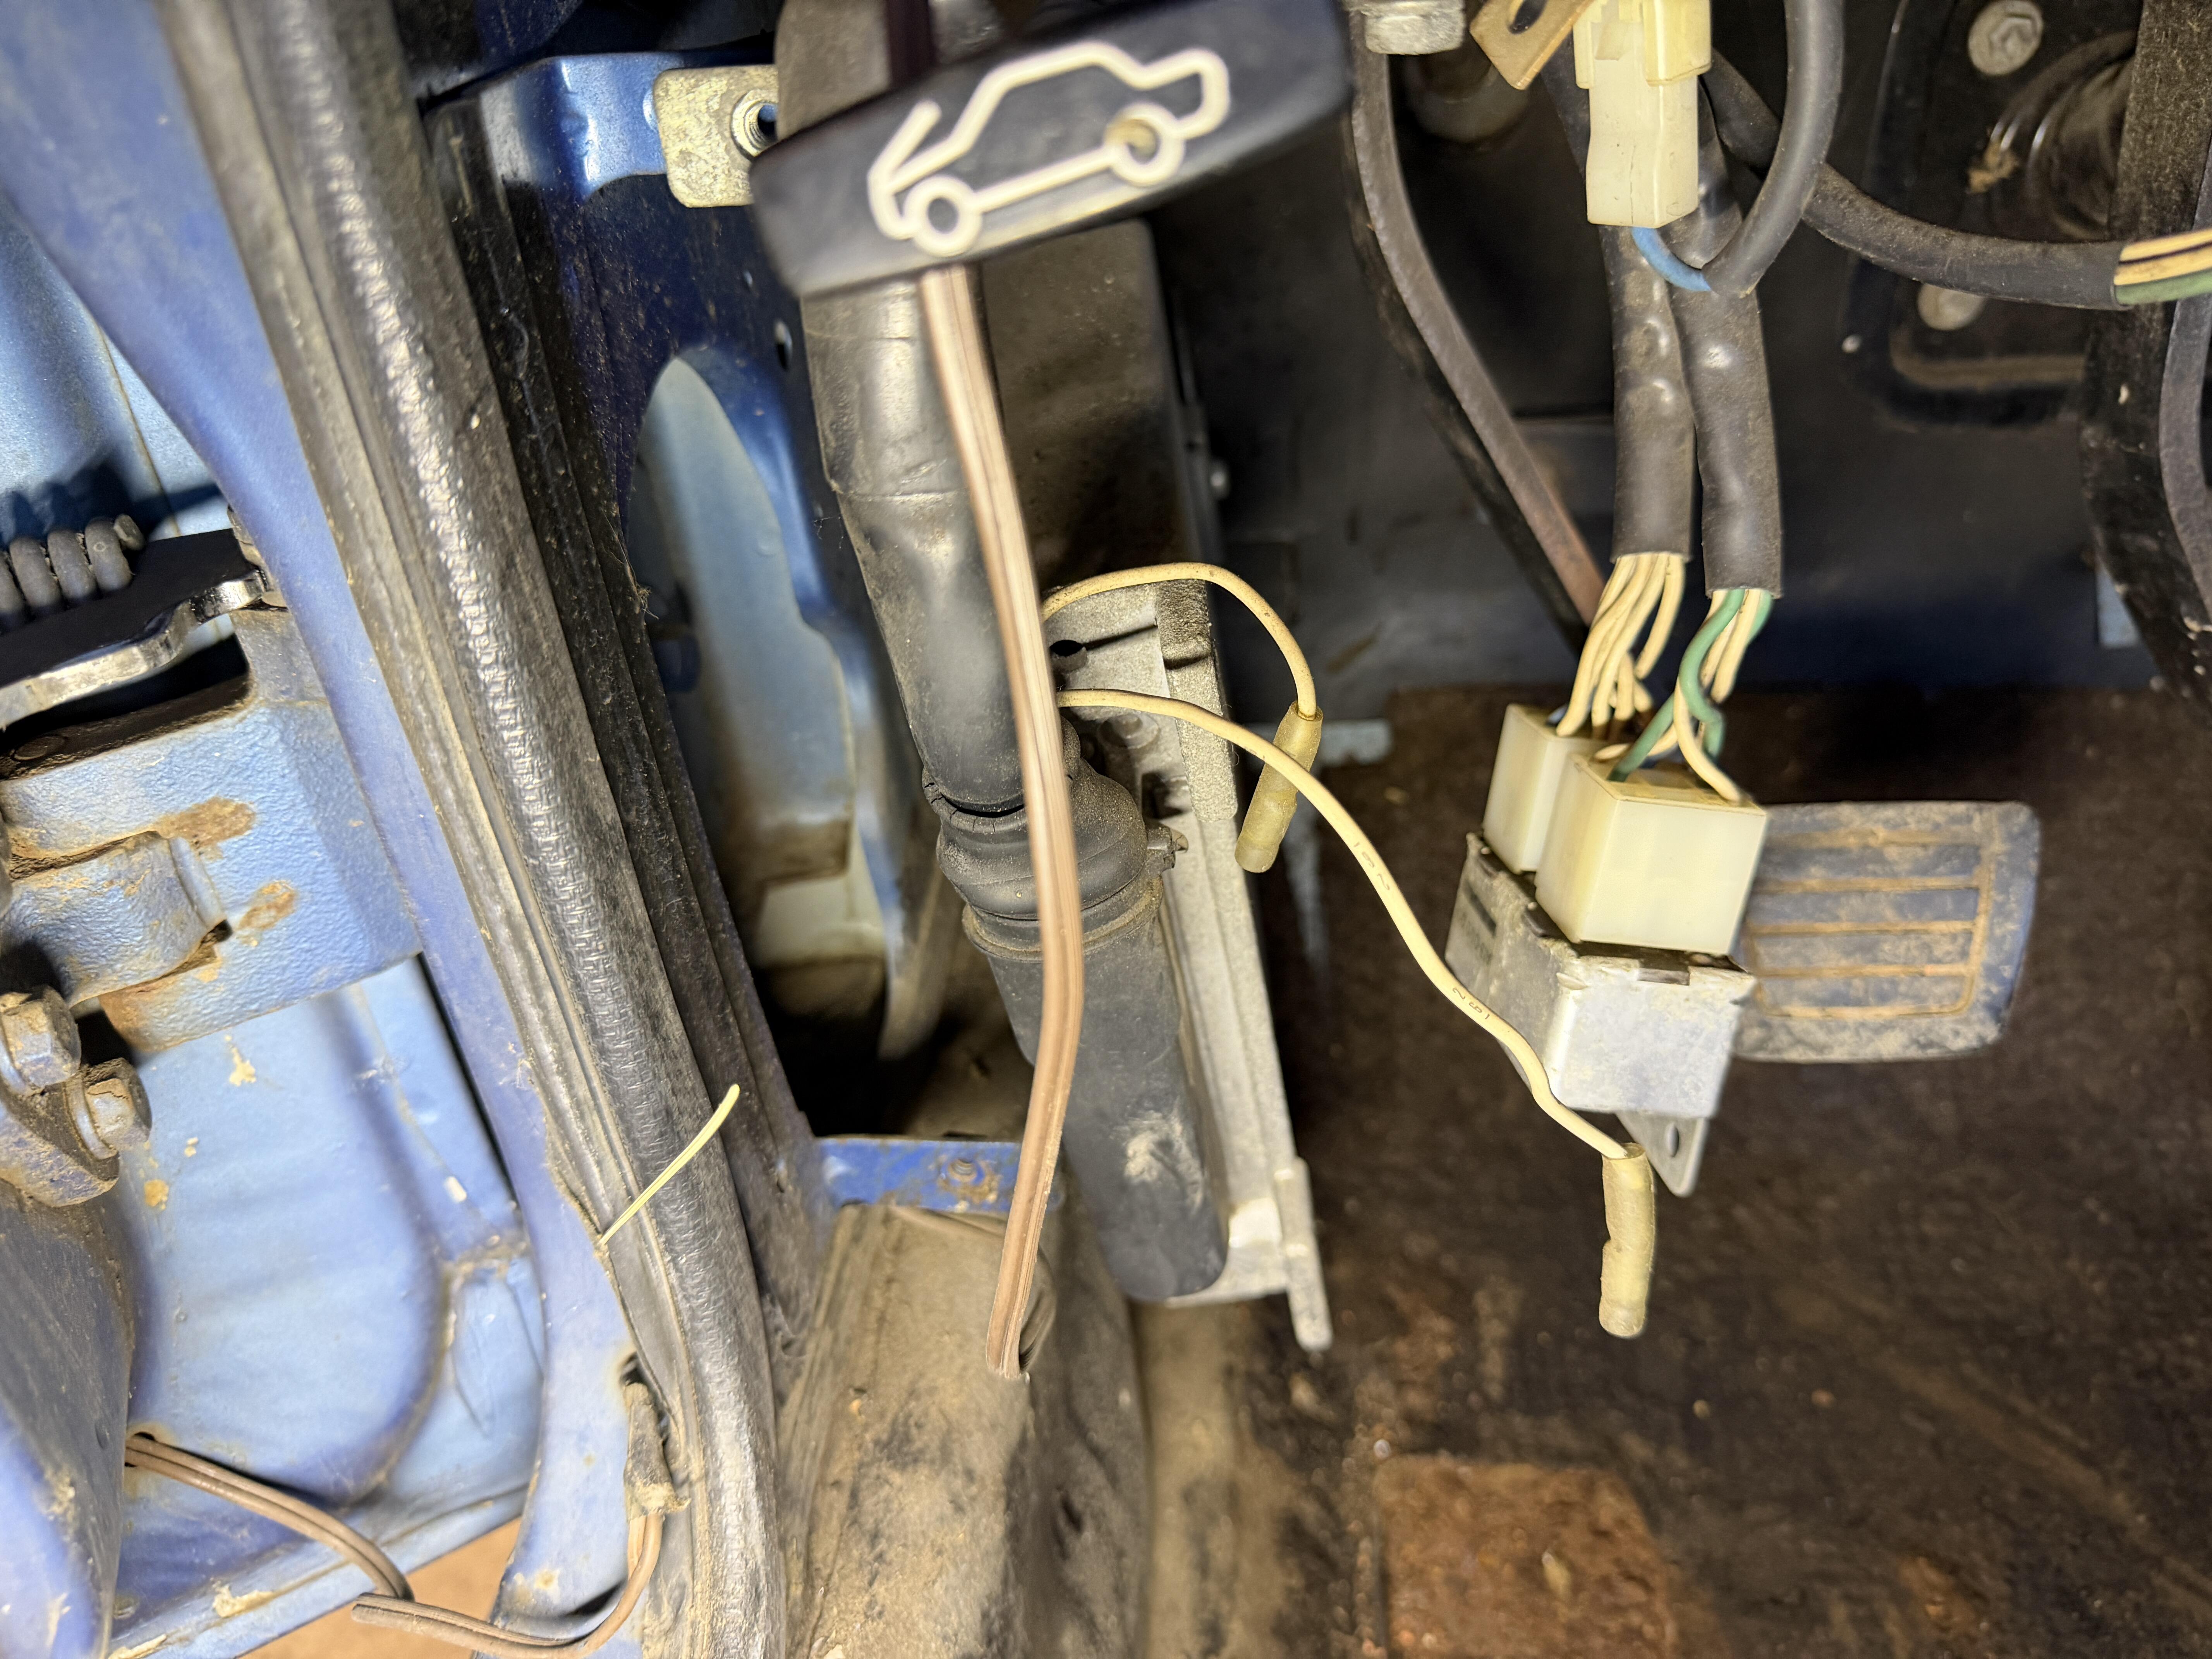
 Little more time out in the garage. Checked the coil and near as I can tell, it is ok. Also checked fuses in the panel and those seem ok. I did find a couple things that weren't plugged in, not sure what they are. The more I dig into it, it really looks like this is not the original wiring harness and/or engine. The firewall boot is still sorta there, but there is definitely no membrane in the middle. I didn't look close enough to see if it just dry rotted out. but it does look like someone ran a harness through it. I'm not sure where to move to next. Is there a way to test ignition module? I found this post that has a lot of good info in it. Im going to give some of this a try.
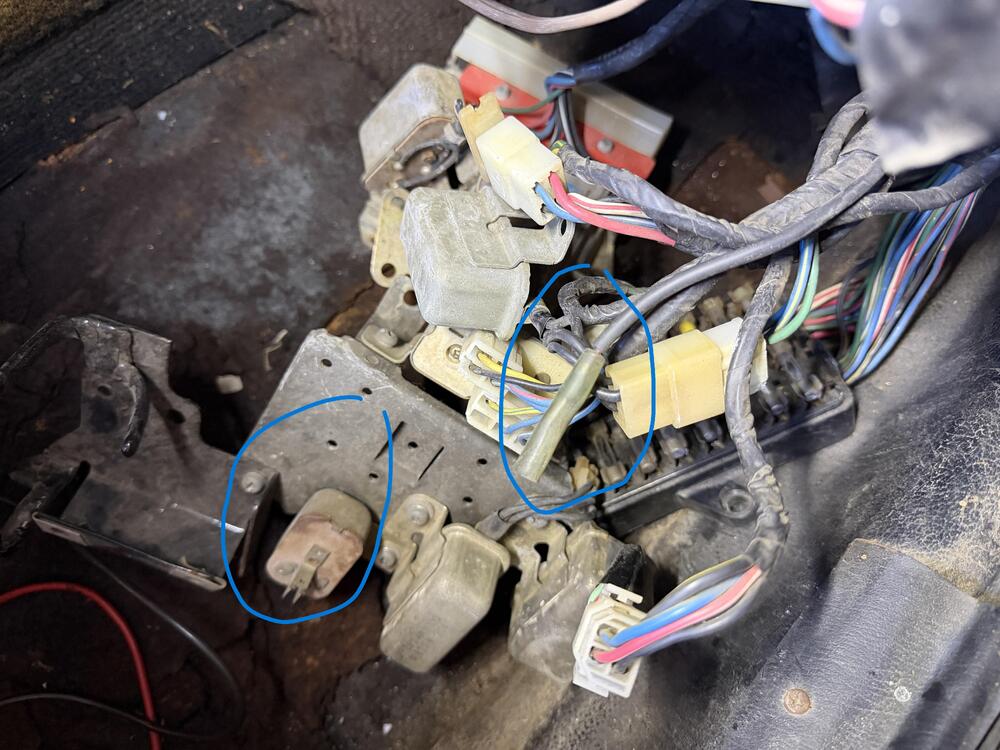
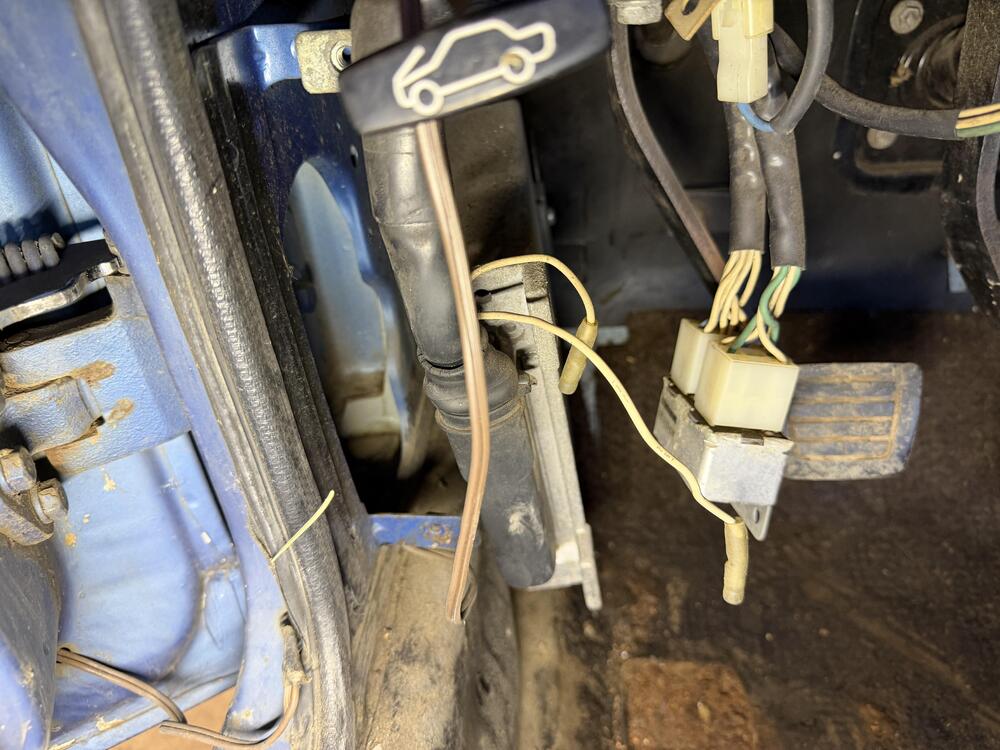
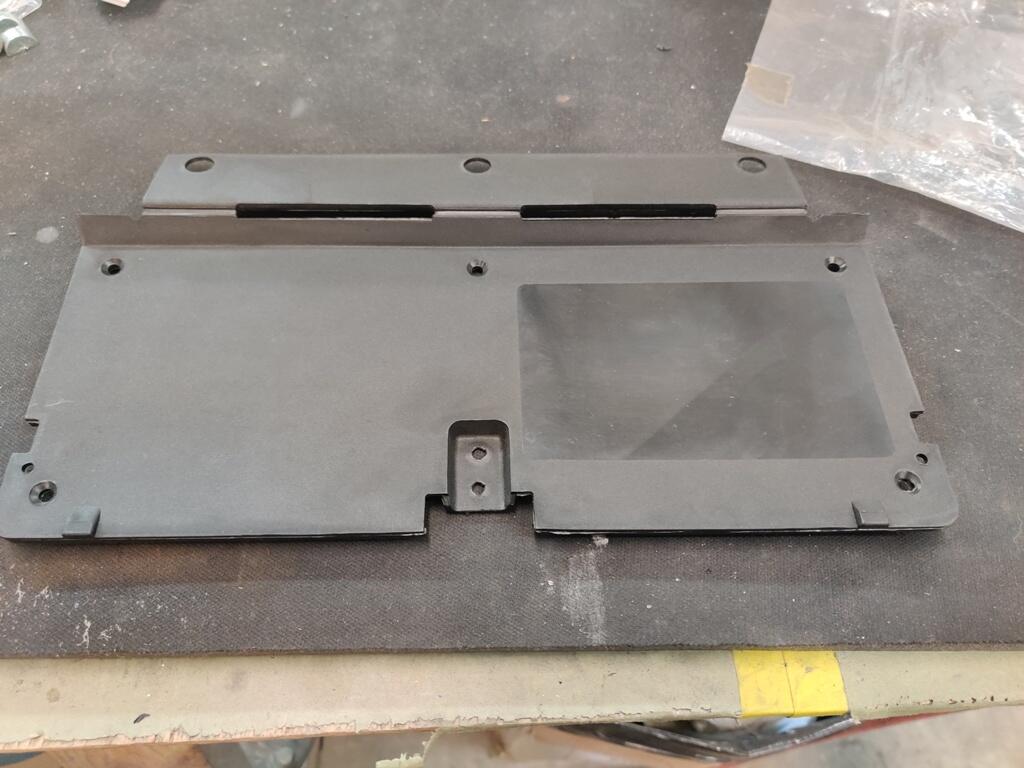
 Recently I got two set of two of the missing Pieces from my 240Z toolbox. I had a set which fit the image, but had different part numbers. Funny enough, now i have three different sets, all have slightly different shape or surface. some have different numbers, but appear to be for the same purpose :-) Despite being a bit corroded, i have at least now another missing piece of the puzzle. Thanks a lot to @26th-Z for your support! I had some free time, so i decided to get some small stuff done on the car. First thing to check off was test-fitting the headlights. Luckily, I always have a range of NOS and used parts on hand. I usually try to use old parts for test-fitting, so I don't mess up new parts, but in this case the old ones weren't really usable. So here we go: NOS headlight buckets and chrome rings, with reproduction rubbers (I will use the NOS set for the final assembly). And installed. You got to love the factory stamps on shiny plated parts. As usual, all bolts are temporary only for the mock-up. For the final assembly, I will use original fasteners :-) I wasn't first sure if the order of the assembly was correct, but it appears it is. And the frog got some eyes, again :-) Next was this choke assembly reinforcement plat made out of hardened plastic: As the name suggests, it's there to reinforce the choke assembly, which is usually mounted on the inside of the center console, and can get a bit wobbly. With this plate, it's instead mounted on the transmission tunnel and way more stable. It's one of these (invisble) improvements of the car, which I think really give the car a better feel. It's quite tricky to place correctly, though. But luckily I had a few completely broken center consoles, so the easiest way was just to drill the holes through the console And then sandwich it all together for test fitting. I also installed an old ashtray just to see if it all still works correctly. Now with the holes on the transmission tunnel. I will not use the original sheet-metal screws but instead have nuts welded on the outside and use machine screws, so it looks like it's a factory thing, from the outside. And the interior mock-ups are coming along. Driver side seat rail, passenger side footrest and center console (With choke assembly) is installed and looks good. Ignore where the choke wires go. They're just there for easier installation.
 Glad to here that my suggestion hopefully was given some thought.


Important Information
By using this site, you agree to our Privacy Policy and Guidelines. We have placed cookies on your device to help make this website better. You can adjust your cookie settings, otherwise we'll assume you're okay to continue.