Topics Last Week
Showing topics, images, events and files posted in for the last 7 days.
- Past hour
-
 Never seen the last type. Suspect it is a retro fit that someone did from some other car. The first one is 240, second is 280, though can’t nail down the change over date. Could be as early as the north american 260 in 74. The fiche might provide the date info
 - Today
-
 The upper perforations are for the vent, the lower ones are for the speaker.
 -
 Did a bit more sleuthing and bought these https://www.ebay.com/itm/357952518138 along with the Toyota Koito housings that you linked! Found the housings cheaper here: https://cruiserteq.com/oem-toyota-koito-h4-headlight-upgrade-kit-w-harness-elec81110kit/?searchid=0&search_query=h4 All-in at about $110, I'm excited to try these out! Hopefully no more melted wiring and better light output.
 -
 (this is for anyone else interested in a little information about some specifics that you raise:) 1. NONE of the above are "Coil - ". (Stock config = Coil "-" is connected to the points output of the distributor. So, new wire from the Coil "-" to your new gauge...(it will be a 2nd wire connection as the Coil "-" needs a "signal to fire" from points or an electronic ignition unit as well - your new gauge is just tapping into that signal)) 2. You don't necessarily need to jumper any of the wires in that connector, but you need to understand the coil wiring to decide whether to JUMP or just ABANDON the G/W and B/W in the connector pictured above. The stock circuit goes like this: IGN SWITCH -> B/W -> Ballast Resistor -> G/W -> Tach connector -> Loop on back of Tach -> Tach connector -> B/W -> Coil "+". The coil gets power at IGN ON through this and the Tach "senses" the flow of electricity to the coil. If you're replacing the stock Tach, the re-route of the B/W back to the Tach is not necessary - the B/W and G/W to that connector can simply be ignored (abandoned). SO - the B/W that goes to the Ballast can be connected to the Coil "+" - either through the Ballast (by removing the G/W and running a short wire from there to the Coil "+") OR bypassing the Ballast and connecting the "ballast's" B/W directly to the Coil "+" instead - IF you no longer need a Ballast Resistor in the circuit. note: I think it's better to abandon and get all that extra wire (and added resistance) OUT of the power circuit to the coil... BTW, the other two wires in that connector: Black - is a Battery Ground. R/L is gauge lighting - it's listed in the wiring schematic as "IL". So Black is the power ground for the Tach - the Tach gets power (battery voltage) from a Green in another connector.
 -
Awesome.
-
 Okay, I'm going to assume the battery is disconnected. Put the key in ON. Put your meter on resistance. If there is more than one setting, put it on the lowest setting. Put the positive lead on the black/white wire at the ballast resistor. Put the negative lead on the white/black wire at the T connector. (Yes, you'll probably need some help. Record the reading and report back. Swap the leads and remeasure. Record the reading and report back.
 -
Contact Oliver at Zspecialties to see if he has any. https://zspecialties.com/ I suggest calling him at the number at that website. Over at zcar.com, his user name is zmanofwashington.
-
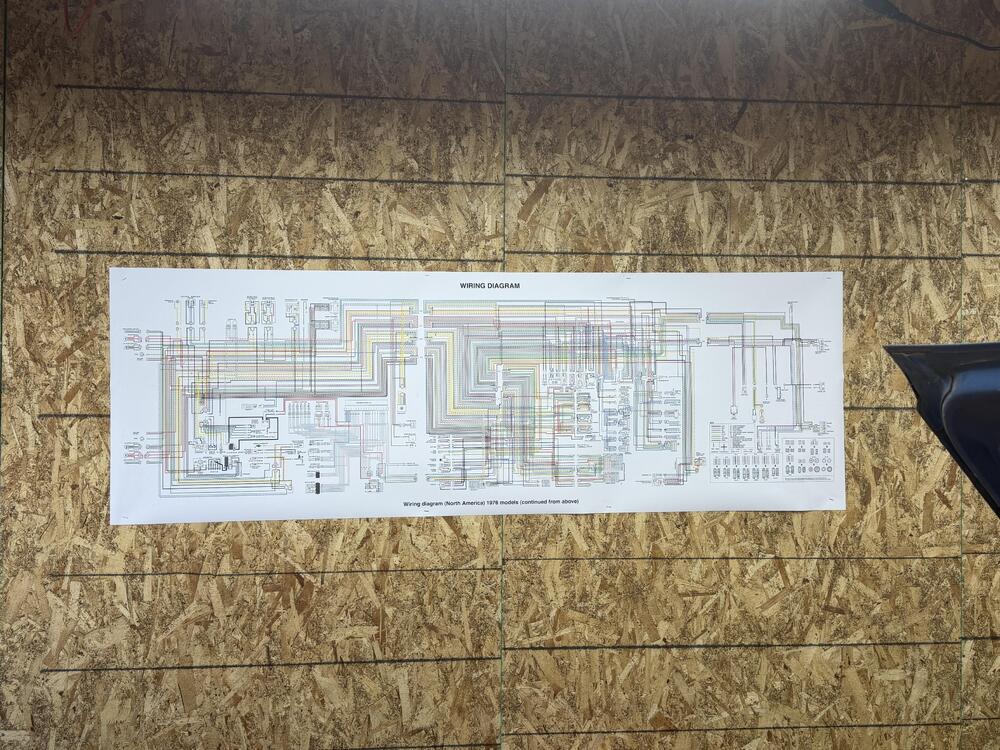
 Another component bites the dust, opened up my fuel pump relay only to find a similar fate as the ignition module. Weird part is, the relay looked like it might have been taken apart once already, but the guts say otherwise. I wonder if all the relays on the passenger side will be like this also. I pulled this link from a post I found here and ordered one. And I also pulled the color wiring diagram from here and had the local printer blow it up. Now I can actually read it.
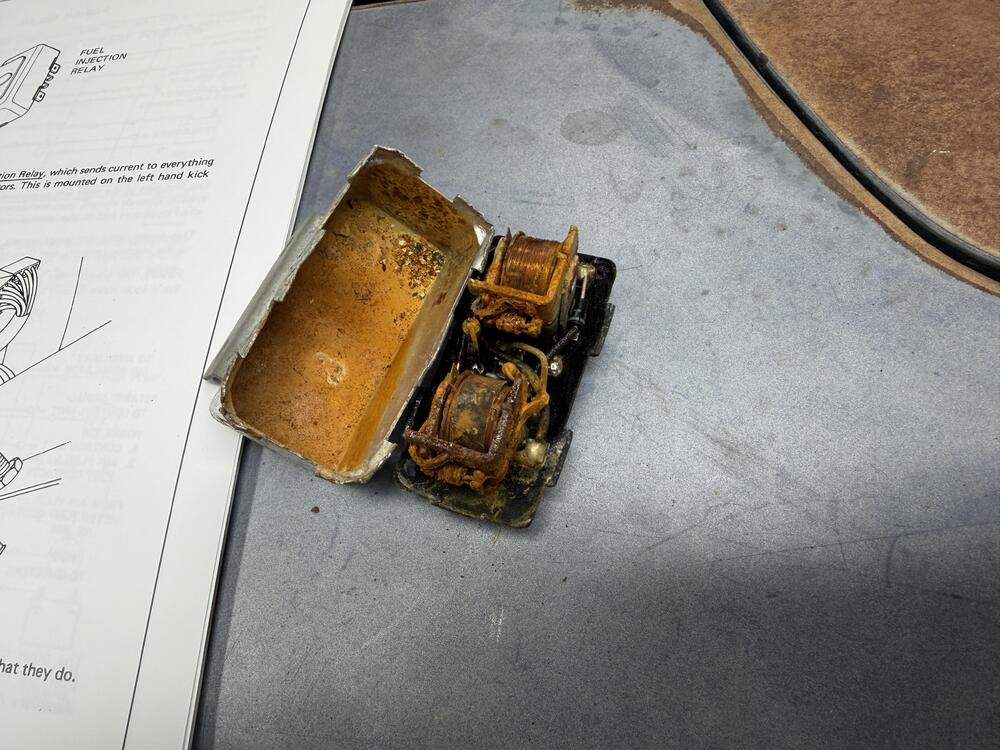

-
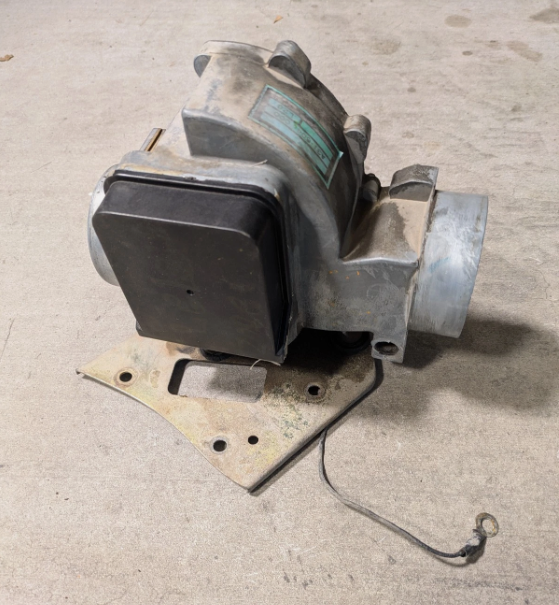
 1977 280z AFM from an EFI engine. Car had been sitting, everything looks in working order. asking $150 obo. located in Gilbert AZ
-
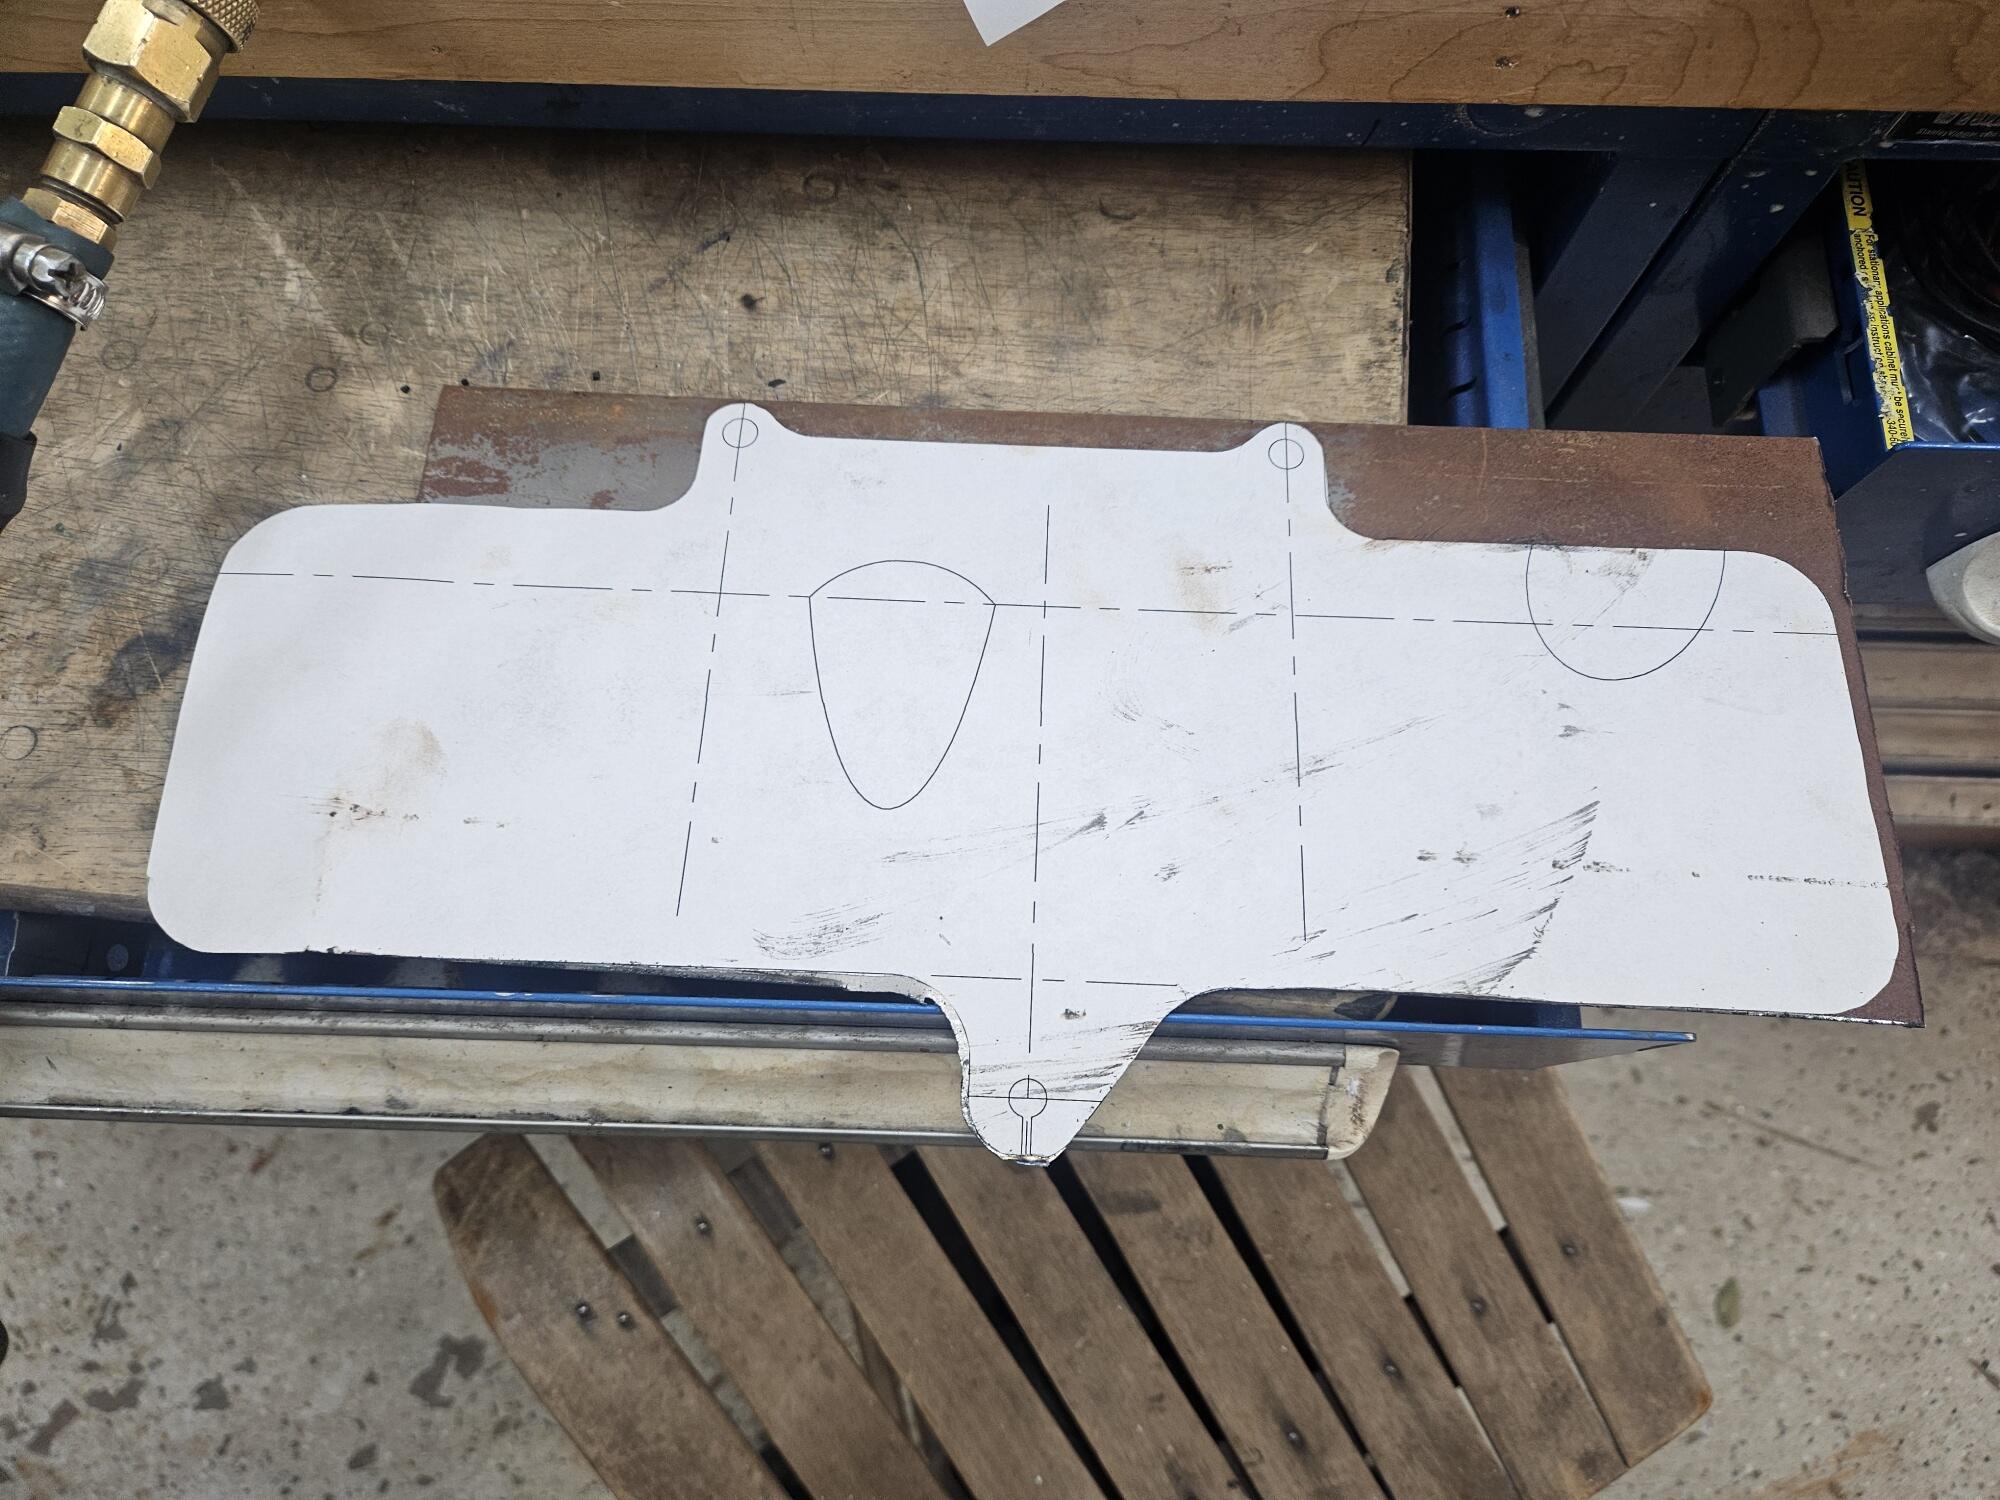
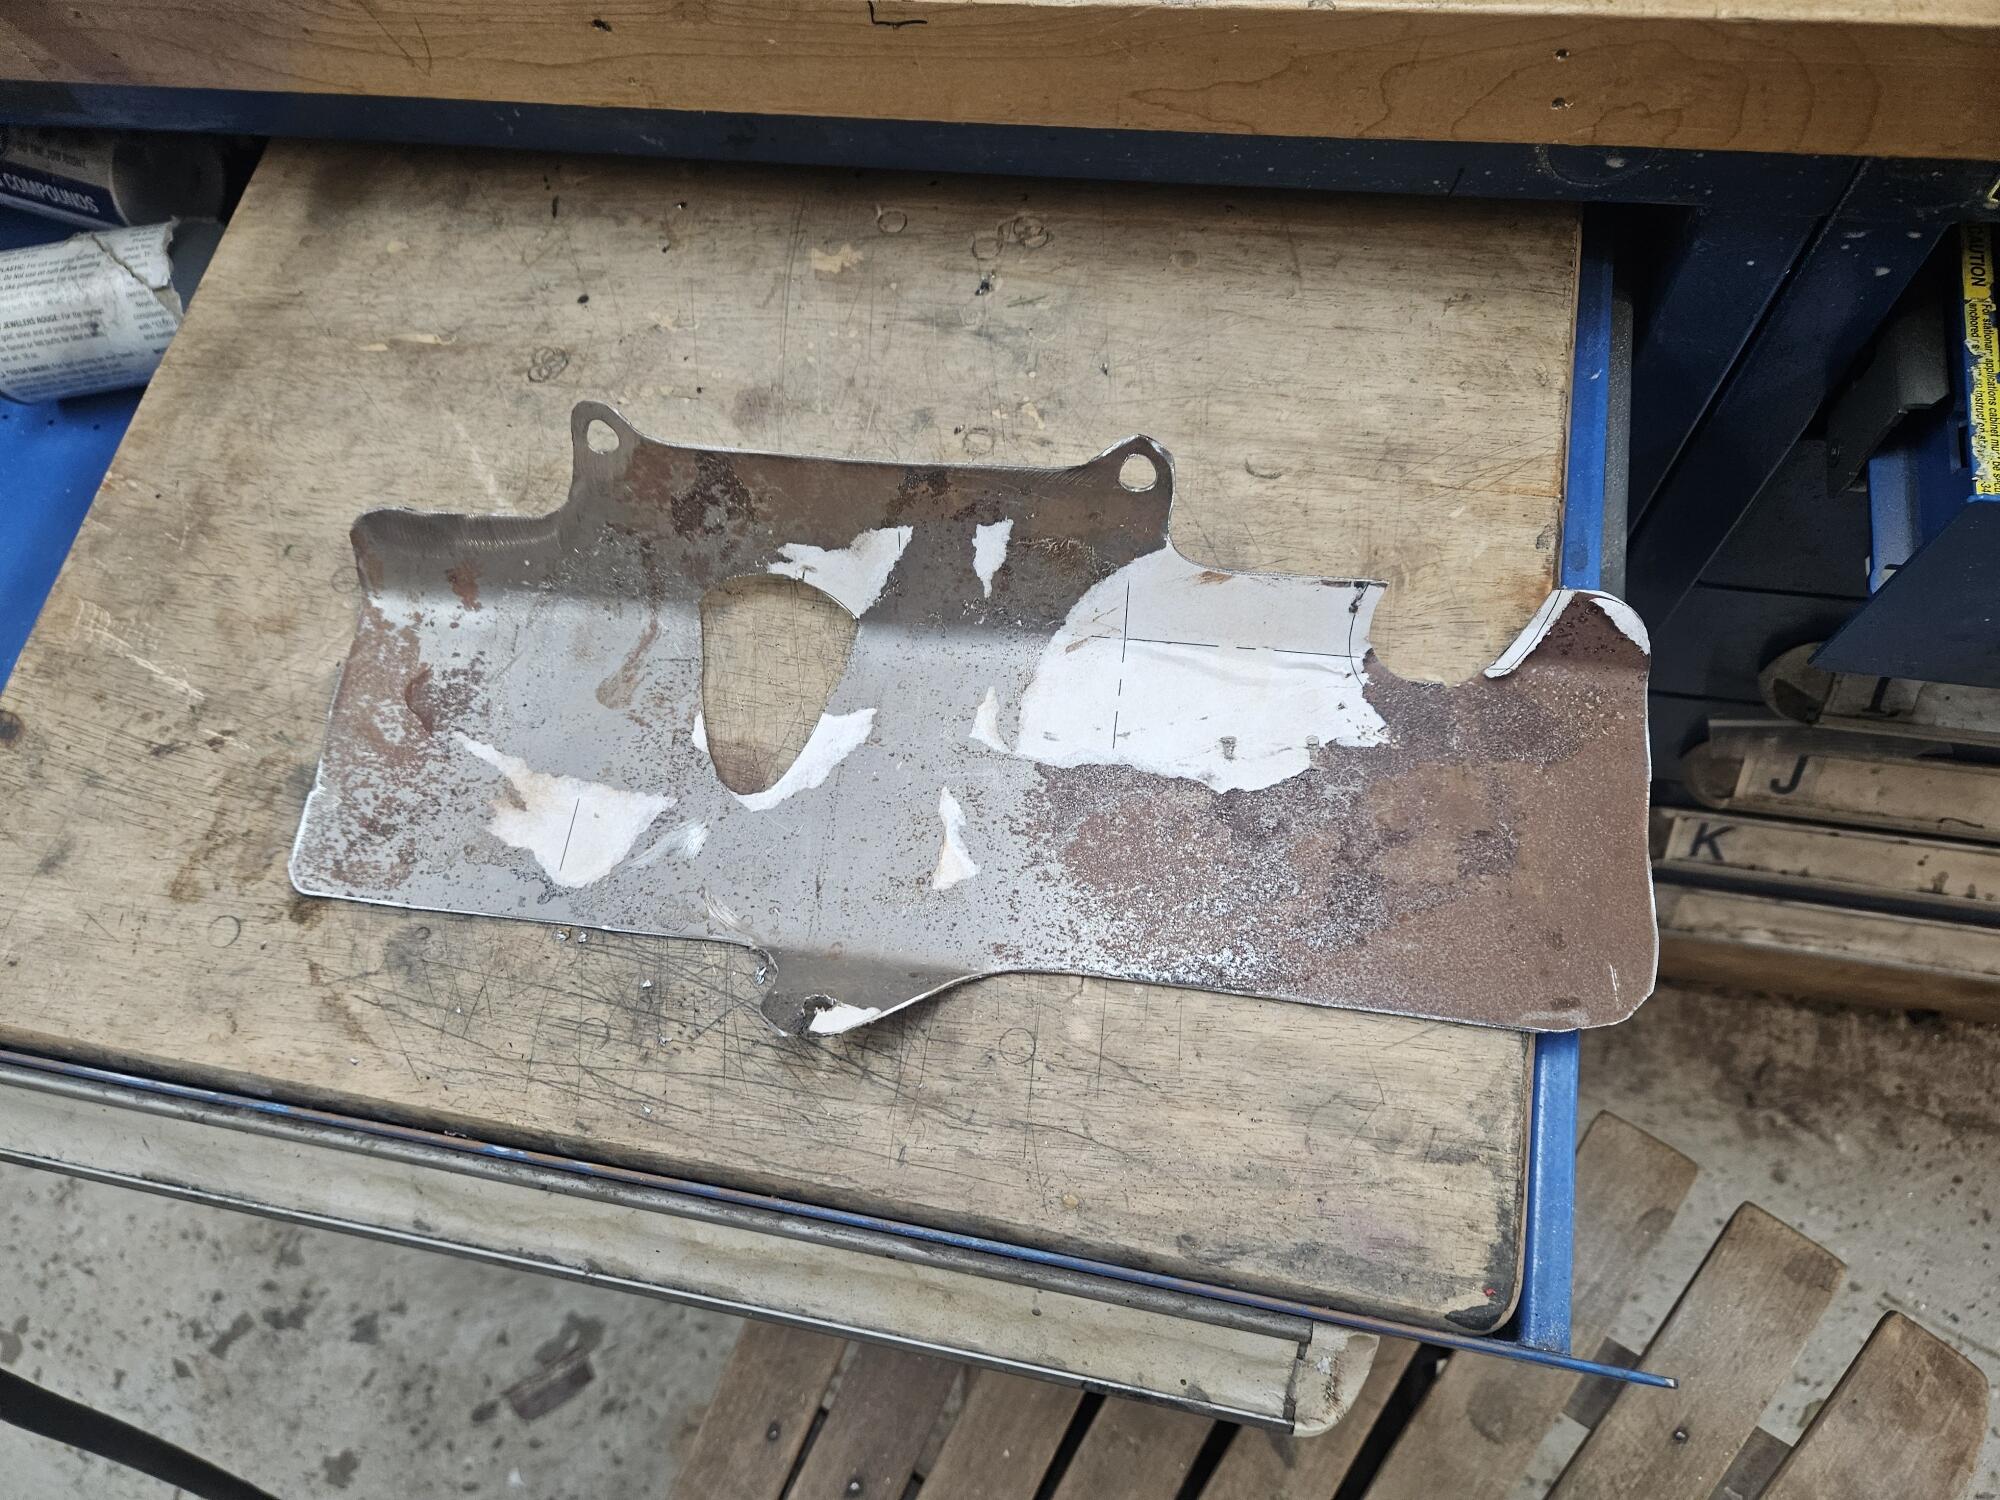
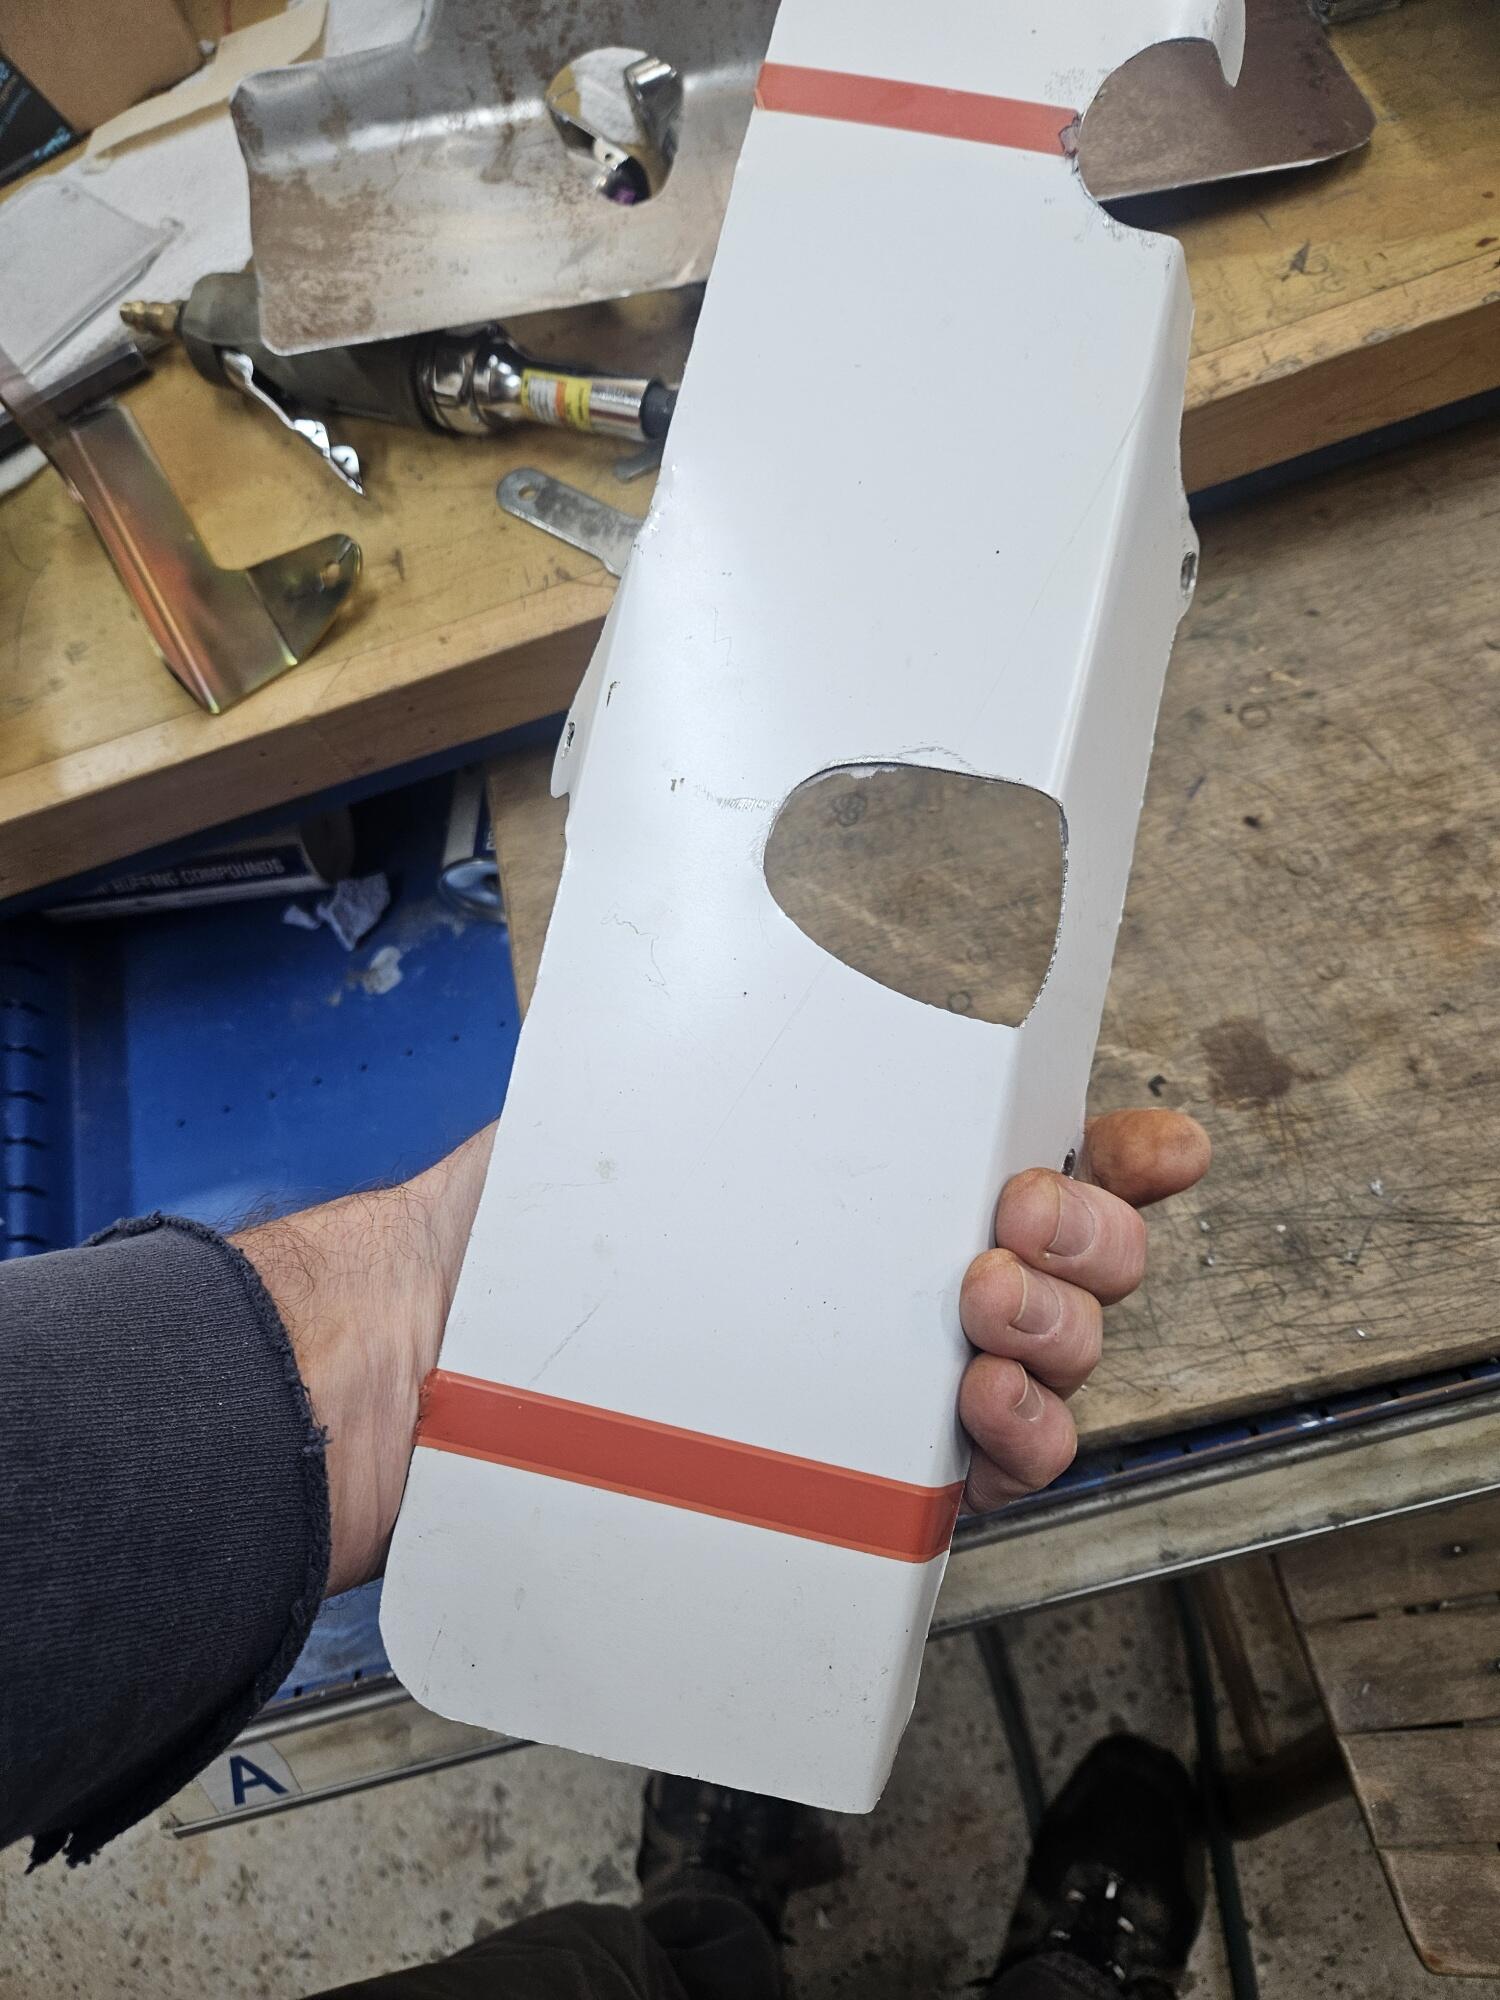
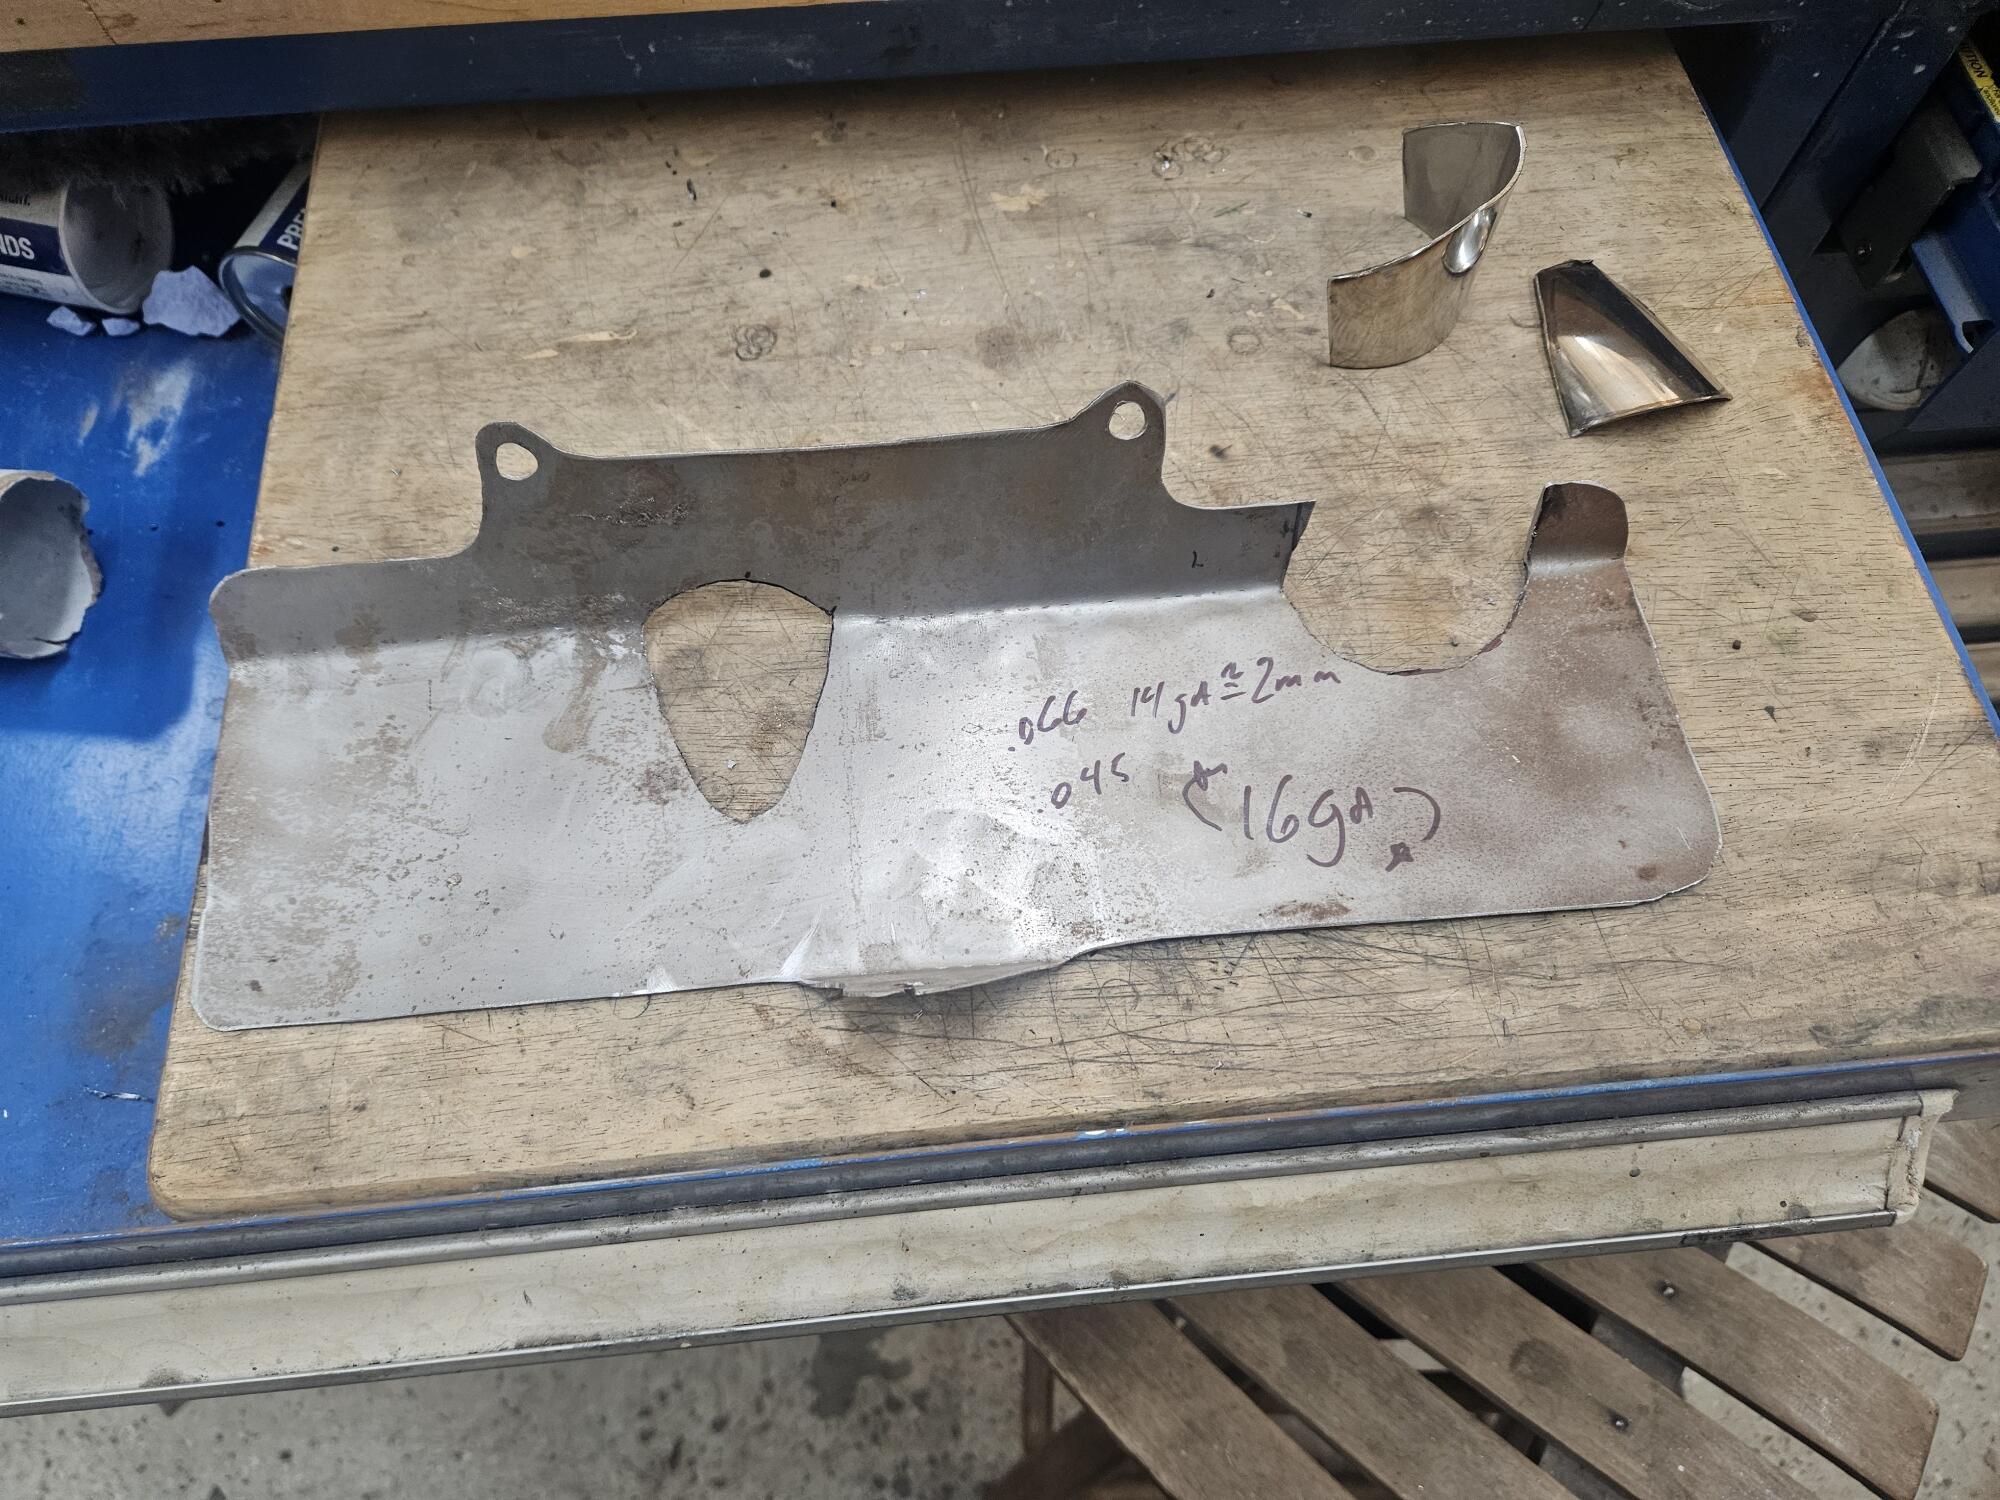
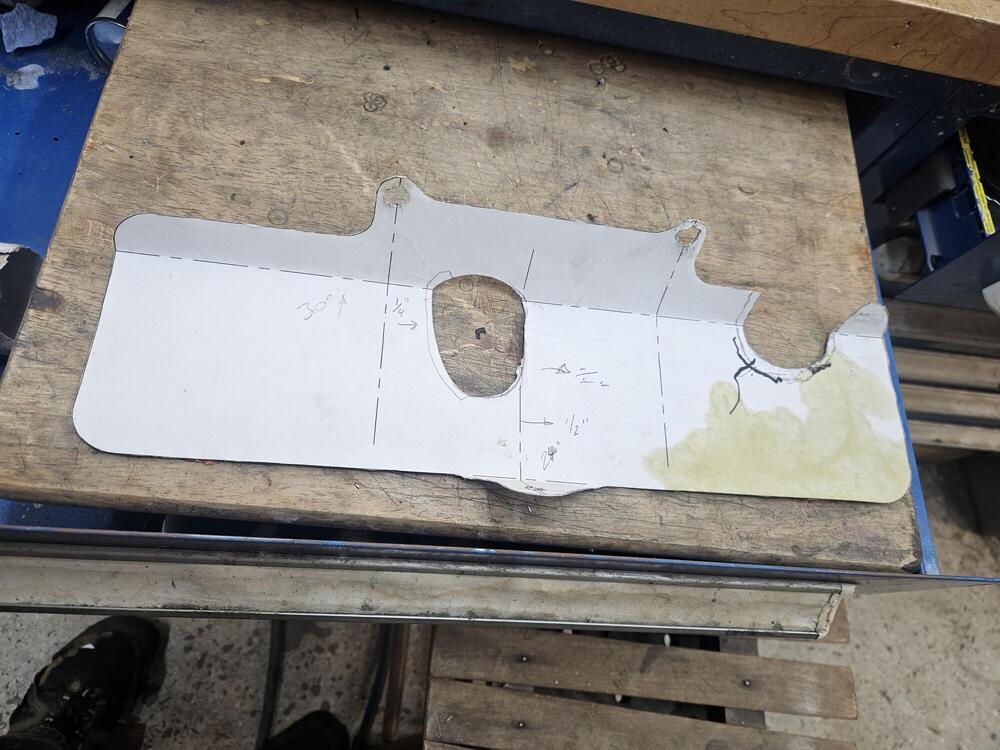
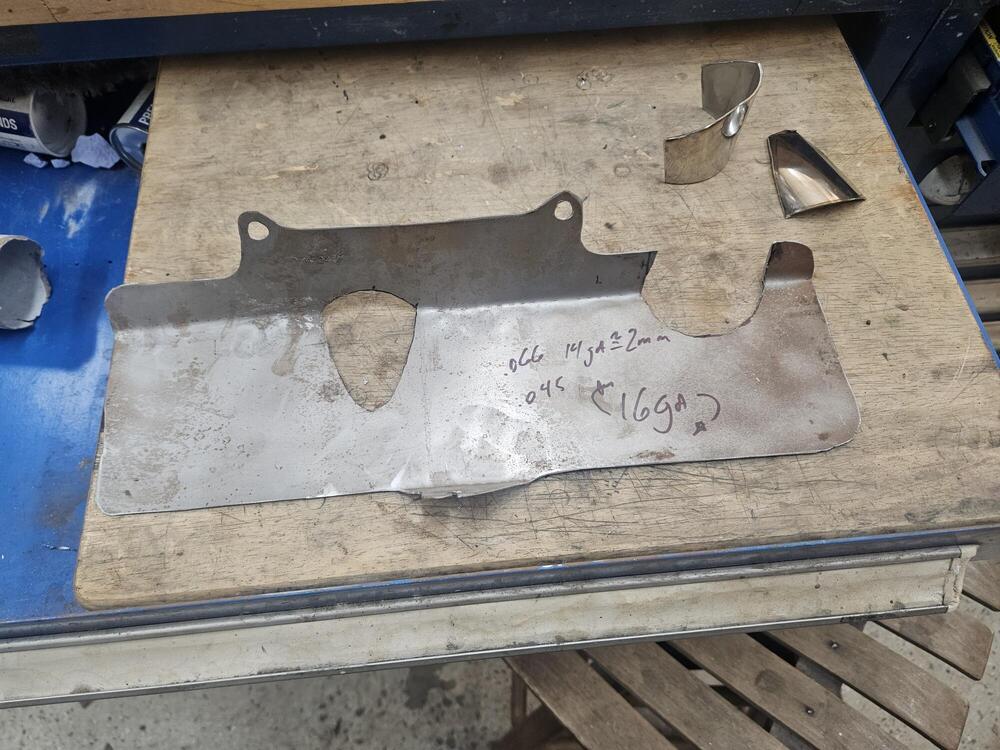
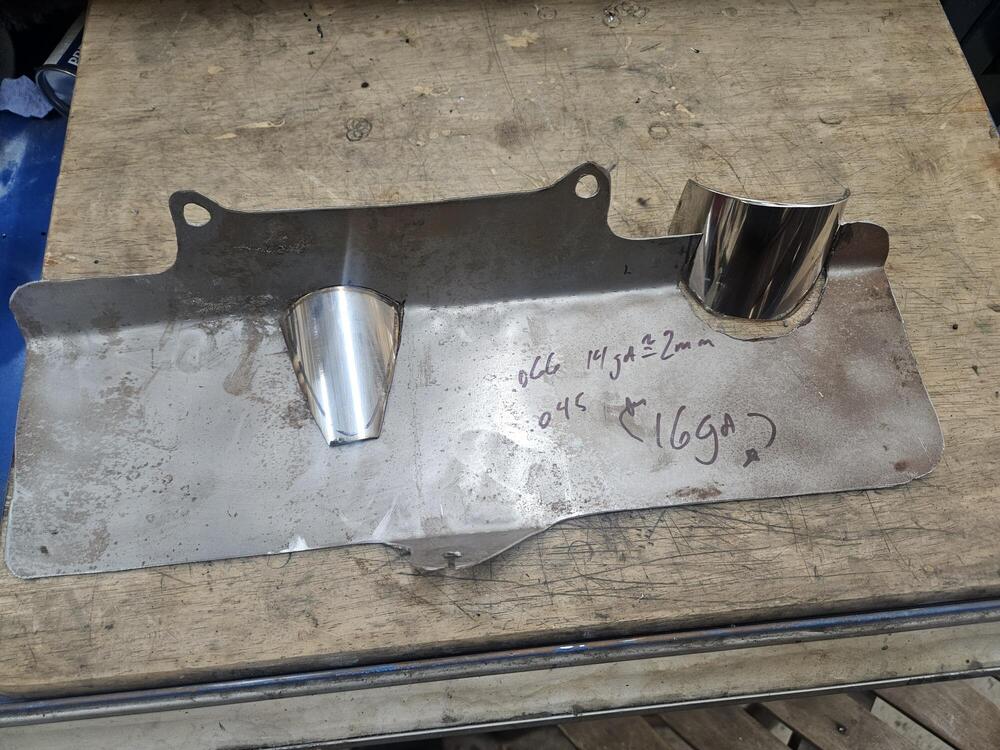
 I worked on the heat shield/ cable bracket some more today. Here is the current pattern An earlier template on a piece of coil metal I glued it to piece of 16ga I had laying around A little cutting We will have to clearance it around some of the header pipes. Since it's an equal length header, they intrude on the carb area more than some We will use some stainless exhaust tube to deal with the clearanced areas. Once I finalize a design I will have sendcutsend fabricate it for me


-
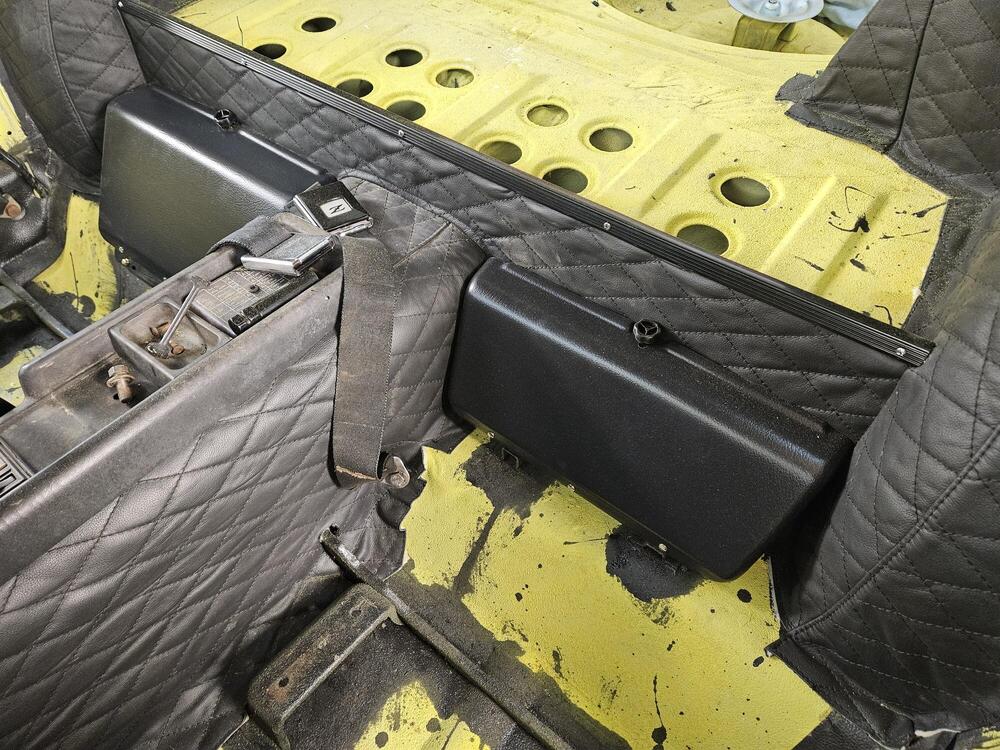
I also got the tool covers from resurrected classics and got them installed A little nerve racking to bend the plastic hinges to mount them

- Yesterday
-
 Planning to swap an R200 into my Series 1 car (12/70 build date) and am looking for the mustache bar, front diff mount and insulator and the rear transverse link mount from a later 280Z that came with the R200.
 -
-
 Awe man this is a trap!
 -
 S30 parts are rare and expensive. Not enough competition or volume of sales to keep the price down.
 -
 This is the other name and email used during the email communications with Sully. Phaedra Rosengarth armychick44@hotmail.com He sent several pictures of the new tank and a few pictures of a partially restored tank that he allegedly was working on.
 -

- Last week
-
 For sale are 3 280zx gauge clusters (without clocks). One is for a right hand drive. I make no claim as to the function of the 2 gauges per cluster, but they should be good. Asking $15 plus shipping If interested contact me @ ron@zclocks.com
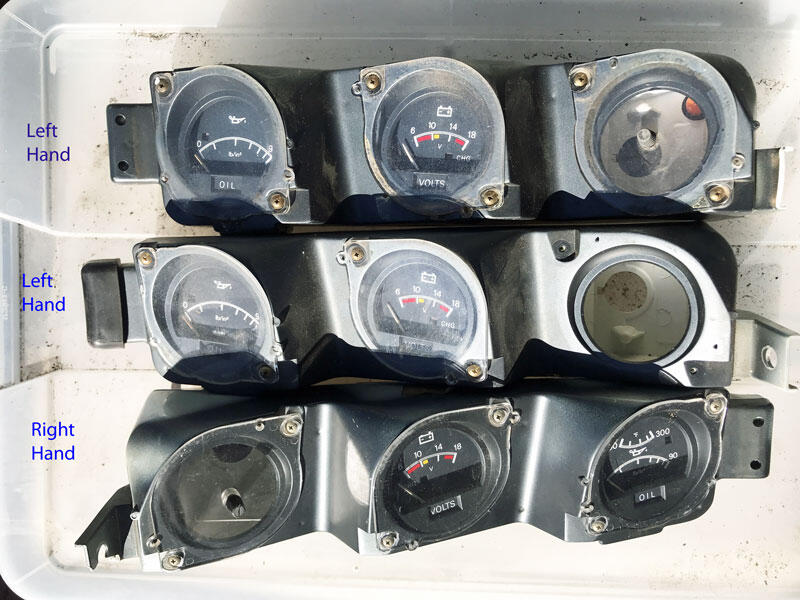
-
 The reason I mess up when talking about ChatGPT with my colleagues on campus…
-
 This bot is not like the others. The link actually leads to a real business. In Dubai.
-
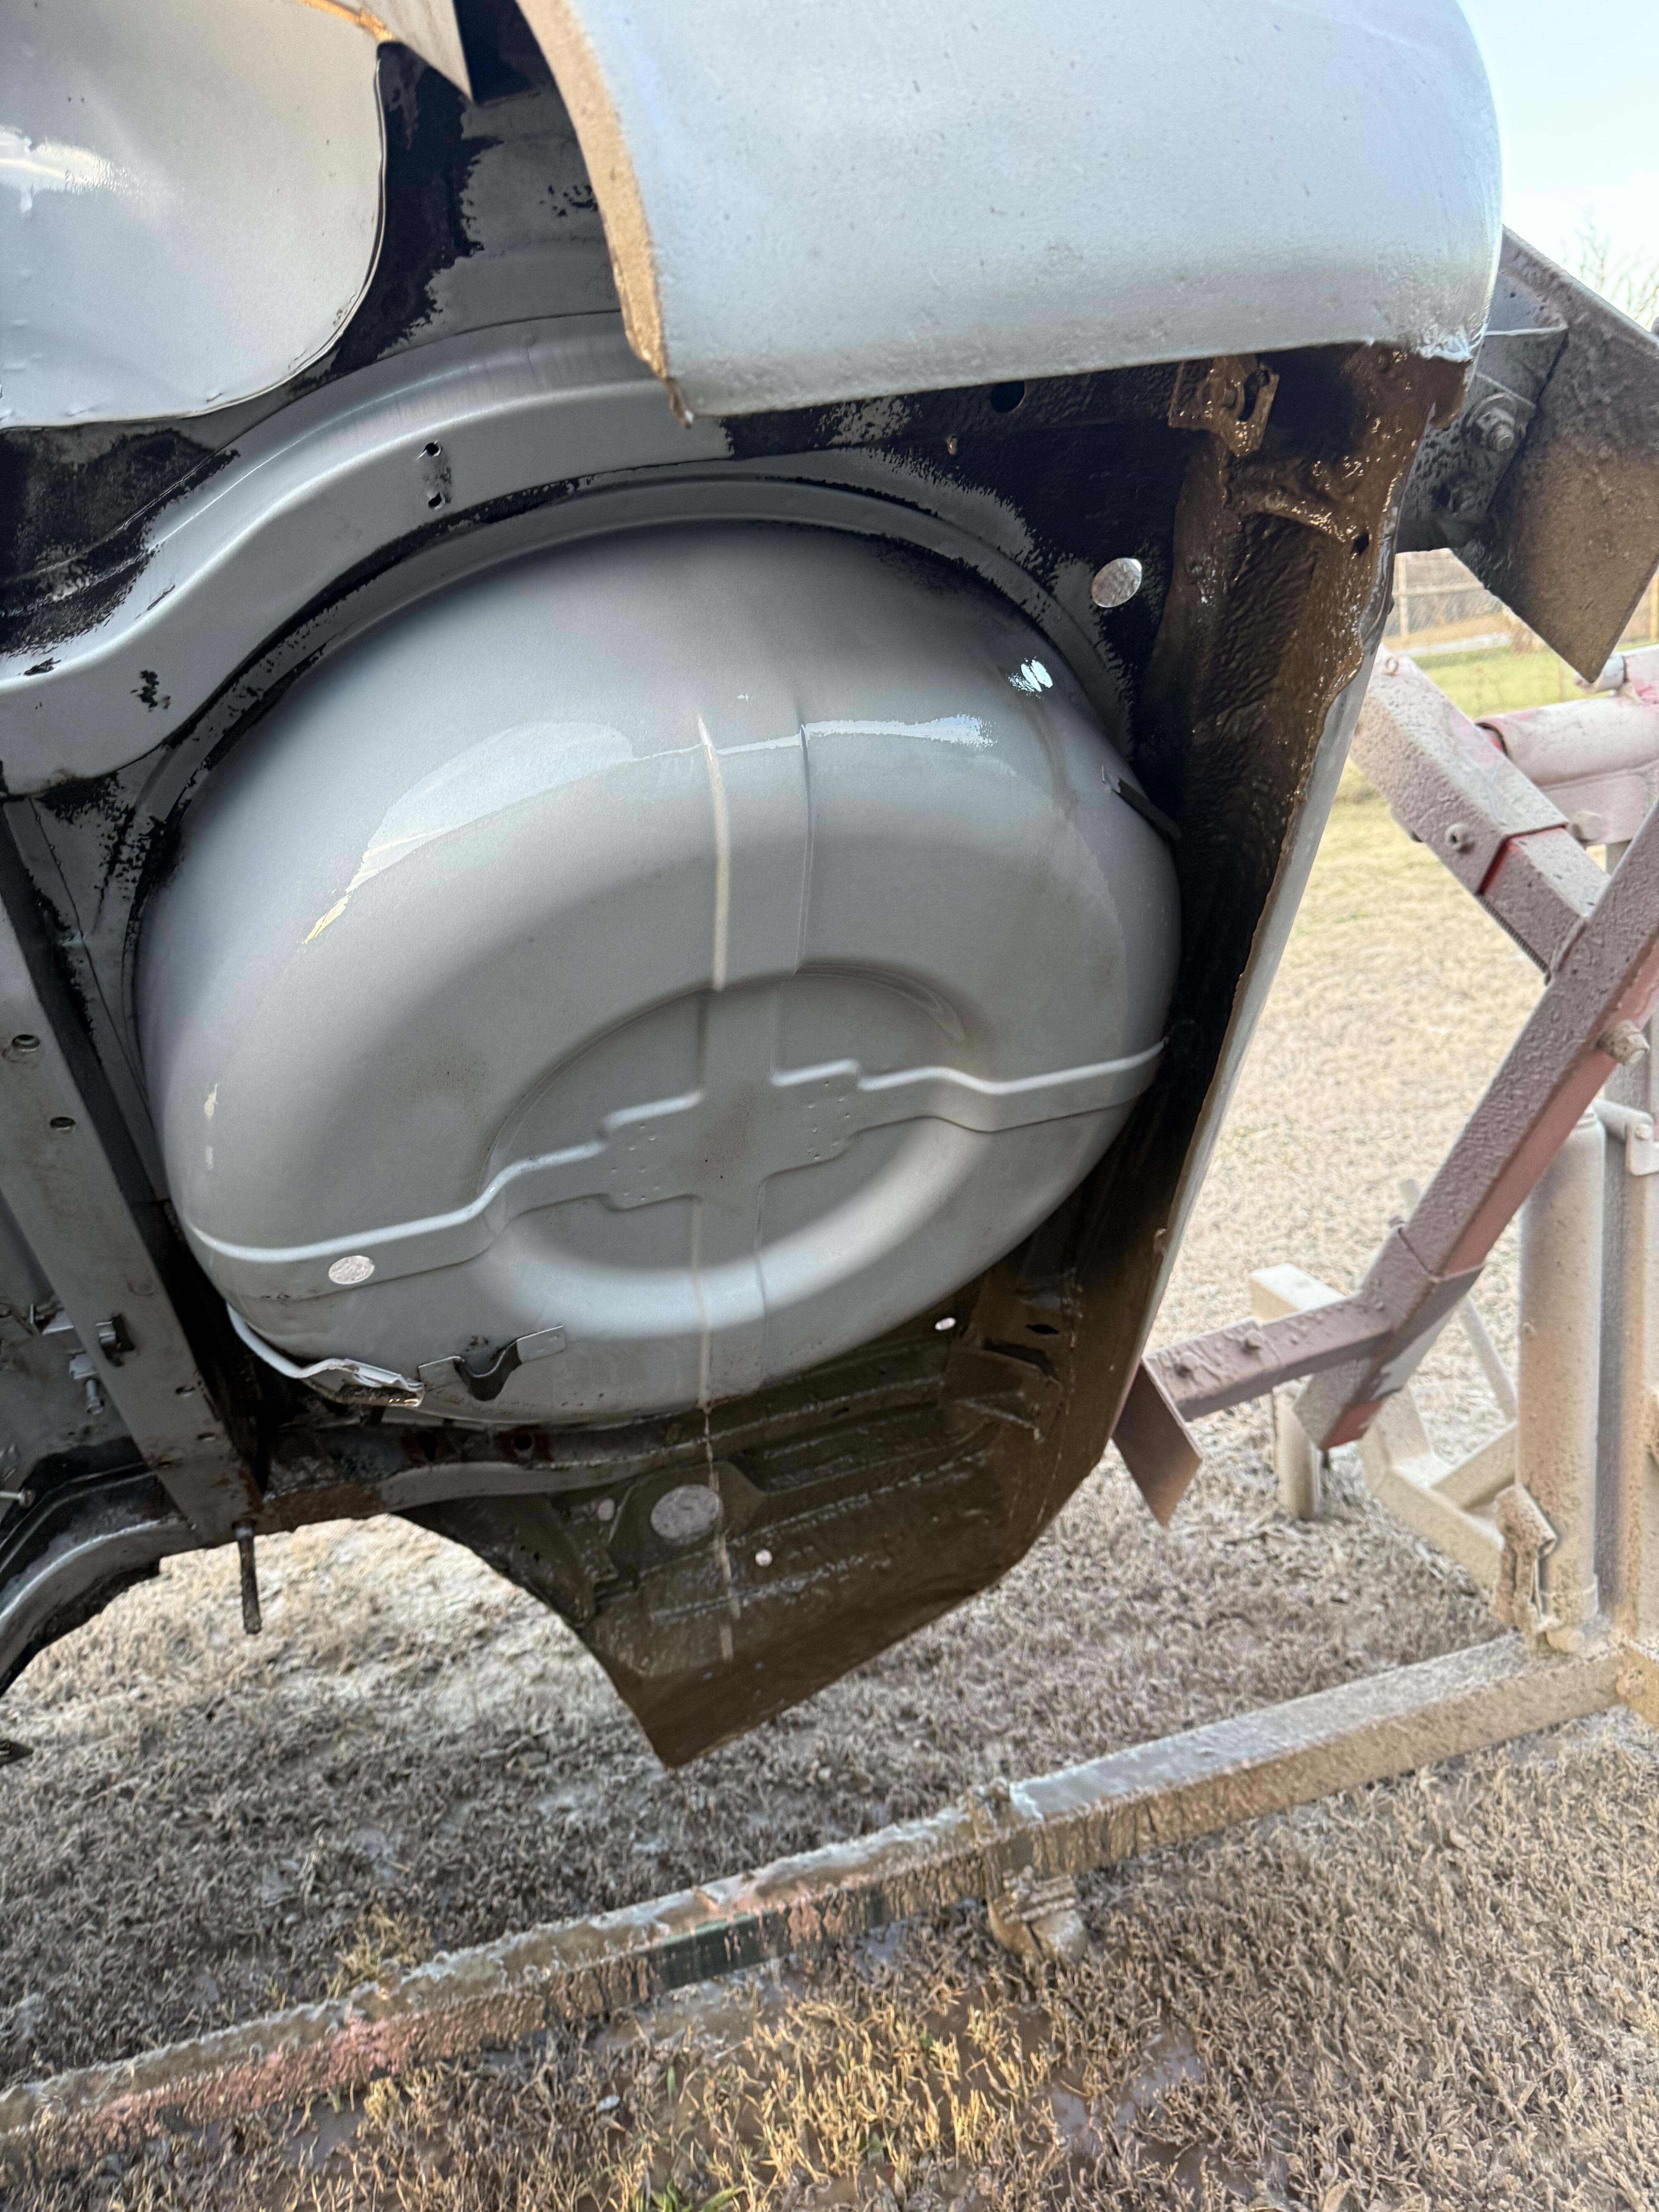
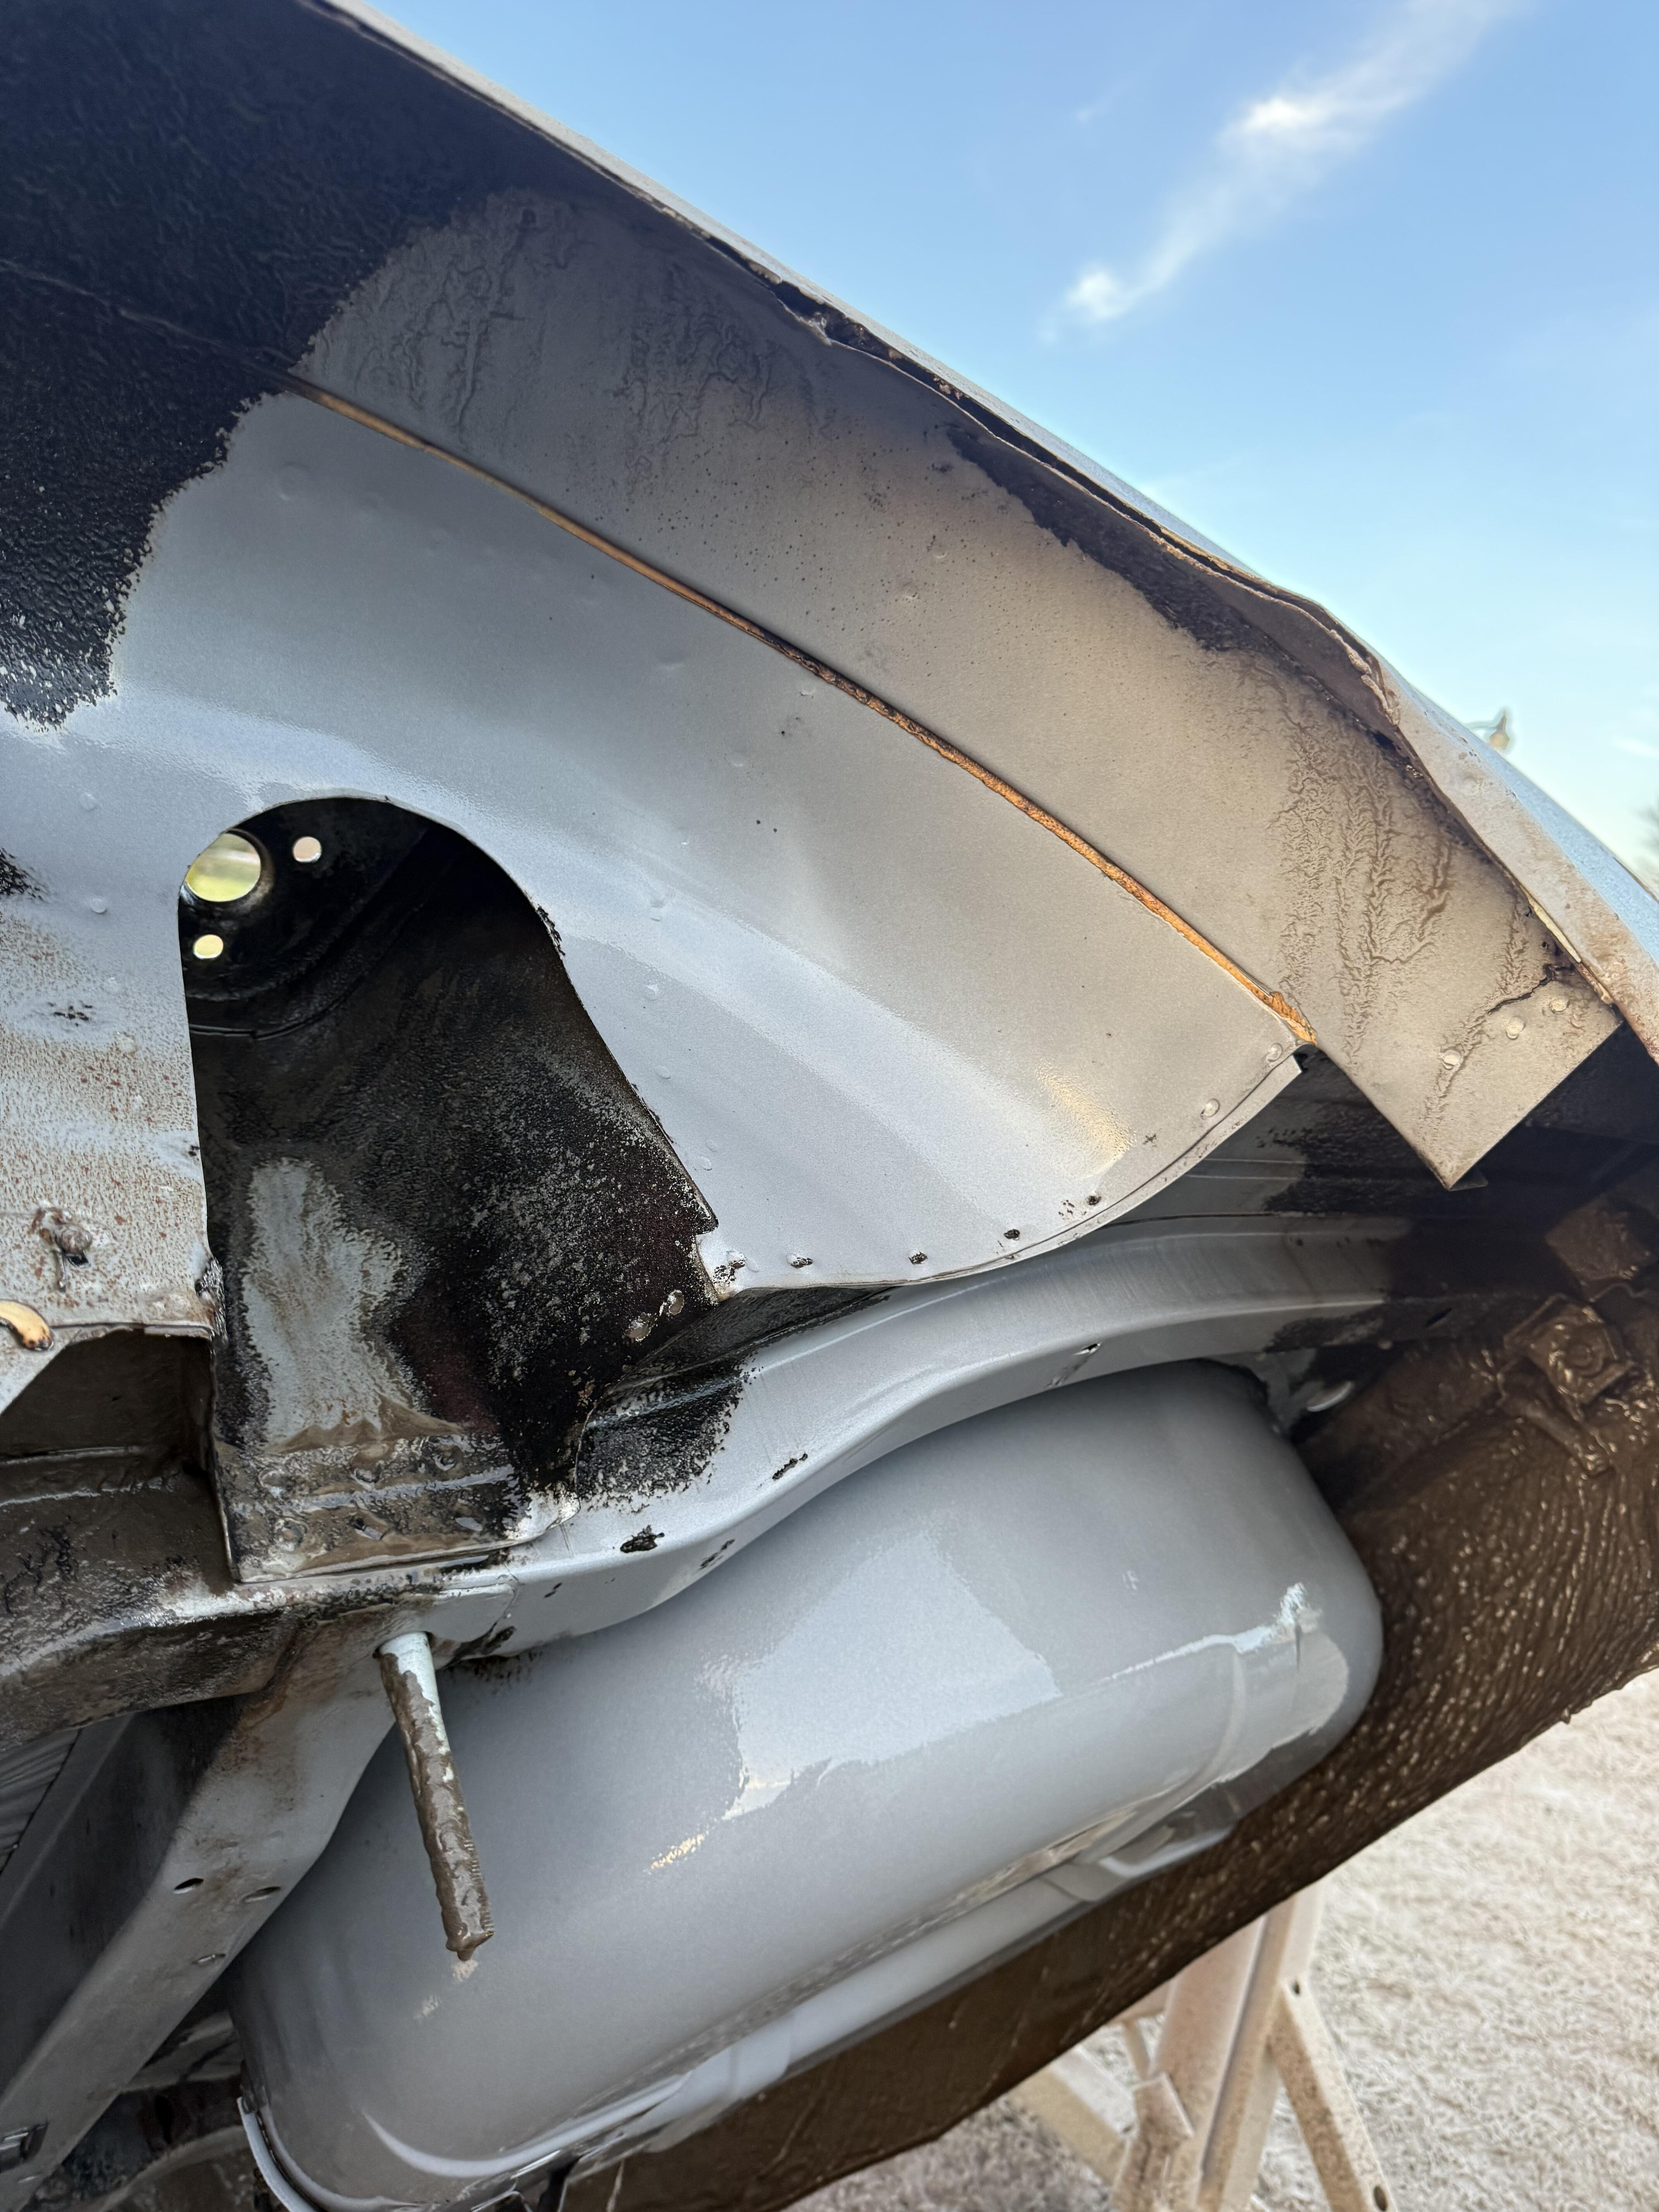
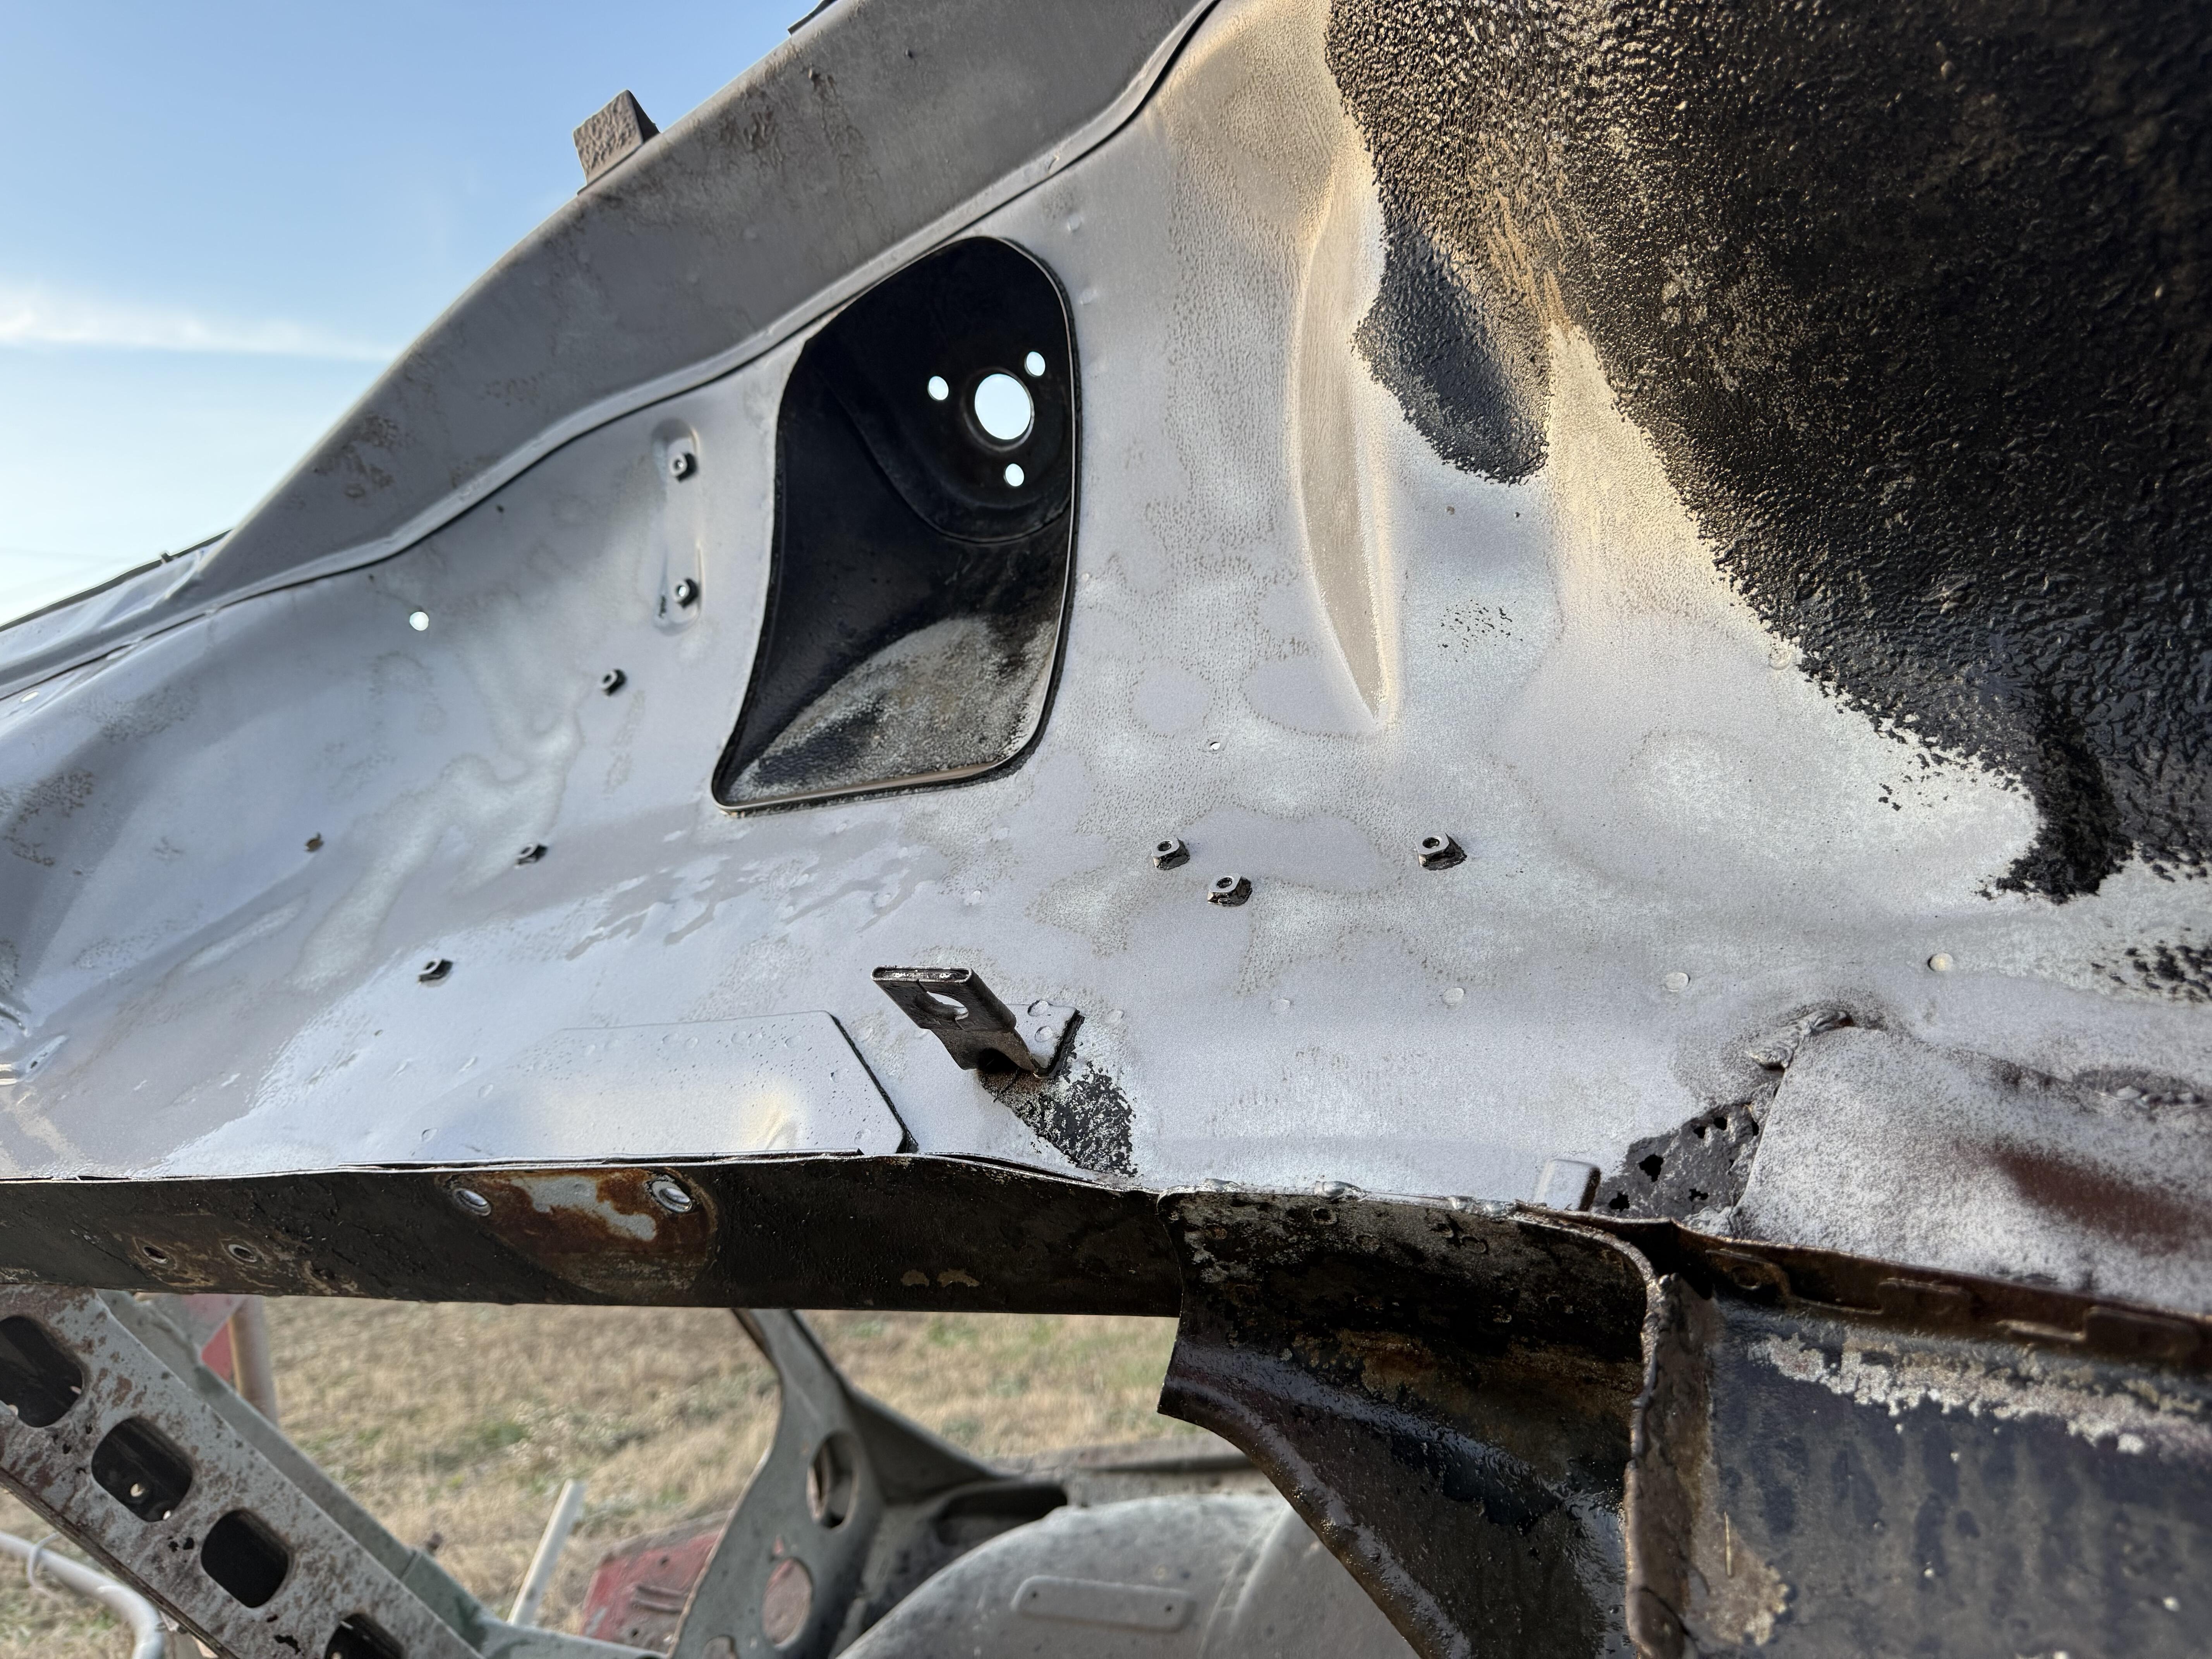
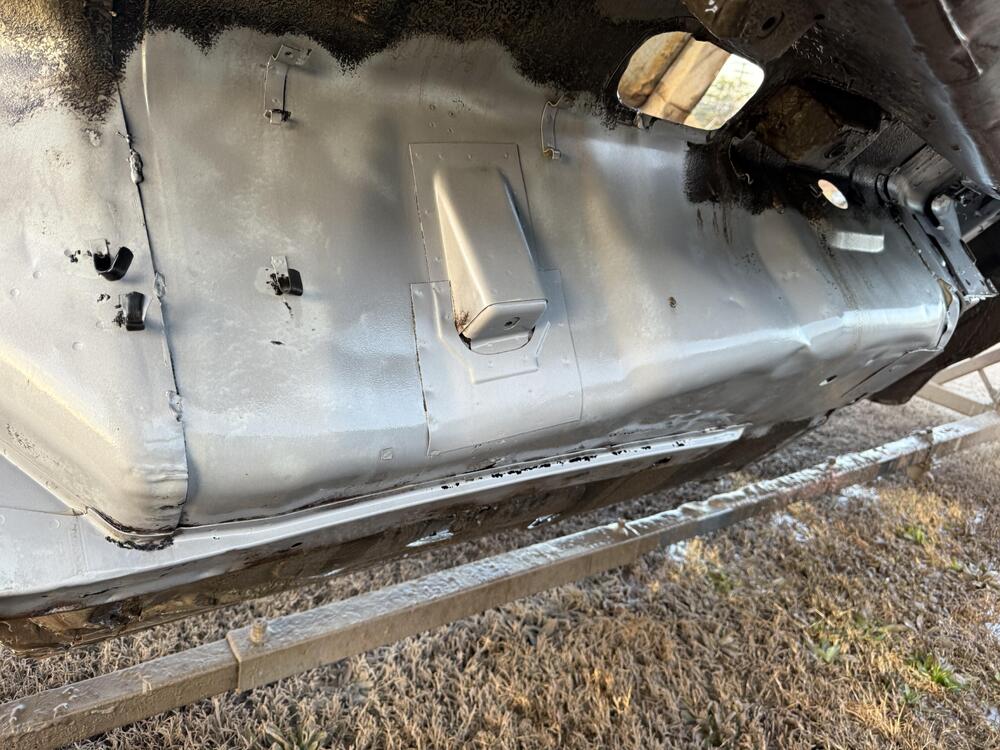
 Roof in really nice shape….a surprise. Frame rails, outer rockers and floors toast ….not a surprise. Firewall, spare tire well and inner fenders are nice..surprise. Tunnel and inner rocker area in great shape, perfect to attach new floors. Have rails, need both floors. I’ve seen gnose cars trim lips off the rear to allow wider/lower tires/suspension. Debating on leaving them trimmed off, or replace entire rear quarters to have the complete outer rear well.


-
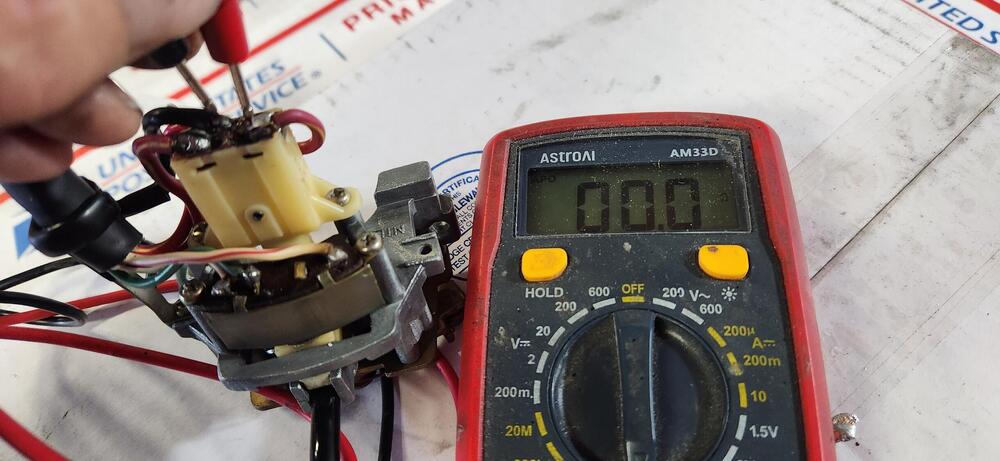
 The first picture from the left shows a completed repaired hi- lo beam switch circuit board repair. The next 2 pictures show continuity on both of the hi- lo beam switch closed circuits. In the mail on the way I have a parts turn signal switch with broken hi- lo beam switch circuit board. In the near future I can detail my repair protocol if there is interest out in Datsunland.

-
 I also used an electric knife on my seat foam and it worked just fine.
 -
Both the original tensioner and the new one have rubber type washers between the tensioner pad and it's housing.
-
 Seek and ye shall find! I was able to find it and jumper the connection. It was really burried at the back. For others coming to this thread, when looking at the two wire bundles from the passenger side it's connected to the one on the right. It splits off from that. (see pic with finger pointing to it) Just grab the smaller taped up bit coming off it and start pulling. The Nismo pump is a bit noisier than I'd like but I'm really happy none the less. Initial pressure on start up is around 6psi and then once it warmed up it dropped to 4 to 4.5psi. I've moved the red wire from the + side of the coil to the ballast and it runs. But, I've currently got a intermittent misfire on two cylinders. Number 2 and 5. I found them by attaching the timing light plug wire connector to them and the light flash wasn't consistent. I've ordered new NGK plug wires, plugs, cap and rotor. I'm not sure of the cap and rotor though. I went ahead and assumed they're for an L28 though I could be wrong. How can I identify the difference between a L24 distributor and one for an L28? I'm guessing they're not identical. I know the 240Z had points and the 280Z didn't. As the car has a L28 from 2000 I'm assuming they also threw in a later distributor with the Pertronix. I pulled the plugs and they were really sooty. I cleaned them with a wire brush and that didn't really help. I'm wondering if it's my ignition or if I'm just running super rich. Both of those are on the most direct line from the carbs and I'm assuming would be getting a more fuel than the other cylinders to their sides. Brakes also need to be fully bled as I've installed the 8.5" booster upgrade from JDM-Car-Parts and new master cylinder as well. So it drives and stops and can be driven around a parking lot or paint shop if need be.