Hardway
-
Posts
1,332 -
Joined
-
Last visited
-
Days Won
16
6 Followers


Hardway's Achievements
")


-

1971 240Z Driver Build Advice Requested PLEASE
Hardway replied to HappyZ's topic in Open Discussions
As someone that has owned three 240z's and two 280z's, always go with the car with the least amount of rust. Mechanical and interior components are swappable all day long. The white car may not be as pretty as the red on the surface but it is by far a better foundation for a build. I would strip the white car to a point it can be painted the color you want, get it painted, then install the best of everything from both cars. -
Glad to see they are back. I actually didn't do anything. PB had a message on their front page about it but had not thought about it tonight. If it happens again I will re-create the post as I have all of the pictures backed up.
-
Photobucket is experiencing an outage. Yes, I could copy the text and re-create the post with the pictures attached to the forums. May work on it tonight if MNF is uneventful.
-
I will double check my Photobucket account. The pictures should be working as I just paid my annual subscription earlier this month. Thank you for bringing this to my attention.
-
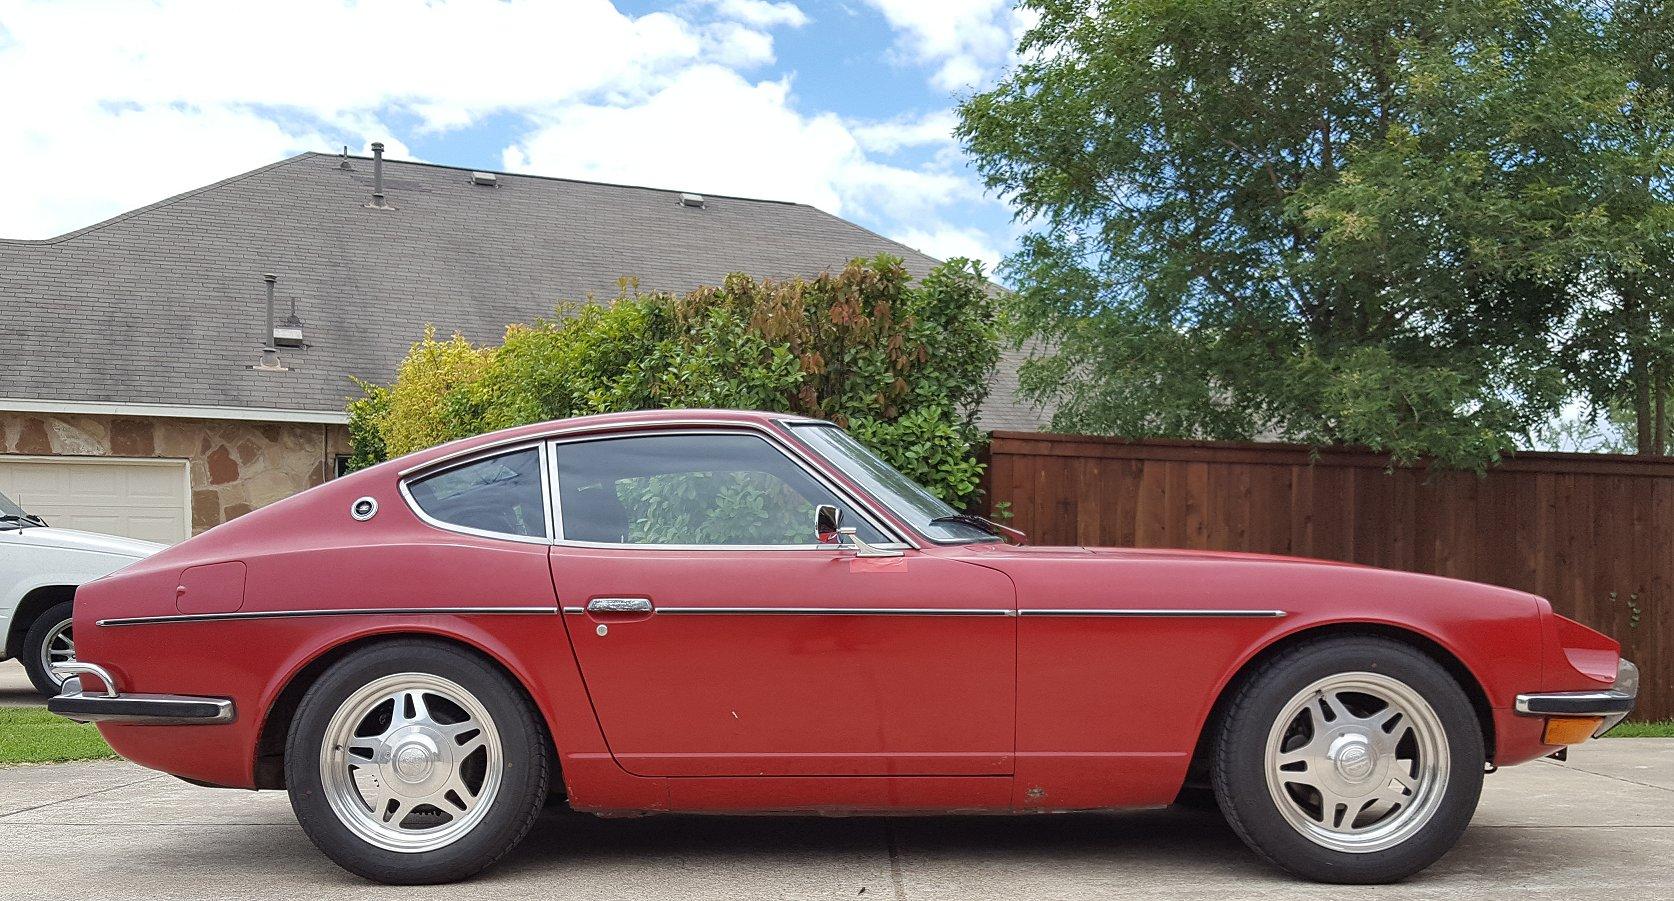
For those of you that follow the Datsun Cars and Trucks For Sale FB page probably saw the car for sale. It was purchased by its new owner yesterday evening and who took it home to Houston. I enjoyed owning the car, refreshing its various components, and learning more along the way. The car is still a blank canvas for the new owner that can be driven as is or taken in any number of directions. My wife and I have some big financial goals we want to achieve in 2020 and the sale of the Z will ensure that happens. I will still check in from time to time to see what everyone is working on. I thank everyone for their encouragement and support.
-
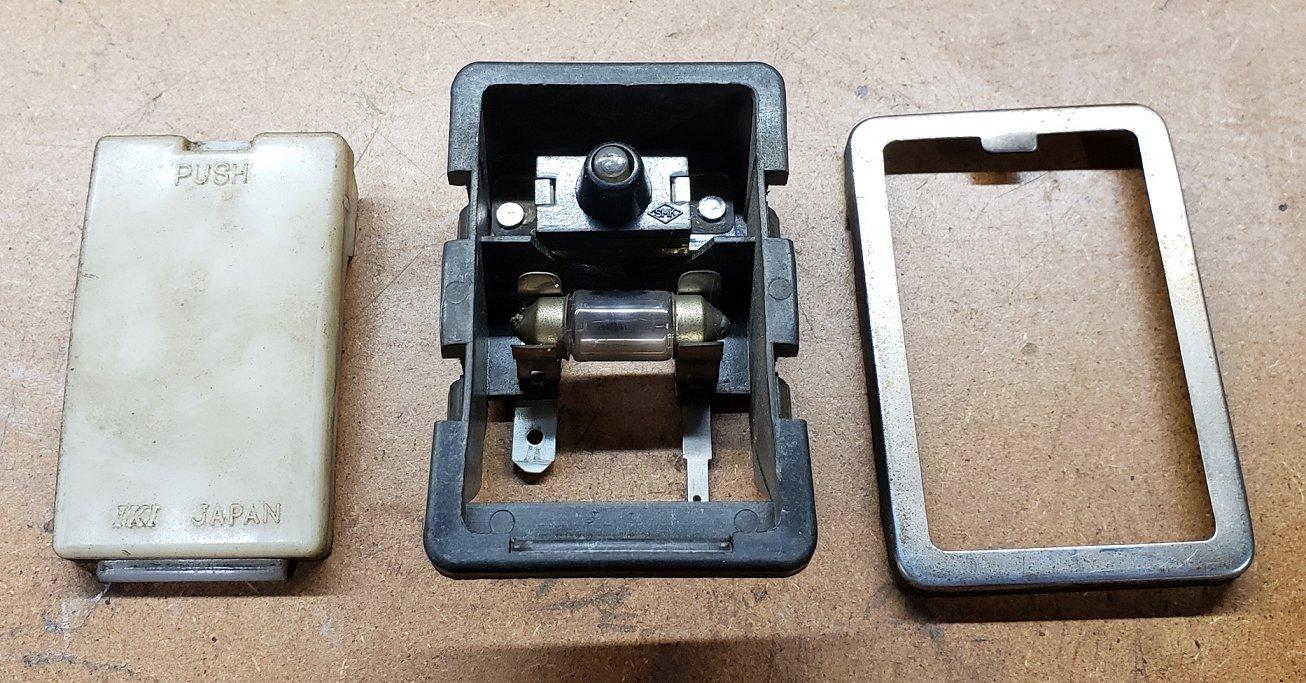
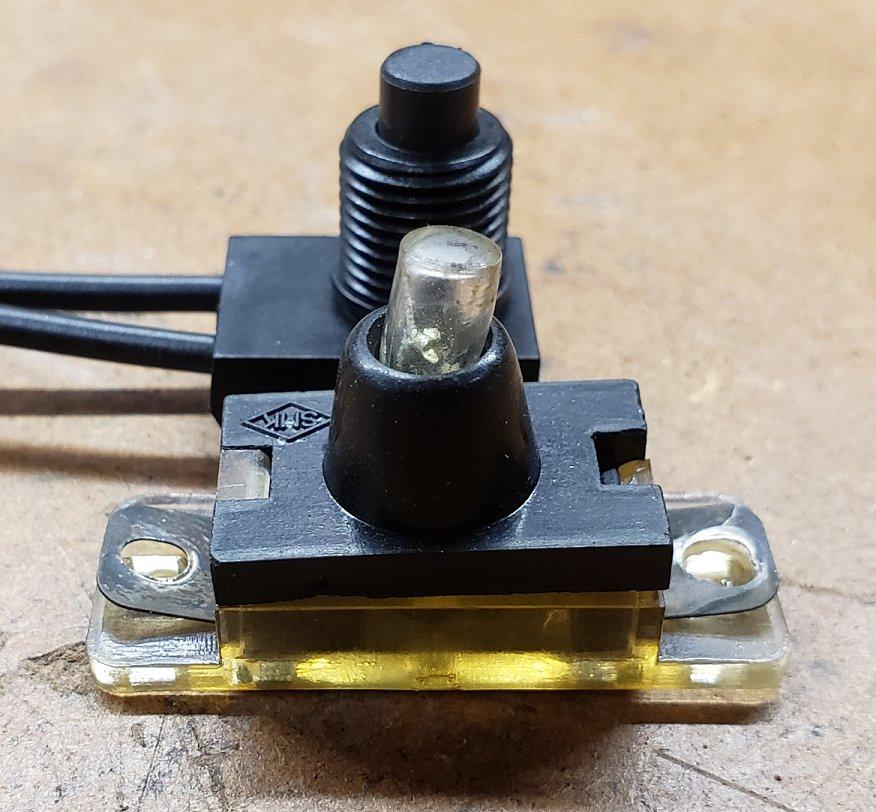
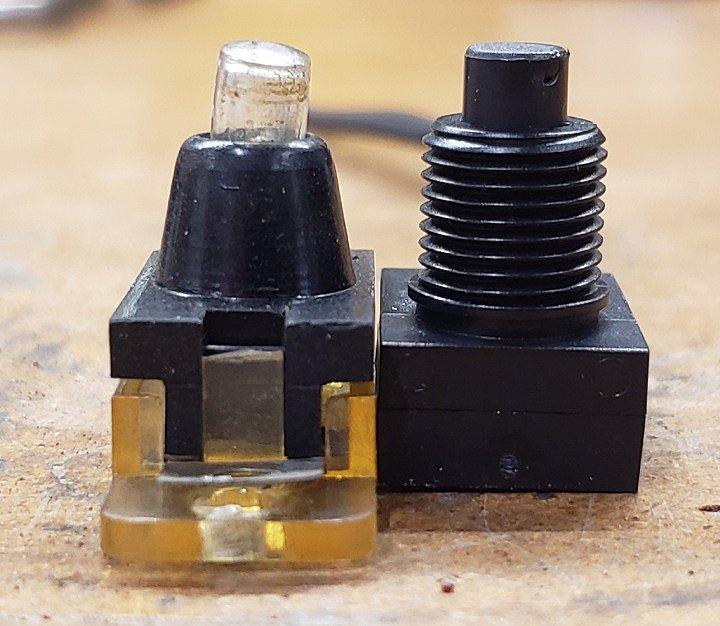
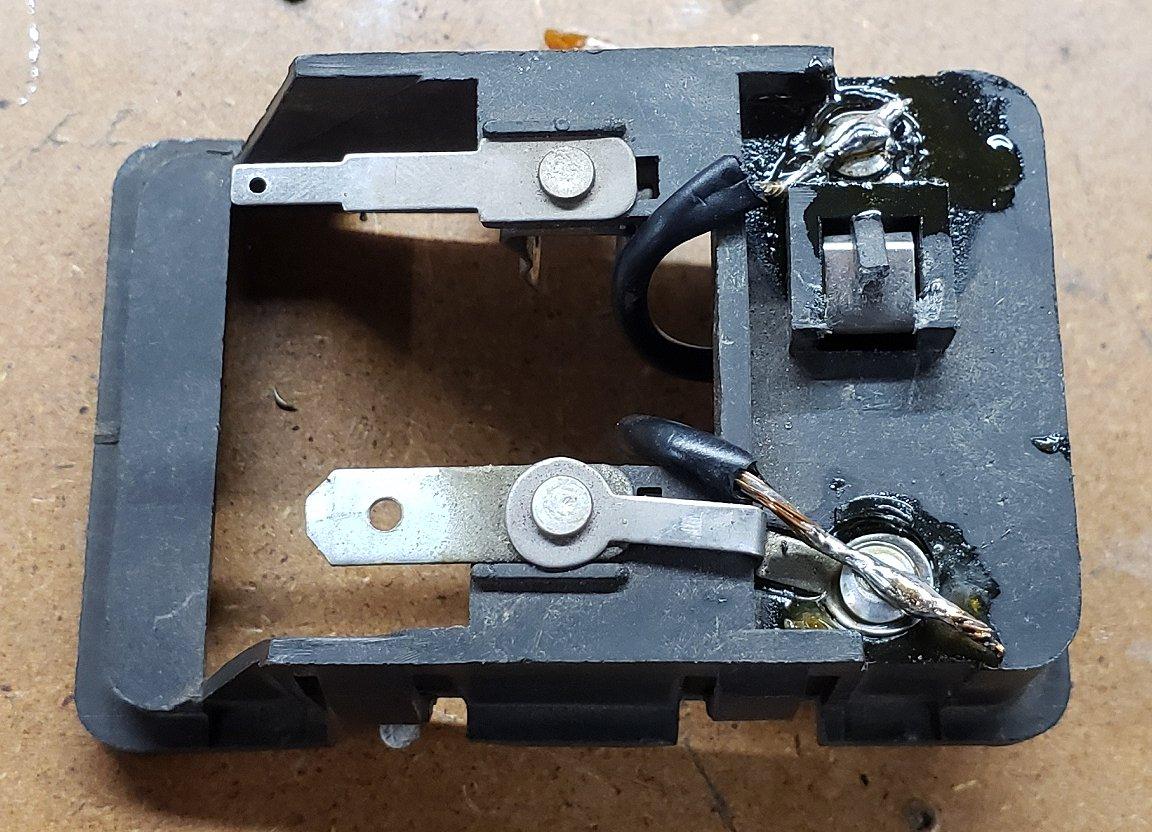
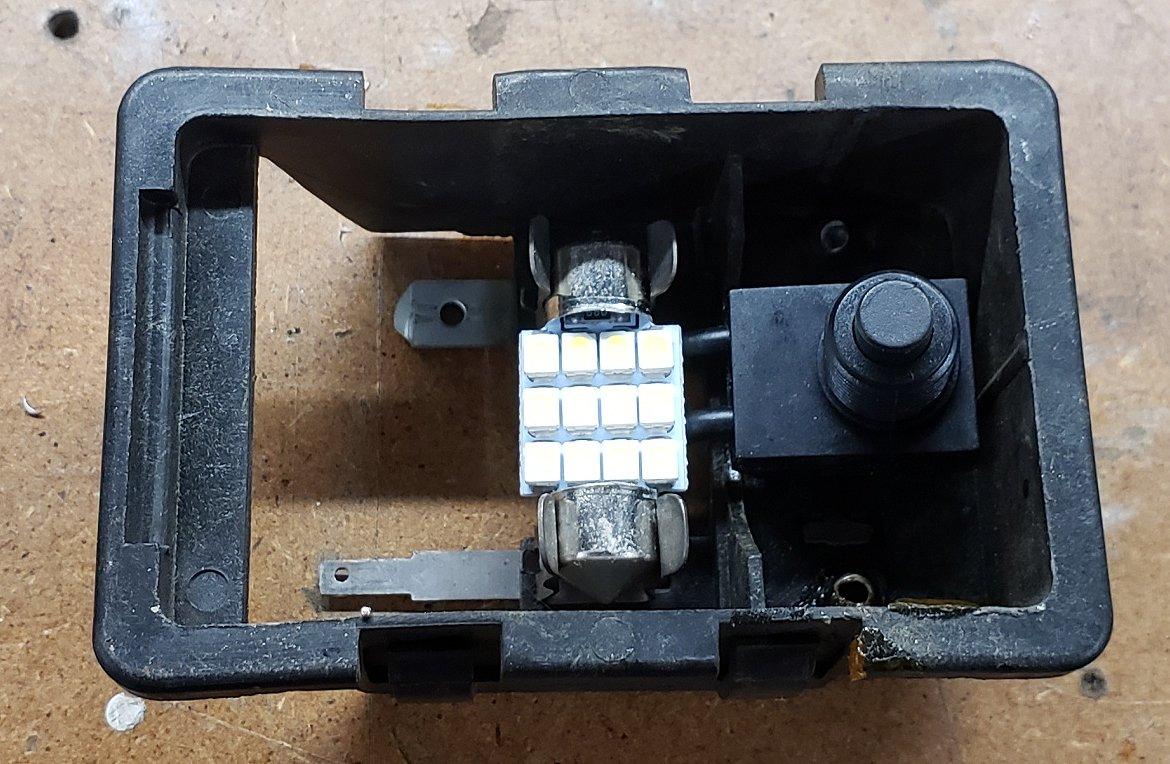
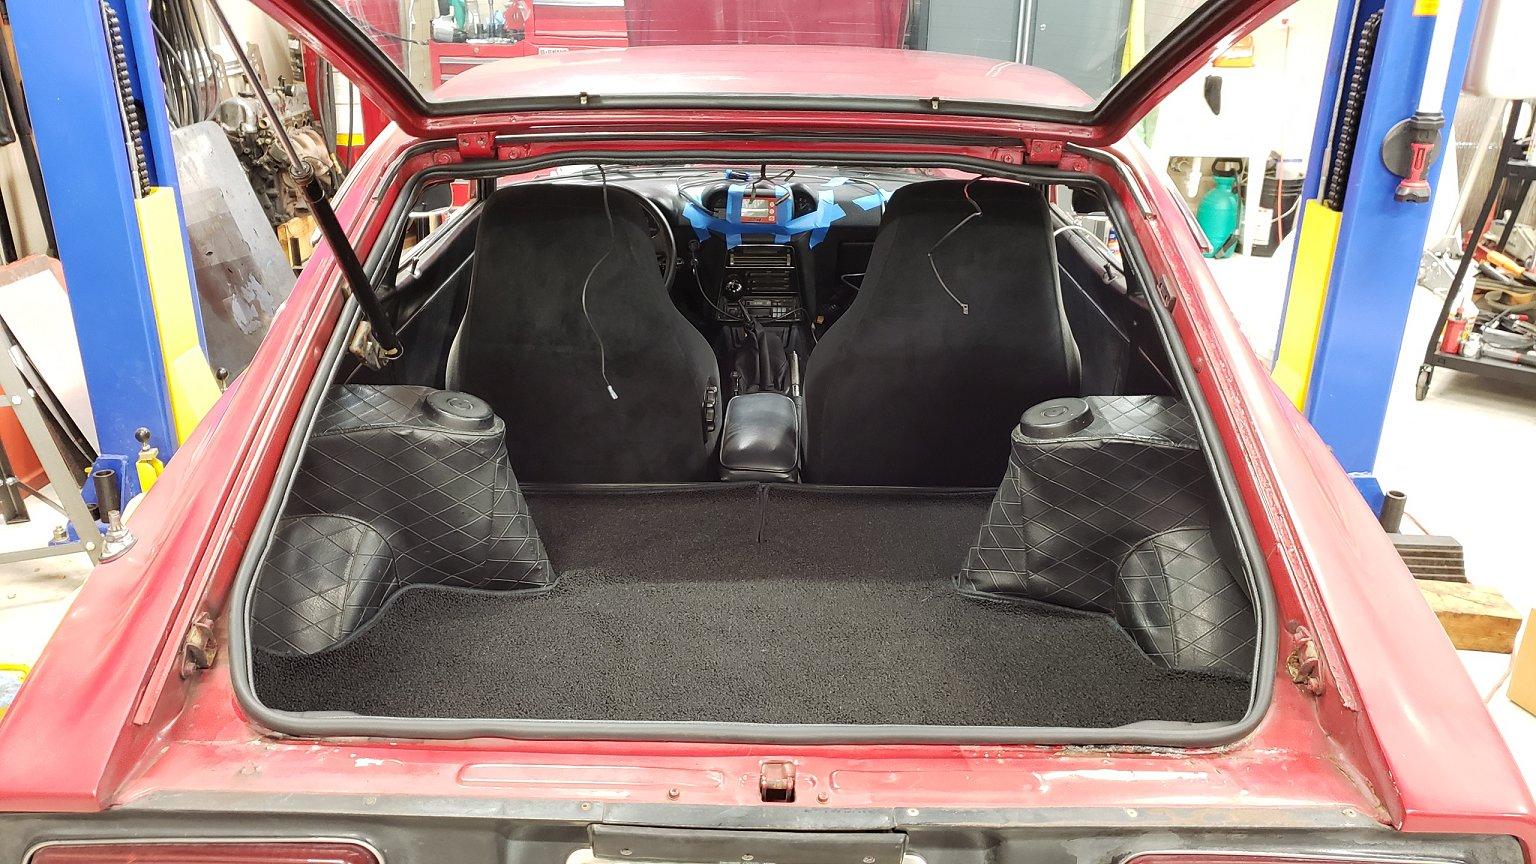
When I removed the rear interior panels for the hatch seal replacement I also had to remove the dome light and trim piece. The dome light has never worked in the car so I wanted to figure out why. A few depressions on the lens told me the switch was not popping back up as it should. After carefully removing the trim piece and lens this was easily confirmed. SMK is still in business and they make of all things, keyboard letter switches. Makes sense but in all my research I could not find this switch or anything close to it by SMK. I would love to know who makes the switch for the NOS units Nissan is selling for $100. There was no way I was giving a c-note for a new dome light so I found these switches on Amazon, 5 of them for $8.68. As always, they arrived in a few days and after some side by side comparisons I decided to move forward. https://www.amazon.com/gp/product/B07LCH1N3B/ref=ppx_yo_dt_b_asin_title_o05_s00?ie=UTF8&psc=1 First I riveted the contacts back to the housing as I had to drill out the spot/swag welds from the old switch. This would give me something to solder to. Looking back on it I wish I had just used some small machine screws and and nuts as I could wrapped the wire around the screw and filled it with solder. Oh well, next time! Then it was just a matter of soldering the wires from the switch to the riveted posts. I had thought about using some double sided tape on the bottom of the switch but I could tell it was not going anywhere, especially once the lens was on. I replaced the old bulb with an LED, again from Amazon and with a quick test I confirmed I had the polarity correct on the bulb and the switch worked. I cleaned up the lens and polished the trim. Upon testing with the lens on I determined I needed to bend the rivets out of the way a little. With the action feeling good I installed with and basked in the glory of my handy work. The light works when either door is opened and works via the switch. Job done!

-
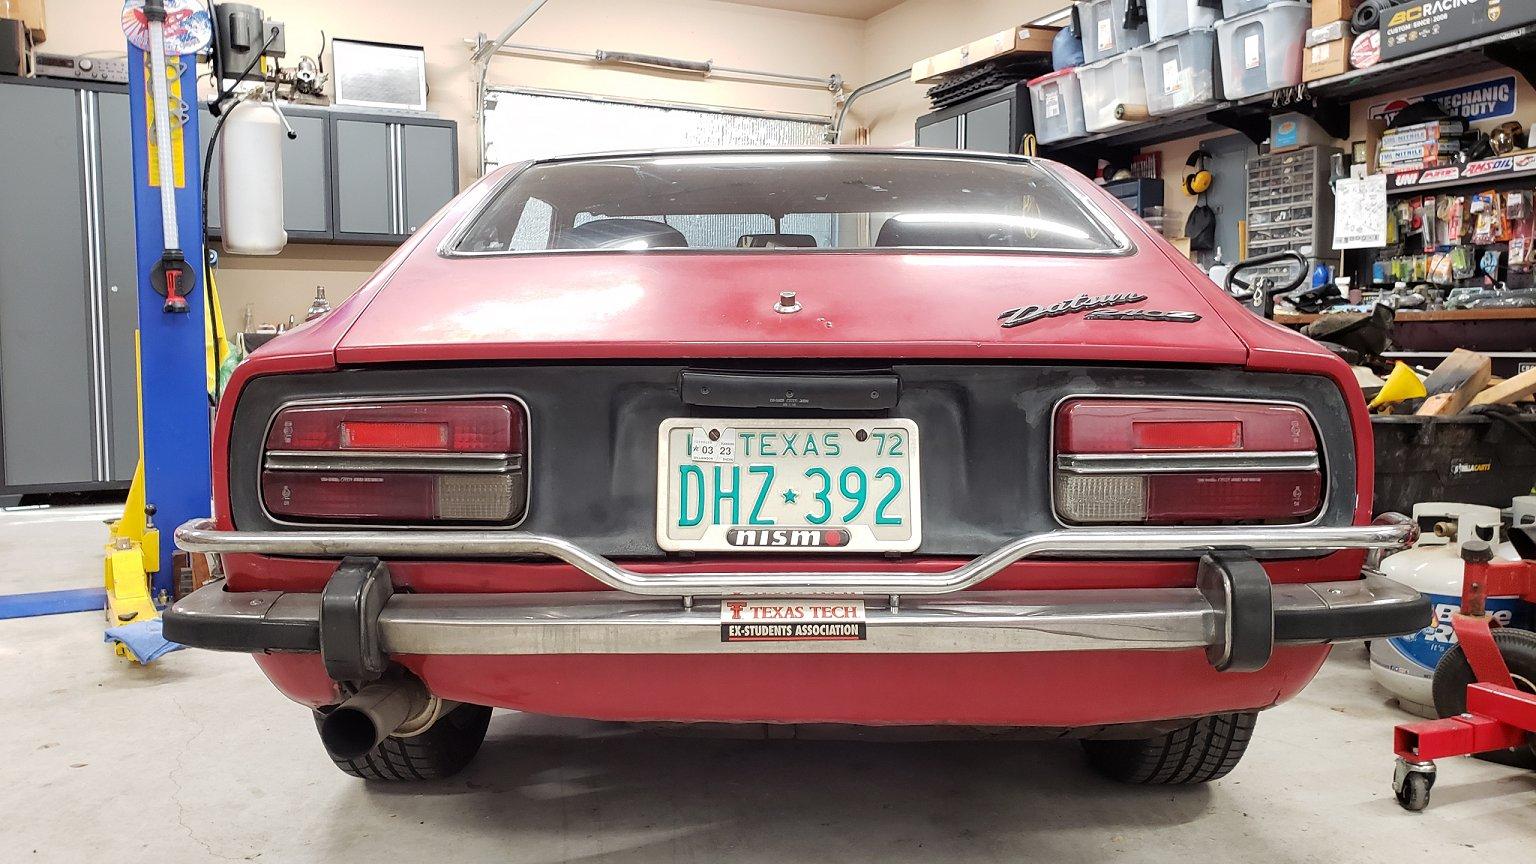
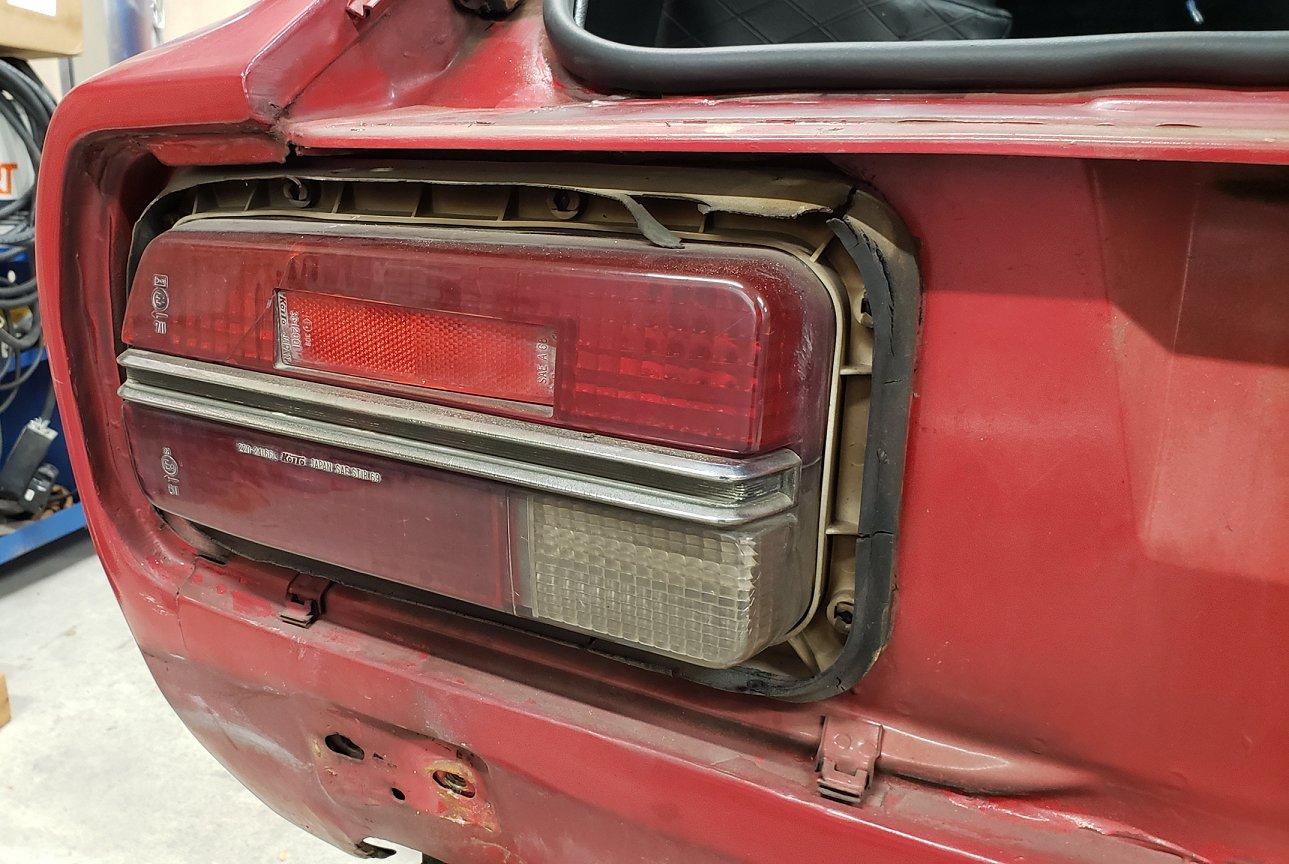
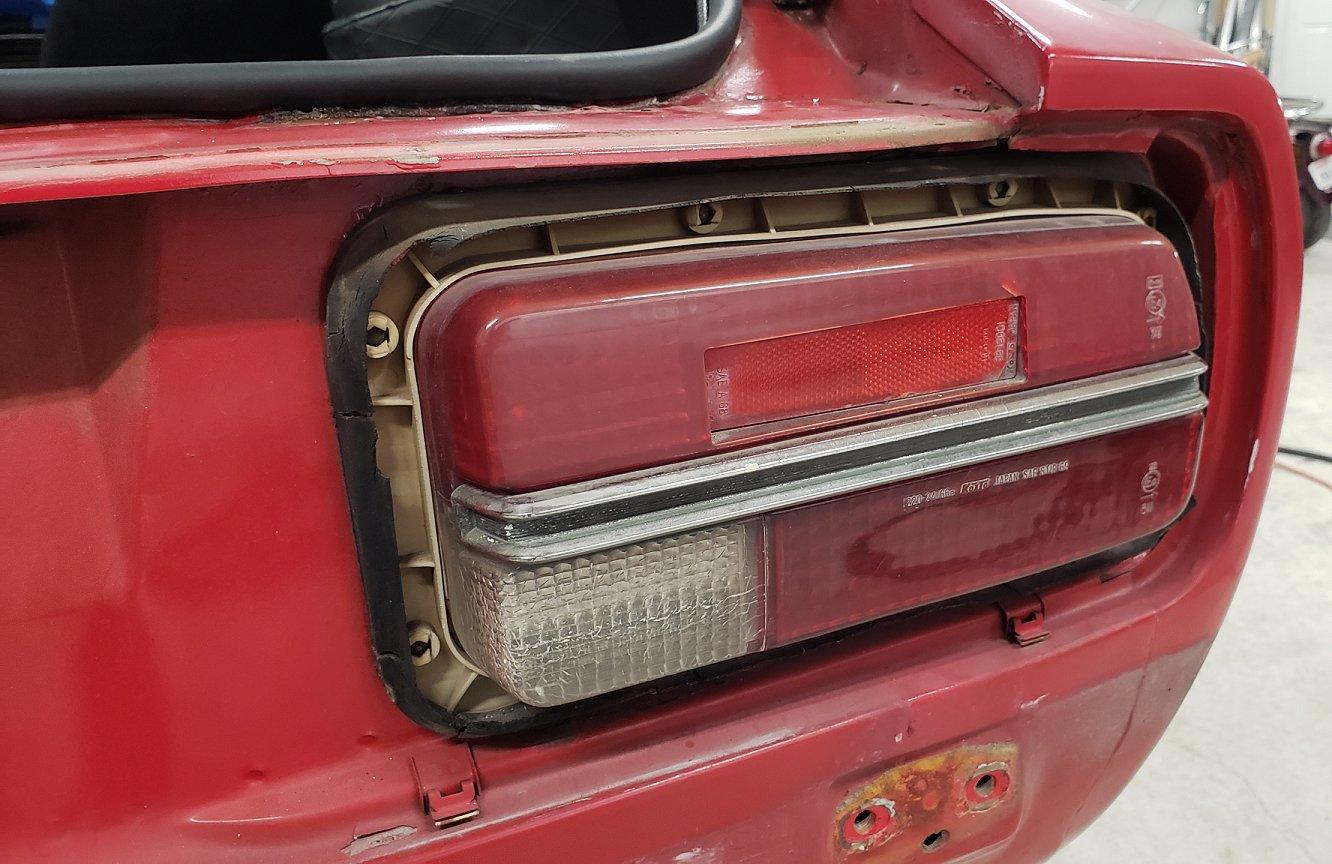
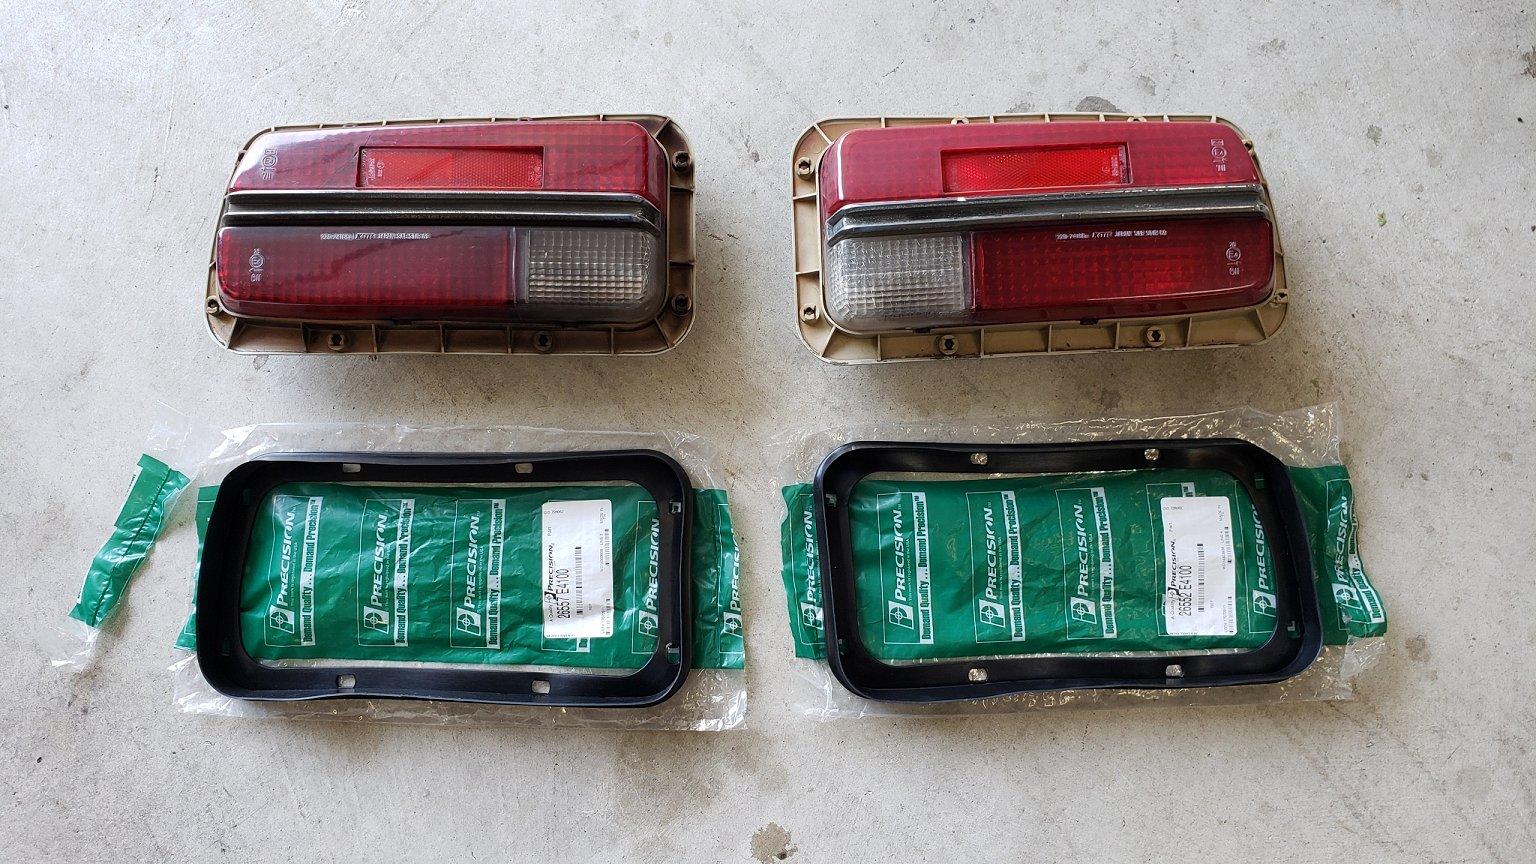
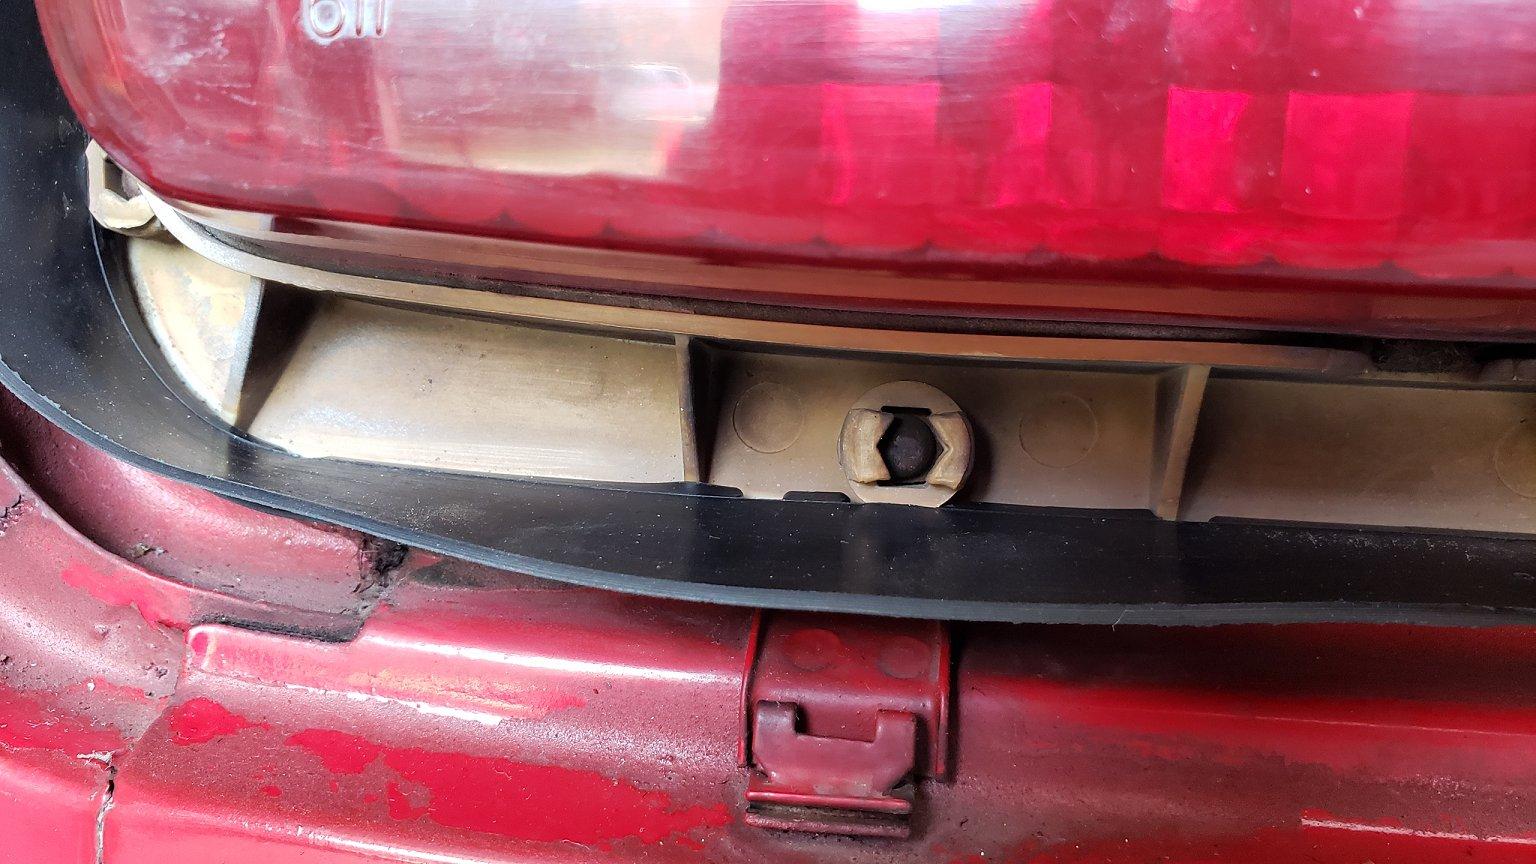
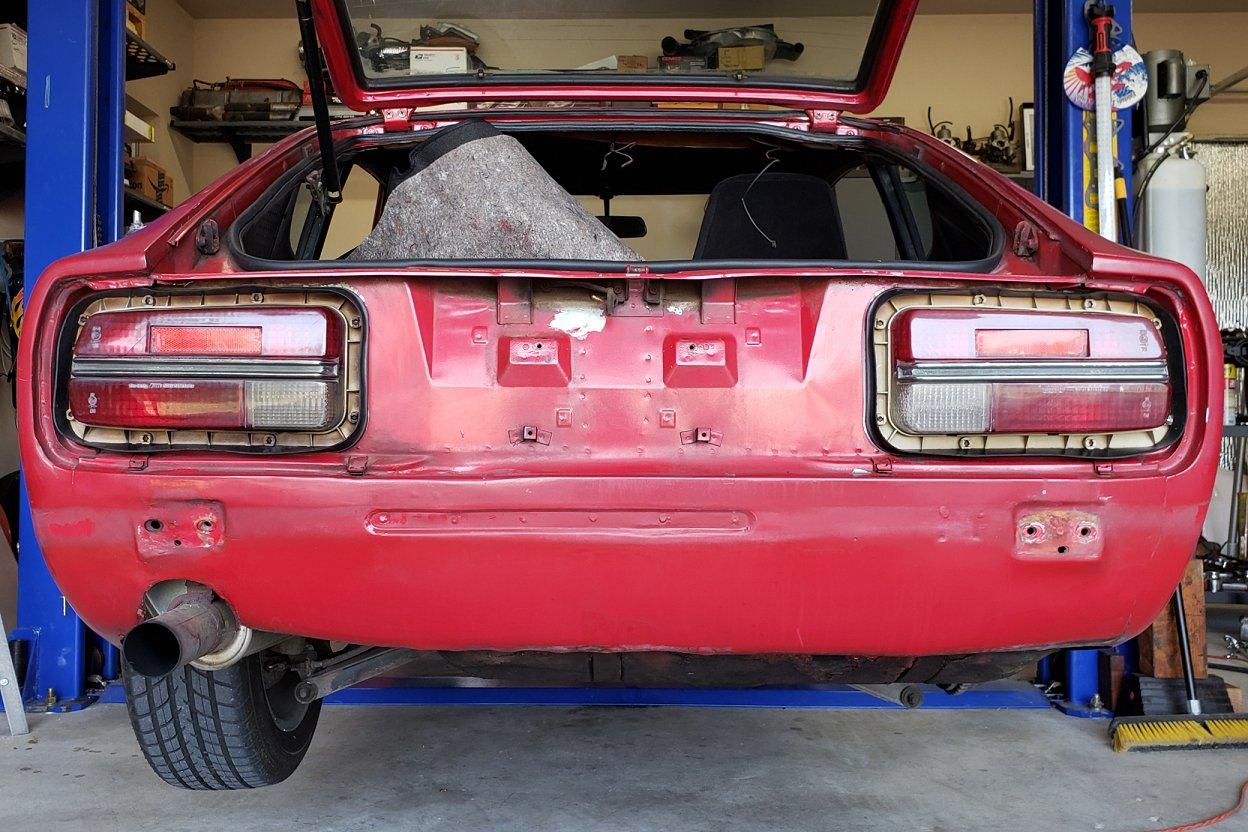
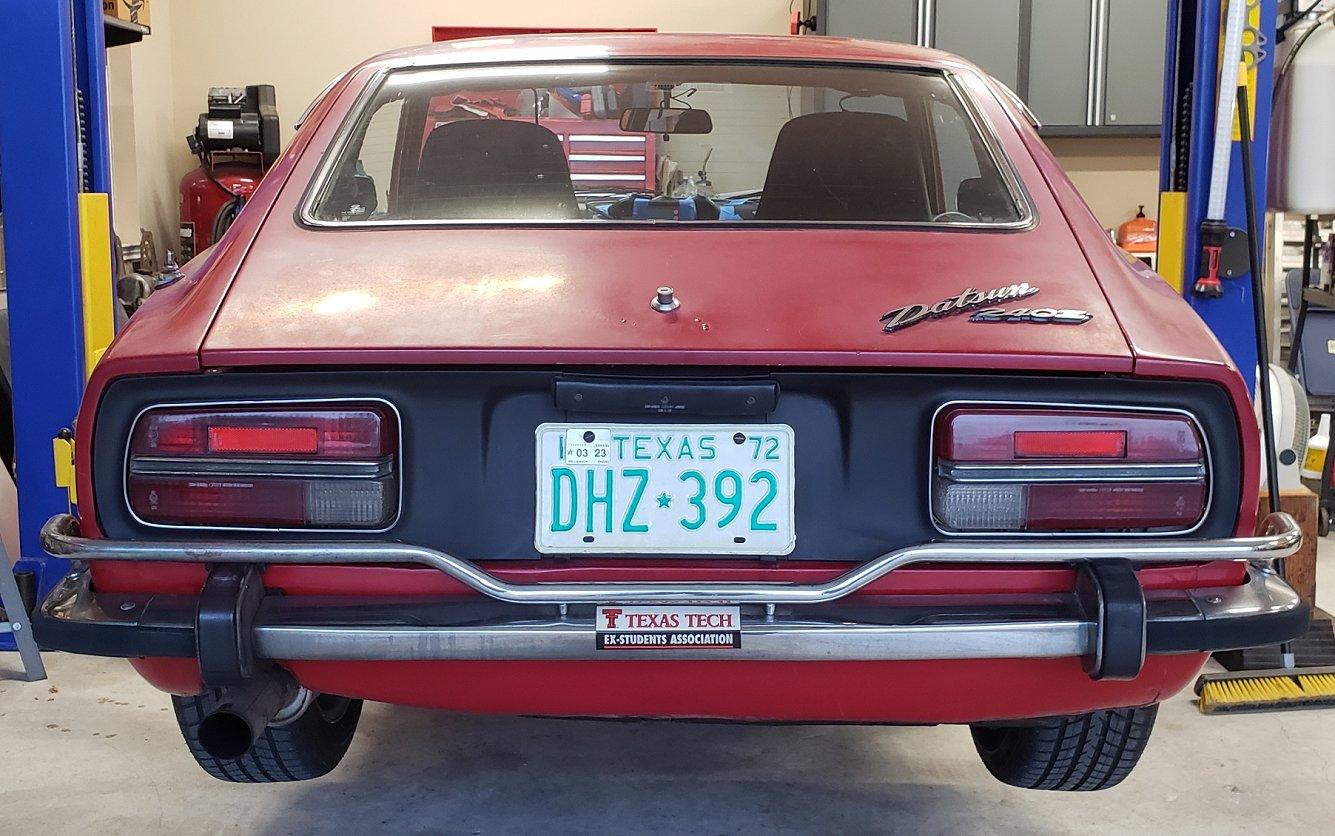
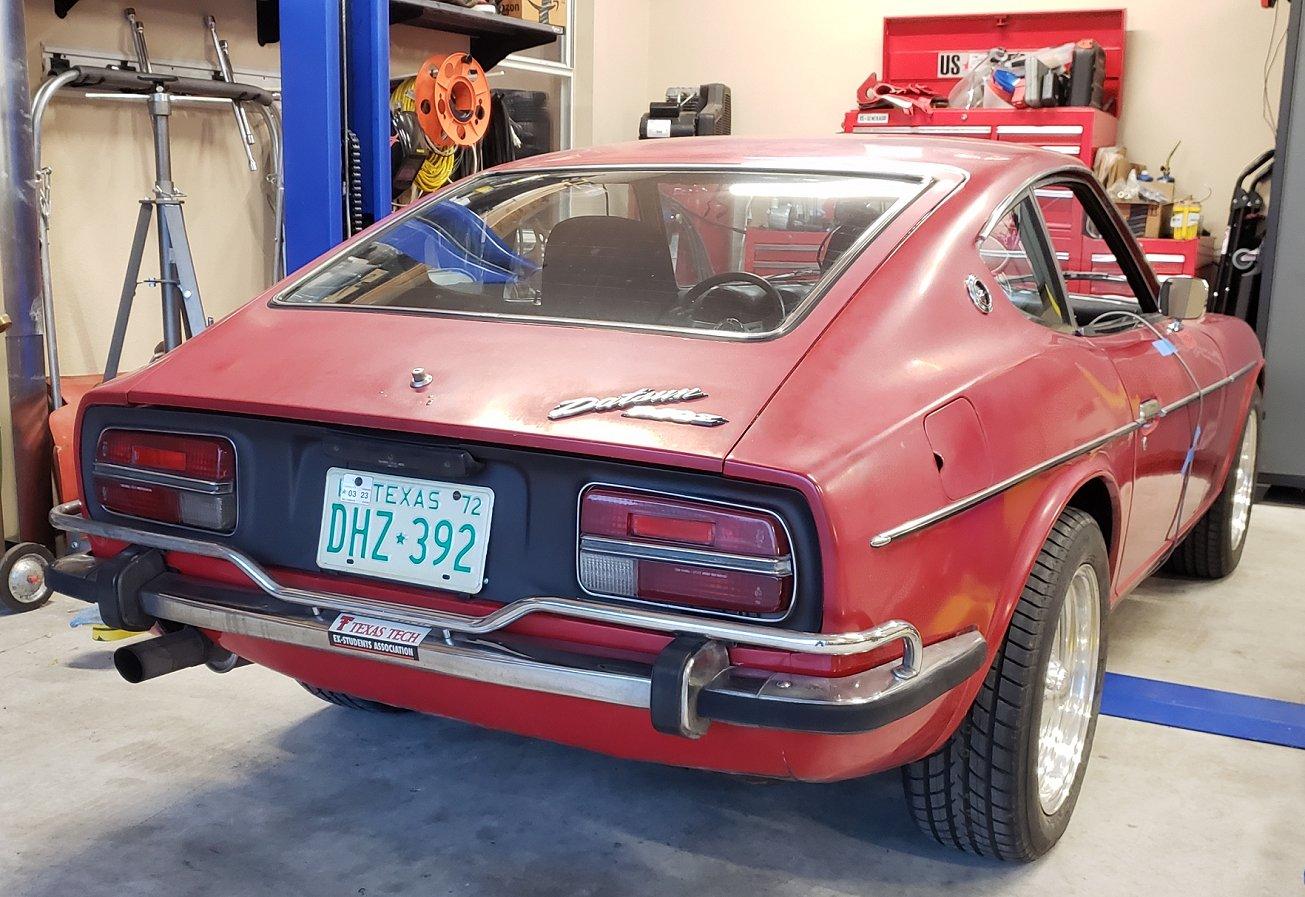
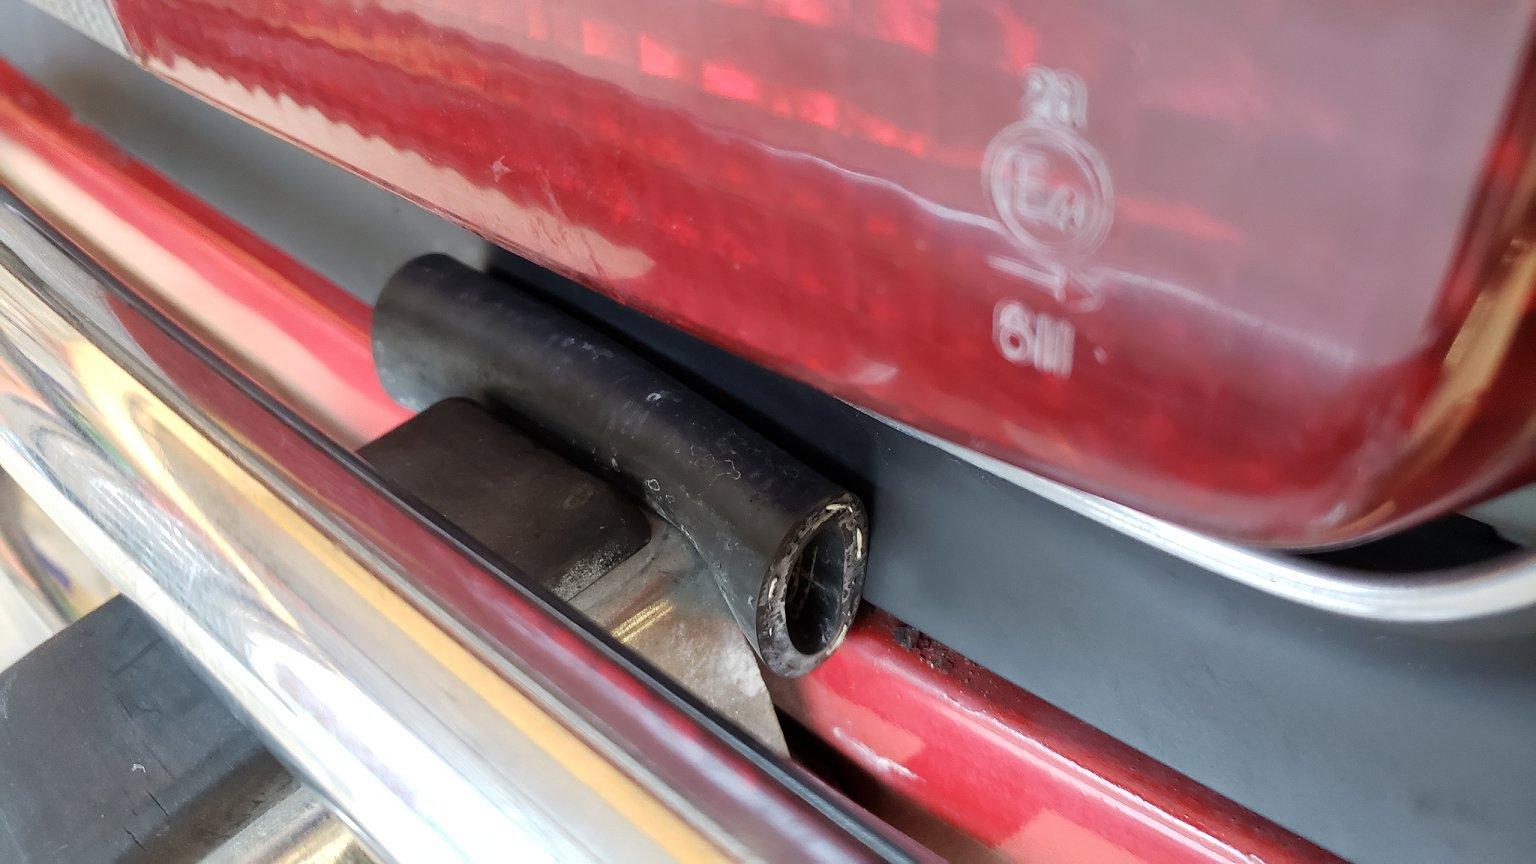
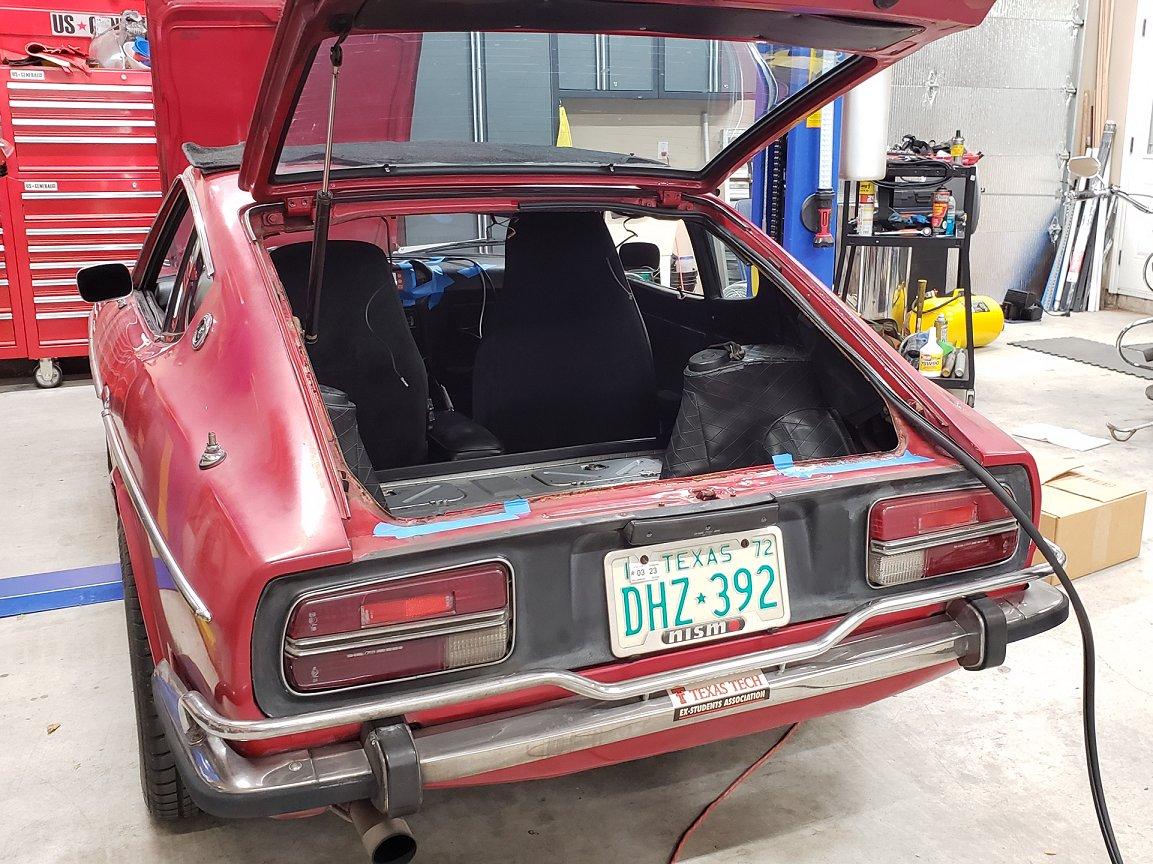
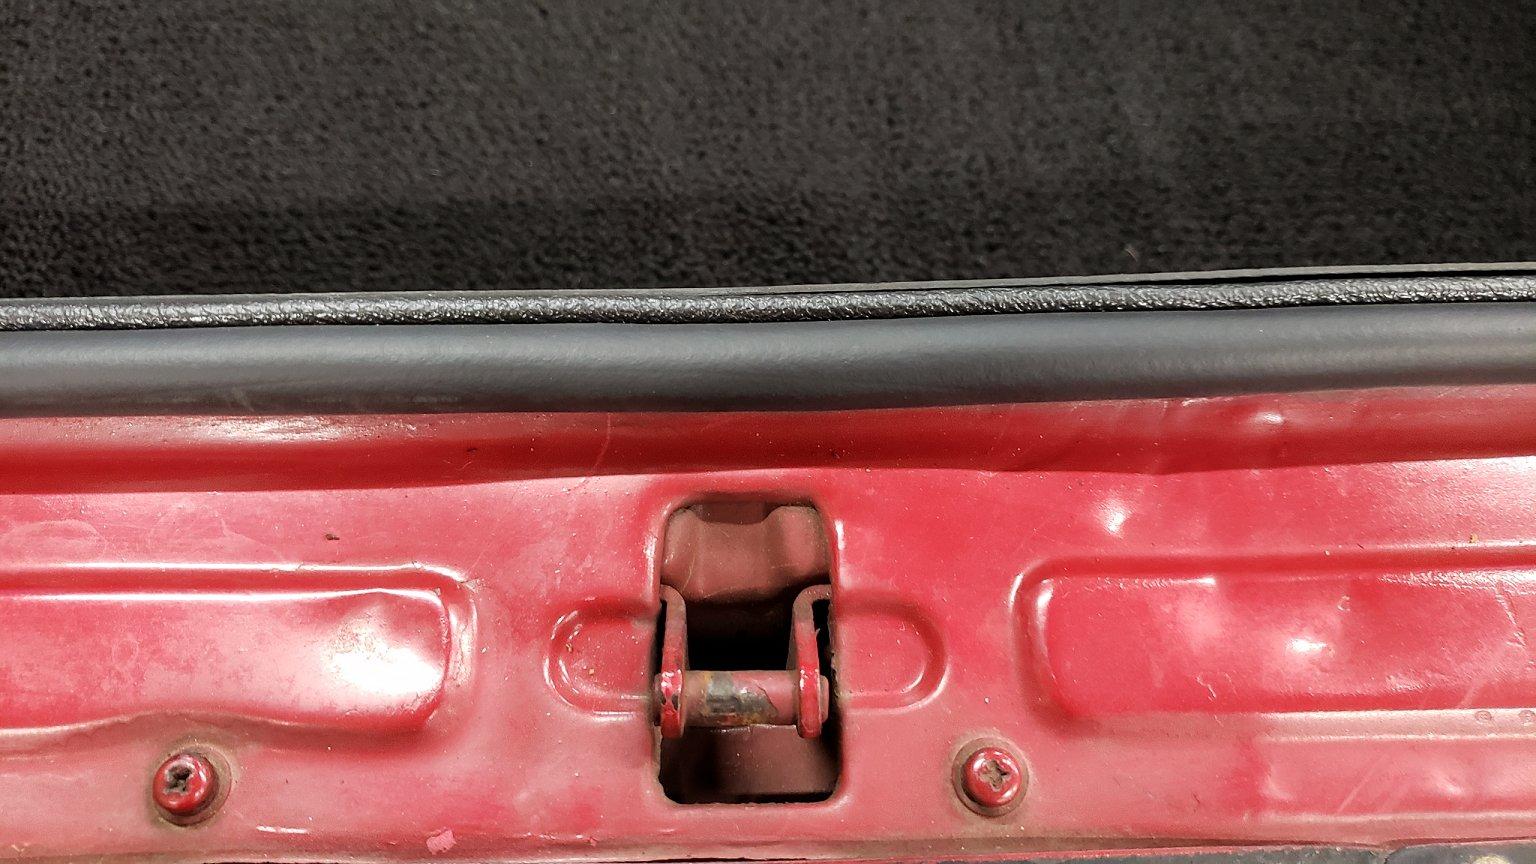
With the new hatch seal in place I decided to tackle the other common cause for exhaust fumes entering the cabin, the tail light gaskets. I had done this before on my series-1 car so I knew what I was in for. I went with a set of Precision gaskets for $50 shipped from a DPAN member. If this was going to be a fully restore car at some point in the new future I would have gone with OEM Nissan seals but they are currently $120. The project was straight forward and as expected the Precision seals are not perfect as some of the grooves do not line up. I would say they are about a 90% fit. While I had the trim panels off I decided to scuff and paint them with some Rustoleum Flat Black. They appear to have had multiple layers of paint and after a lot of find sanding I was satisfied. Next I took some fine steel wool to the stainless trim and that really brightened them up. Finally they were prepped and masked for paint. I spent about 45 minutes laying down 5 thin layers of paint. The end result was not perfect but a 10x improvement over the splotch job that was on it. As I reassembled everything the bottom of the trim panels would not stay in their clips. This is due to the new seals so I improvised with some heater hose to push against them until the seals develop some memory. I plan to leave them in place for a few weeks and them remove them. I also ditched the Nismo license plate frame as it is not a vintage piece. The Texas Tech bumper stick has to stay for now as I am sure its removal will create another project. All in all I am happy with the result.
-
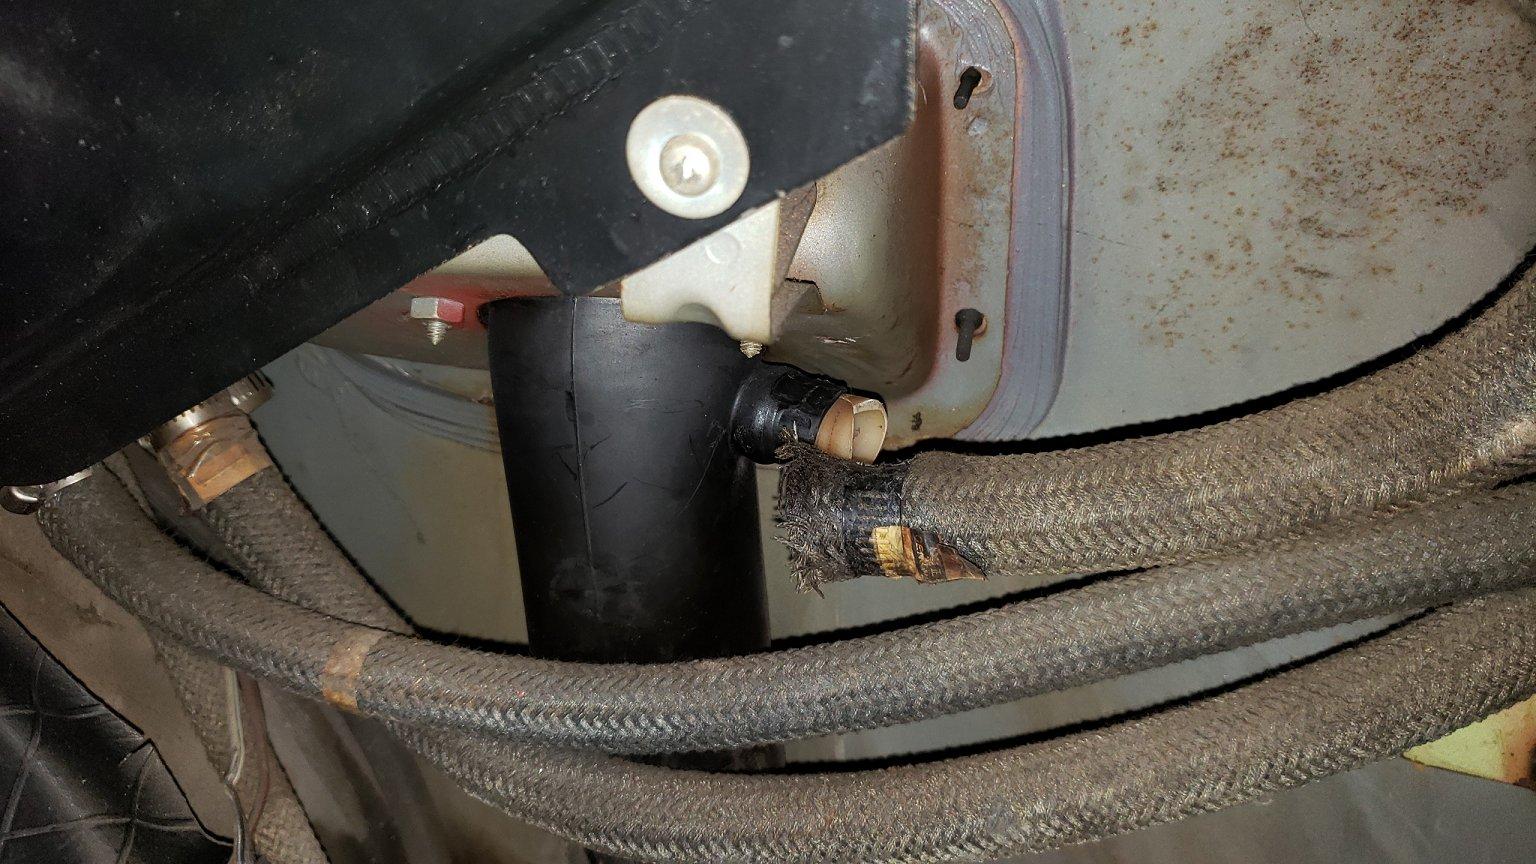
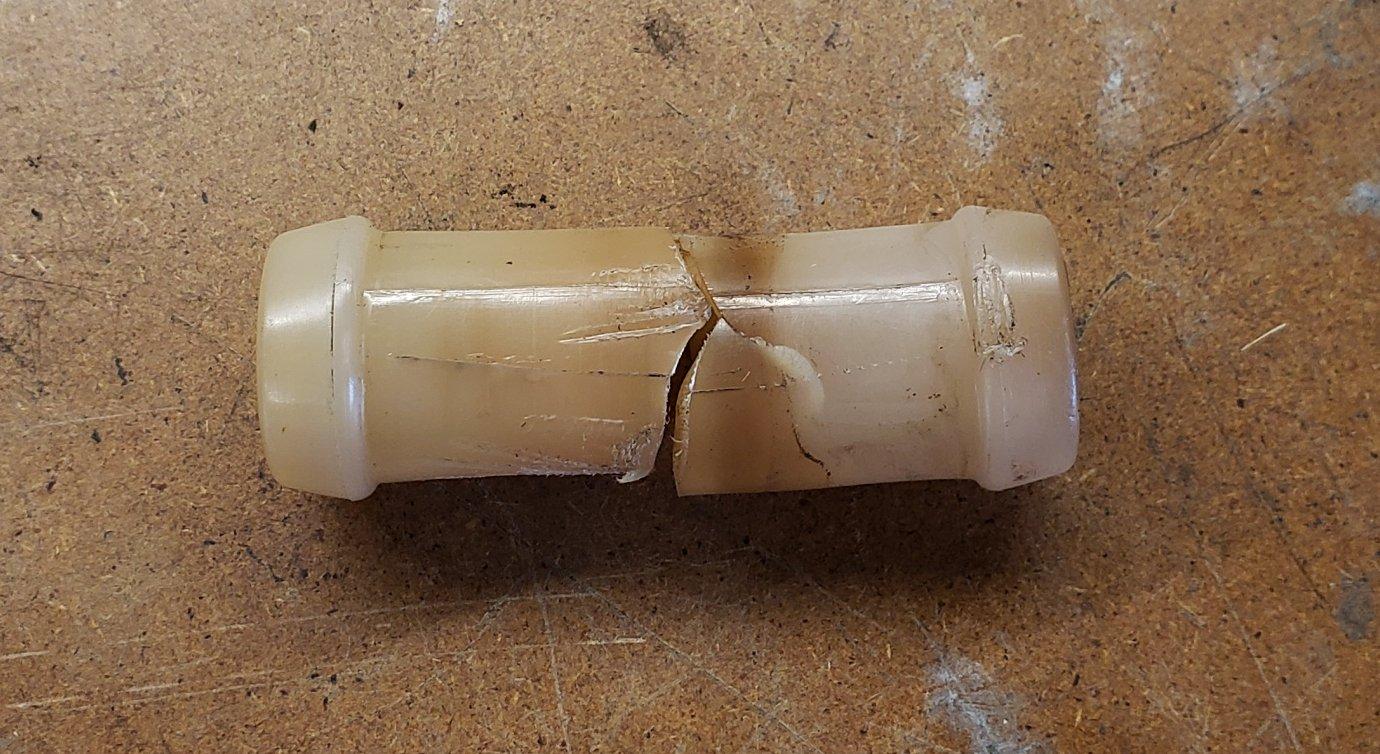
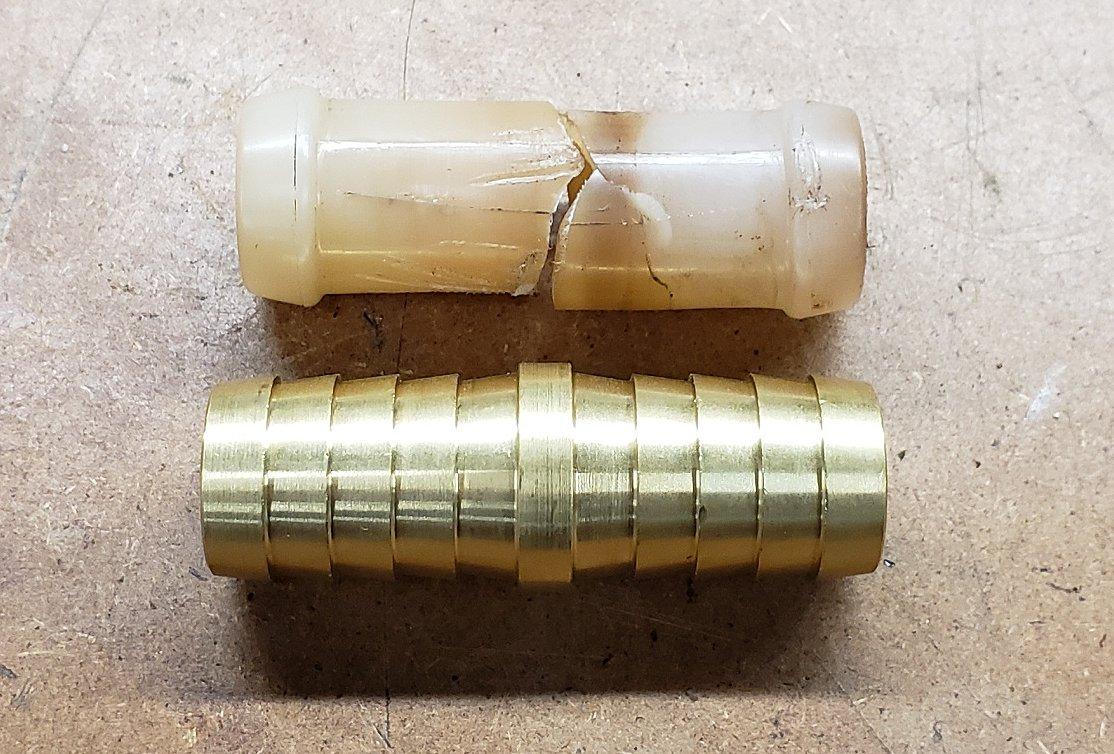
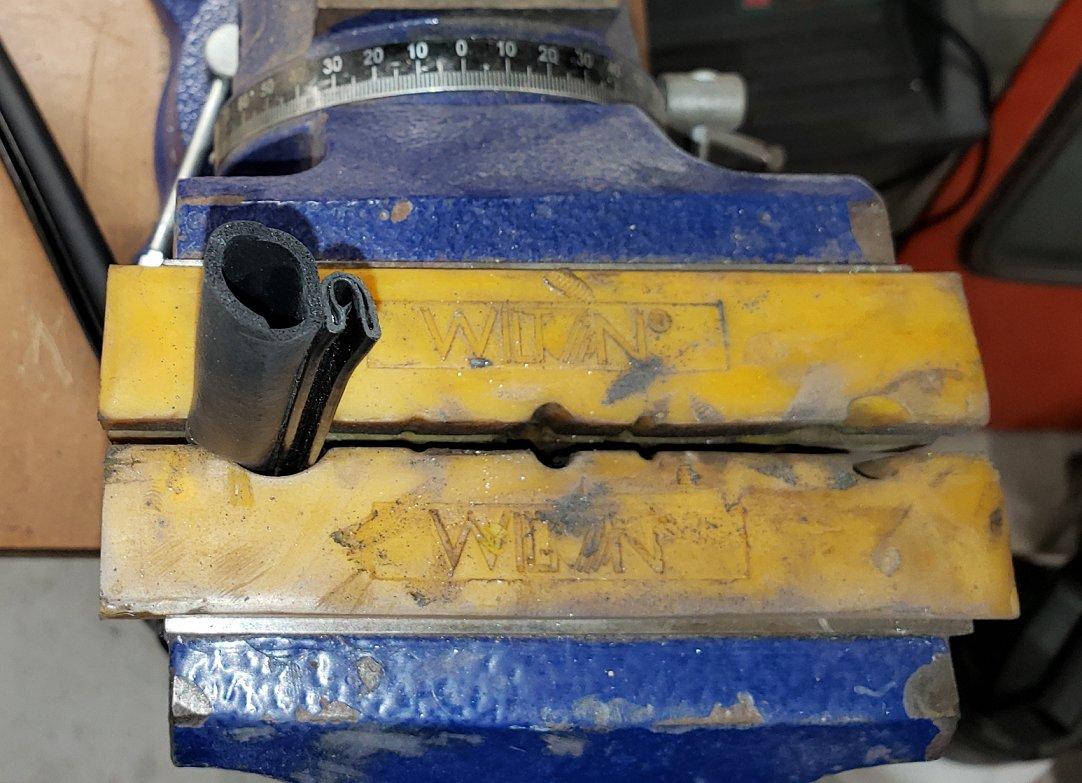
As I have been driving the car more in effort to tune the carbs, the exhaust smell was becoming too much so I decided to start with the hatch seal. The seal on the car was well past its prime. Before starting to remove the old seal I removed the rear interior panels and quickly discovered the highly probable cause for the occasional raw gas smell I would get, a broken plastic vent hose coupler. A quick search on Amazon got me a new brass piece to my door in a couple days and was quickly installed. With the old seal removed along with all the residue I could scrape off I took some measurements and ordered 25ft of seal number 1120A832 from McMaster Carr. Knowing I or someone else would paint the car in the future I wanted something that could easily be removed but still seal up in the mean time. While I waited for the seal to arrive I successfully re-glued the outer seal at the top of the hatch opening. I also wire brushed and sprayed some rust encapsulator on spot that were under the seal. Once the seal arrived I spent about an hour installing it as it requires strength and finesse. The seal seems to work very well as it has some real cushion but still allows the hatch to close with ease and is not pushing it up.
-
Good afternoon fellow Z owners! Working through an issue on my '72 240z that seems to be somewhat common but with no common solution. Engine does not run smooth, shakes at idle, ignition timing set to 9 degrees BTDC at 900rpm. When accelerating under load it pops and backfires but not all the time. Fuel system is set to 3psi and per the gauge runs this all the time. I am running a Mallory 2363901 distributor with the UniLite electronic ignition module. Tach works in car. Baseline: Key set to Run, Battery = 12.14V. Using an Accel Super Stock coil 8140C. Mfg spec is 1.4 ohms Primary and 9.20K ohms secondary. Mine reads out 1.7 Primary and 11.61K Secondary. I was using an older MSD Blaster 2 coil but its Secondary resistance was over 2x the Mfg. spec. Power going to ballast blk/white wire = 11.08V. On the other side of the ballast grn/wht wire = 6.36V The positive blk/wht wire on the coil when pulled off the coil is 11.80V but when plugged on to the coil = 5.49V The condenser is also connected on the other side of the + side of the coil. The solid black wire on the negative side of the coil produces a solid tone of continuity when grounded to the car and when it is connected to the coil. 1. Is the voltage drop on the + side of the coil expected with the power wire is connected to it? 2. Should I be seeing 12V on the power side of the ballast instead of 11.08V? Is the drop of approx. 5V through the ballast expected? Do I still need the ballast since I am running electronic ignition? 3. Do I need to have the condenser attached on the + side of the coil since I am running electronic ignition? 4. Do I need to buy a new coil at this point? Thank you in advance!
-
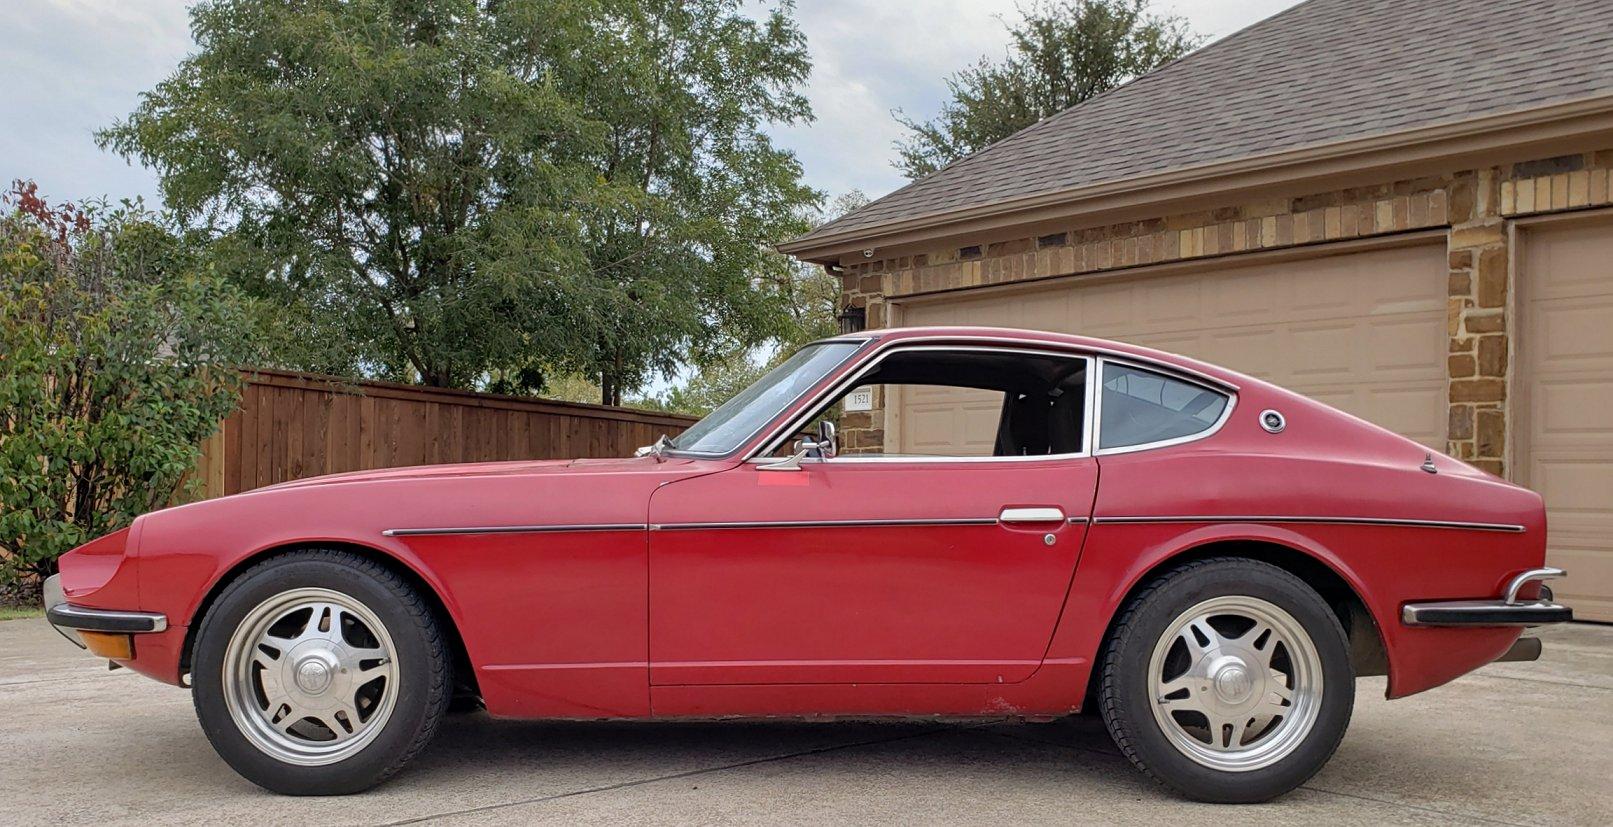
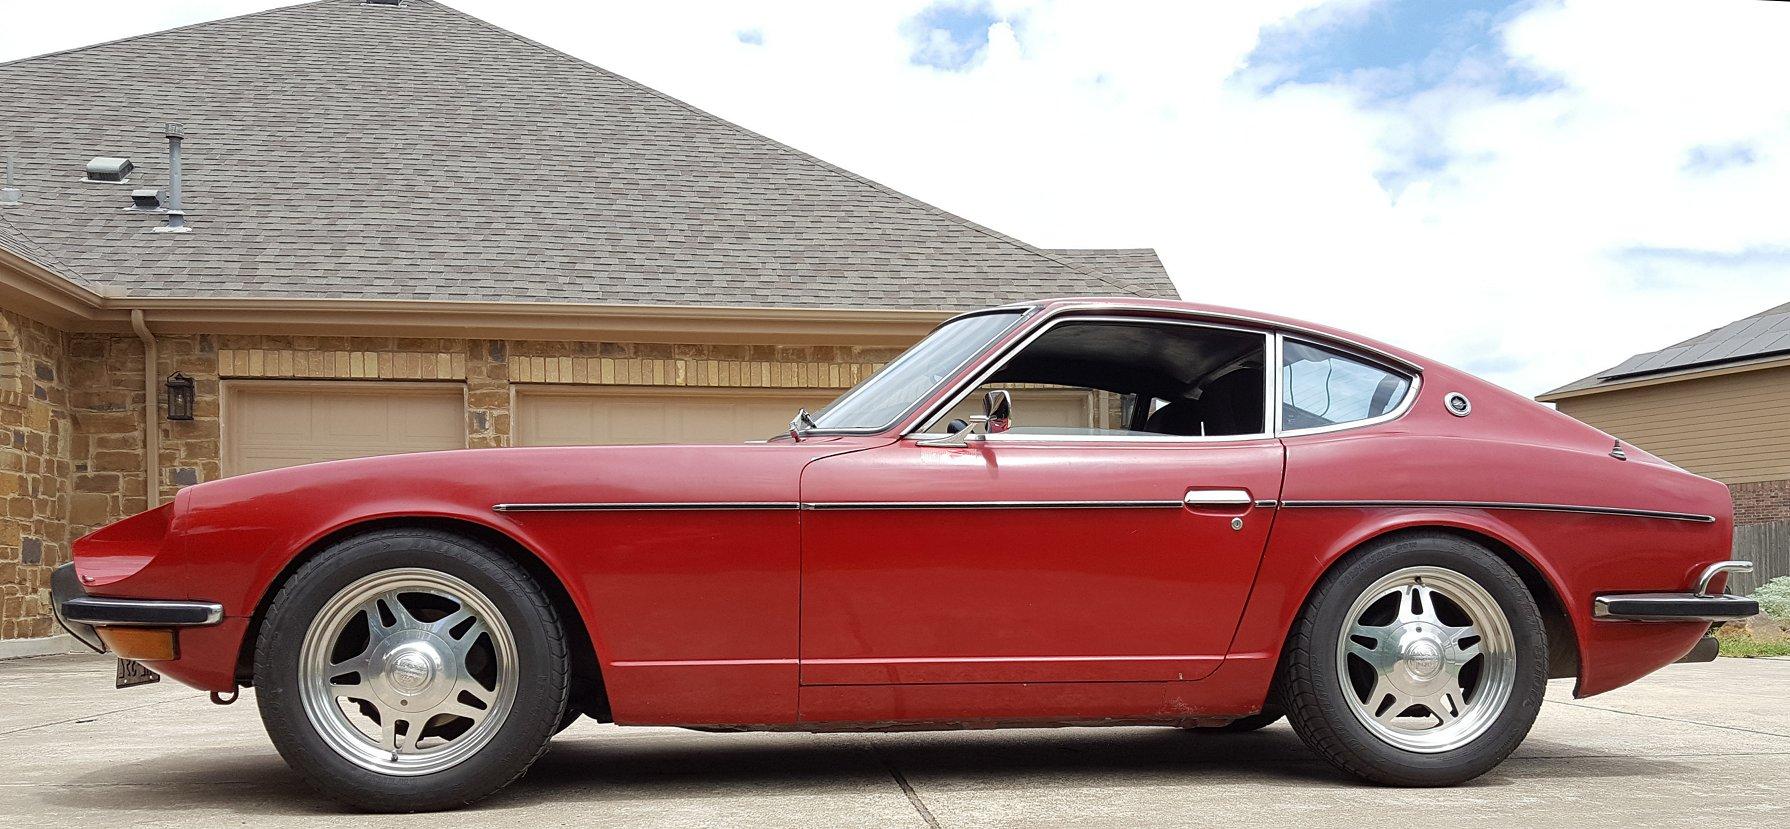
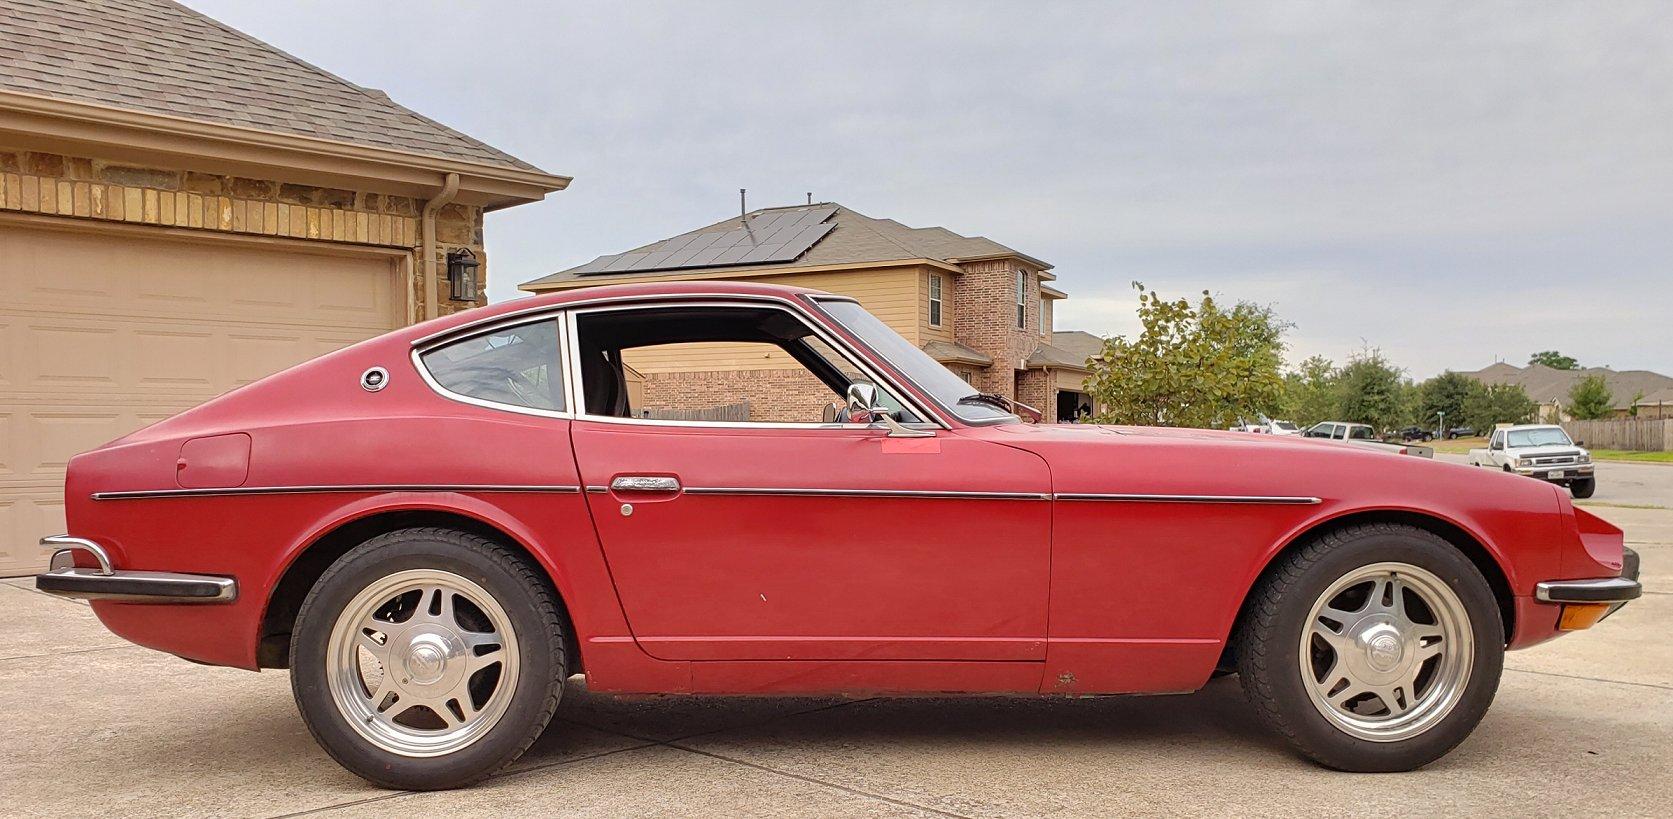
I took the Z for a test drive and I am really happy with the results. The car still handles well but now it actually has rear suspension travel so it rides nicer but is still on the firm side. Visually, I think it looks 100x better. The sunken rear suspension just let the car down and now it looks like the wheels fit the car and have some room to breathe. Below are some before and after pictures. What do you guys think?
-
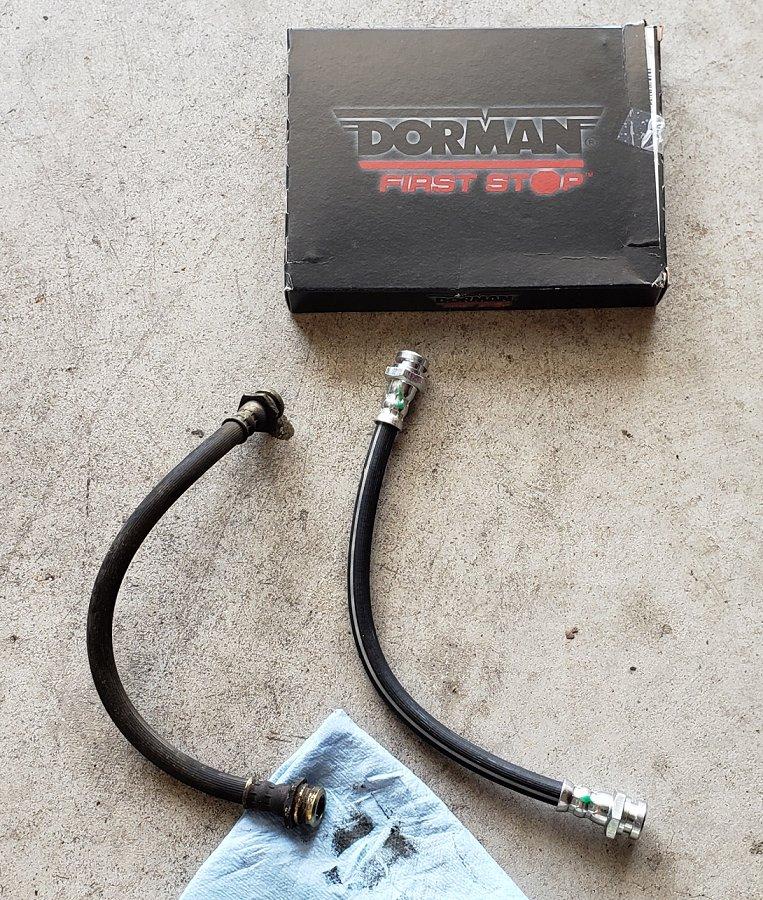
With the struts wrapped up the rear brake hoses looked suspect and since the system was already open now was the time to replace them. A pair of Dorman H96862 hoses were ordered on Amazon for $8.32/each and arrived in 2 days. Installation was straight forward but I did have to heat up the ends of the old hoses to break the unions loose. The diff, half-shafts, and everything else was re-installed. A few rounds of brake bleeding commenced and with a firm pedal achieved the rear wheels went back on and the car lowered back on to the ground. The initial impression of the rear spring change was good but only a test drive would tell.
-
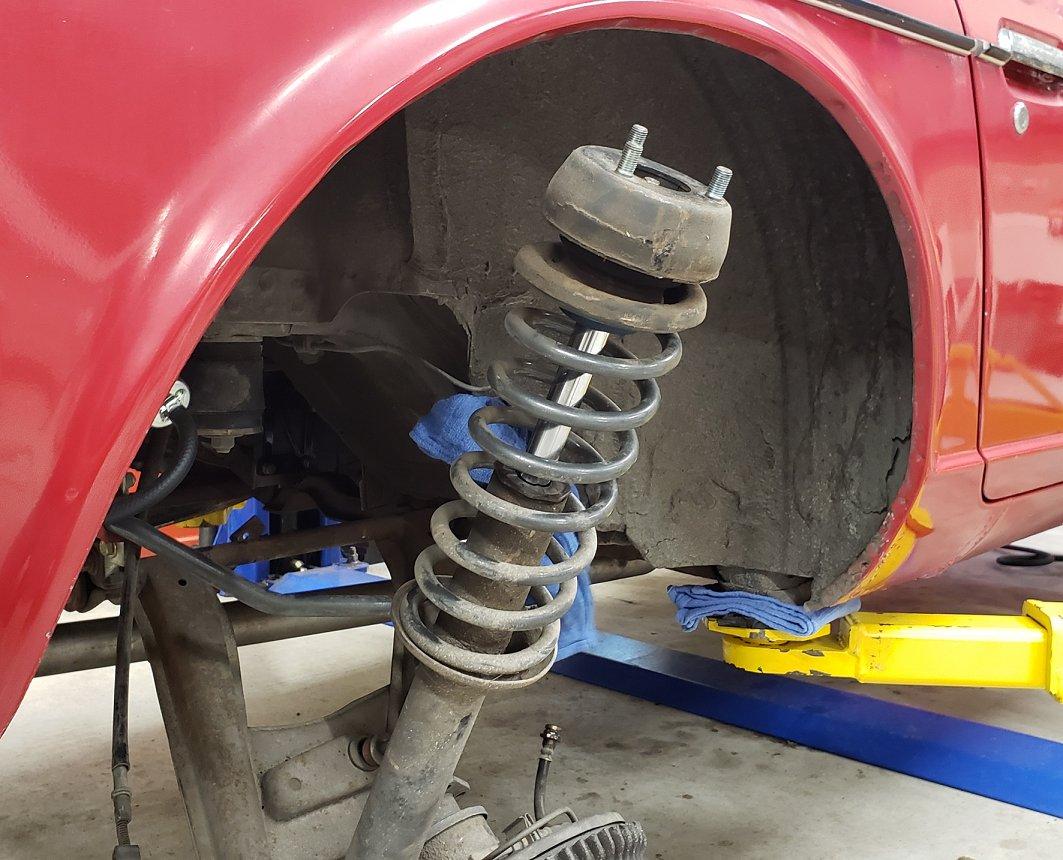
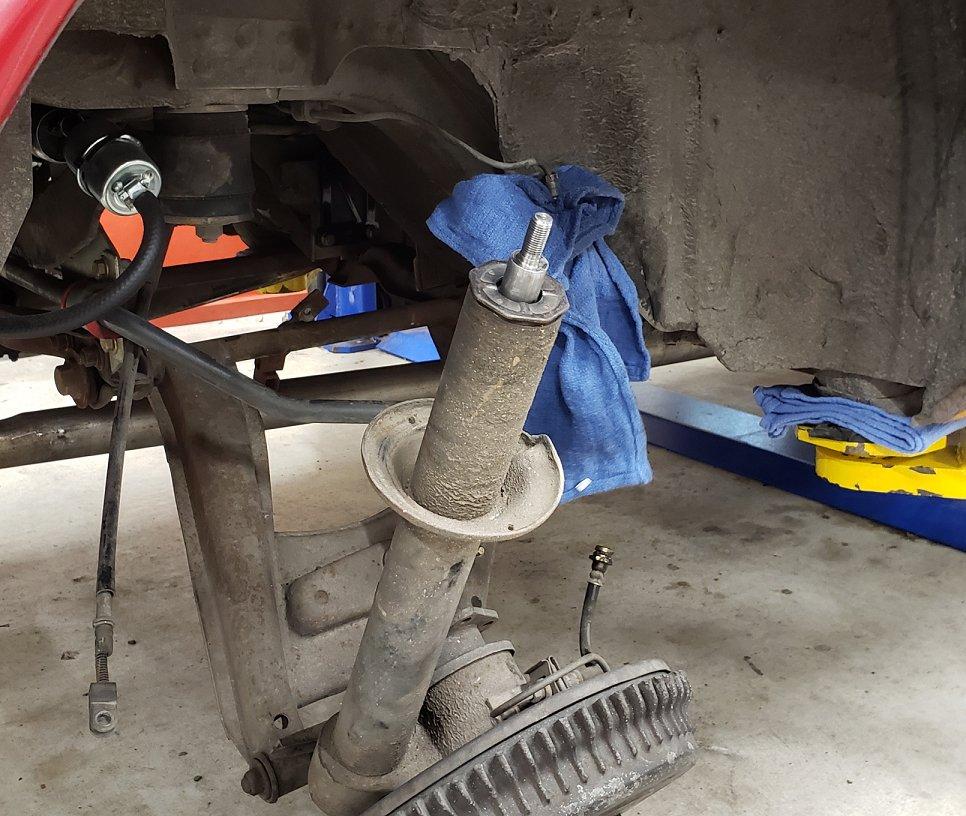
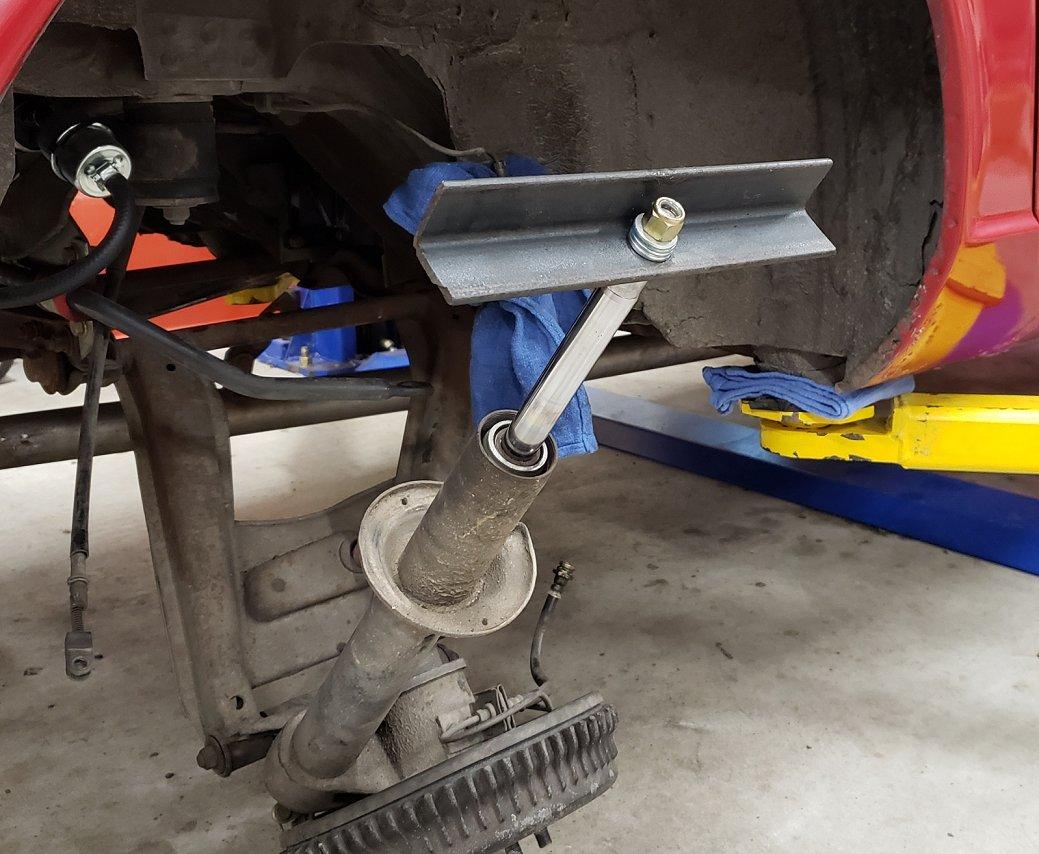
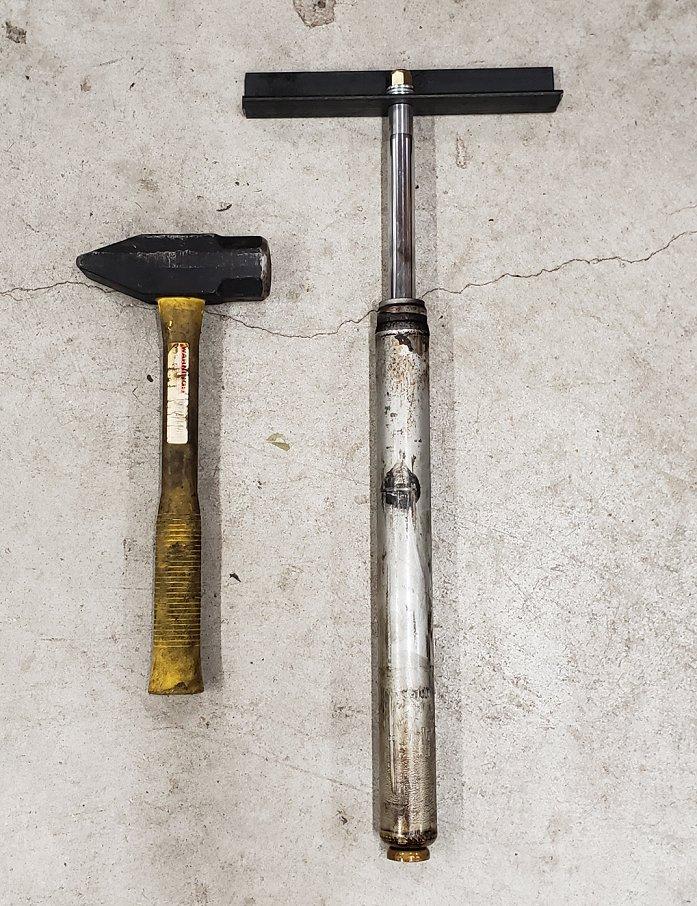
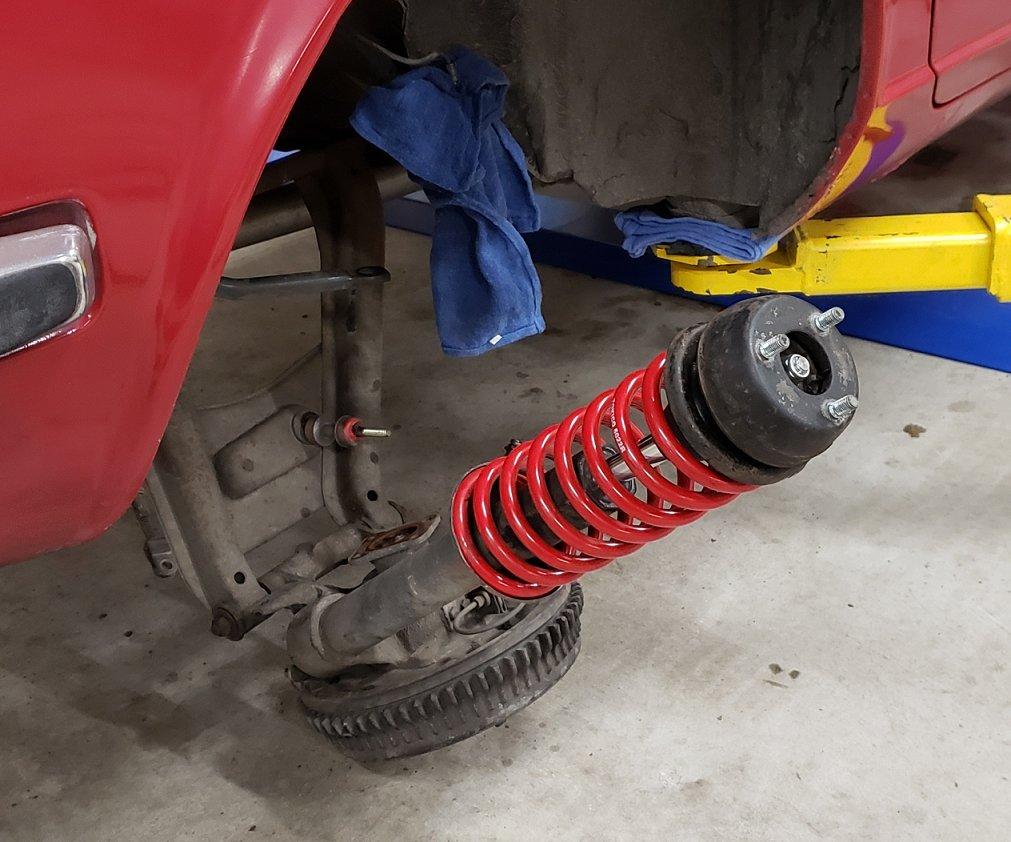
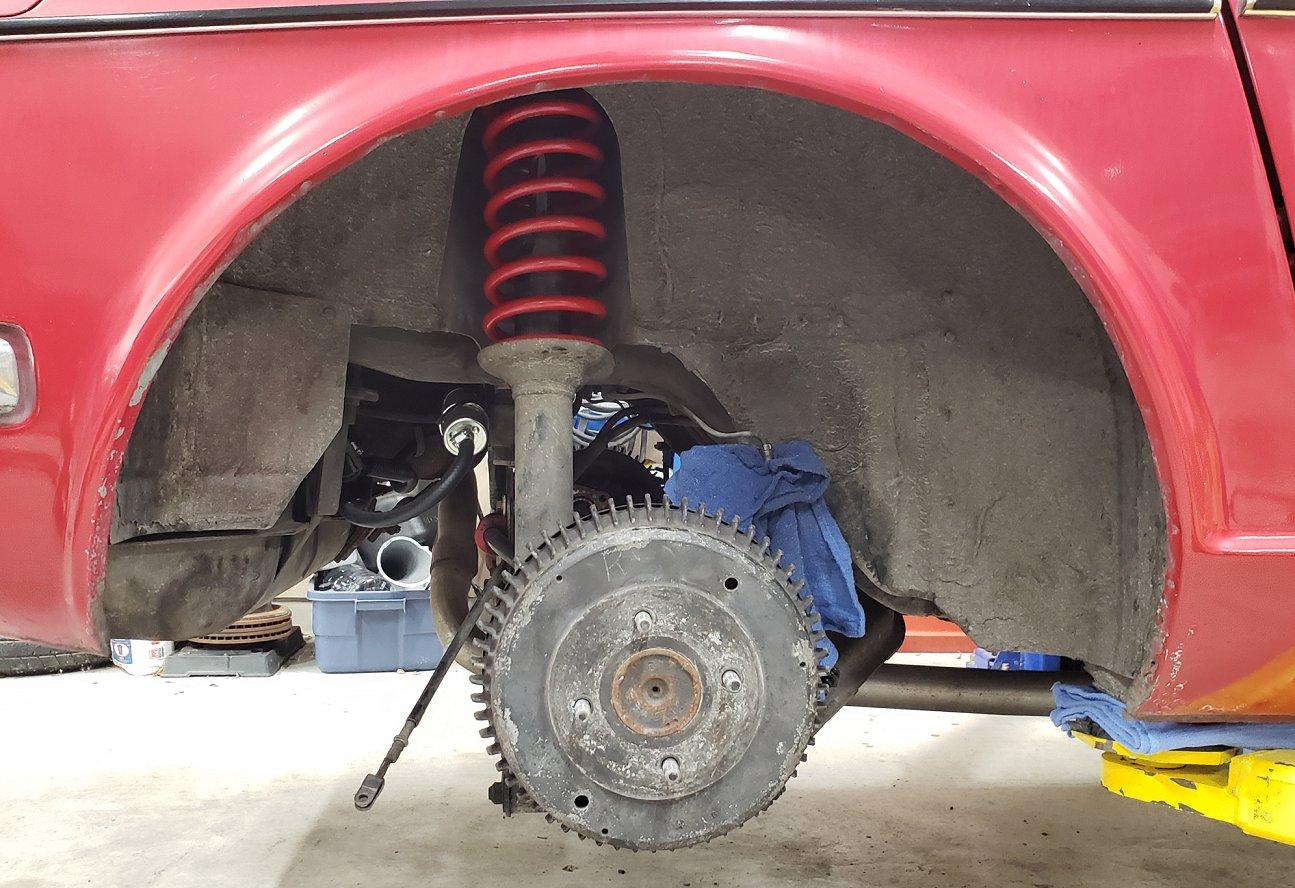
Next up was the struts. With the half-shafts removed and brake hose disconnected it was just a matter of dropping it down and swinging it out. No surprise, the strut cartridge was shot. When it came time to remove it, no surprise that it was stuck in place. No surprise = No problem. I needed to make a handle of some sort to pull it out. Using a piece of scrap angled steel I drilled a hole in the middle, bolted it to the the strut and with a few hits of the mini sledge on the bottom it happily saw things my way. I had some Tokico struts and springs for a 280z that a fellow Z owner traded me for lunch at Torchy's Tacos. I already had some correct KYB rear strut cartridges but compared the rear springs and figured I would give them a shot. They are about 3/4 of a coil longer than the ST springs that were on the car. If this did not work I also had some 280z rear strut mounts that I could try as well. The ST springs did not have to be compressed to remove them but I did have to compress the Tokico springs a little which to me was a good sign. Reassembly was straight forward with no drama. The driver side received the same treatment as its strut cartridge was dead as well.
-
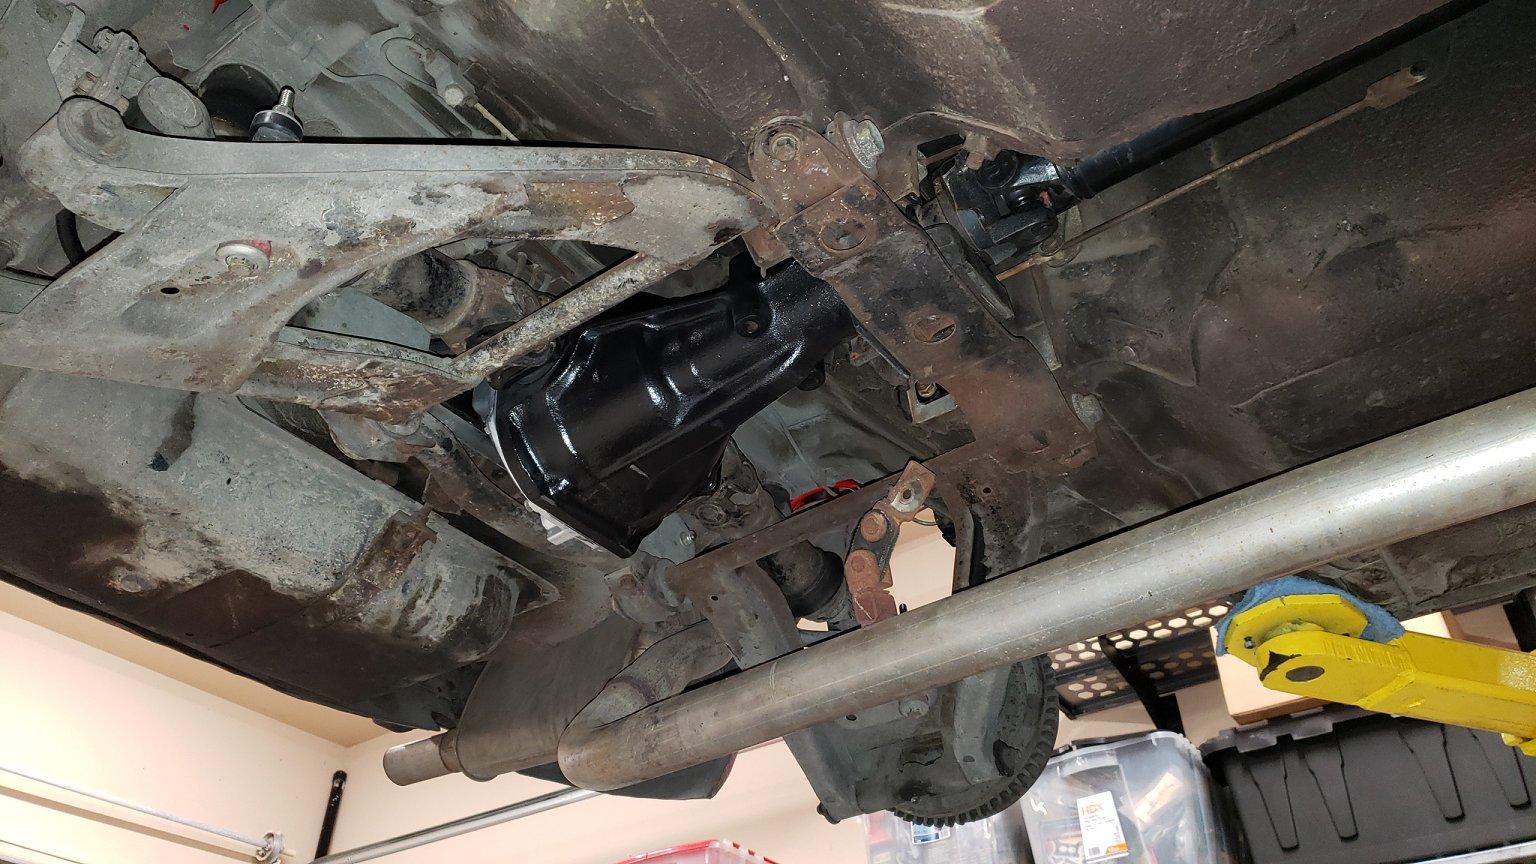
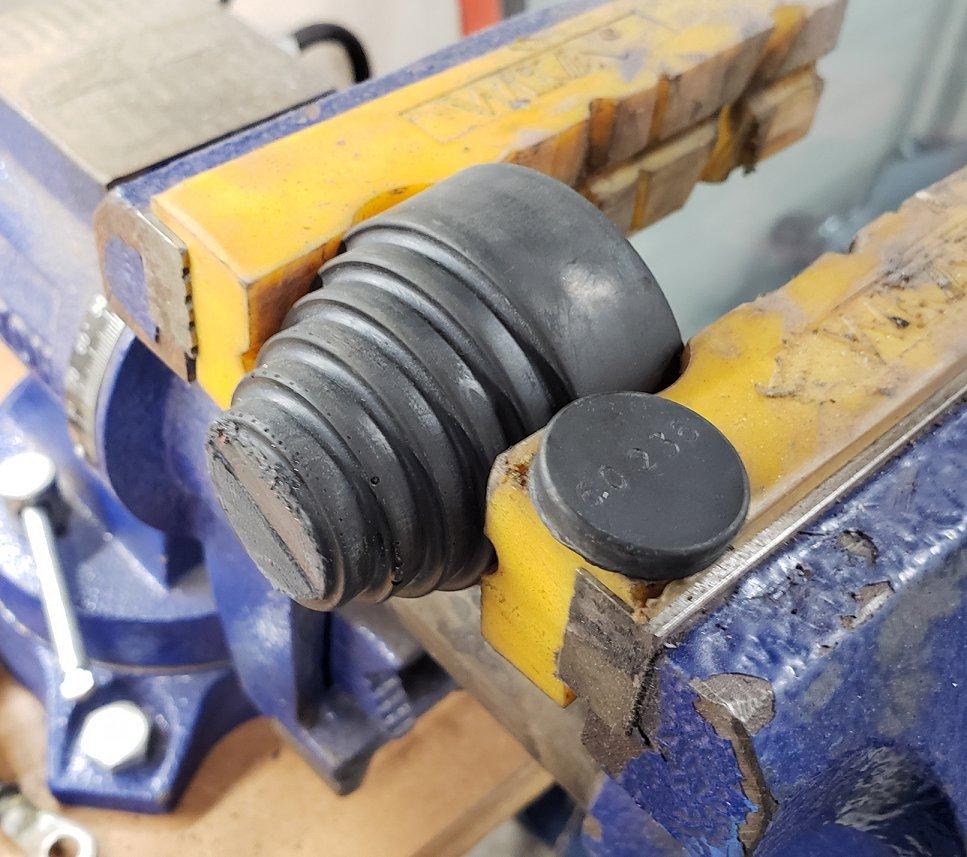
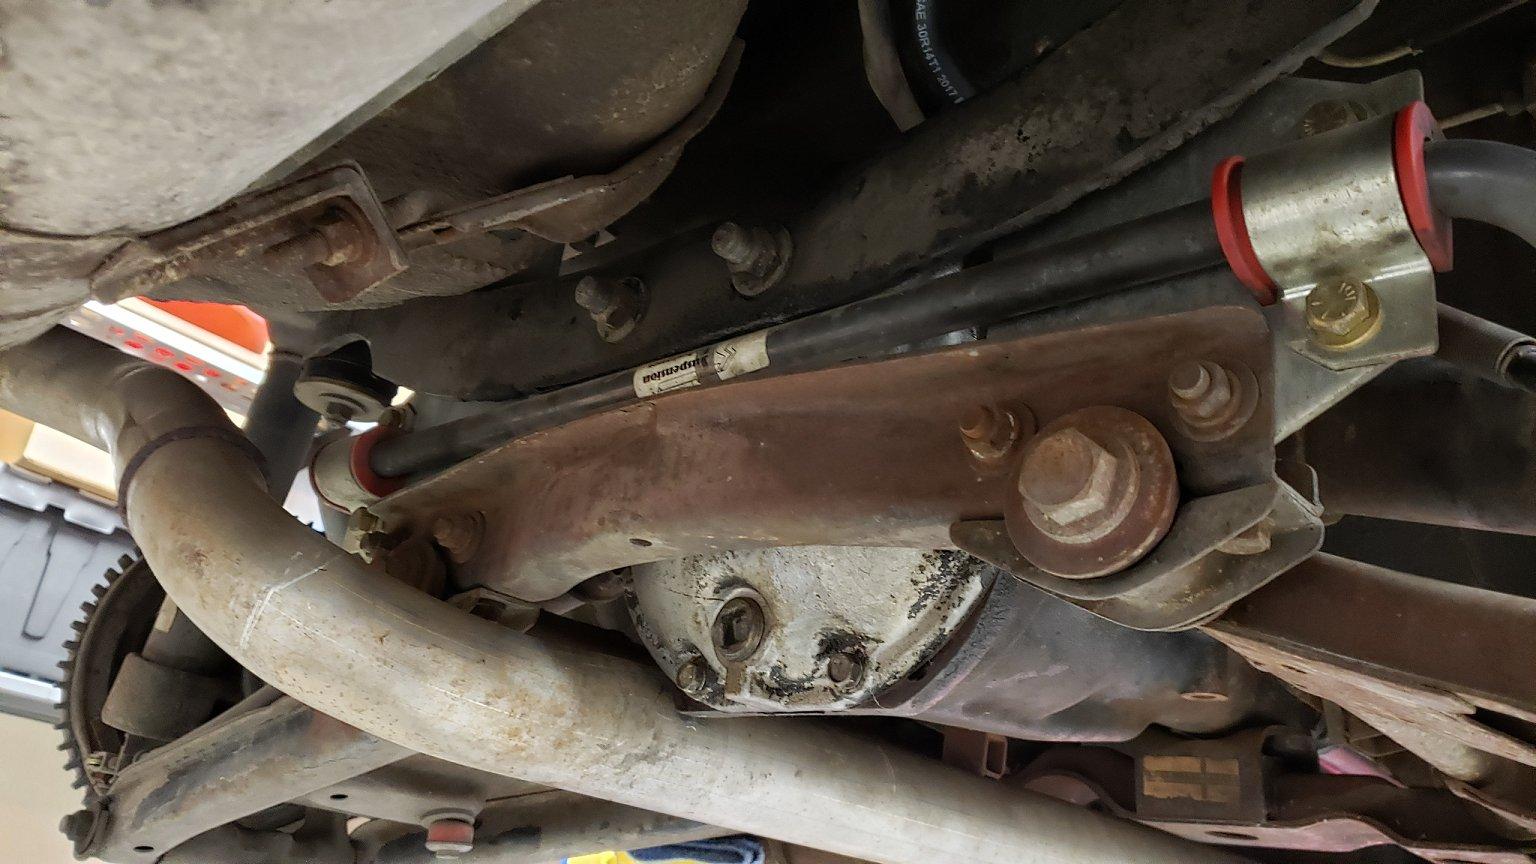
While the paint was drying I set about installing the RT mount. With the diff out of the way it was the easiest project so far. This is my 3rd time installing one of these so I was going to use the same "sandwich" recipe as before. Cutting one layer of the snubber mount off and retaining the original lower mount. You do have to use some longer bolts to get the lower mounting bracket started but the factory bolts can be used once you have it drawn up and into place.
-
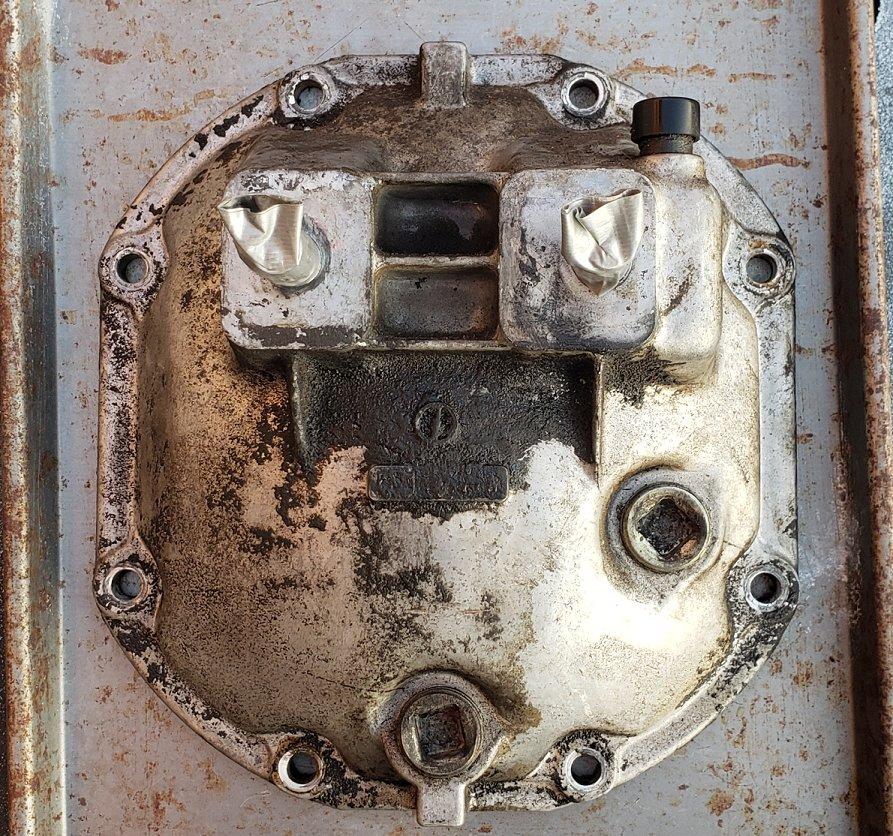
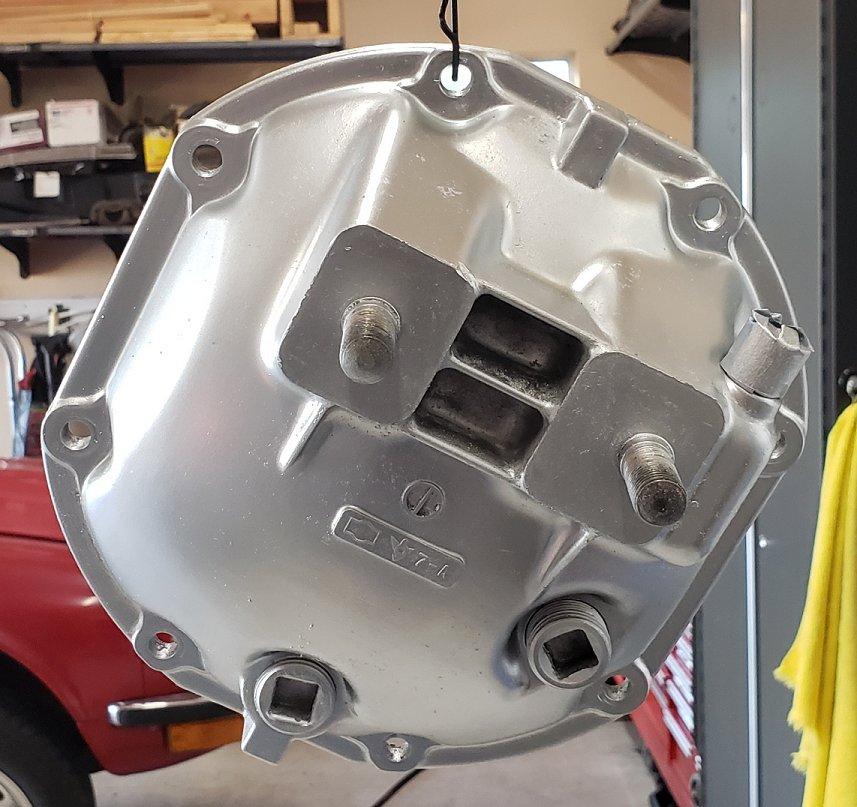
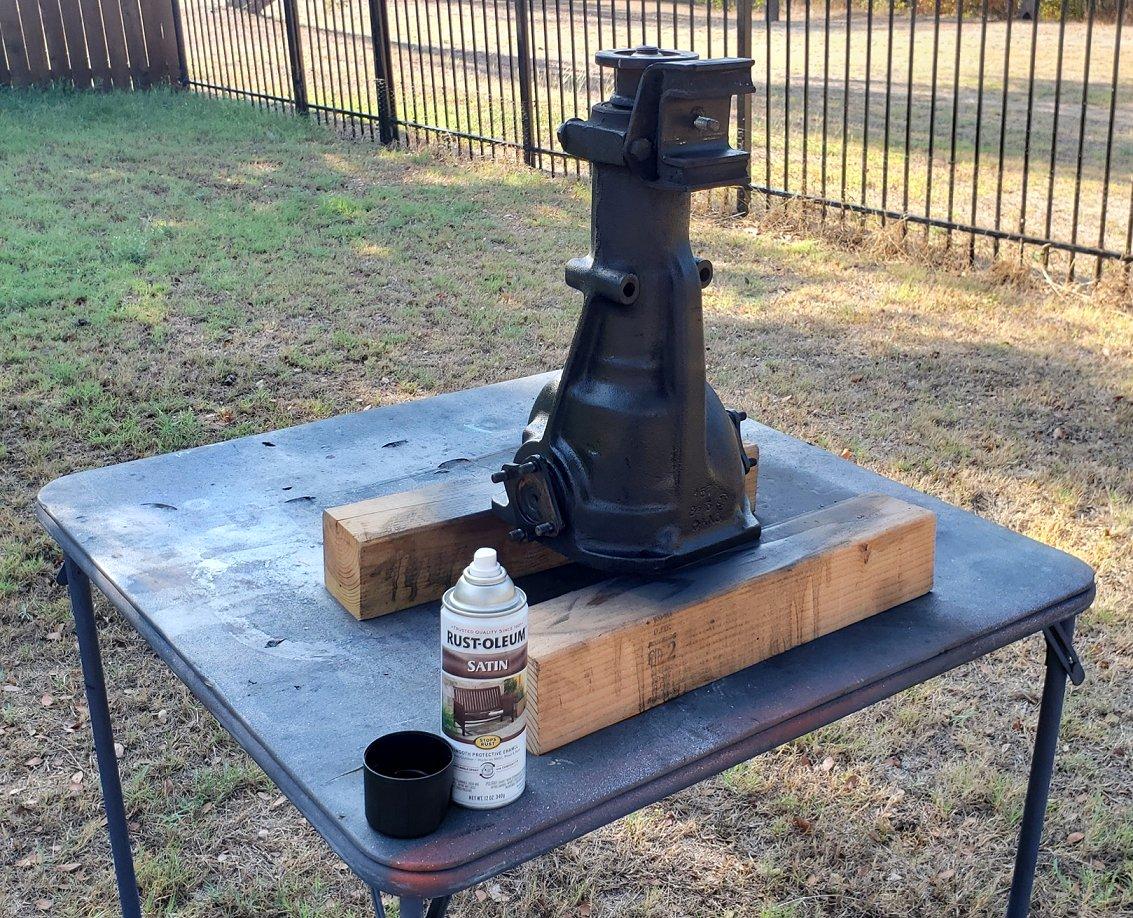
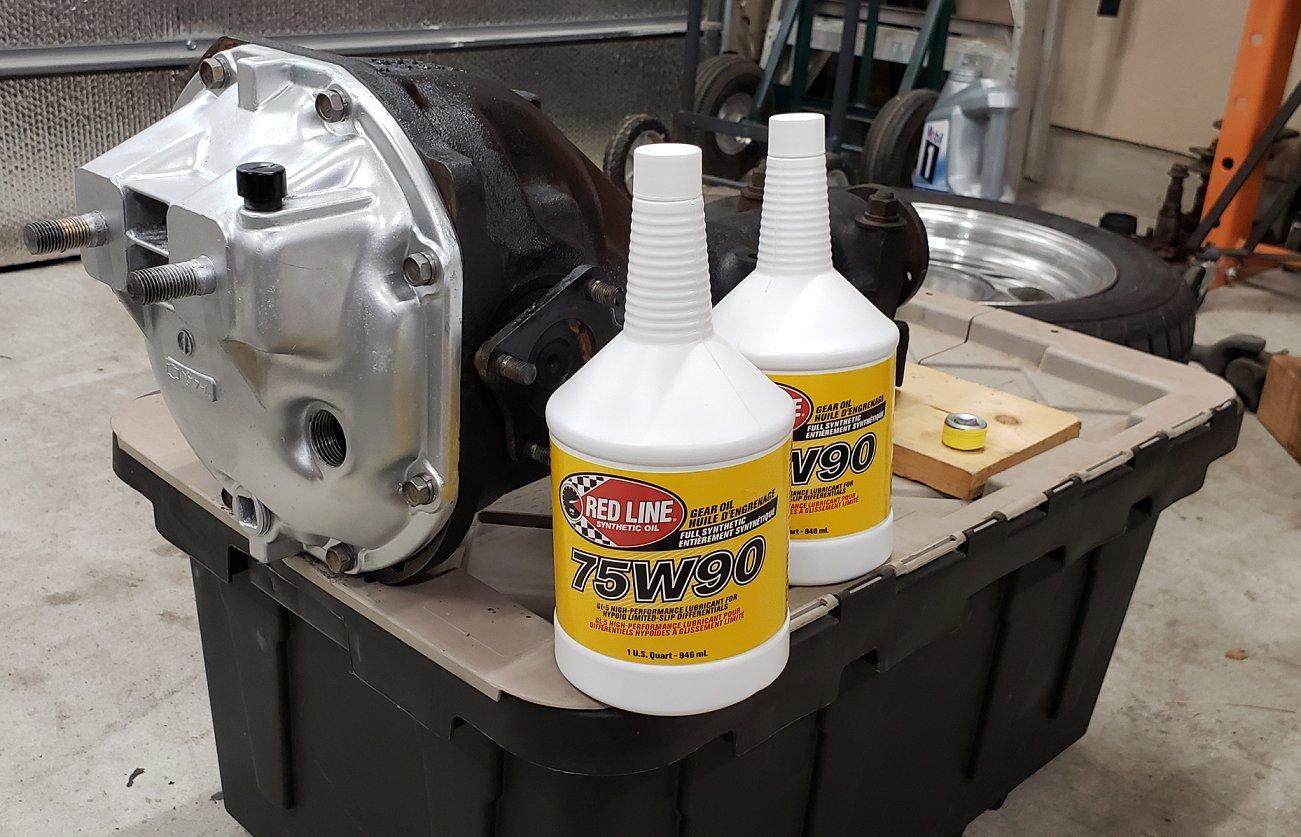
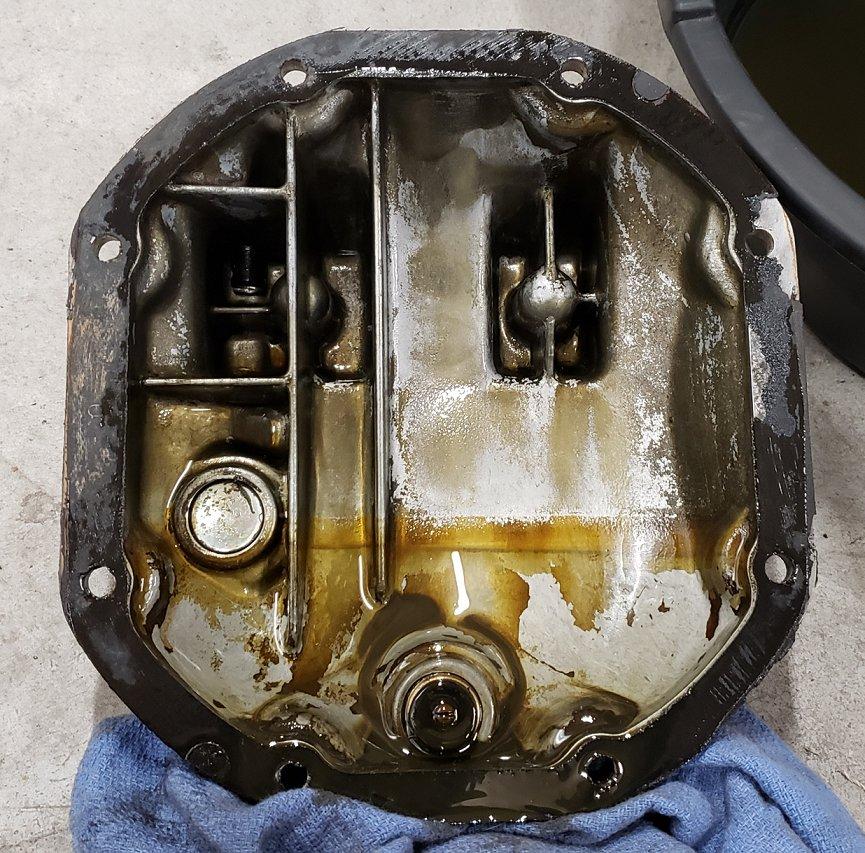
With everything checked out I spent some time cleaning everything up and painting it. A fresh cover gasket was installed with a light smear of black RTV. I used Red Line fluid that is designed for use in LSD differentials. Been using Red Line for years with nothing but great results.
-
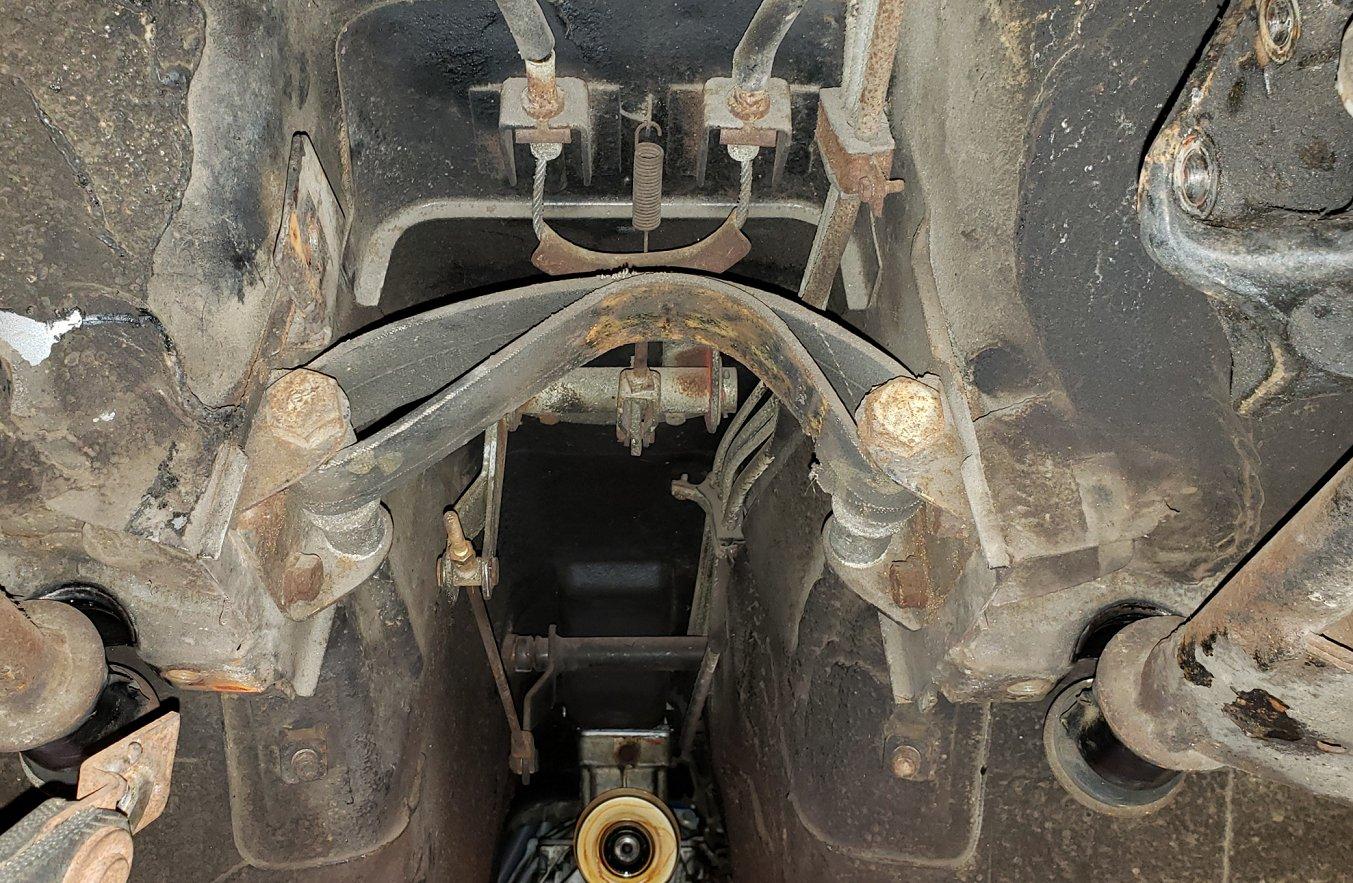
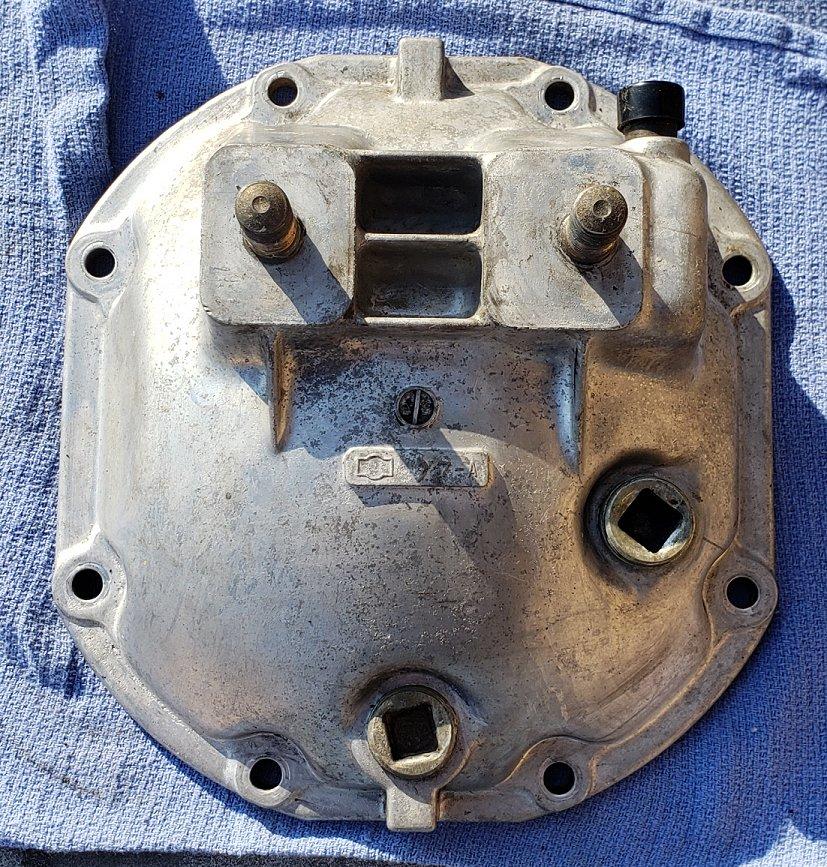
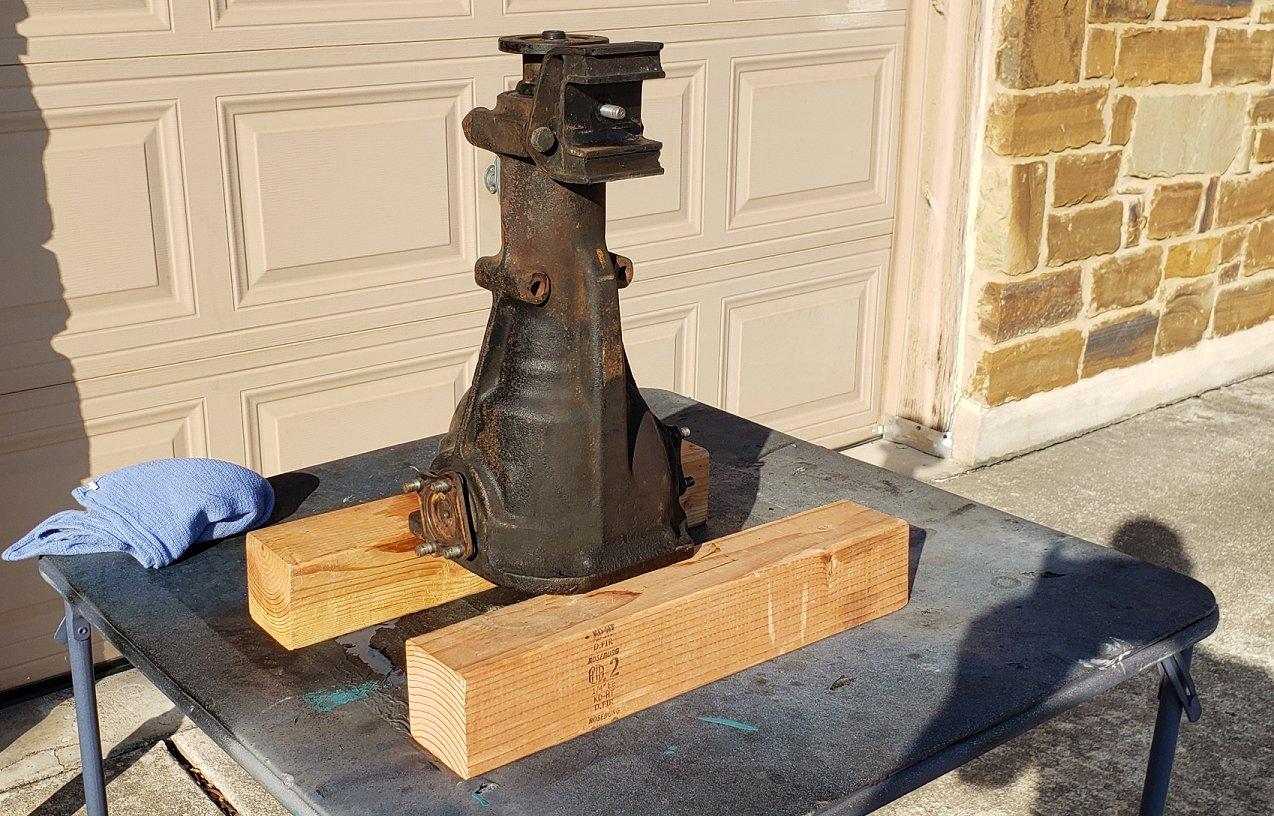
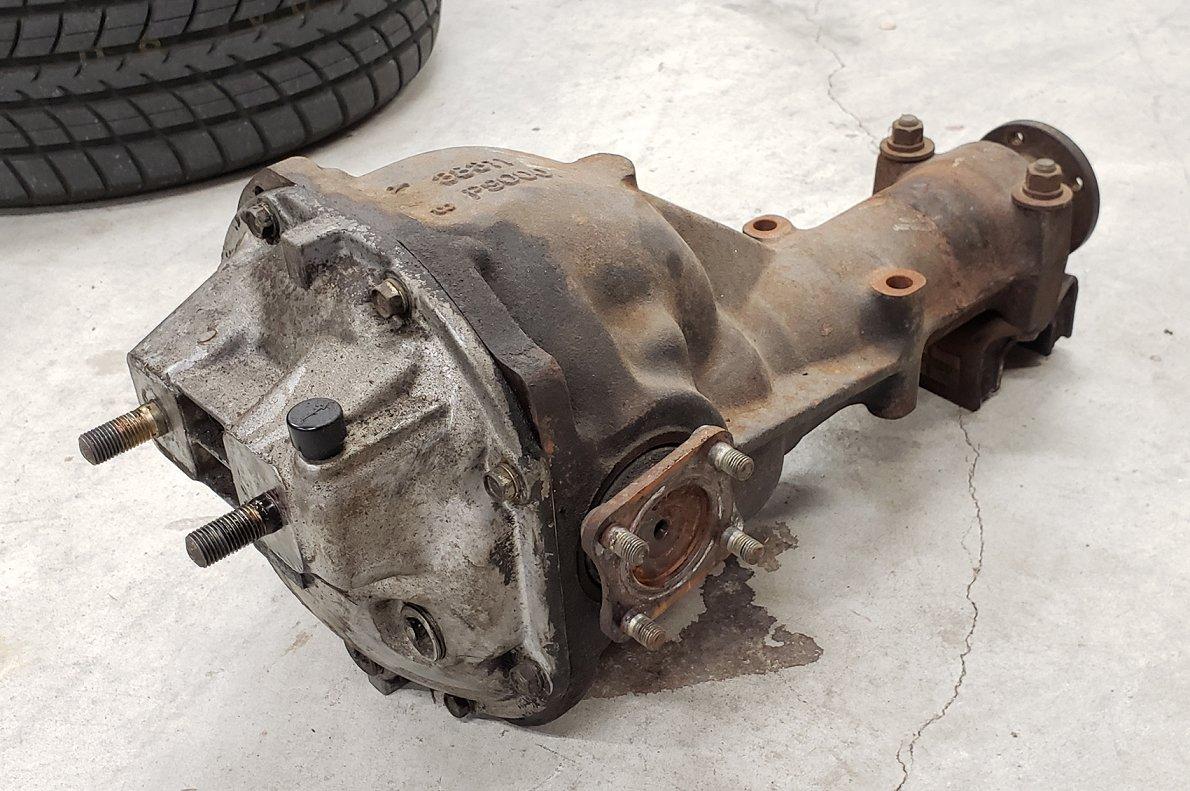
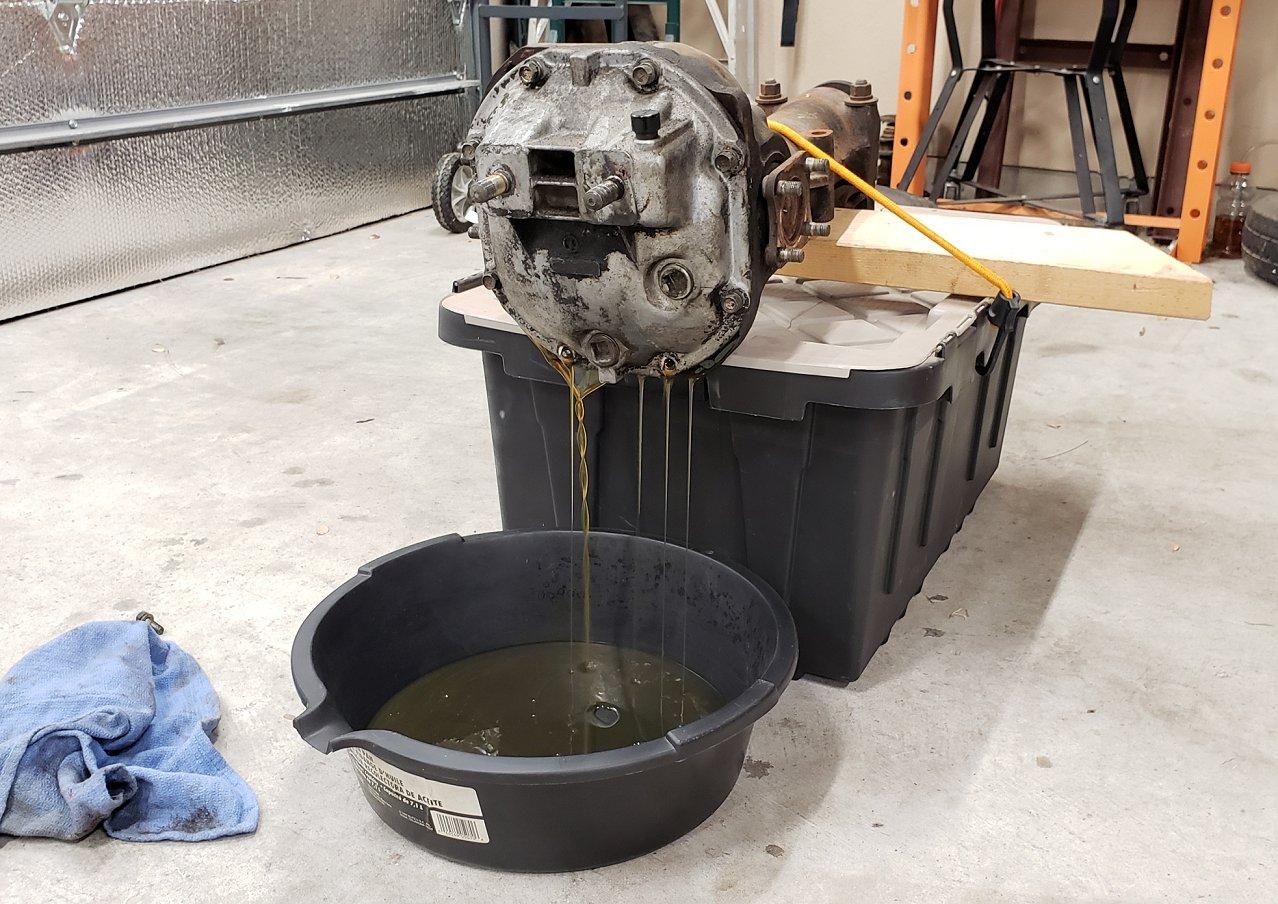
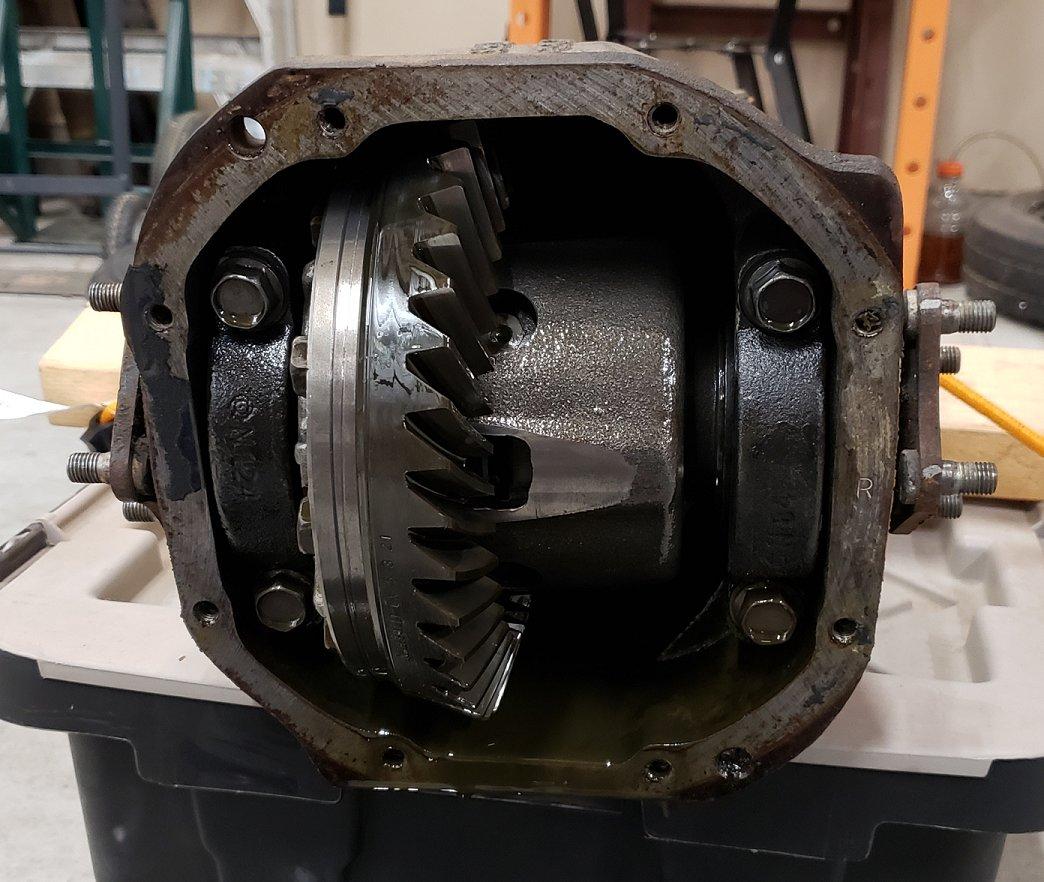
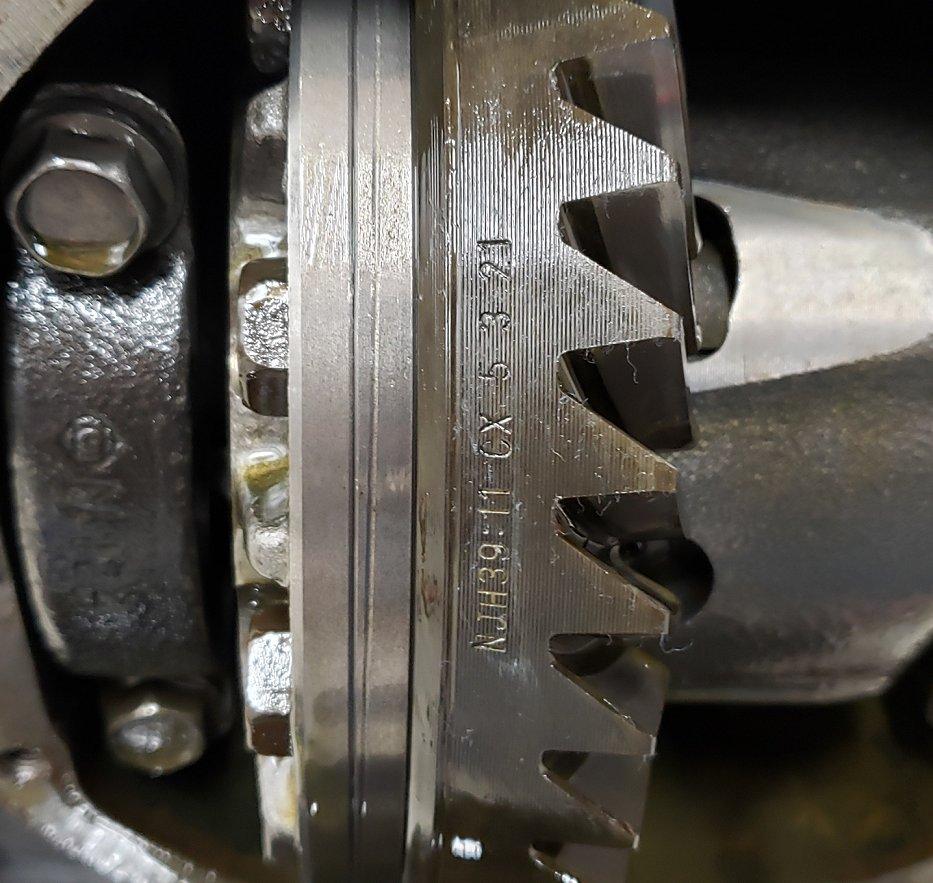
A few weekends ago I got back on the Z as I wanted to address some items before the ideal Fall driving season arrived. It is unknown when the diff fluid had been changed so I wanted to change it. However, due to the placement of the ST sway bar bracket it would require dropping the diff to do so. This actually worked in my favor as I wanted to replace the strap type upper diff mount with an RT mount I had on the shelf and see what could be done about the sagging rear suspension. First things first, getting the diff out. After about an hour or so of wrench turning and some assistance from wife it was out and safely on the ground. It was not leaking and a quick removal of the fill plug revealed it was full. I drained it and looked the gears over. Its an R200 with a Precision LDS and 3.54 gears. There was also no material found stuck to the magnetic drain plug. Moving forward.