

Glove box liner- make your own
Entry posted by Mikes Z car
4,619 views
This describes how I made a two part glove box liner for a 240Z using 3/16" thick foam board.
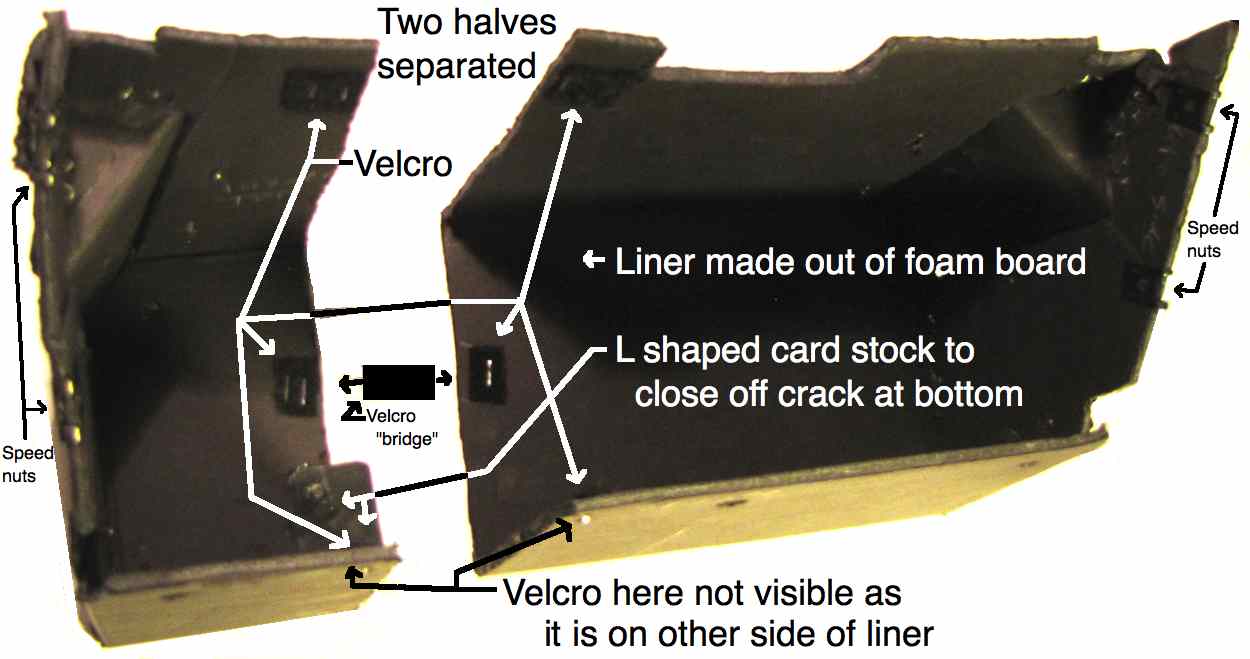
The two parts make it easy to install:
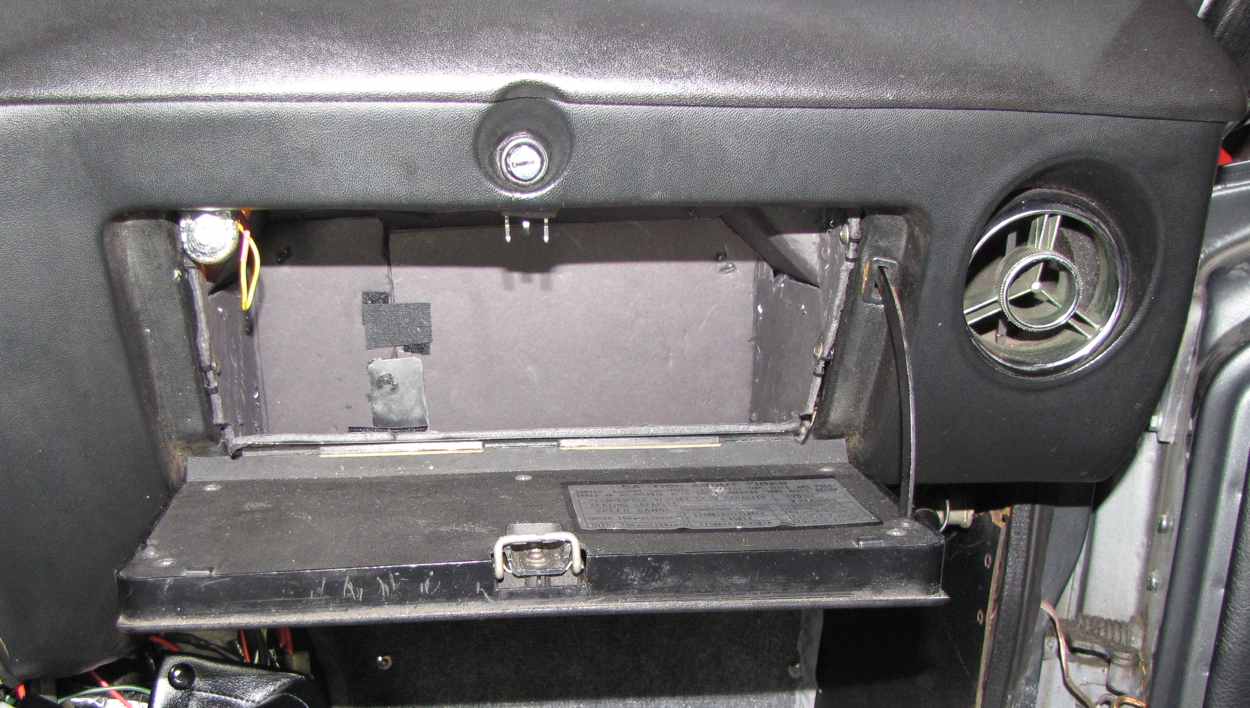
Replacement glove box liners are available from classiczcars.com vendors however I like making things so I thought I would fabricate a new liner. I considered making this out of metal but my metal working skills are not that good so I thought I would use an easier to work with cardboard like material. After I made the liner I cut it in half 3 1/2" from the left side as it would be seen installed in the car to make it easy to install (or remove later). I took the old liner out to work on the heater fan and to run speaker wiring but broke it getting it out. I like originality but wanted something easier to work with. I still have the original liner that has been repaired if needed for some reason later.
Two part liner separated:
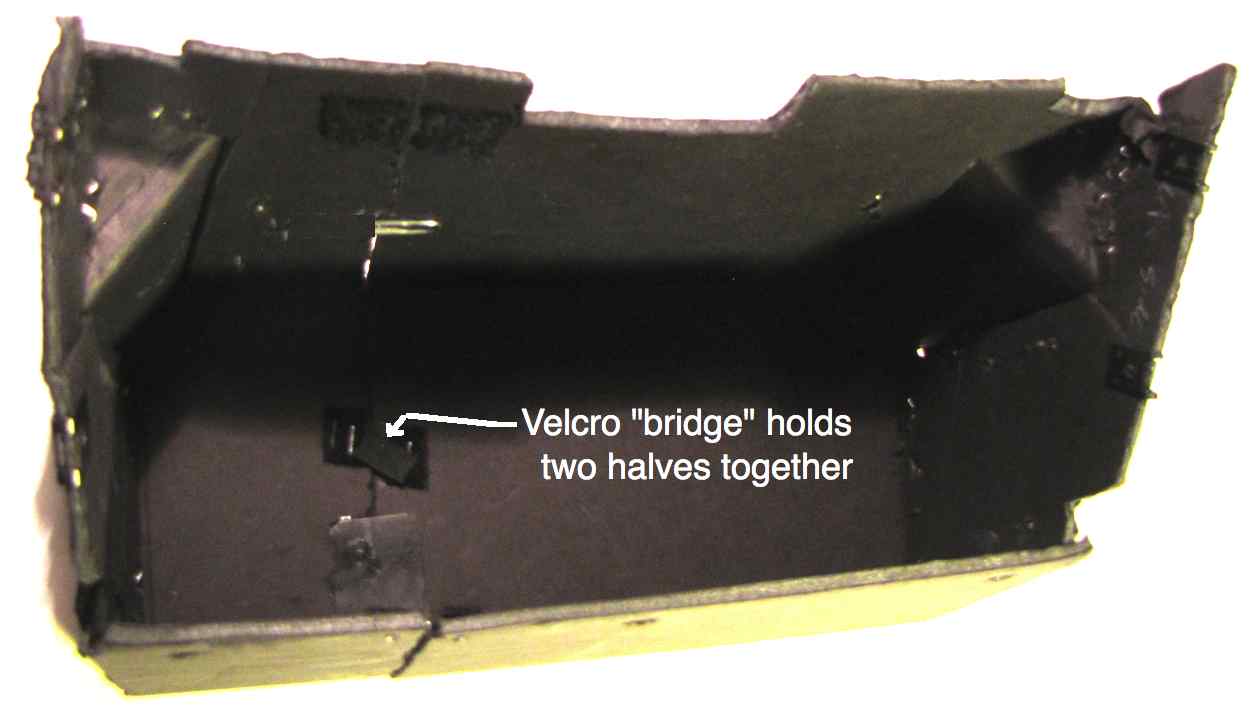
Two part liner pushed together:
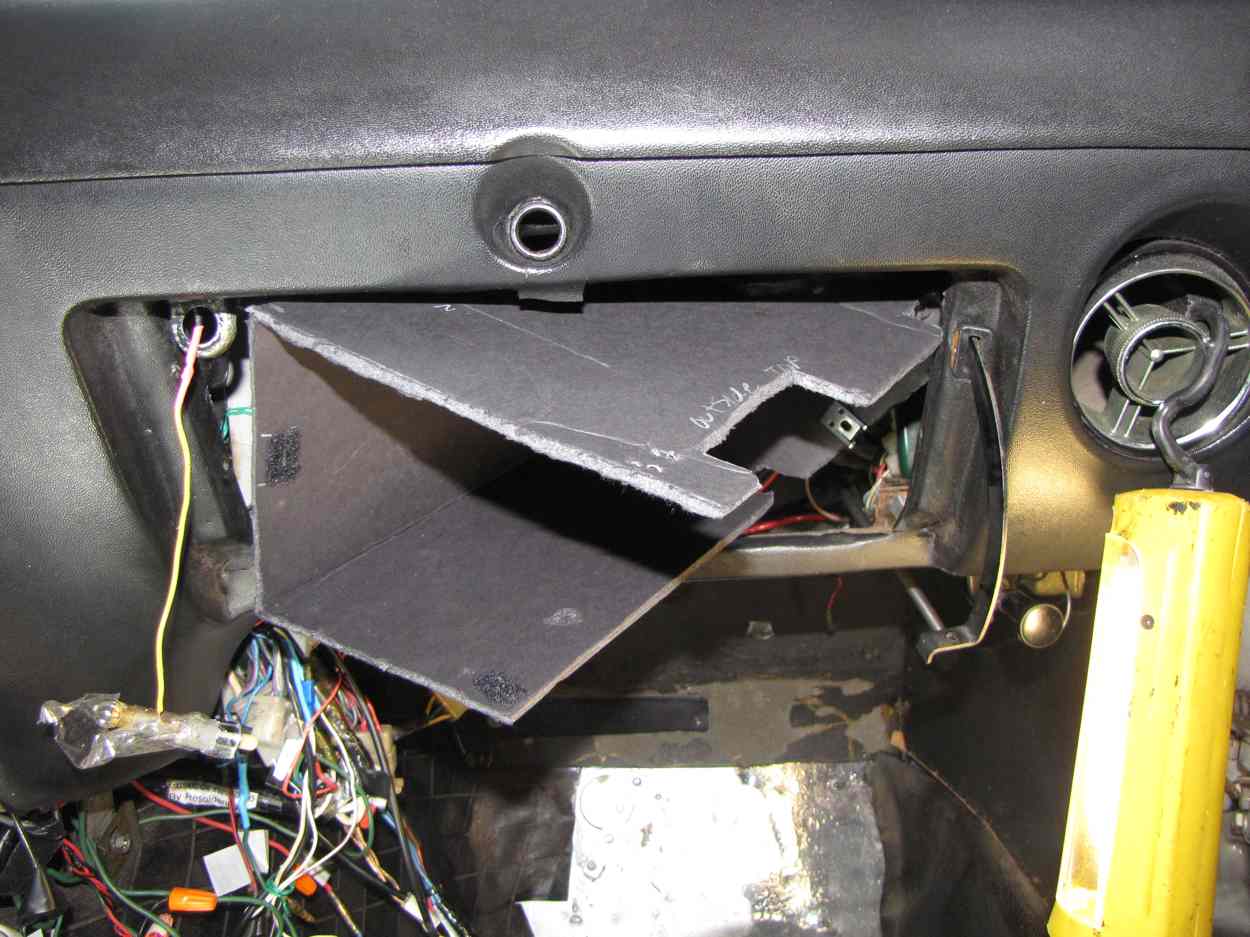
Installing two-part liner-
Step 1:
Step 2:
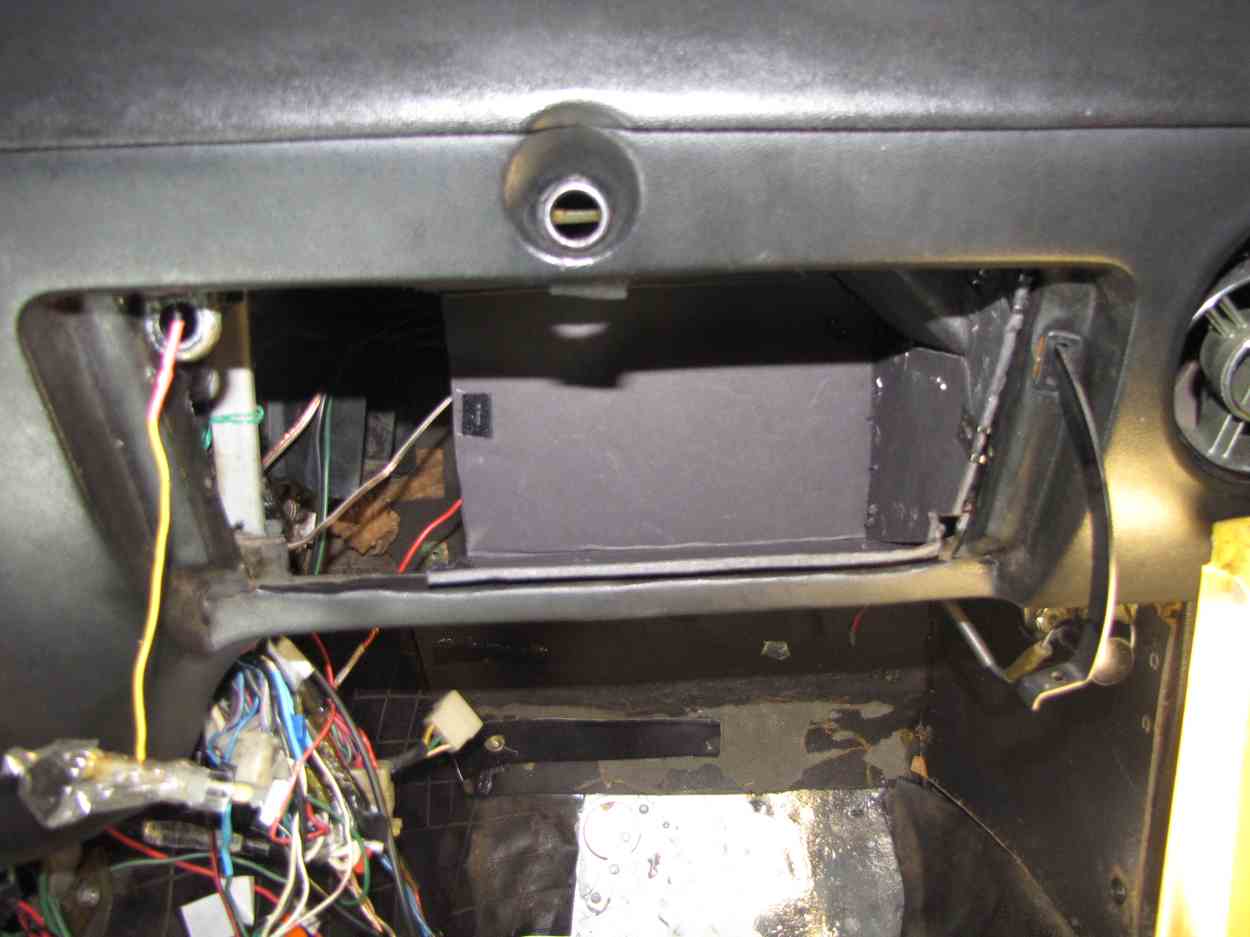
Step 3:
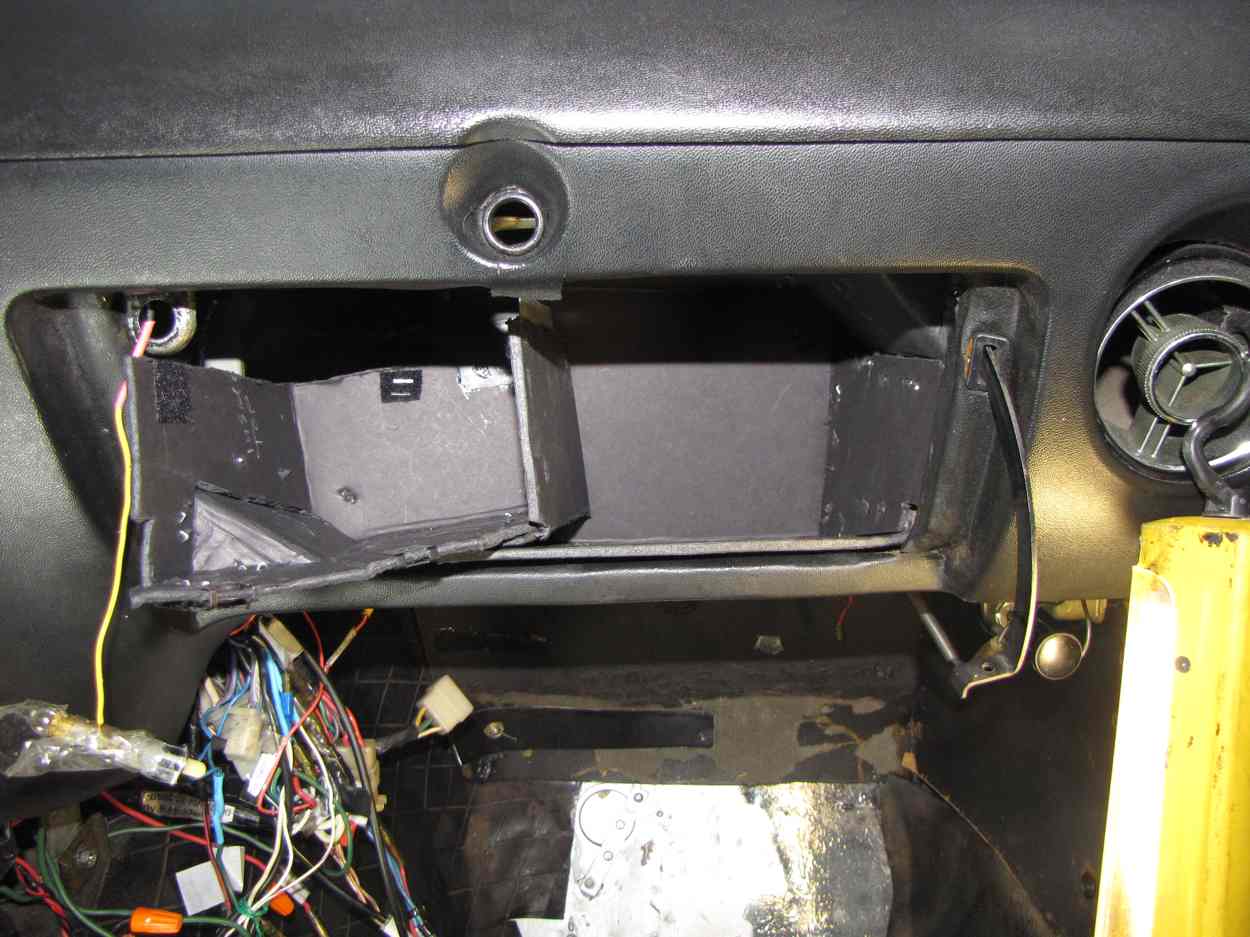
Step 4:
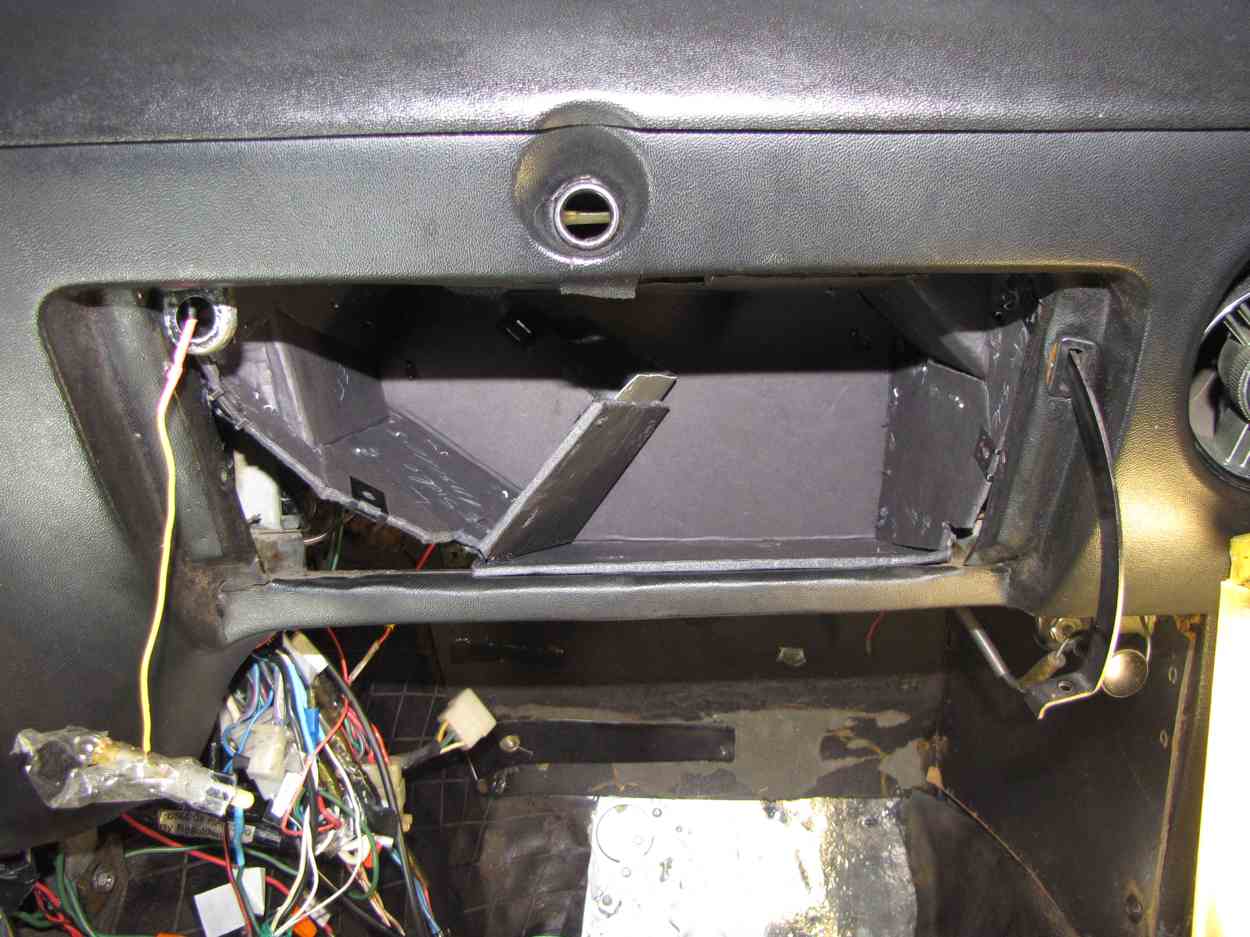
Installed:
The 3/16" foam board I used for the liner was available at a craft store and a dollar store. It has an open cell foam core sandwiched between poster board. It is strong and resilient, much stronger and more flexible than the 40 year old original posterboard liner. I copied the liner from a 1/1972 liner I had on hand after I took it apart, flattened it out and drew lines around it on the foam board. I also took pictures of the original liner under a sheet of glass to flatten it out laid on fabric board with one inch lines going both ways to allow duplication by someone else. The color is reversed in the pictures to make the patterns easier to see. Lines can be drawn 1 inch apart going both ways on the foam board with a white pencil and a long straight edge. By referring to the patterns in the pictures the patterns can be duplicated on the foam board. Both pictures below are looking at the outside of the liner.
Side and angled top patterns:...........................Main pattern (both patterns from a 1/1972 car):
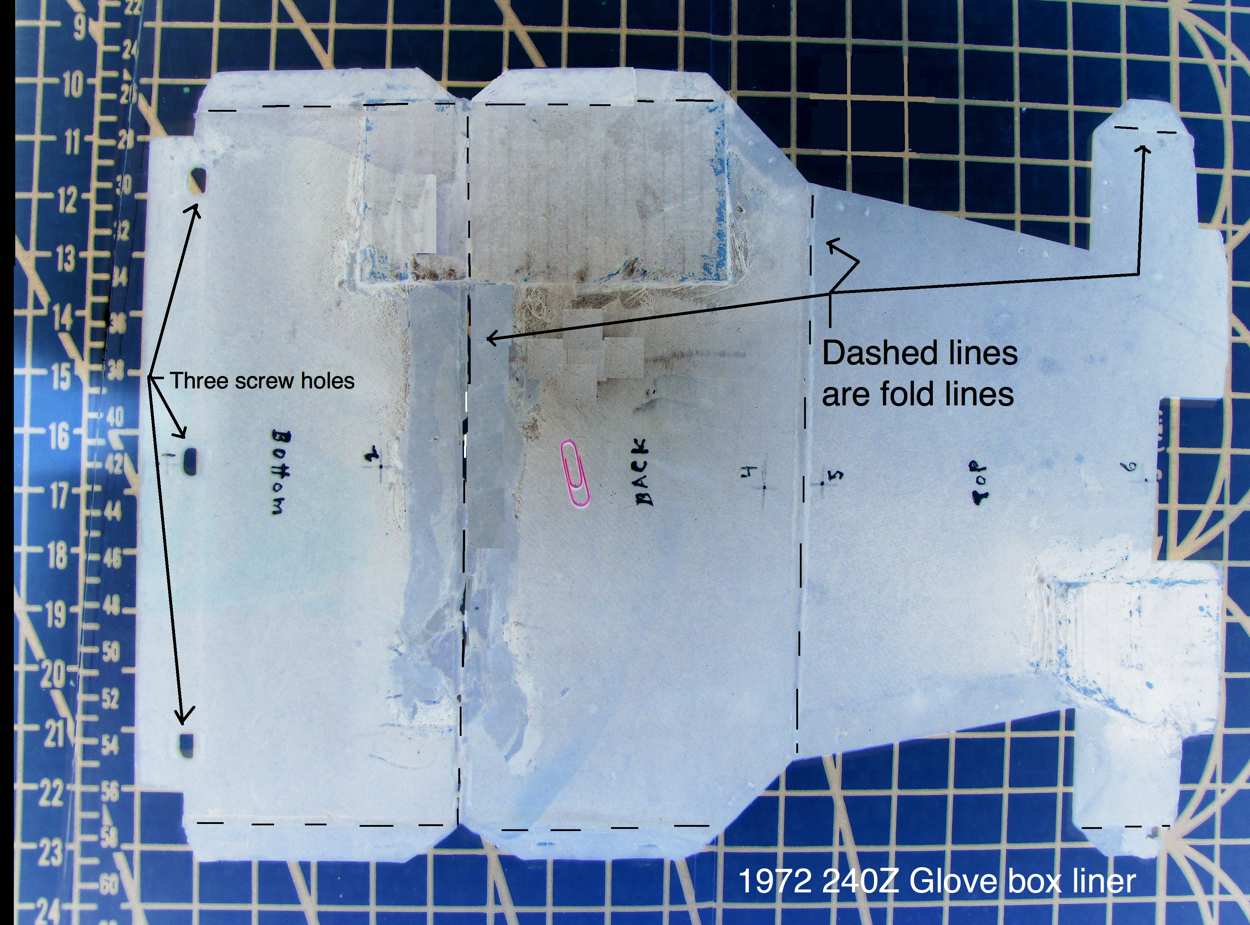
To make the folds I pushed a wide putty knife blade into the cardboard on a hard surface where the folds are needed as indicated in the pictures.
Pattern identification:
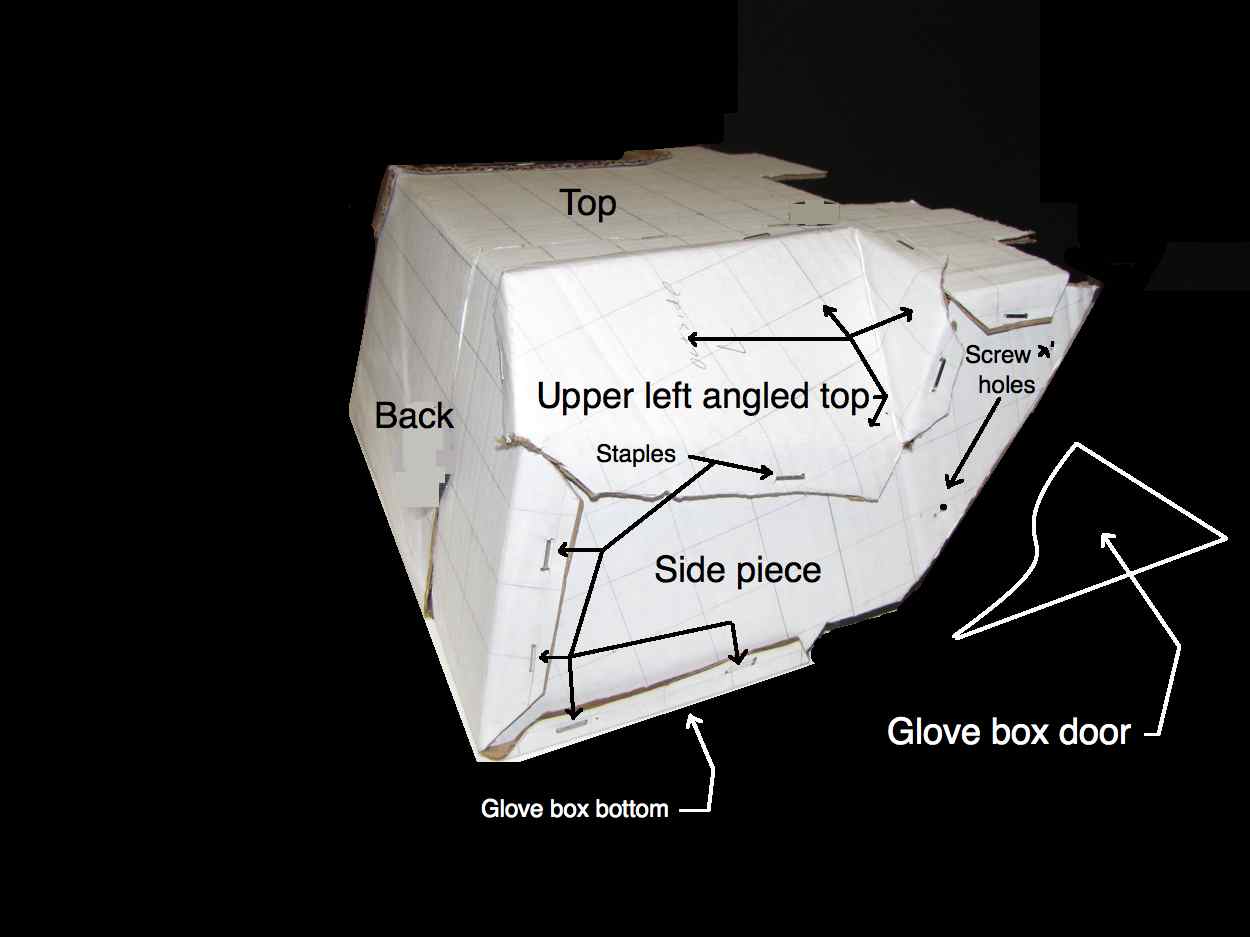
I used a spring loaded power hand stapler to staple the parts together at the folded over tabs in the same places as the original liner. I bent each staple over on the inside with needle nose pliers afterwards though glue could have been used instead to fit the parts together using magnets to temporarily hold parts together. It may be necessary to trim the two halves where they meet to get them to fit into the car, I had to trim about 1/2" off of this middle edge with scissors after I made the liner because the original liner material was thinner than what I used. The four speed nuts needed for the sides at the top I found at an auto parts store though they might also be found at a hardware store if they are not on an original liner you already have.
*****************************************************
I actually made three of these liners, the third one that is in the car now is described above. The 1st one was made out of ordinary cardboard and while sufficiently sturdy for normal use I had tried to copy the original without taking it apart which introduced errors in the shape. Note that the car has steel support under the bottom of the glove box for the first three inches from the glove box door all the way across making the area near the door very strong no matter what material I might have used. The second liner was constructed from thin white cardboard and was made from the pattern in the pictures above. It fit together and in the car well but I went with foam board as it is even sturdier.
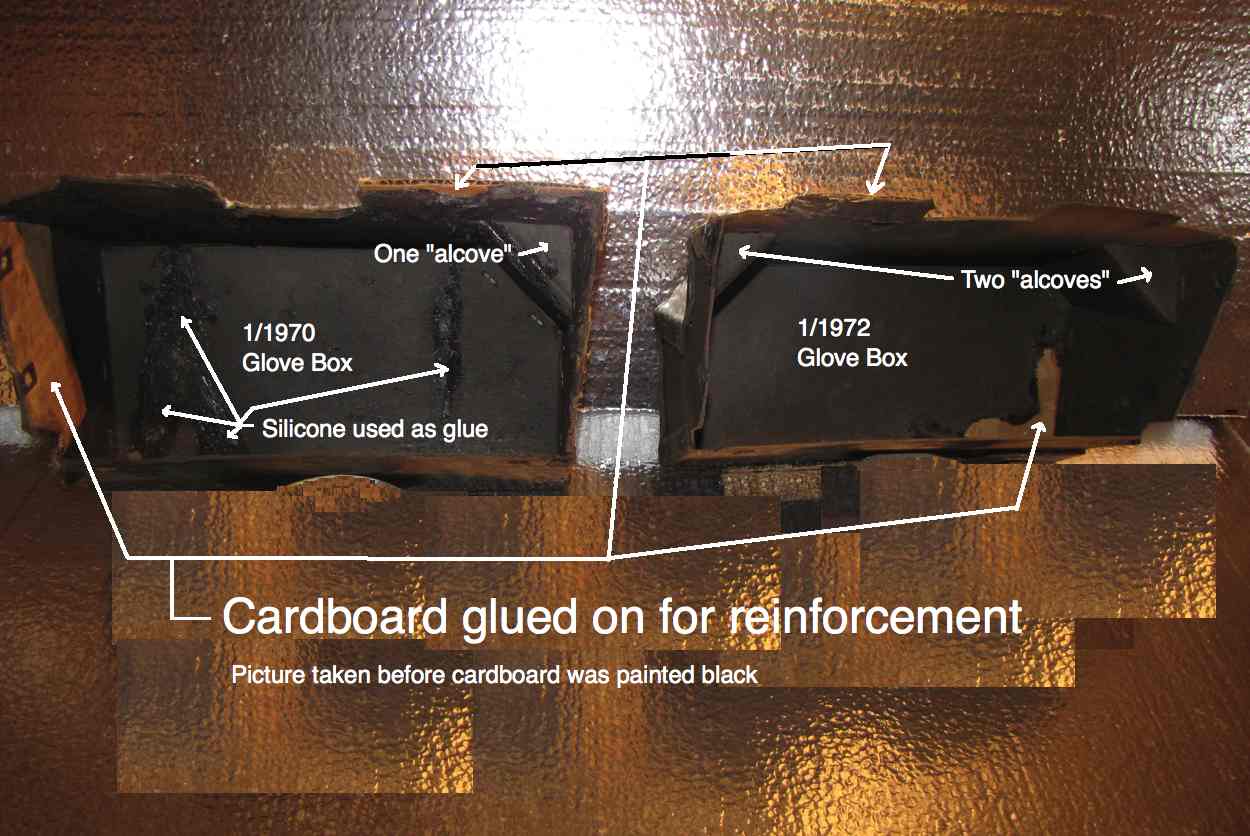
For reference, here is a difference between glove box liners for a 1/1970 car and a 1/1972 car (and repair notes). I copied the 72 liner because I figured it would work in both the 1970 car I have and in later models (the drawing layouts above are for the 1/1972 car):


2 Comments
Recommended Comments
Create an account or sign in to comment
You need to be a member in order to leave a comment
Create an account
Sign up for a new account in our community. It's easy!
Register a new accountSign in
Already have an account? Sign in here.
Sign In Now