


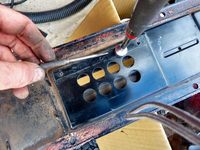
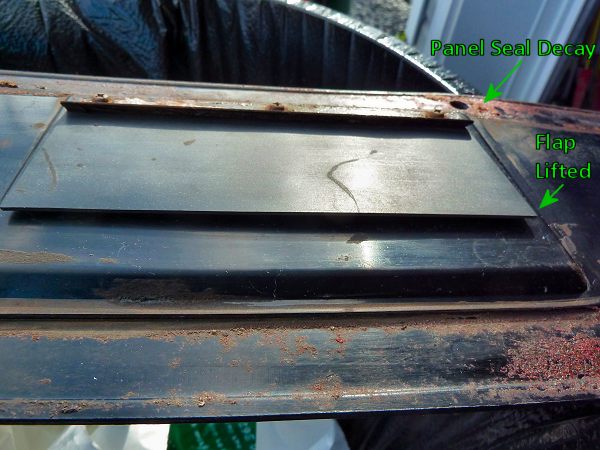
Jan 1971 240z.I decided to refresh the stock vent system and at the same time, bag the interior so that all possible leaks were sealed. I used a thick vapor barrier from the home insulation industry as well as a special sealing tape to close all holes (grommets,rust holes, panel holes, empty bolt holes) and panels from front to back.Here is what I did to refresh the vent in the hatch:The original hatch had long lost the perimeter seal. It was just globs of an seemingly old acrylic caulking or a decayed foam seal that was similar to globs of chewing gum.
-
[*=1]The two rubber flaps that blow outward when air flows through the cabin were settled into a permanently open "lifted"position. The chance they would ever close under negative cabin pressure seemed unlikely in this state.
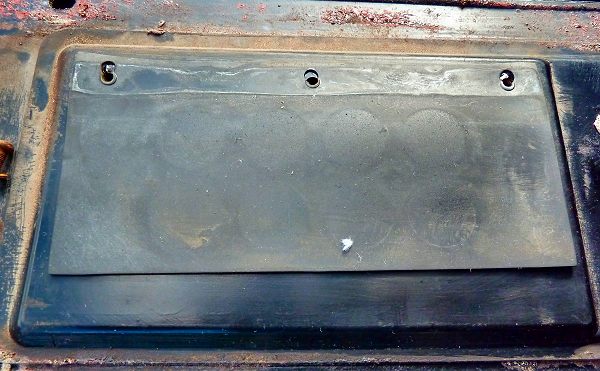
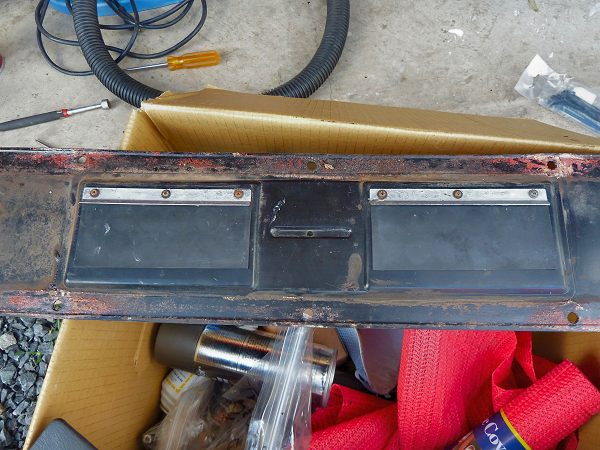
 [*=1]To refresh the rubber, I cleaned it and flexed it then wiped with lacquer thinner.To make the rubber seal better, I flipped around so that the default shape now pressed against the panel.[*=1]Taking the screws out makes reassembly a bit challenging. My solution was to use a magnet to lift the steel bar (tapped with 3 holes) up to the inside (relative to car) side of the vent. I then used a scribe to adjust the steel bar so that the holes aligned. This then allowed the screws to attach.Note that there is one short screw and it goes closest to the centre of the panel.Actually the procedure is a little more complex: the first step is to get a screw into the middle of the bar then to get a screw, rubber seal, and top metal plate into an end hole.[*=1]Here is are the two refreshed flaps in place.[*=1]To seal the panel, I ran a closed cell foam around the perimeter and I also ran a bead of sealant around the perimeter to completely seal the panel against the hatch.
 [*=1]To refresh the rubber, I cleaned it and flexed it then wiped with lacquer thinner.To make the rubber seal better, I flipped around so that the default shape now pressed against the panel.


Recommended Comments
There are no comments to display.
Create an account or sign in to comment
You need to be a member in order to leave a comment
Create an account
Sign up for a new account in our community. It's easy!
Register a new accountSign in
Already have an account? Sign in here.
Sign In Now